TKGA 2015: The Cherries on Top

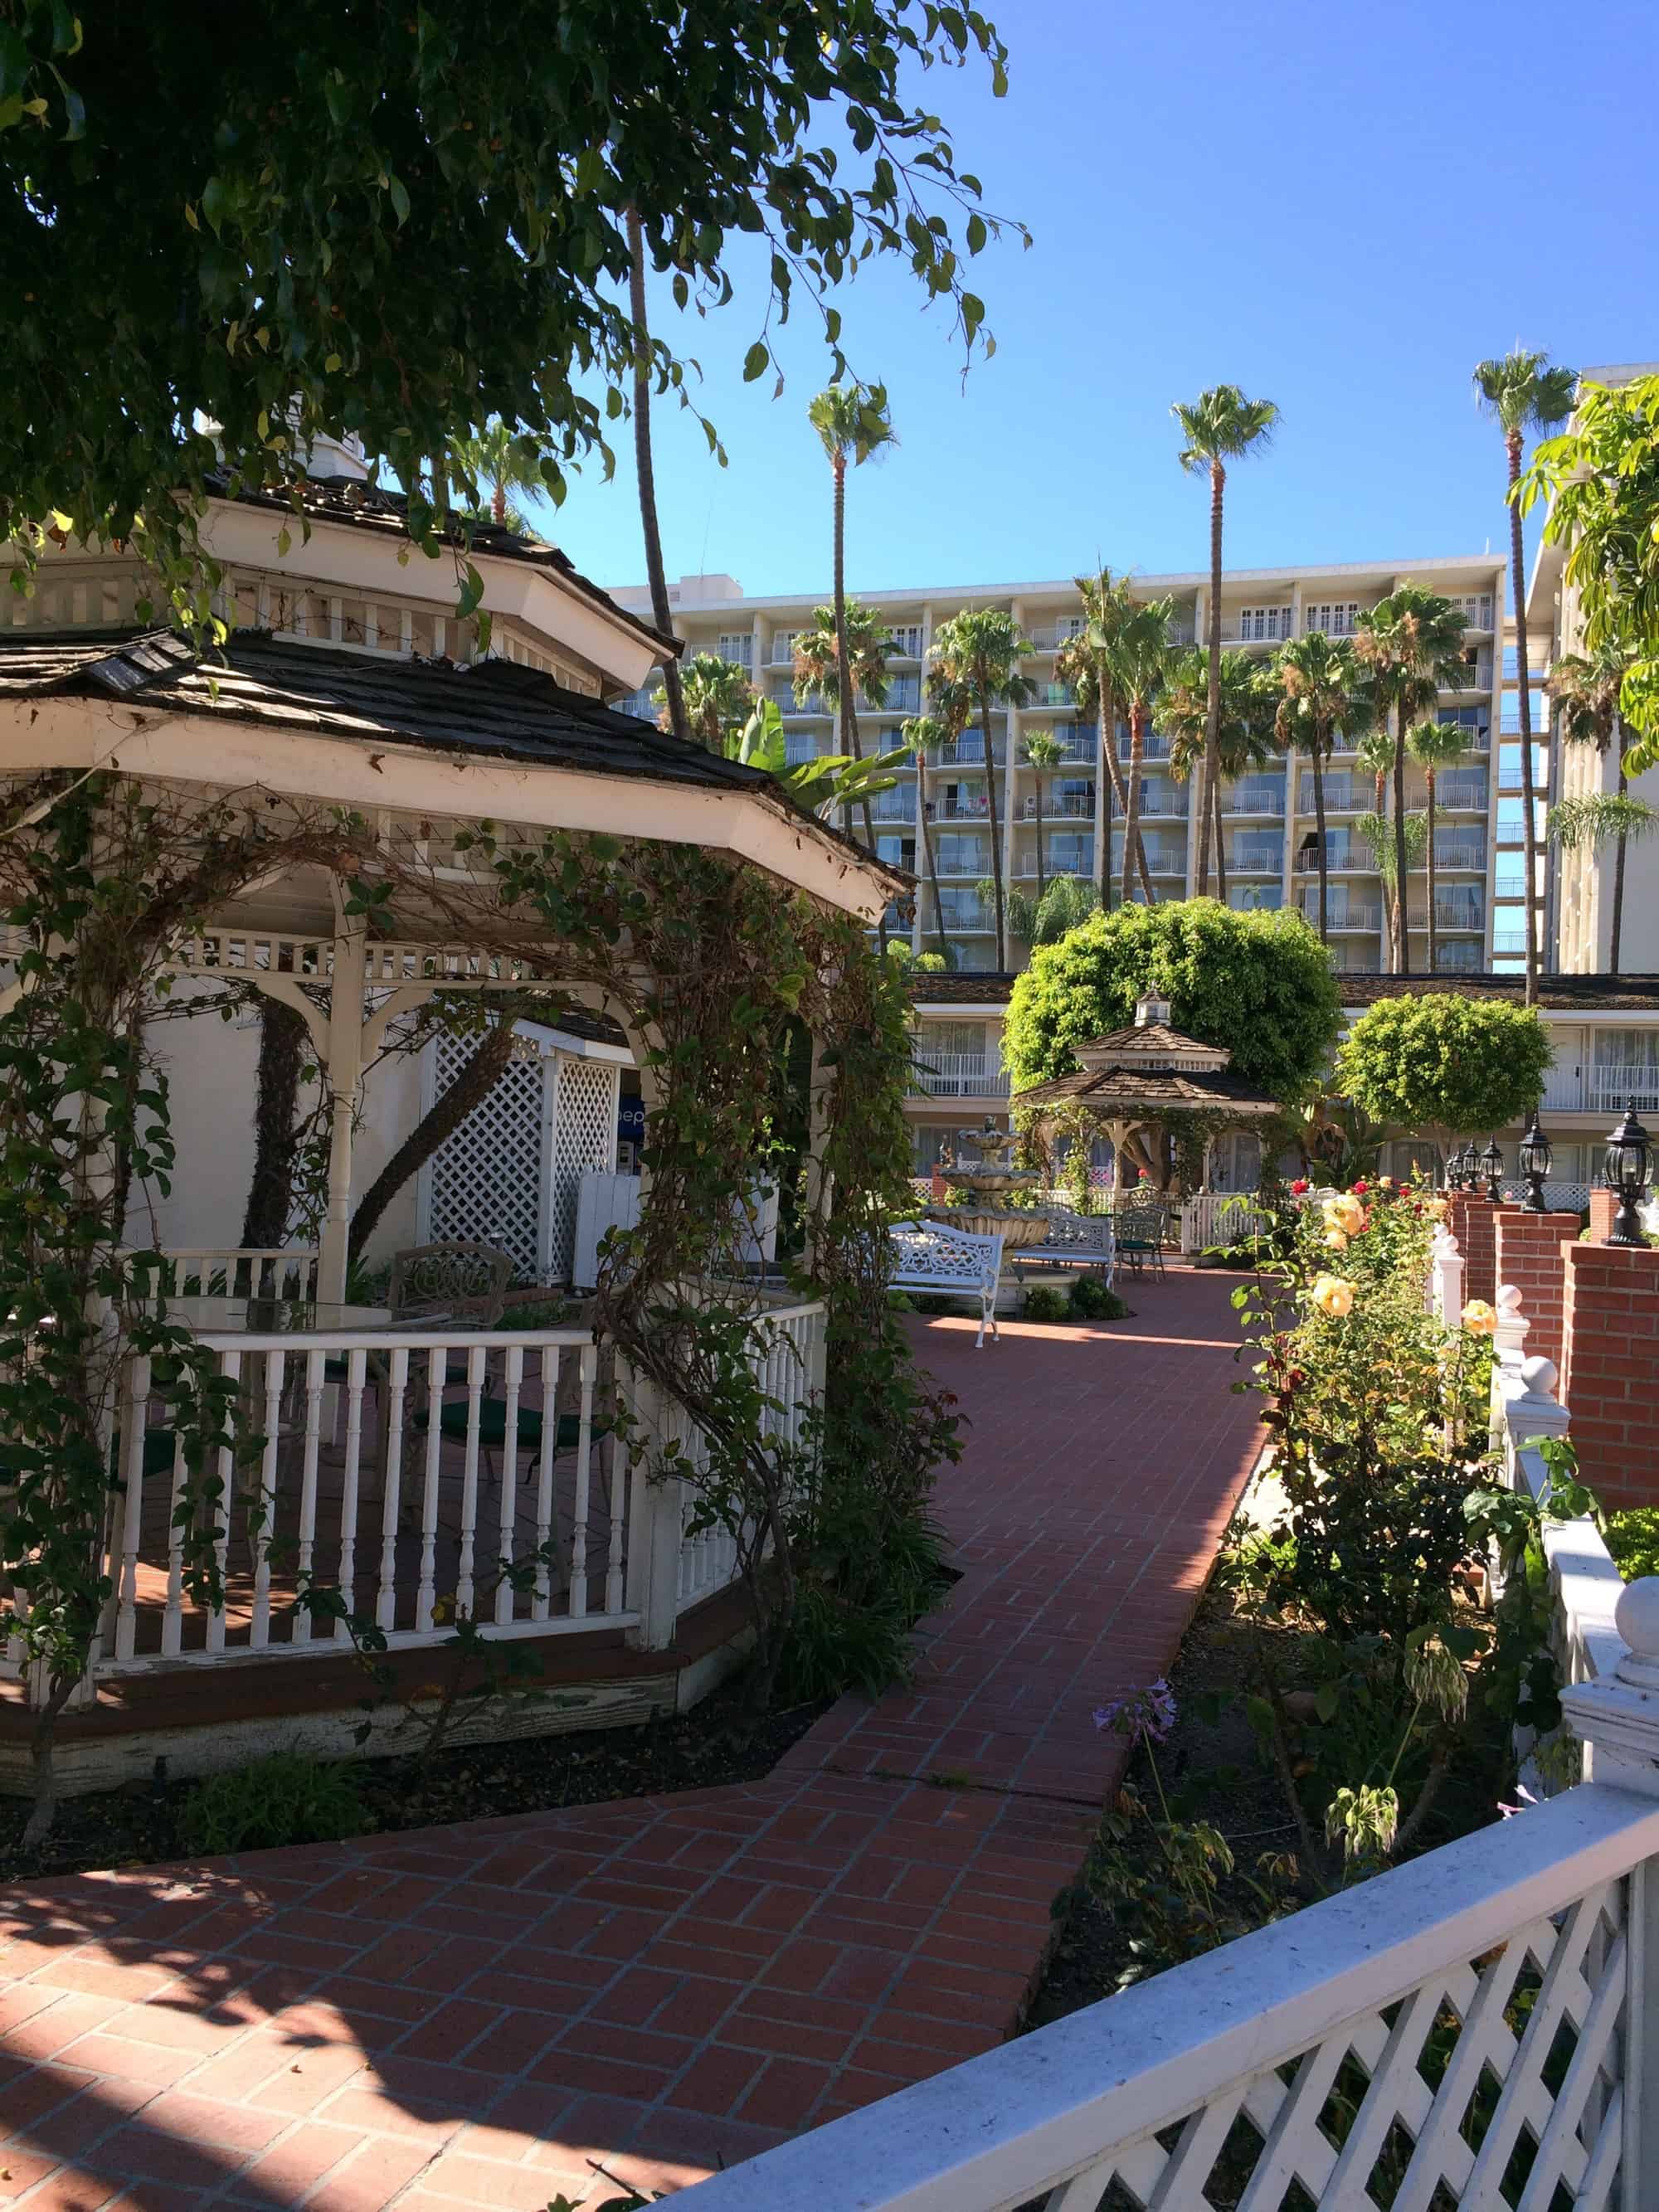
I went to TKGA primarily for education, but I signed up for every event I possibly could.  Since I was traveling all the way across the country to attend this Conference, I might as well do All The Things!  These extra events were the Market Preview, The Breakfast of Brilliance, and The Yarn Tasting.  I realize that the title of this blog sounds like it is the last post in this series on TKGA.  It is not.  These extra events took place on Thursday and Friday.  I’m publishing this post today since I’m writing in roughly chronological order.  I did attend two classes on Saturday and I will post about them tomorrow.

But before I get to those events, I have to share this license plate, which Heather and I spotted in the hotel parking lot when we were on our way back from lunch on Thursday:

image

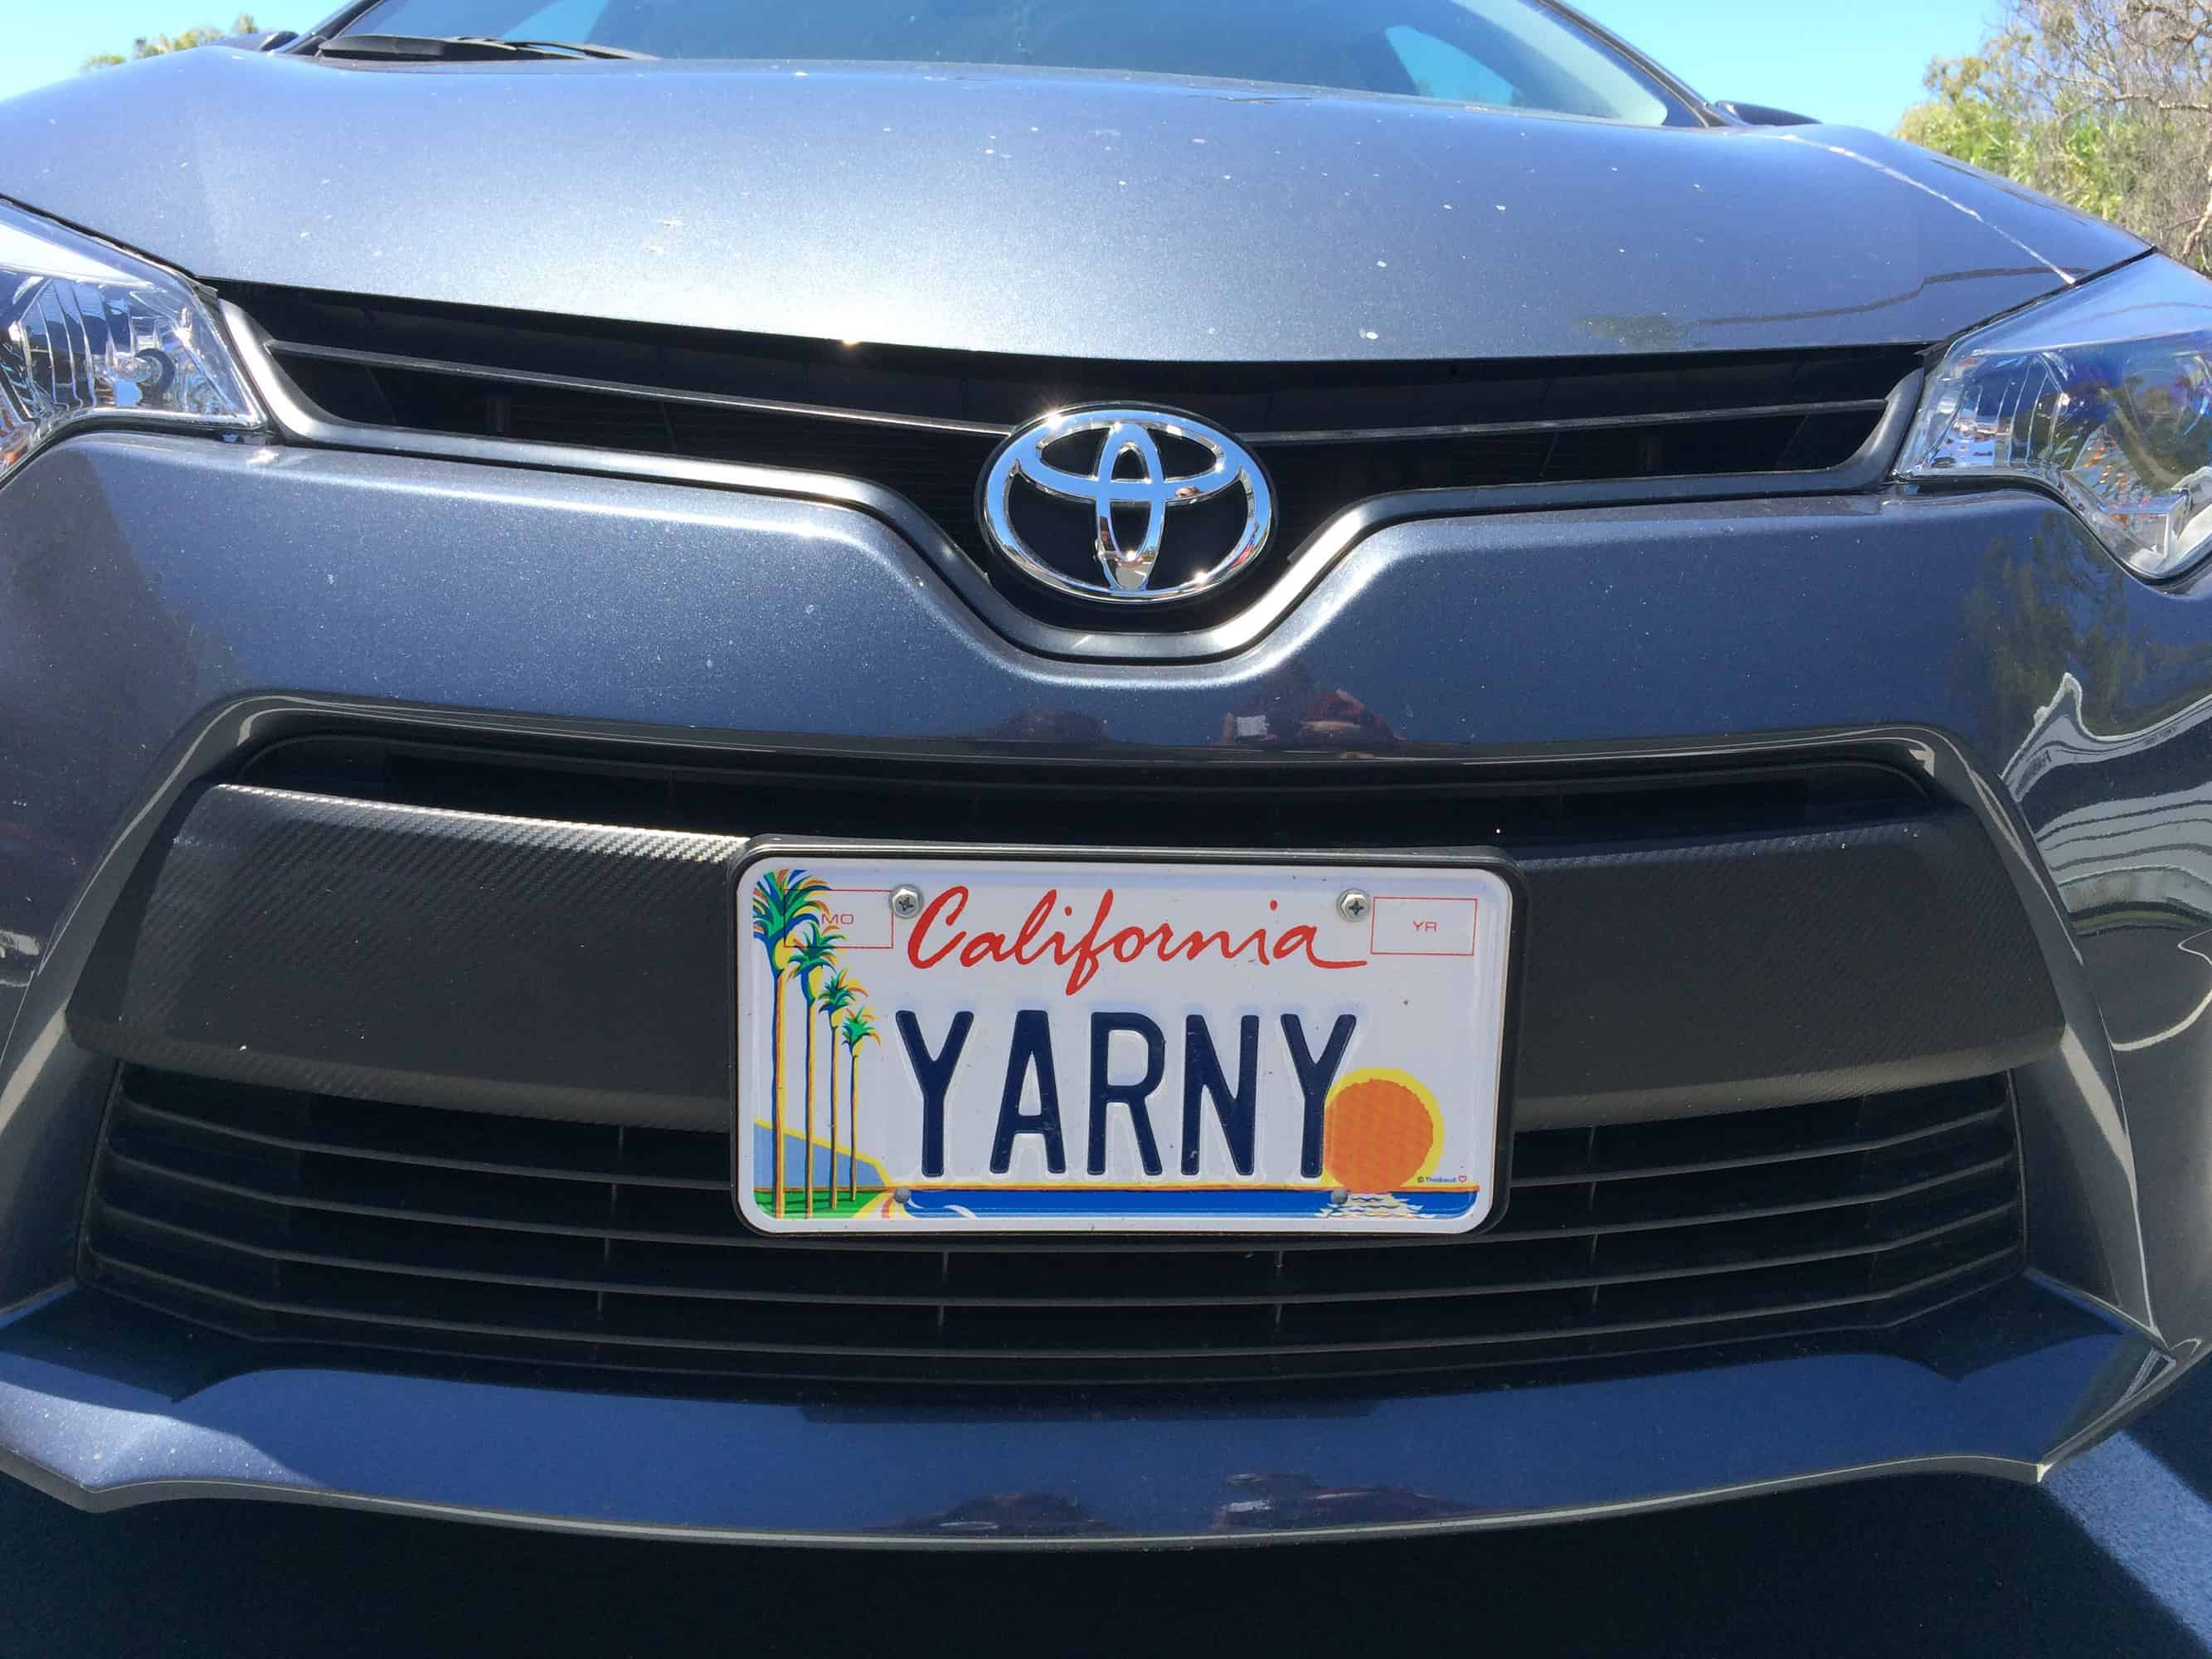
I particularly love how the setting sun looks like a ball of yarn!

The Market Preview

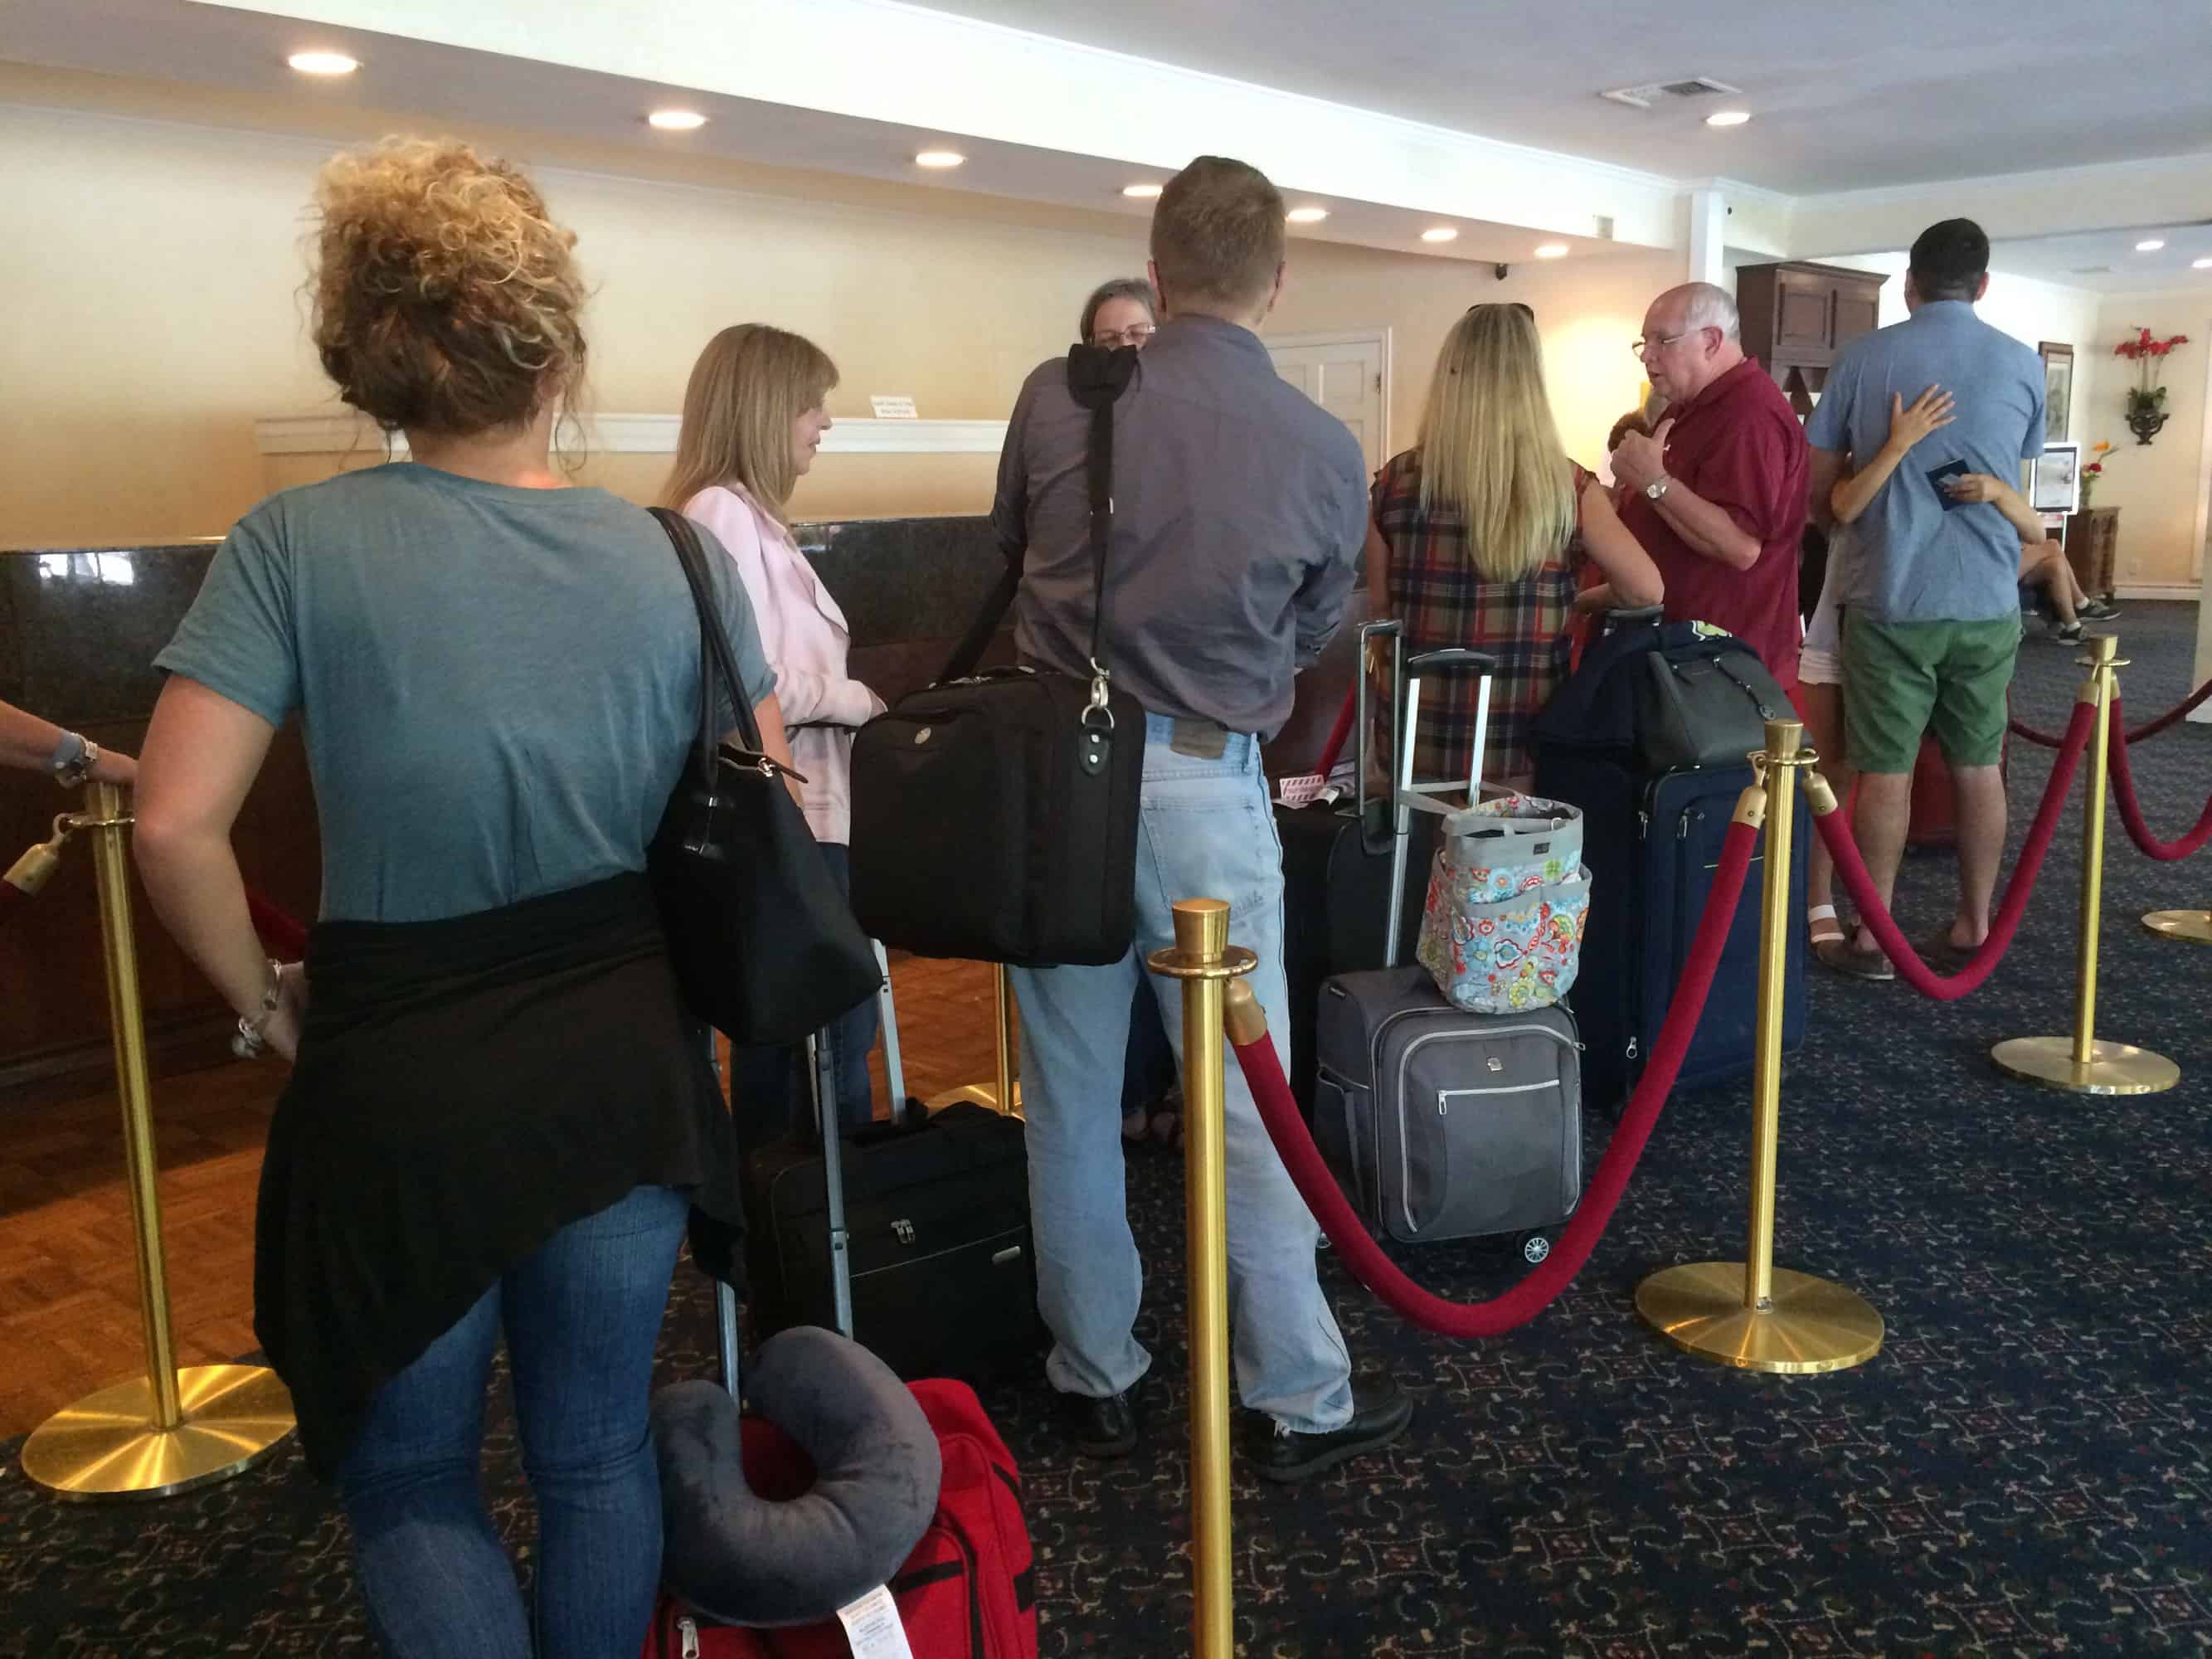
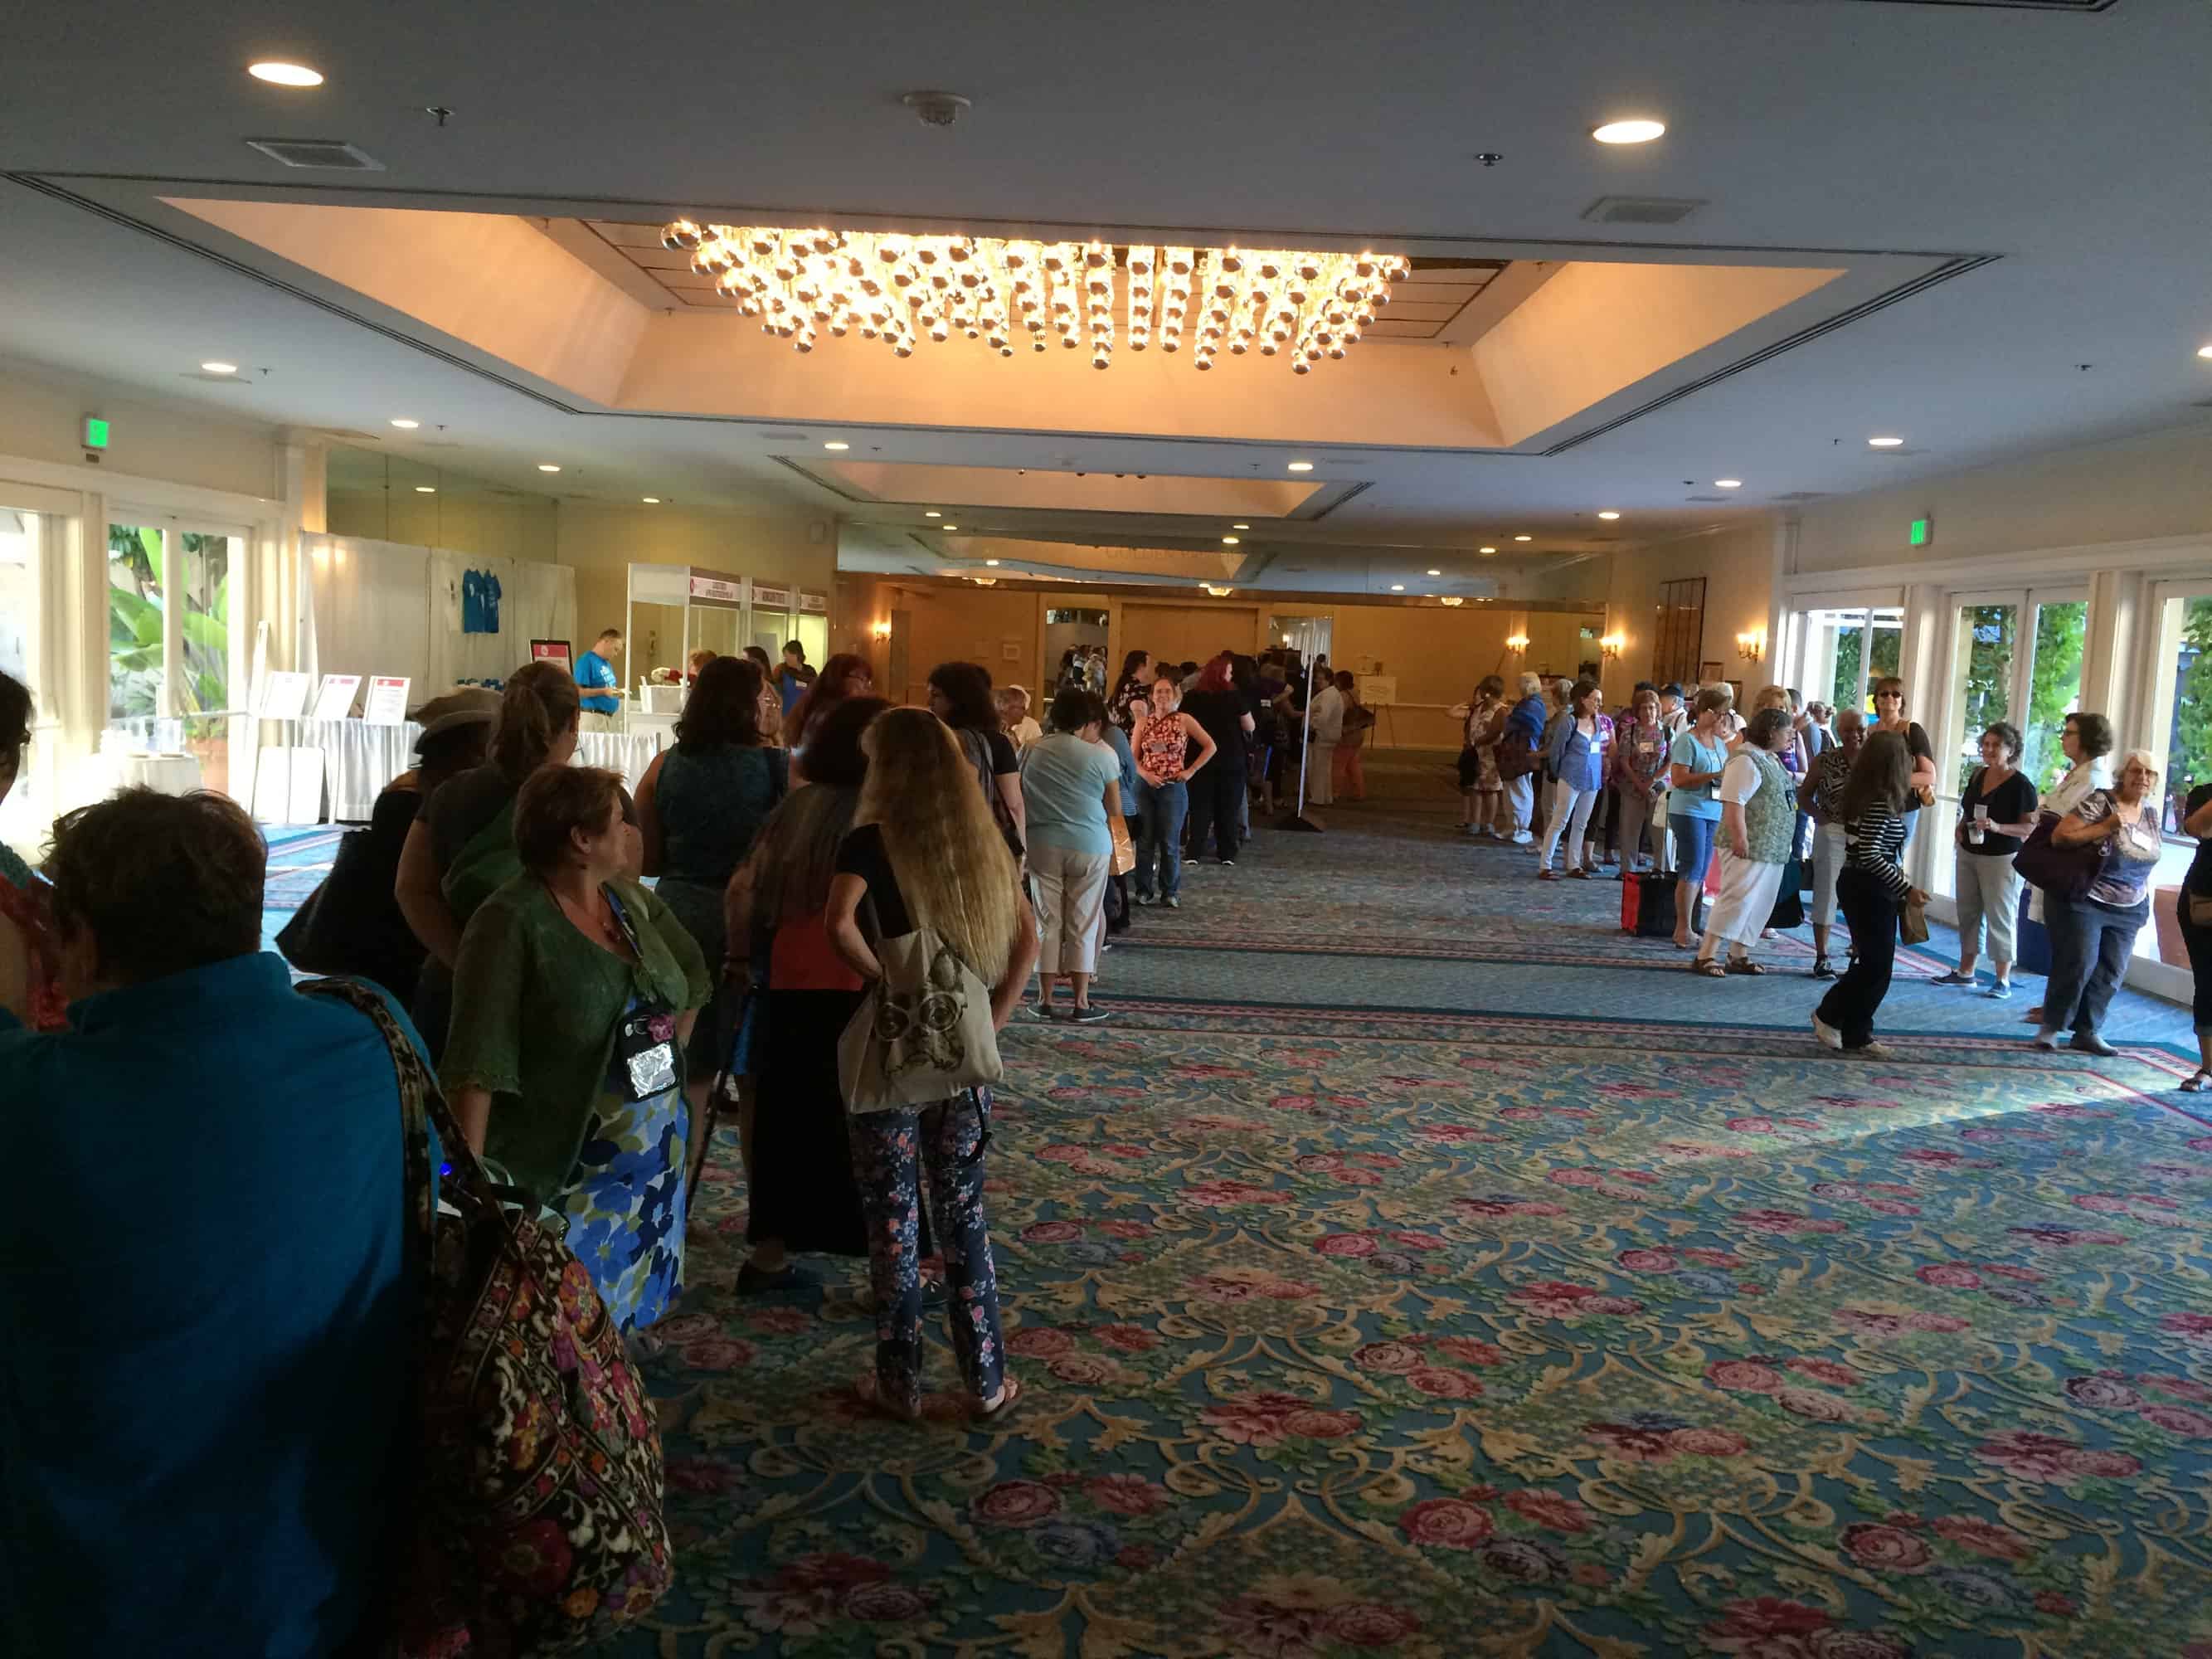
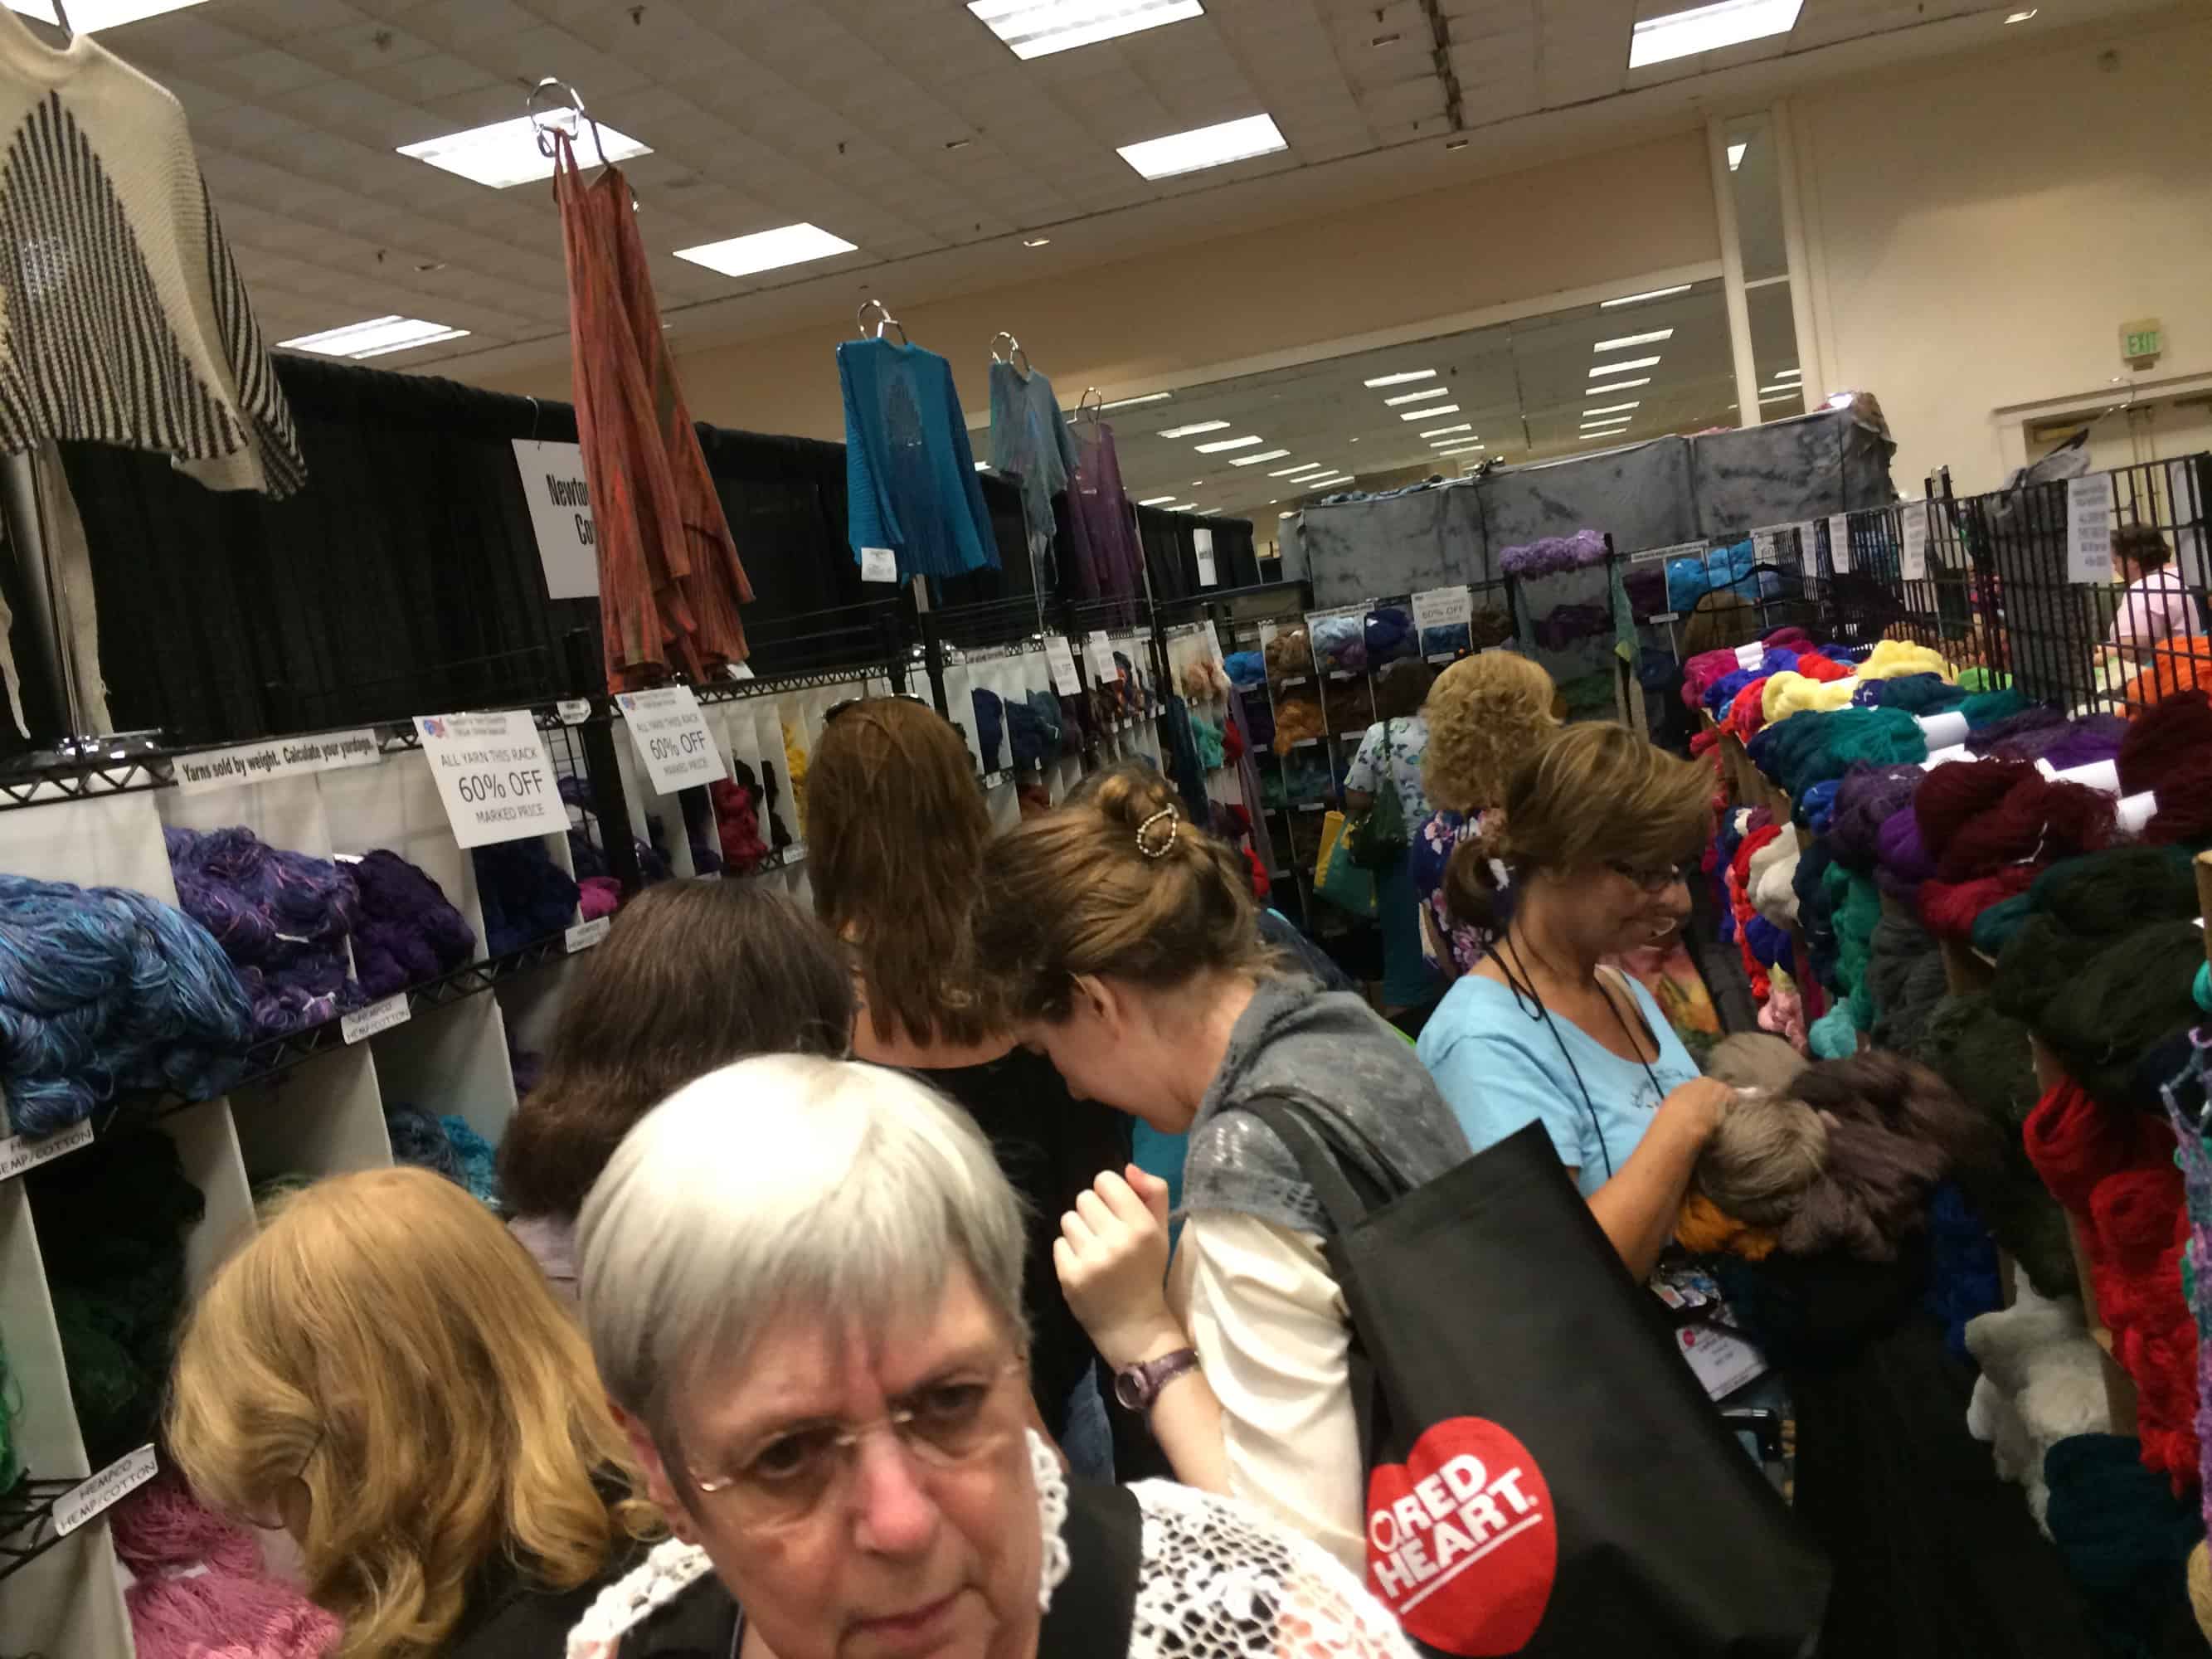
The market did not open to the public until Friday, but anyone attending the conference got to go into the market from 7 to 9 pm on Thursday.  When we arrived 20 minutes before the doors opened, the line reached all the way across the lobby!

We're waiting for those double doors in the distance to open.
We’re waiting for those double doors in the distance to open.

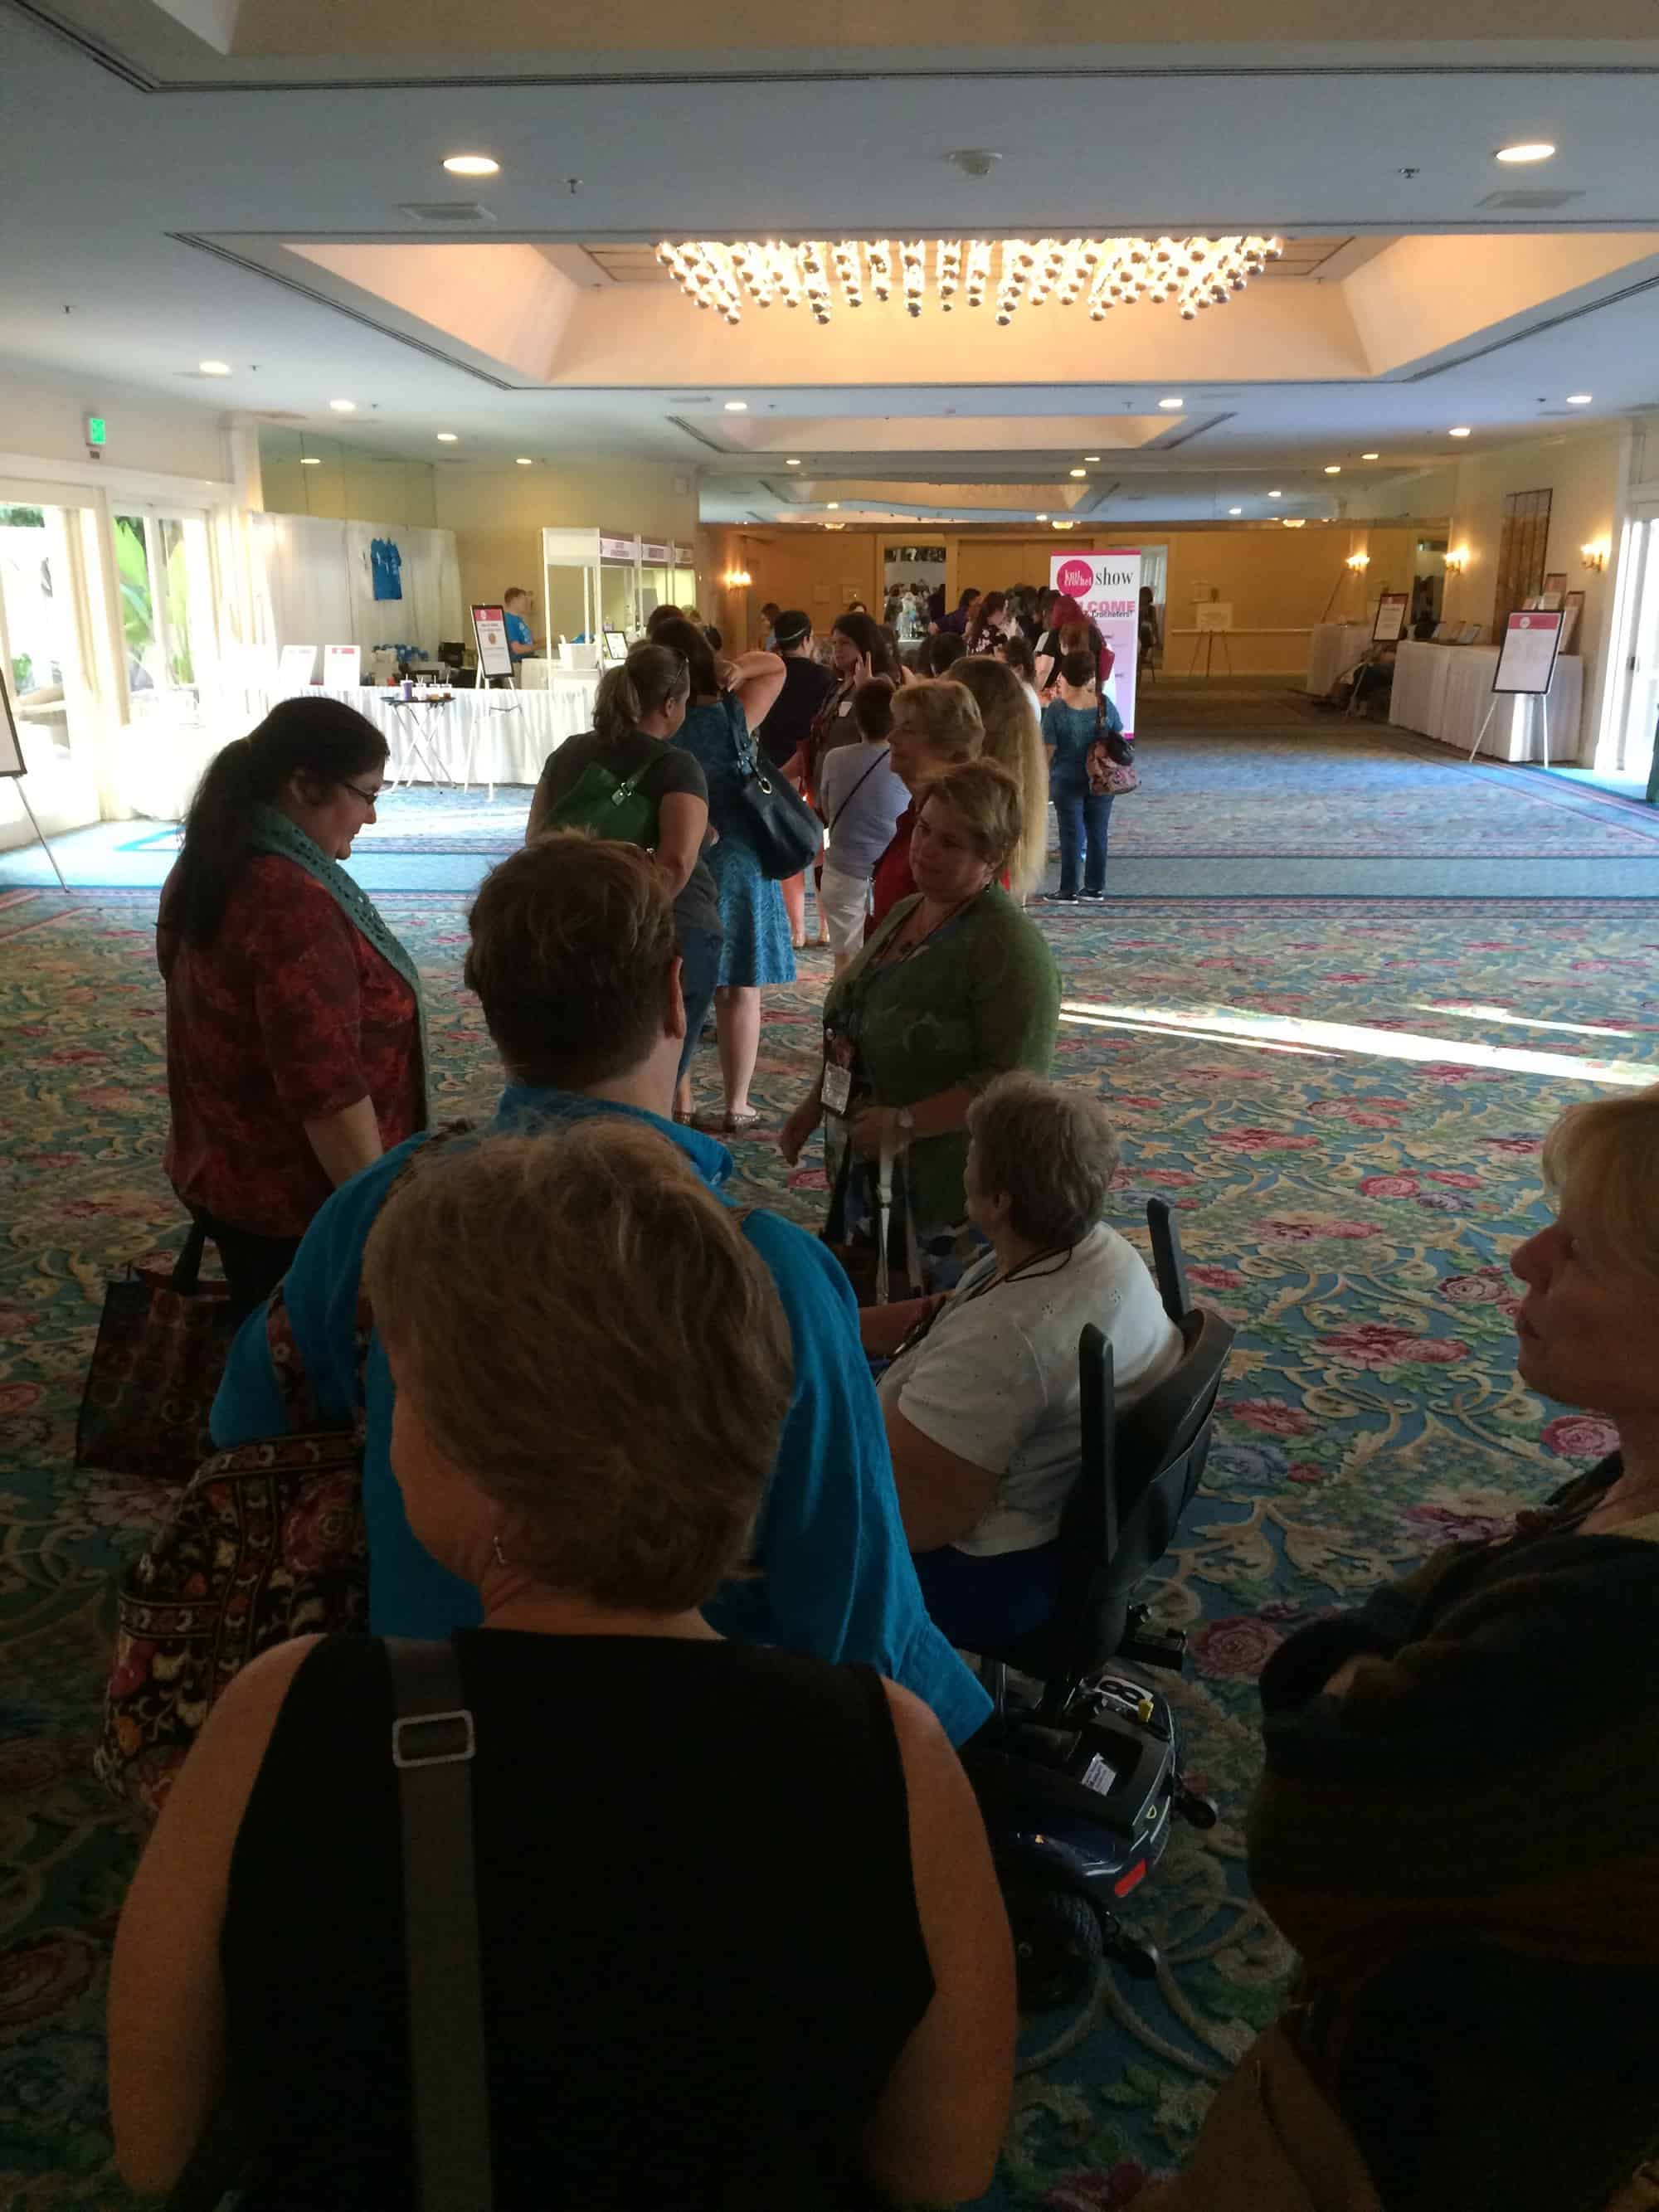
The line grew quickly, snaking around the lobby.  By the time the doors opened, the back of the line was nearly to the market doors.

IMG_9685
First view of the market.

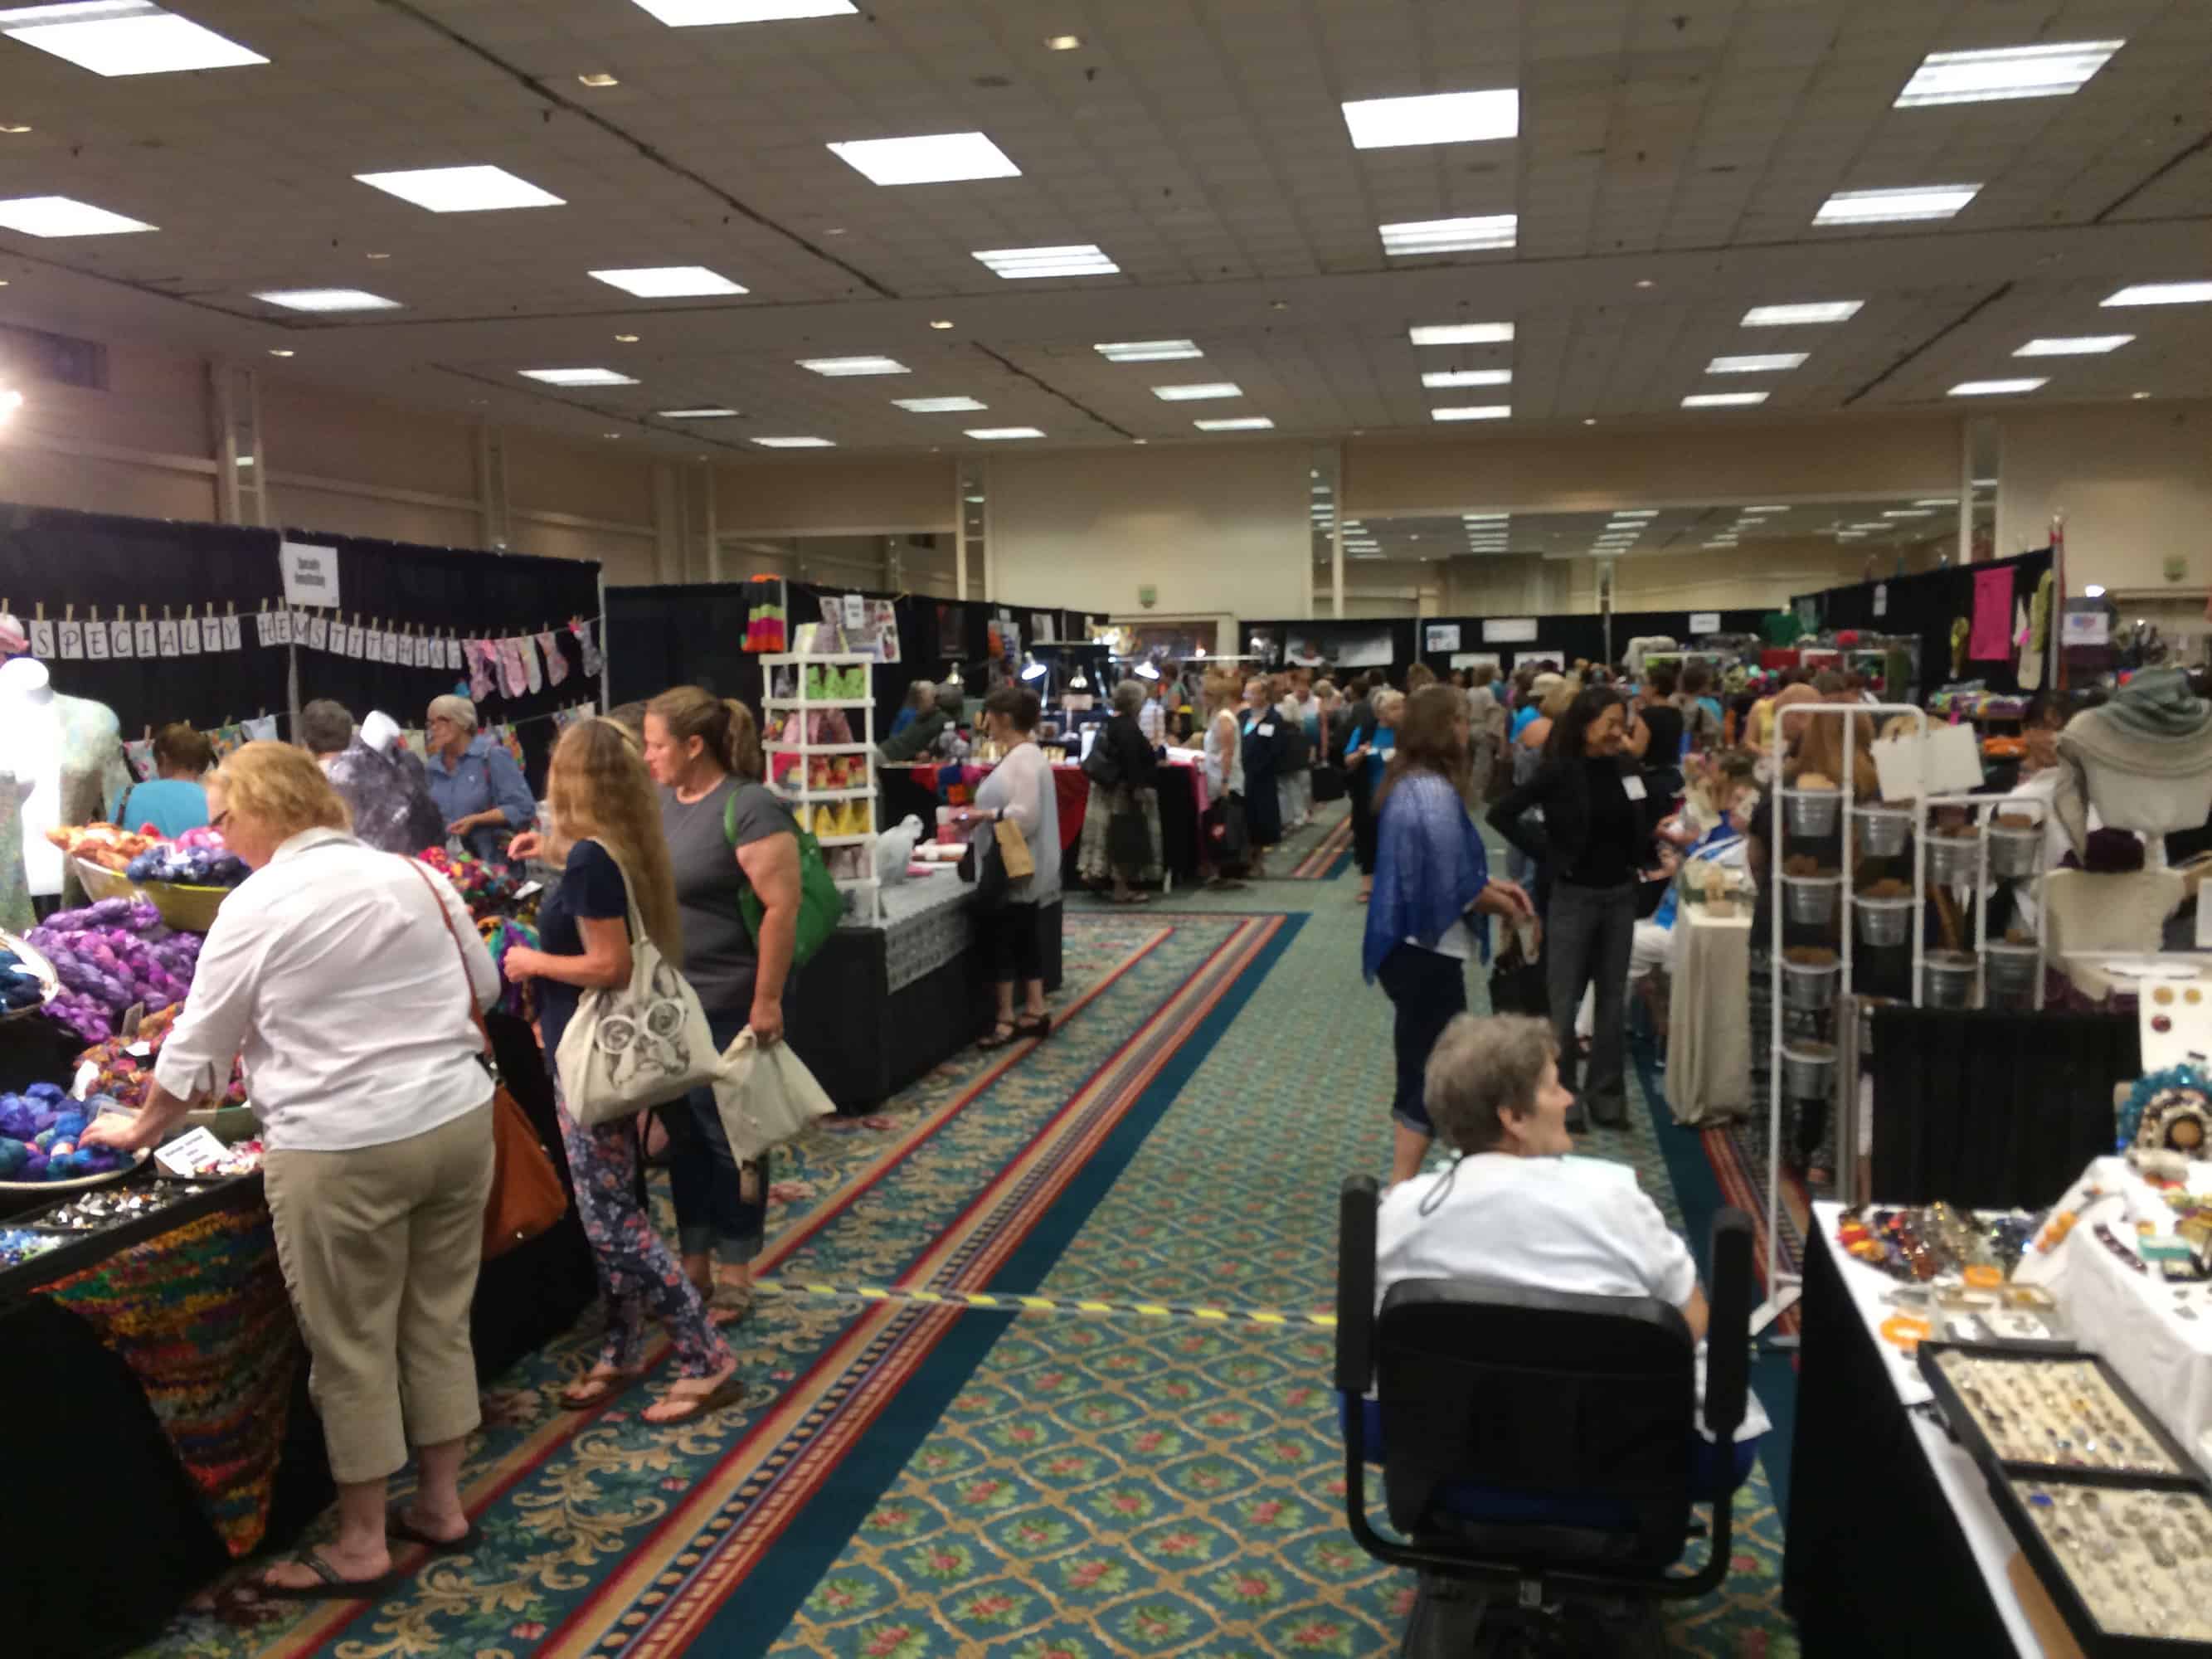
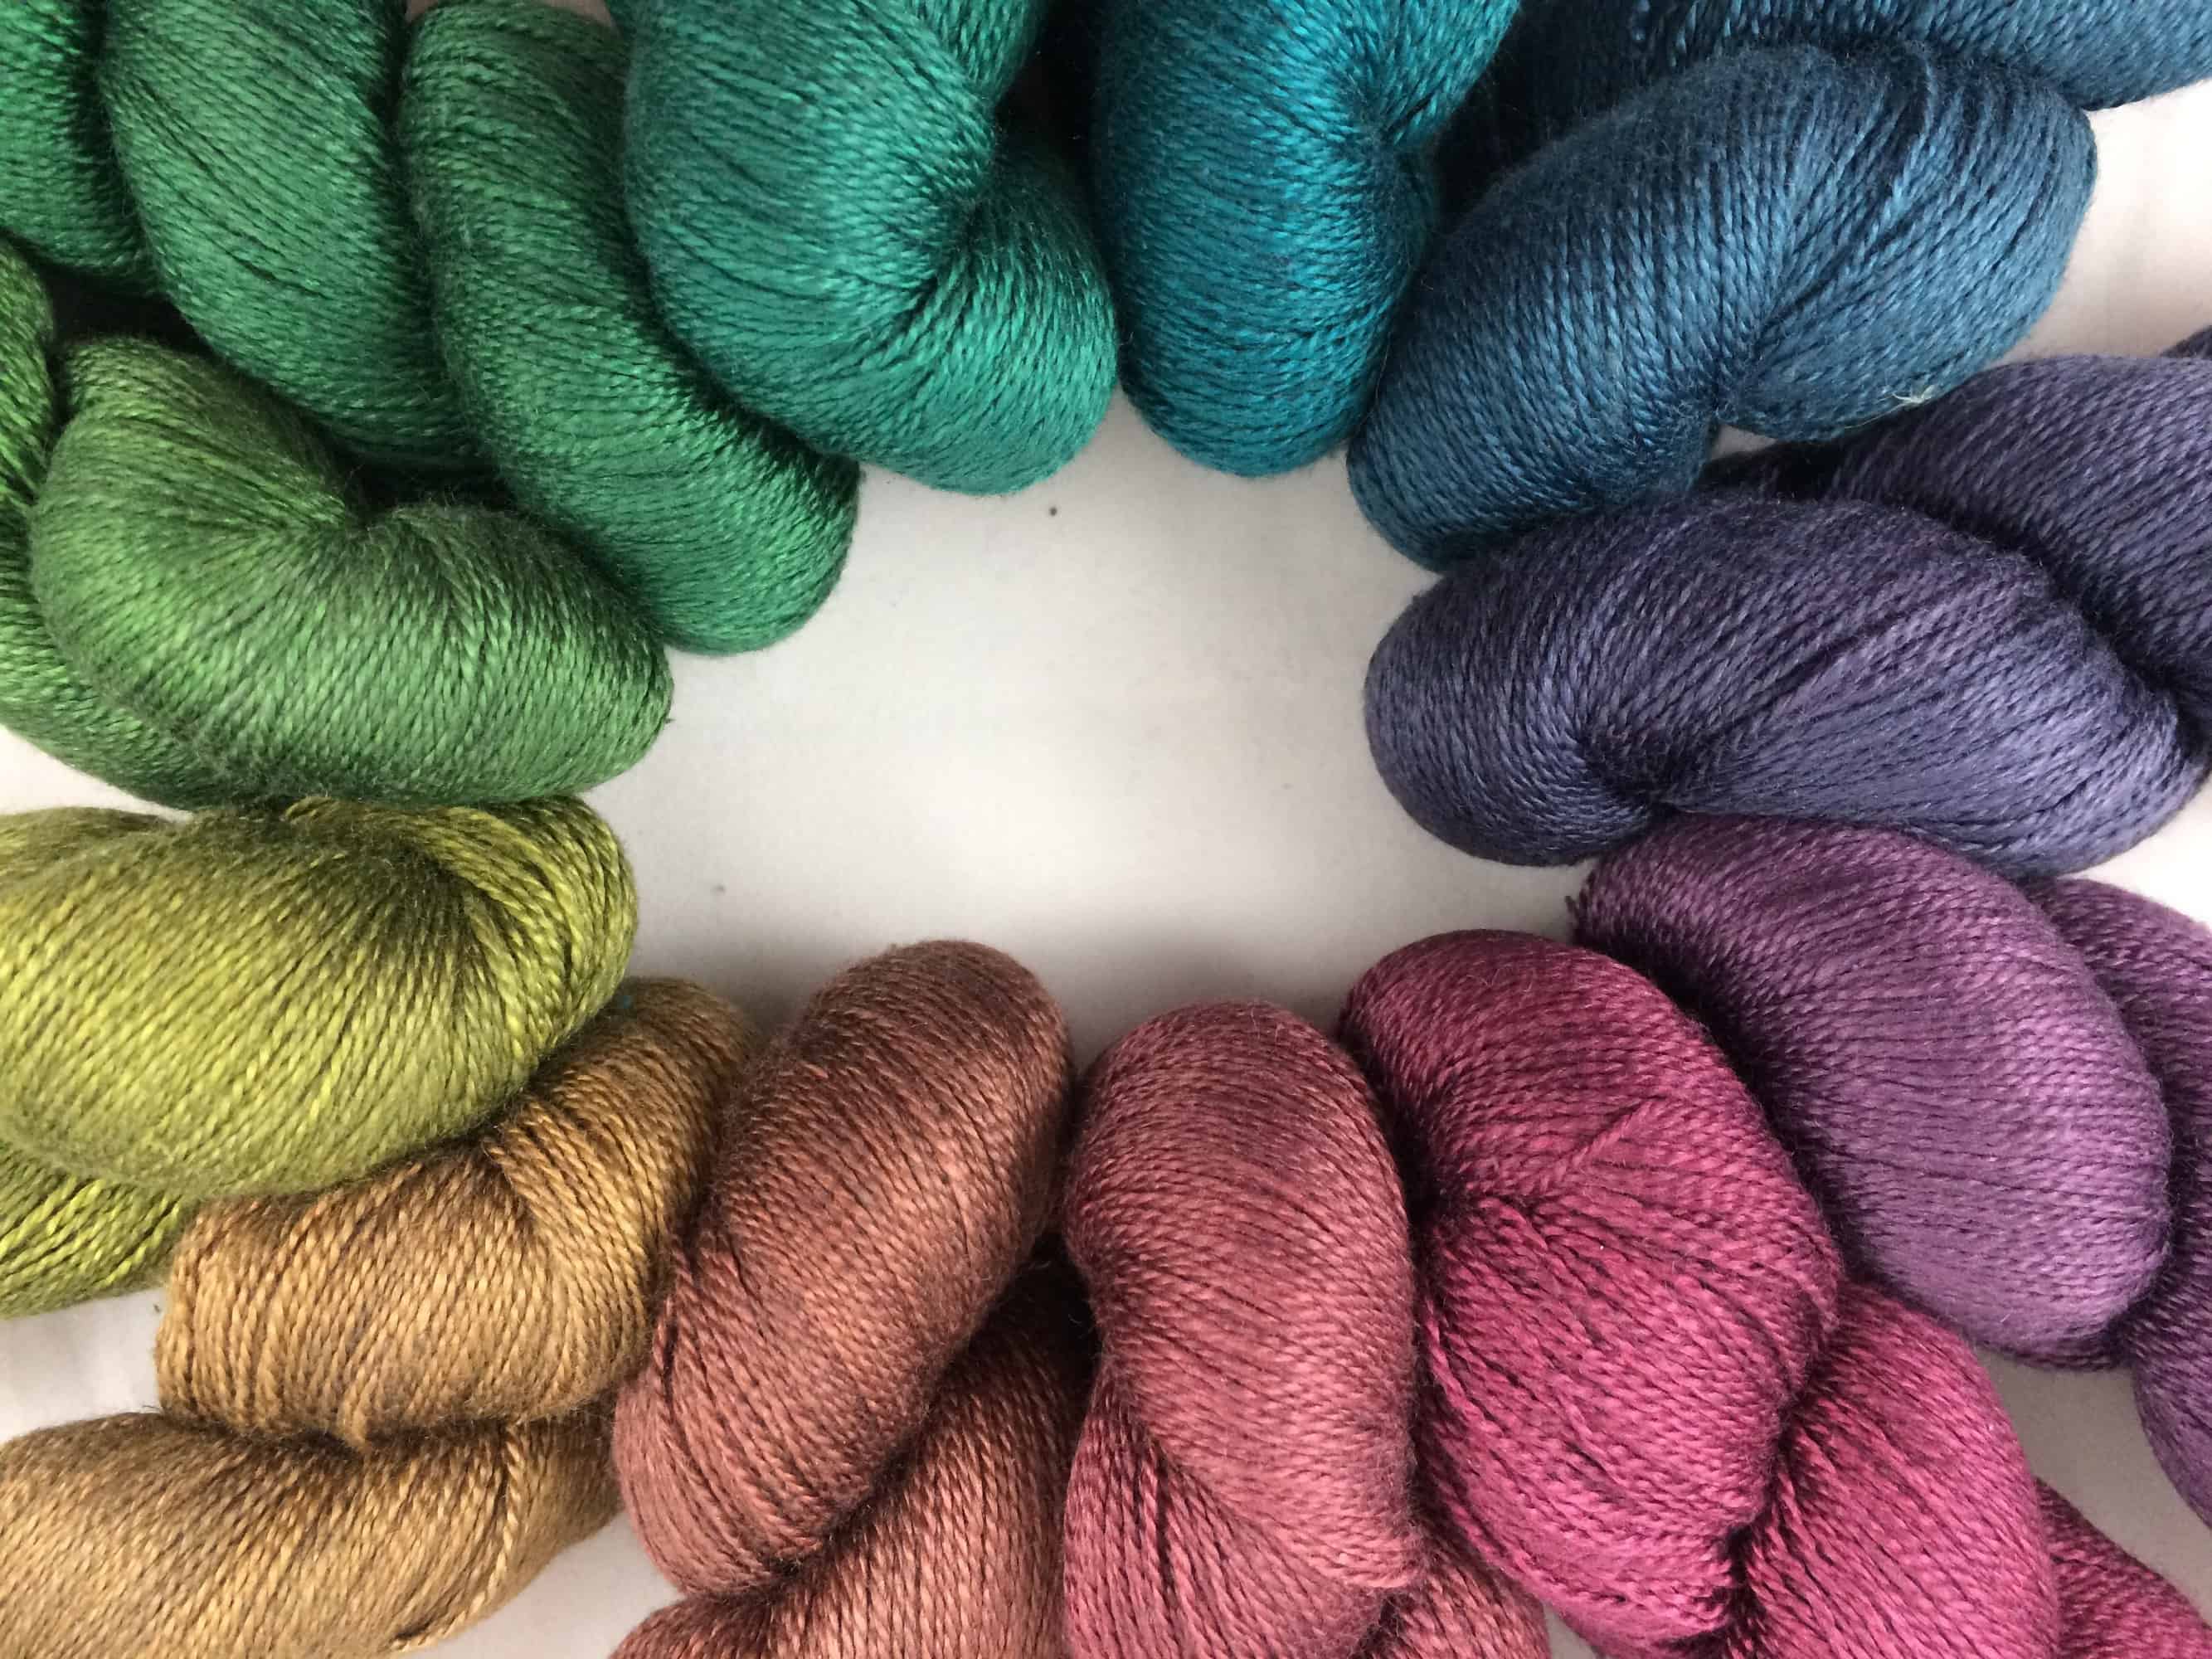
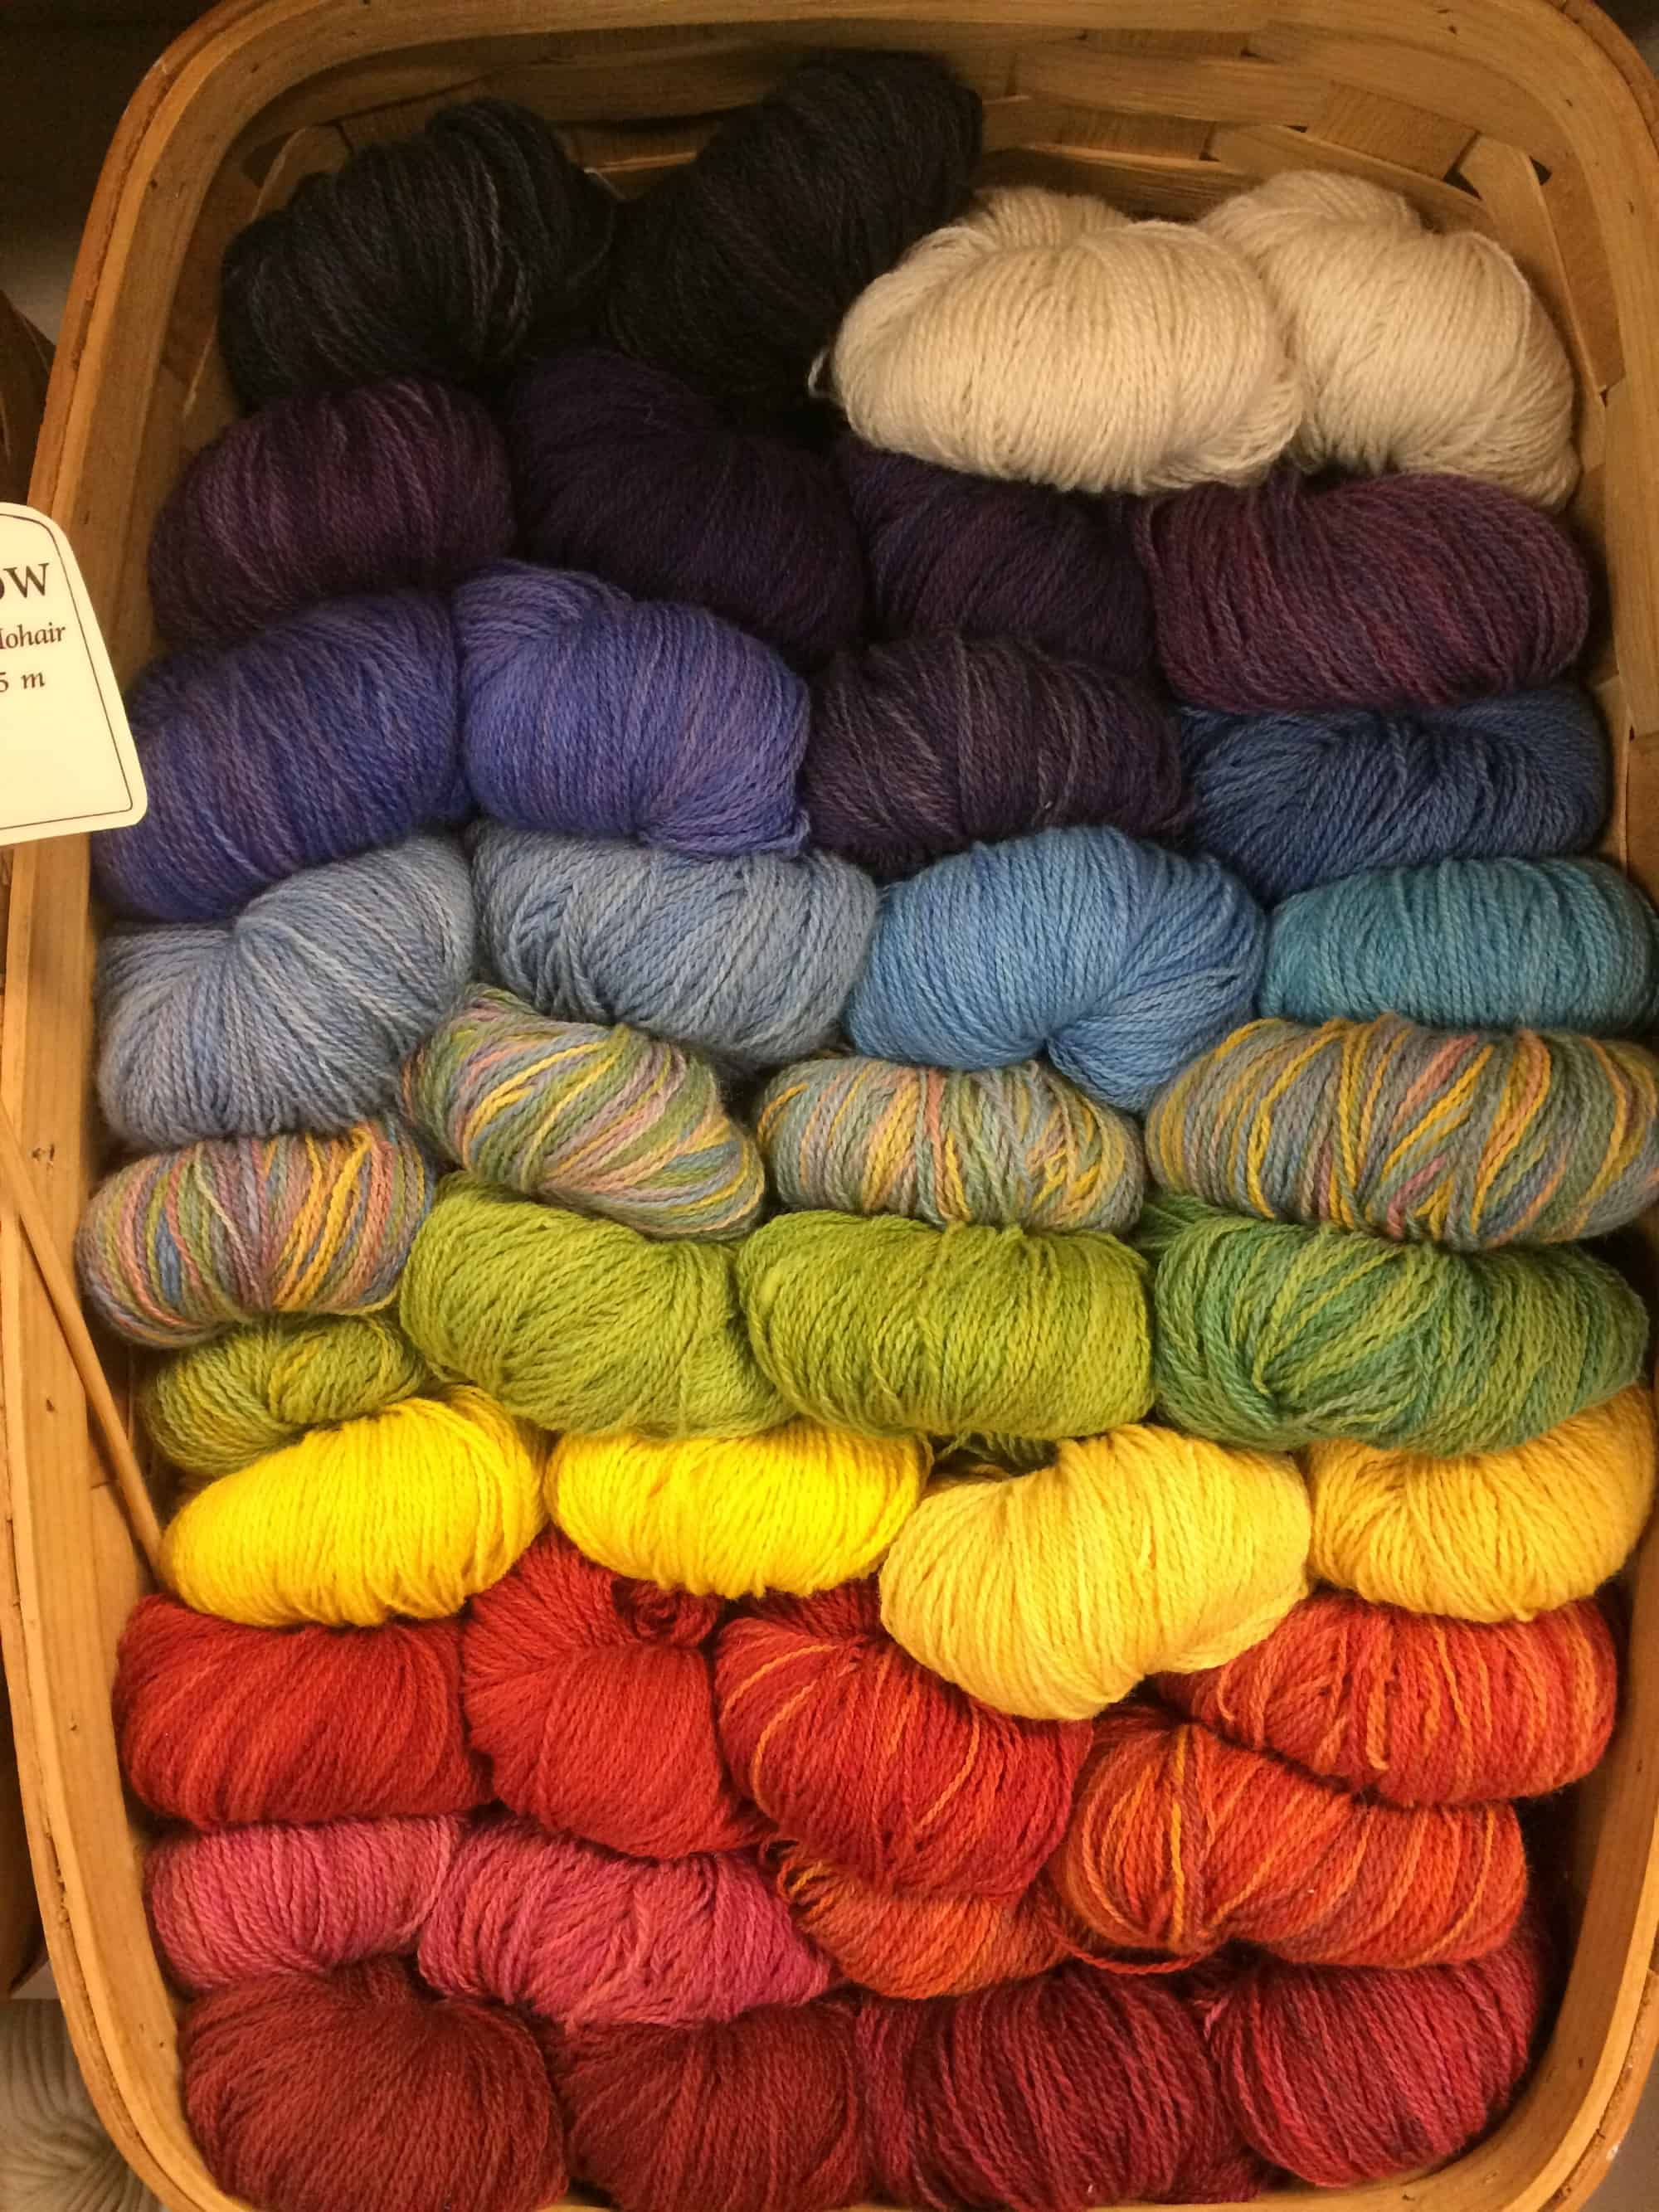
I headed straight to RedFish Dyeworks.  I had not heard of these local dyers before, but during the Finishing Course on Thursday, Arenda showed us several Fair Isle sweaters she’d knit with their yarn and raved about their color sense.  I bought a package of twelve 50g / 450 yard skeins of 20/2 silk for weaving:

image

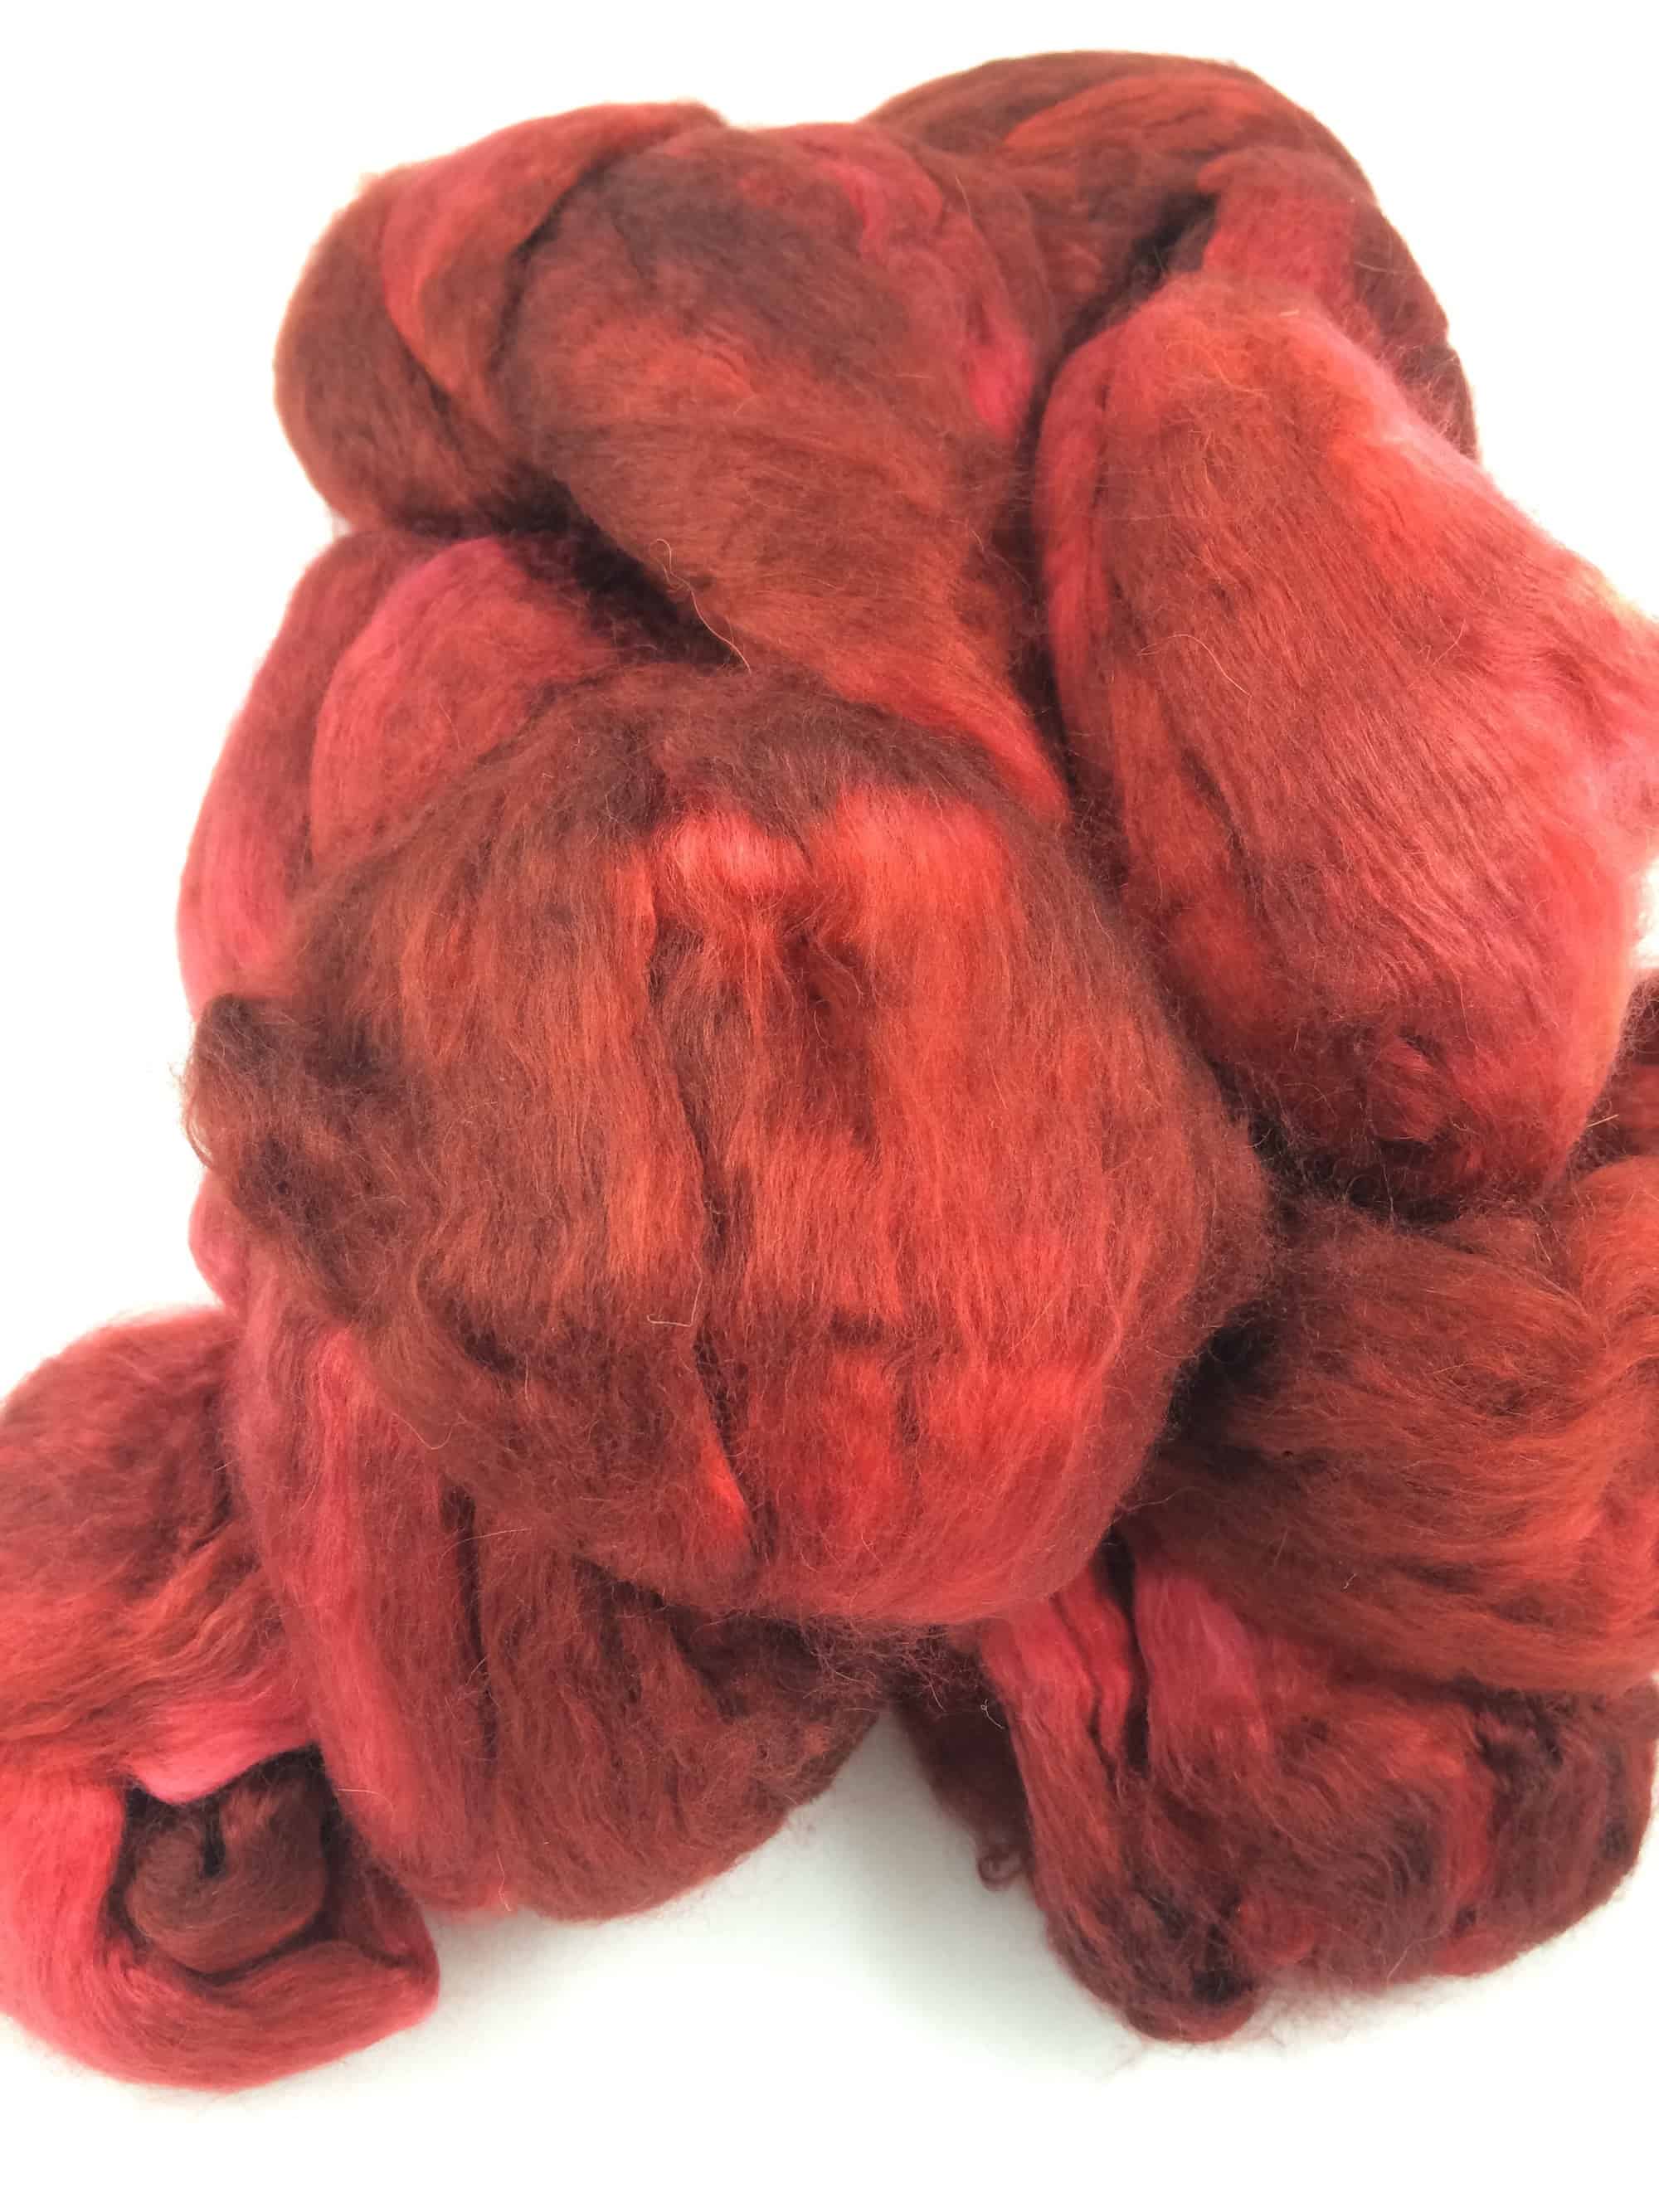
I also bought 4 ounces of 50% silk / 50% baby camel roving.  The roving is incredibly soft thanks to the baby camel fiber and has the sheen of silk.  I can’t wait to spin it!

image

Newton’s Yarn Country booth was next door to RedFish Dyeworks.  Their booth was standing room only!

IMG_9686

They sell weaving yarns at excellent prices.  I looked through the booth, but didn’t buy anything.  Most of their yarns were cotton or tencel and I already have many cones of those fibers for weaving.

The Yarnover Truck was in the house.  Like literally in the house, on the market floor.

image

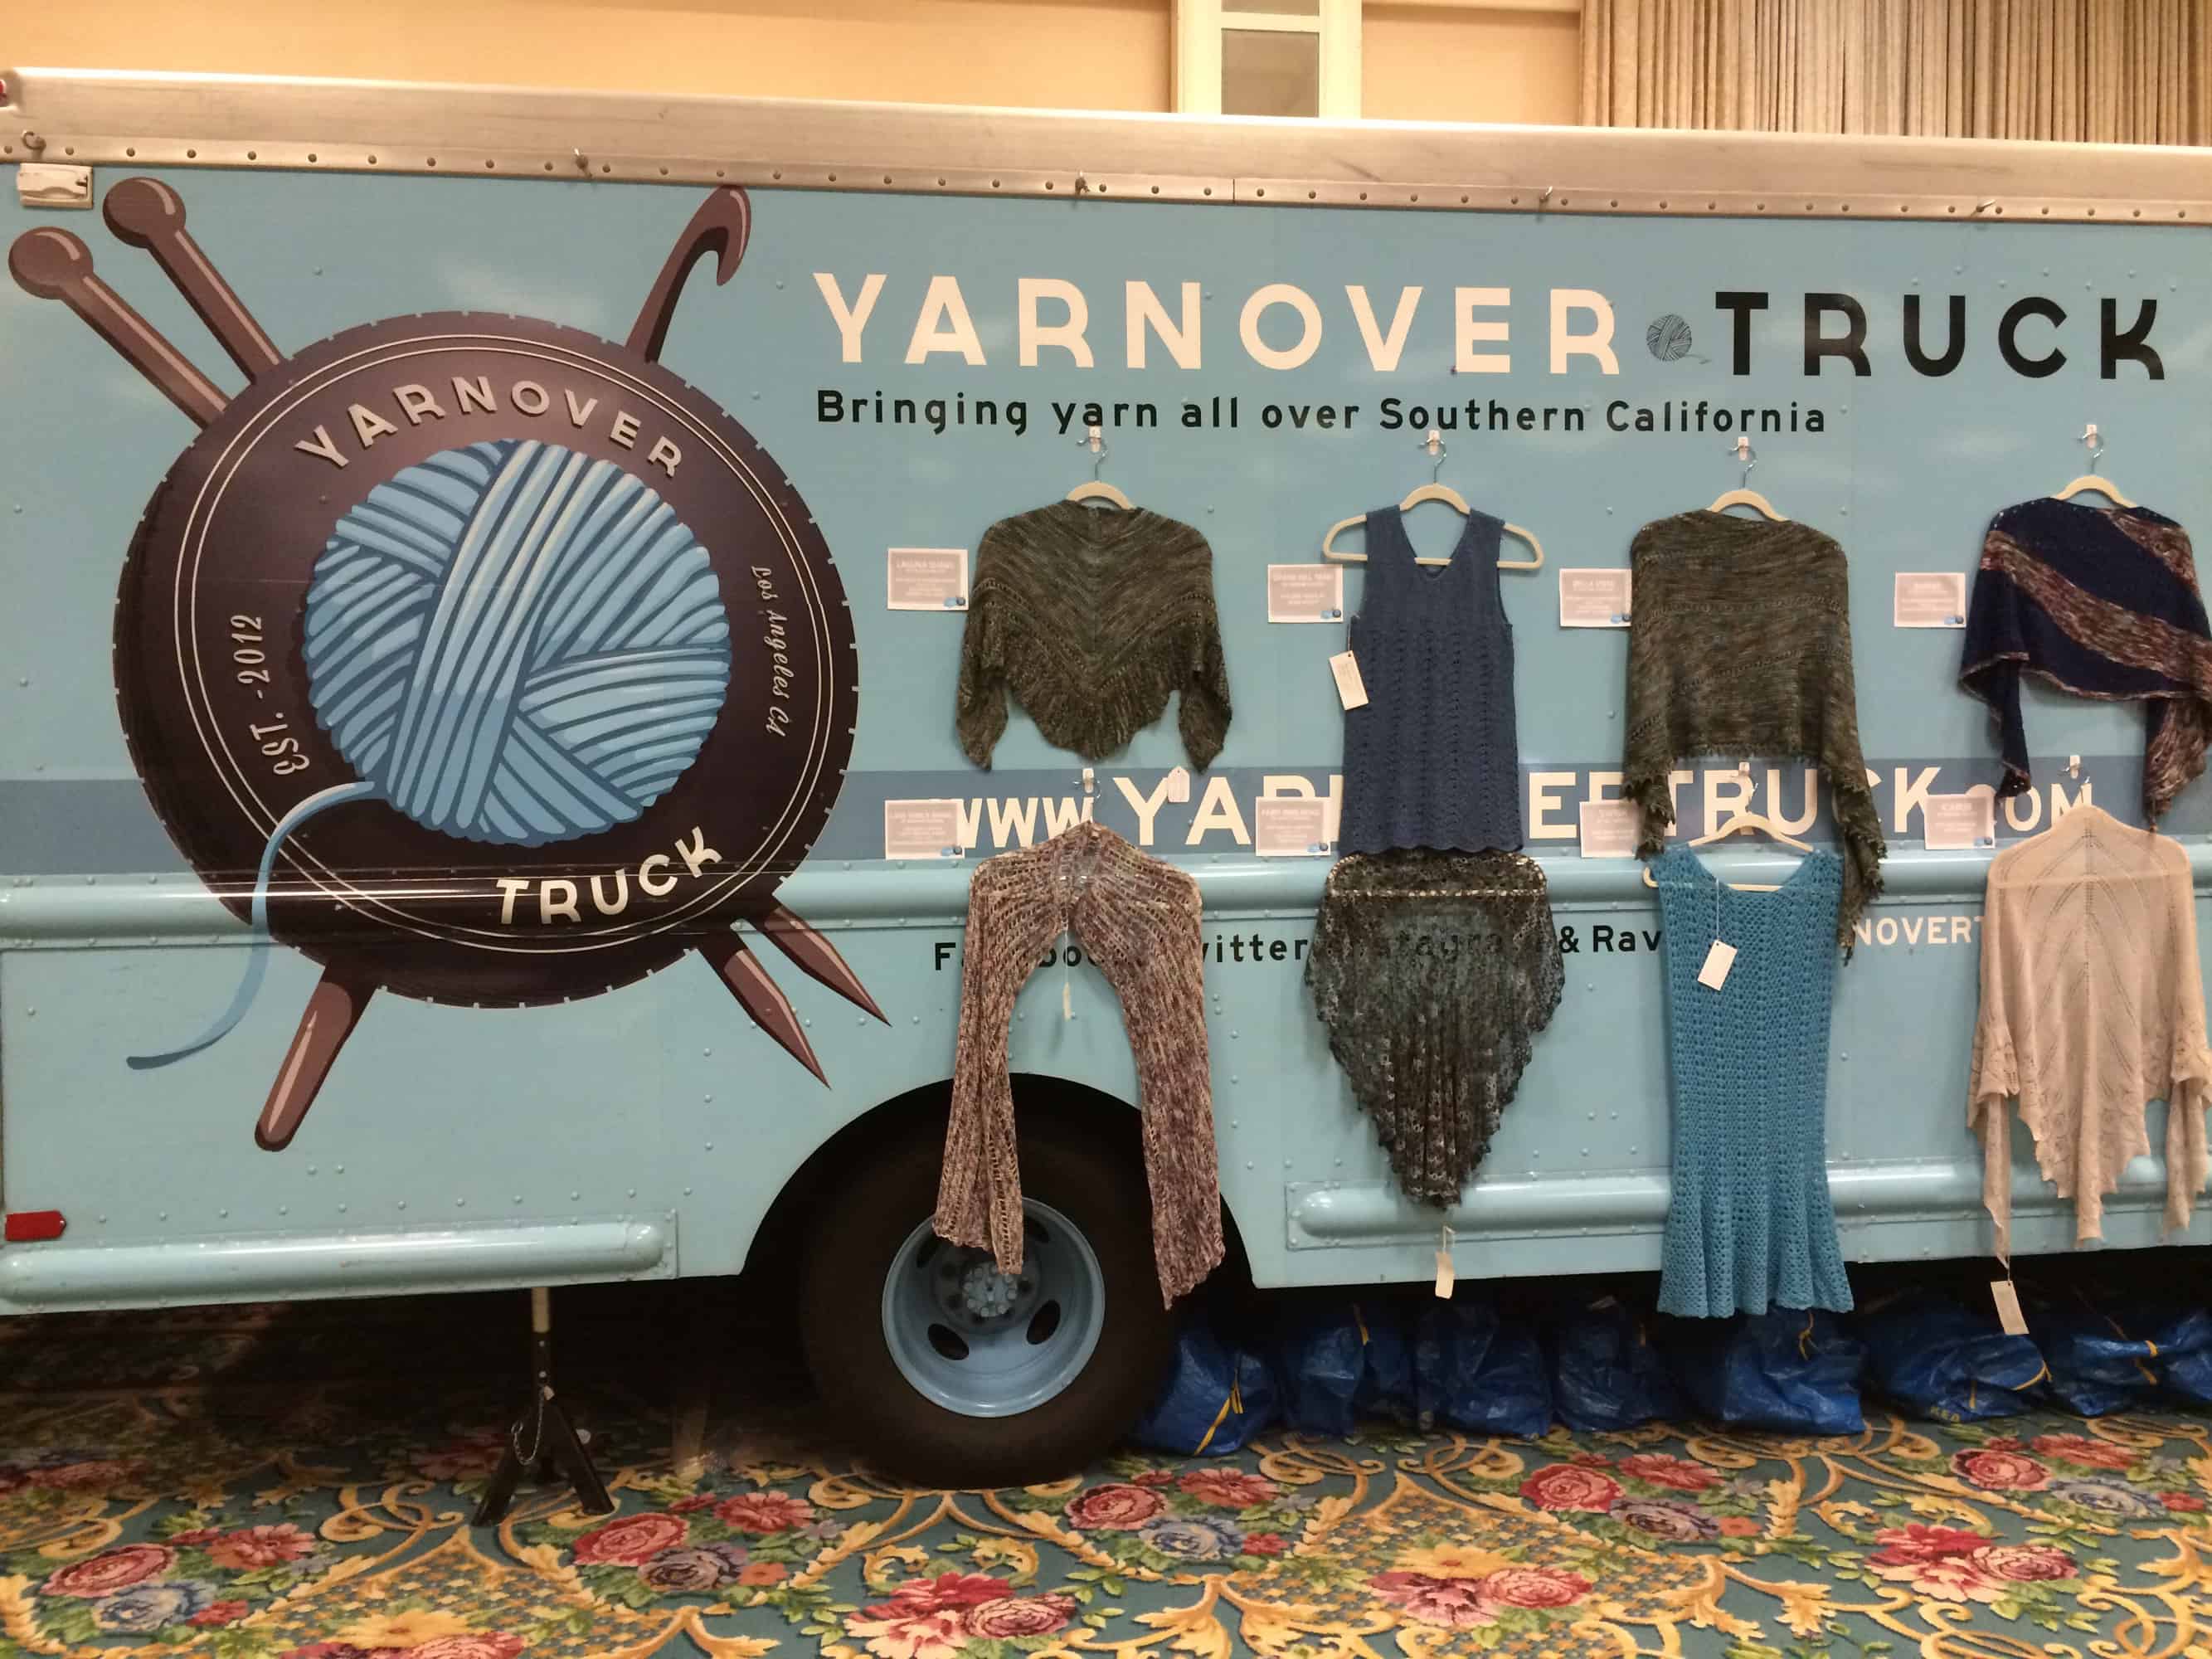
Four Purls, a LYS in Lakeland, FL, has a yarn truck, which I’ve seen at various events (e.g. Orlando Distaff Day 2015), but it’s always parked outside.  I love the name “Yarnover Truck.”  I want to call them and ask them bring that yarn over.  Too bad I live on the opposite side of the country.  The inside of the truck is lovely, with built-in cubbies full of yarn:

image

I didn’t buy anything from them during the market preview, but I came back later to pick up some yarn for a baby blanket that I’m making for a friend.

image

Another booth carried Jelly Yarn.

image

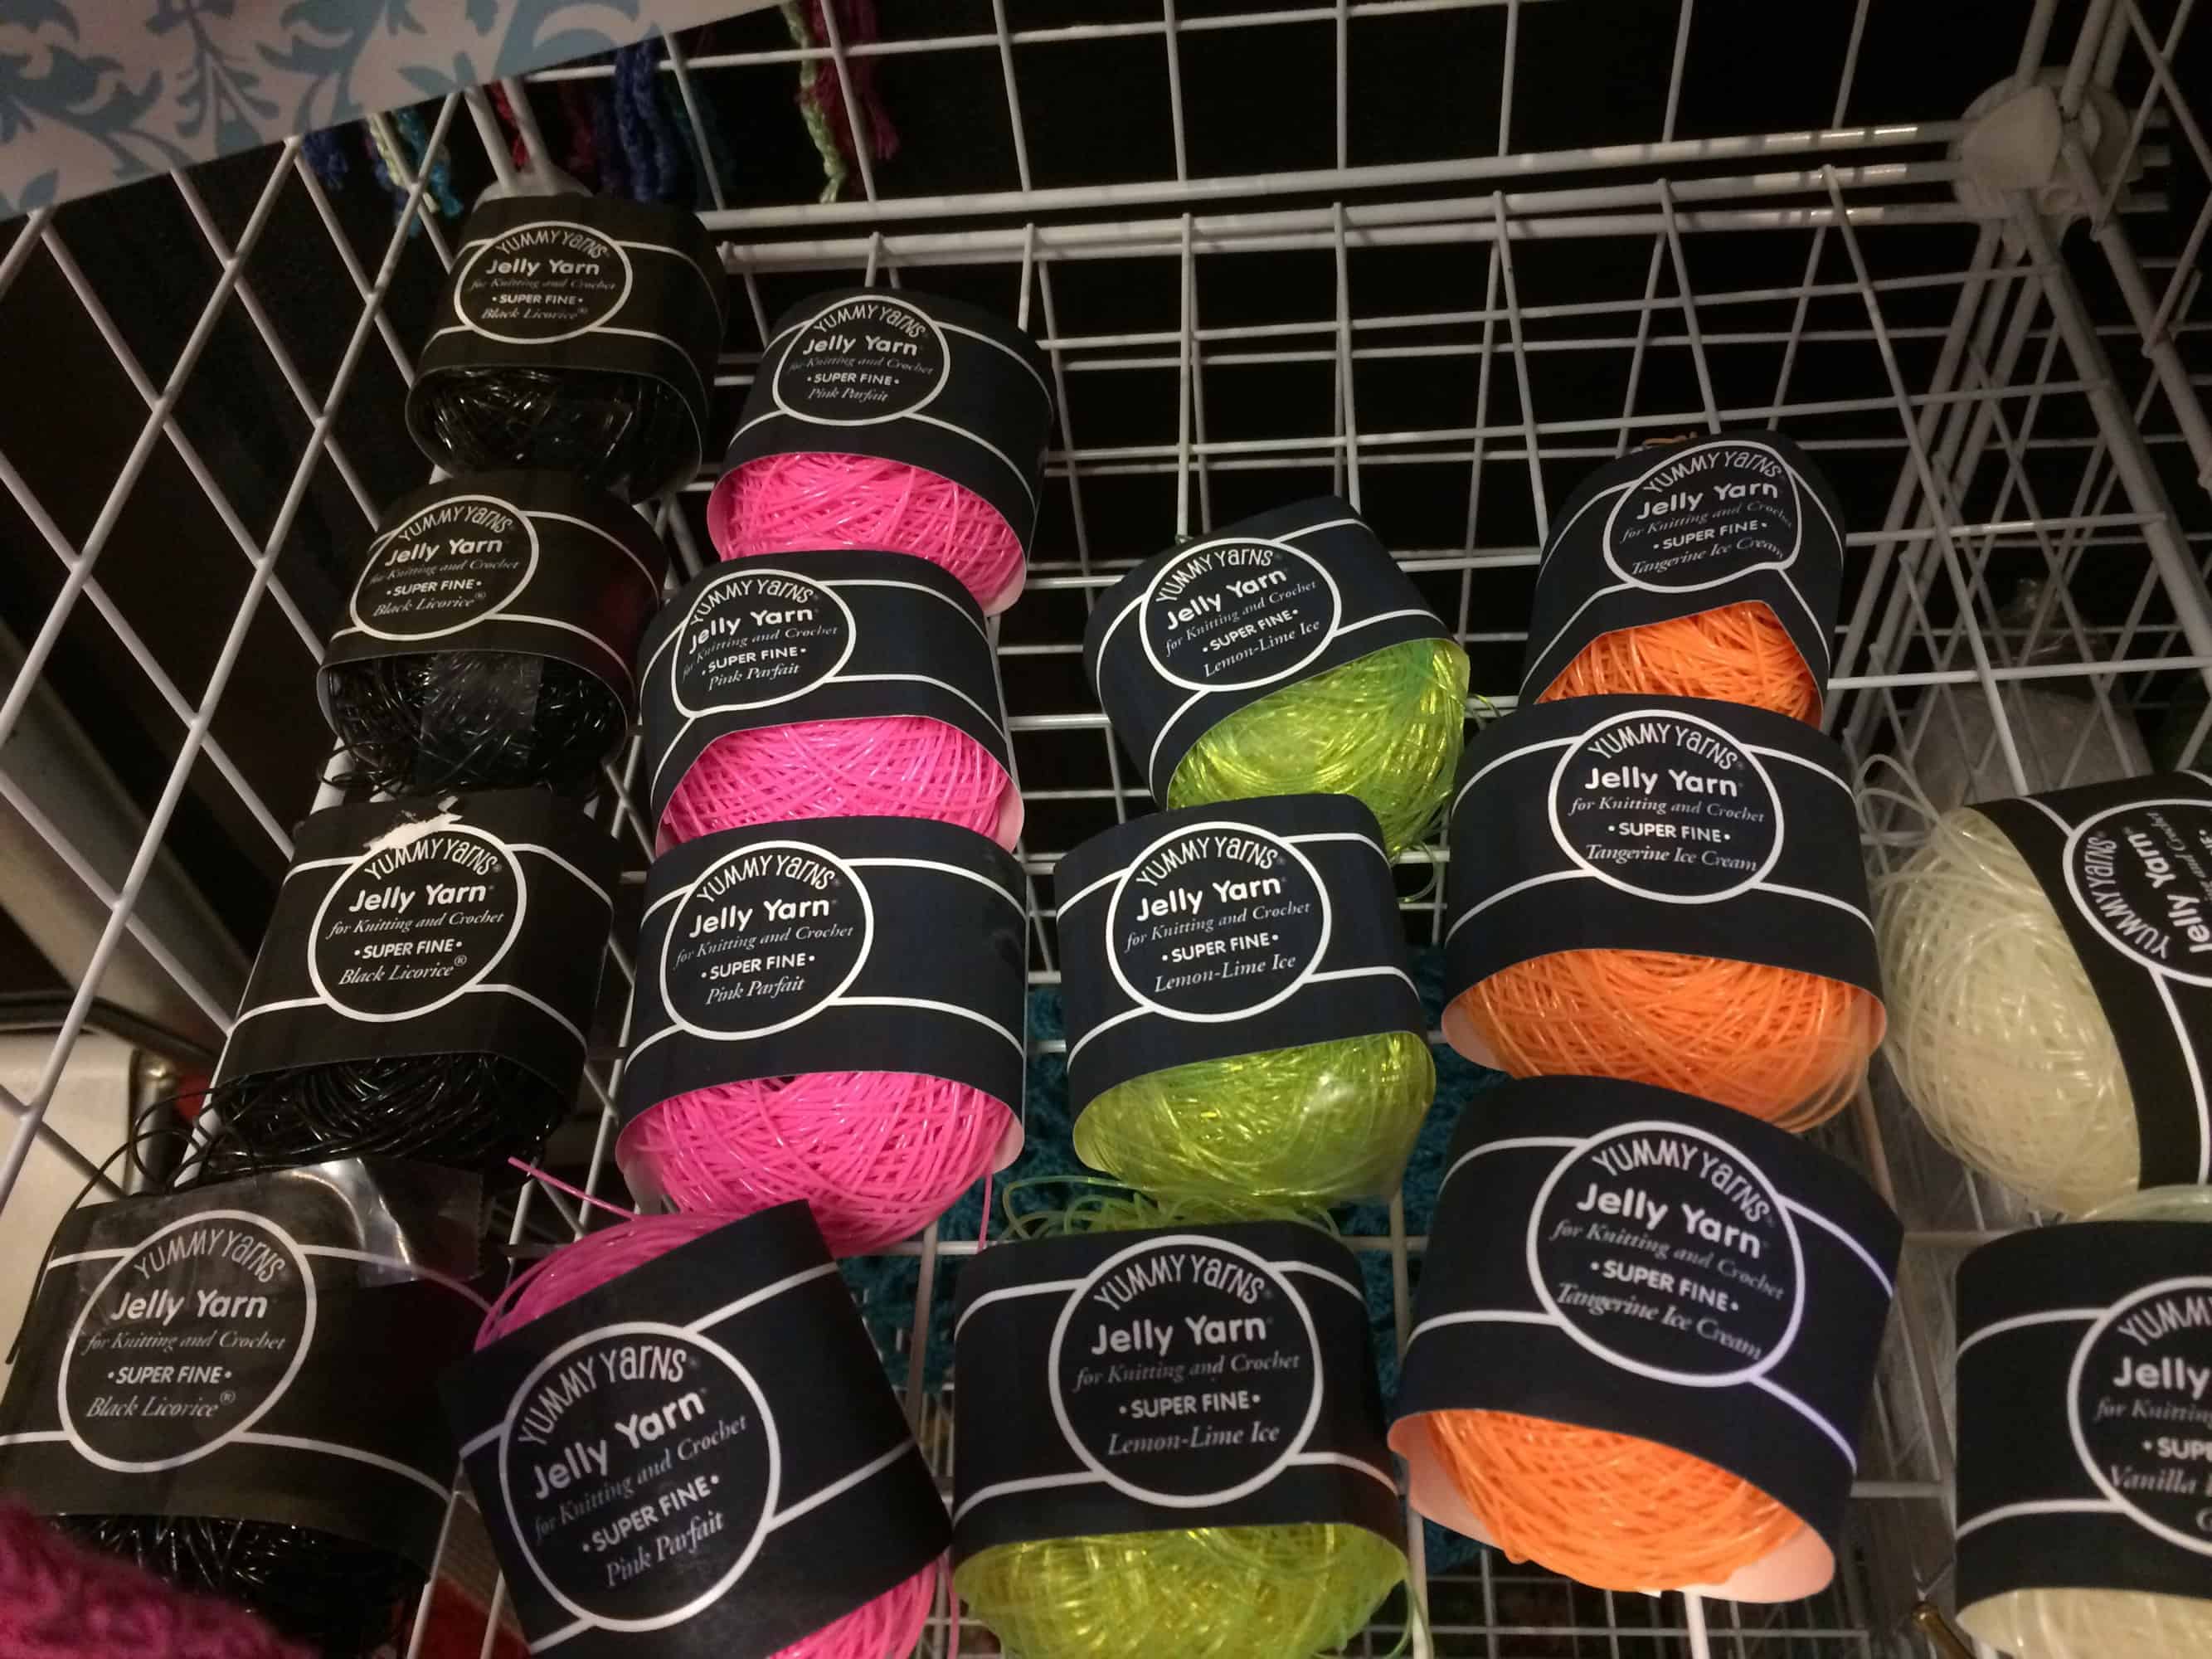
Remember those jelly shoes every little girl had back in the late 70s and early 80s? This yarn feels just like those shoes.  And some of the colors glow in the dark:

image

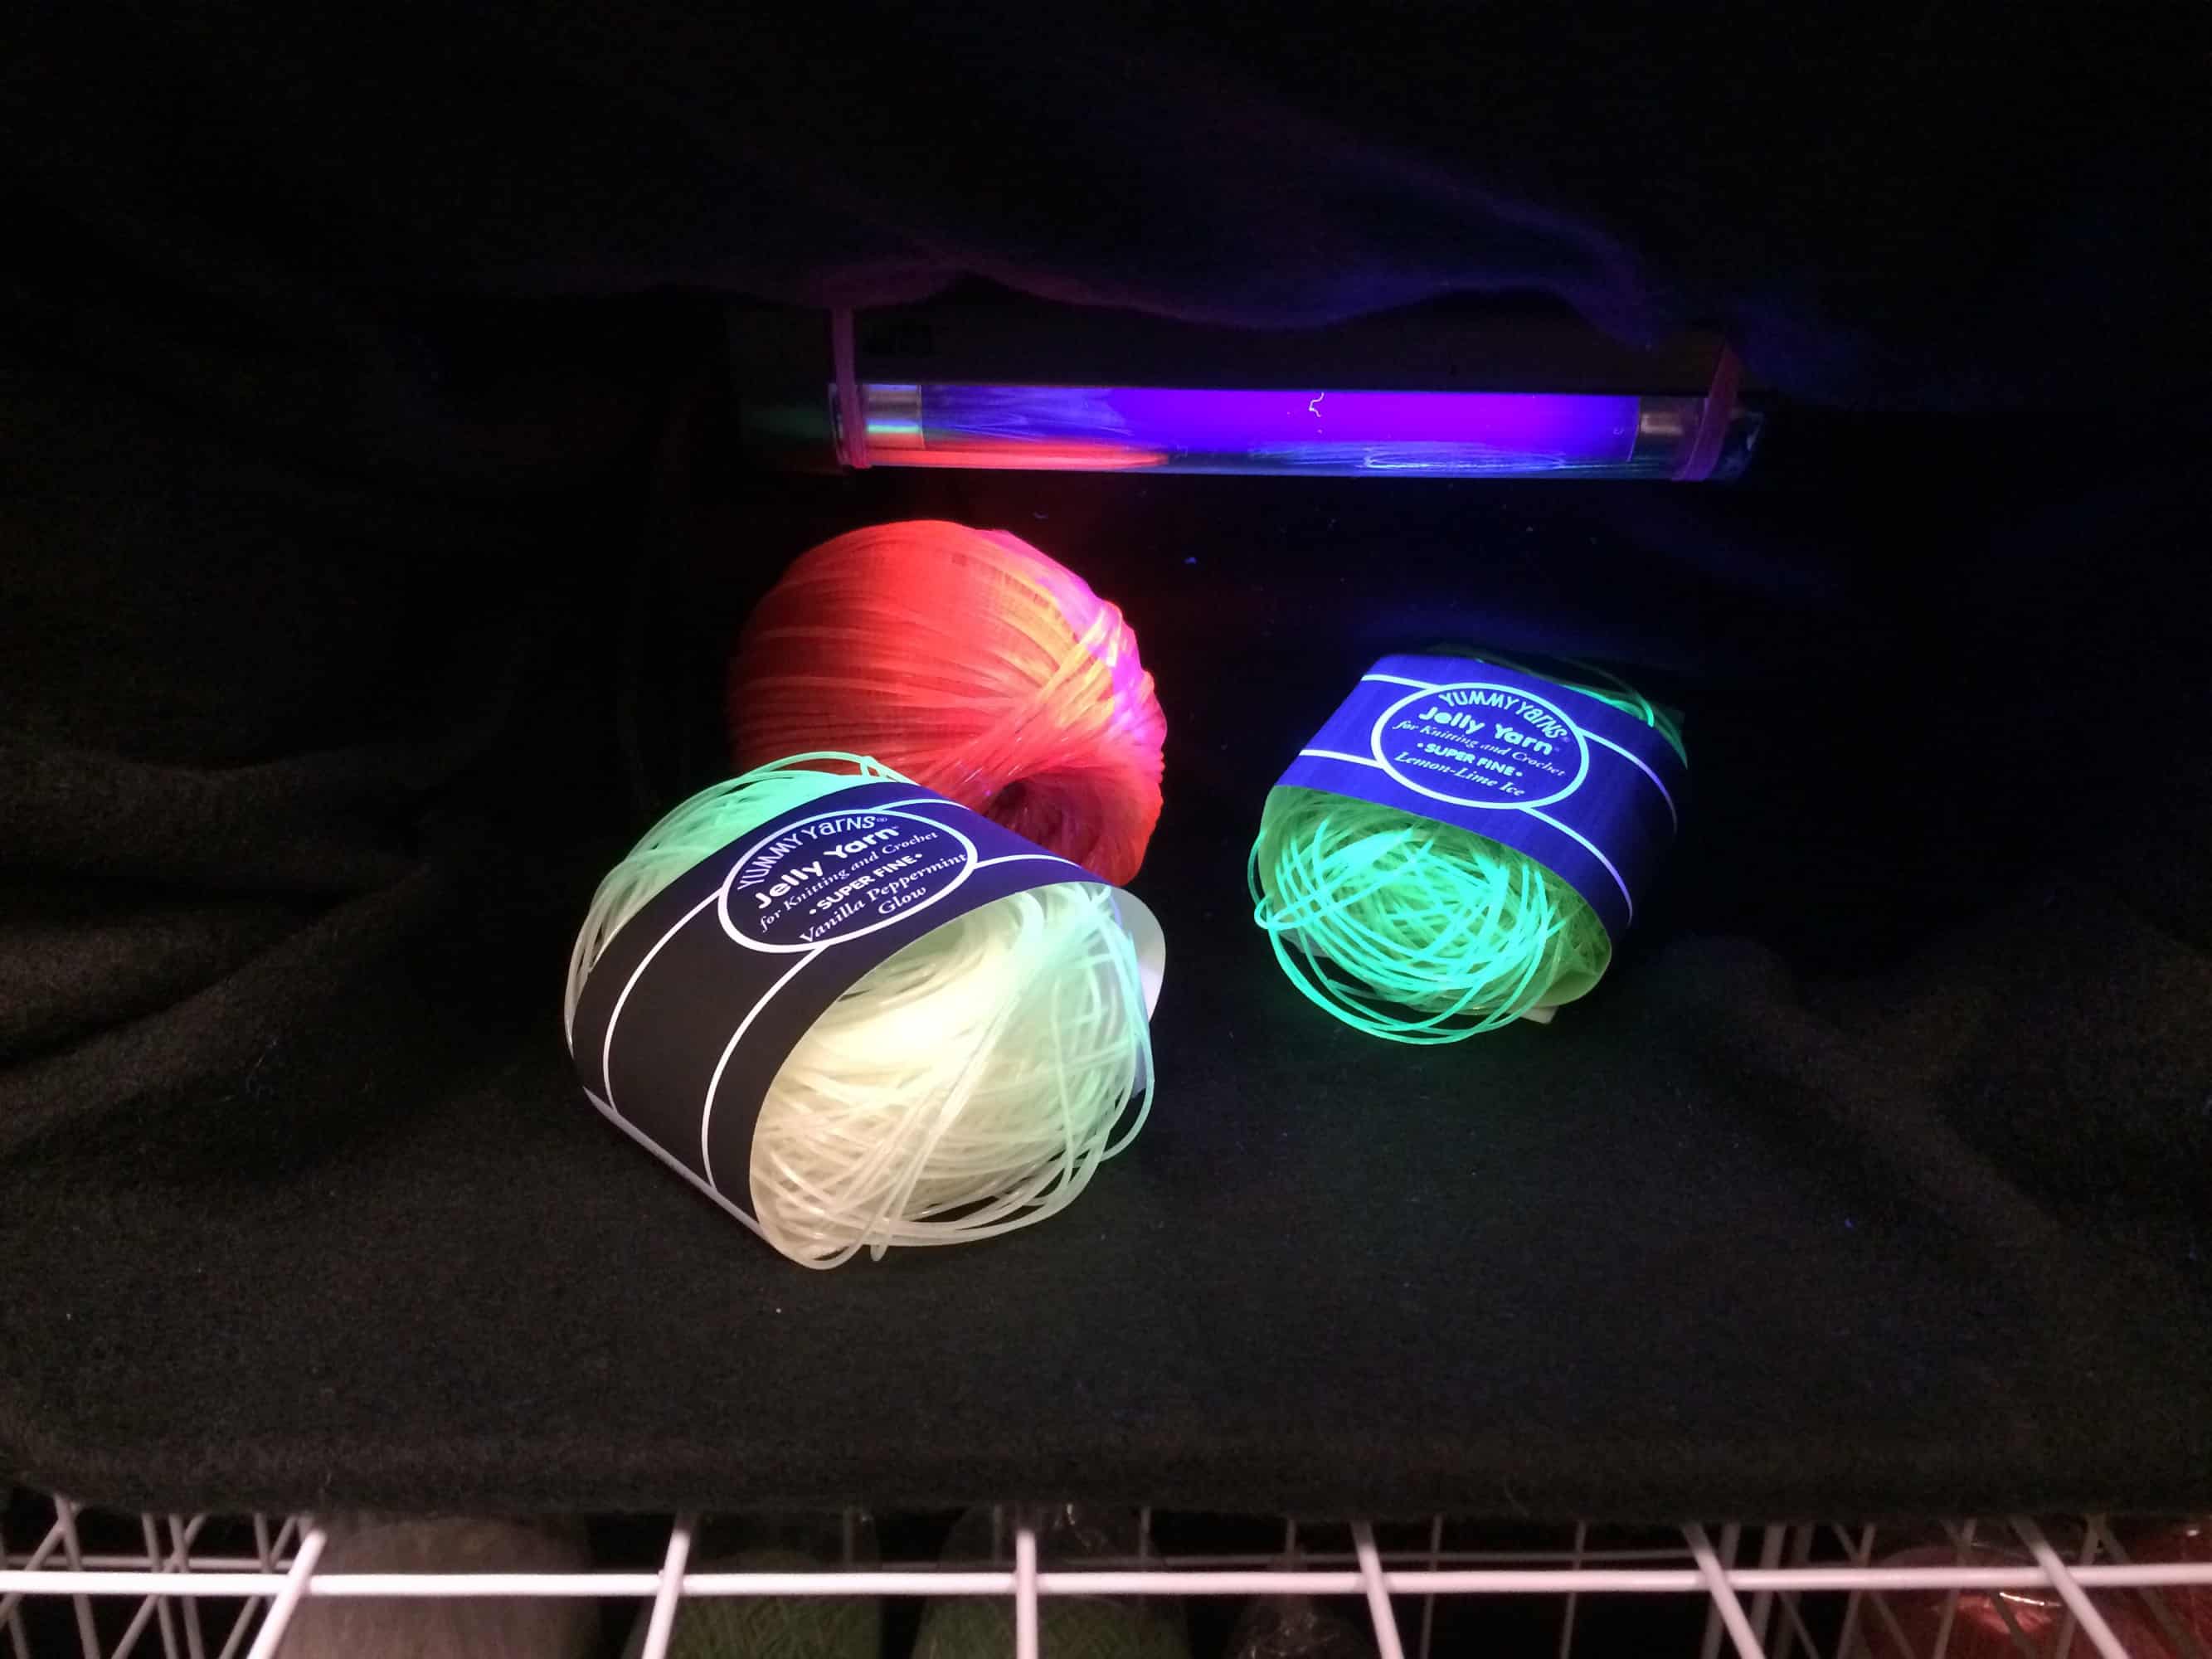
I resisted the temptation to buy some during the market preview because what would I actually do with it?  While it’s tempting to think that I might knit myself jelly shoes (or slippers, perhaps) I’m certain they’d be too fragile to wear outside during a Florida summer. I was unable to resist its siren call for the entire Conference however.  Three skeins came home with me (in Ravenclaw colors, of course).

image

Unique Market Features

The TKGA / CGOA Market had two unique features: The Brilliance Bar and a Yarn Winding Station.

image

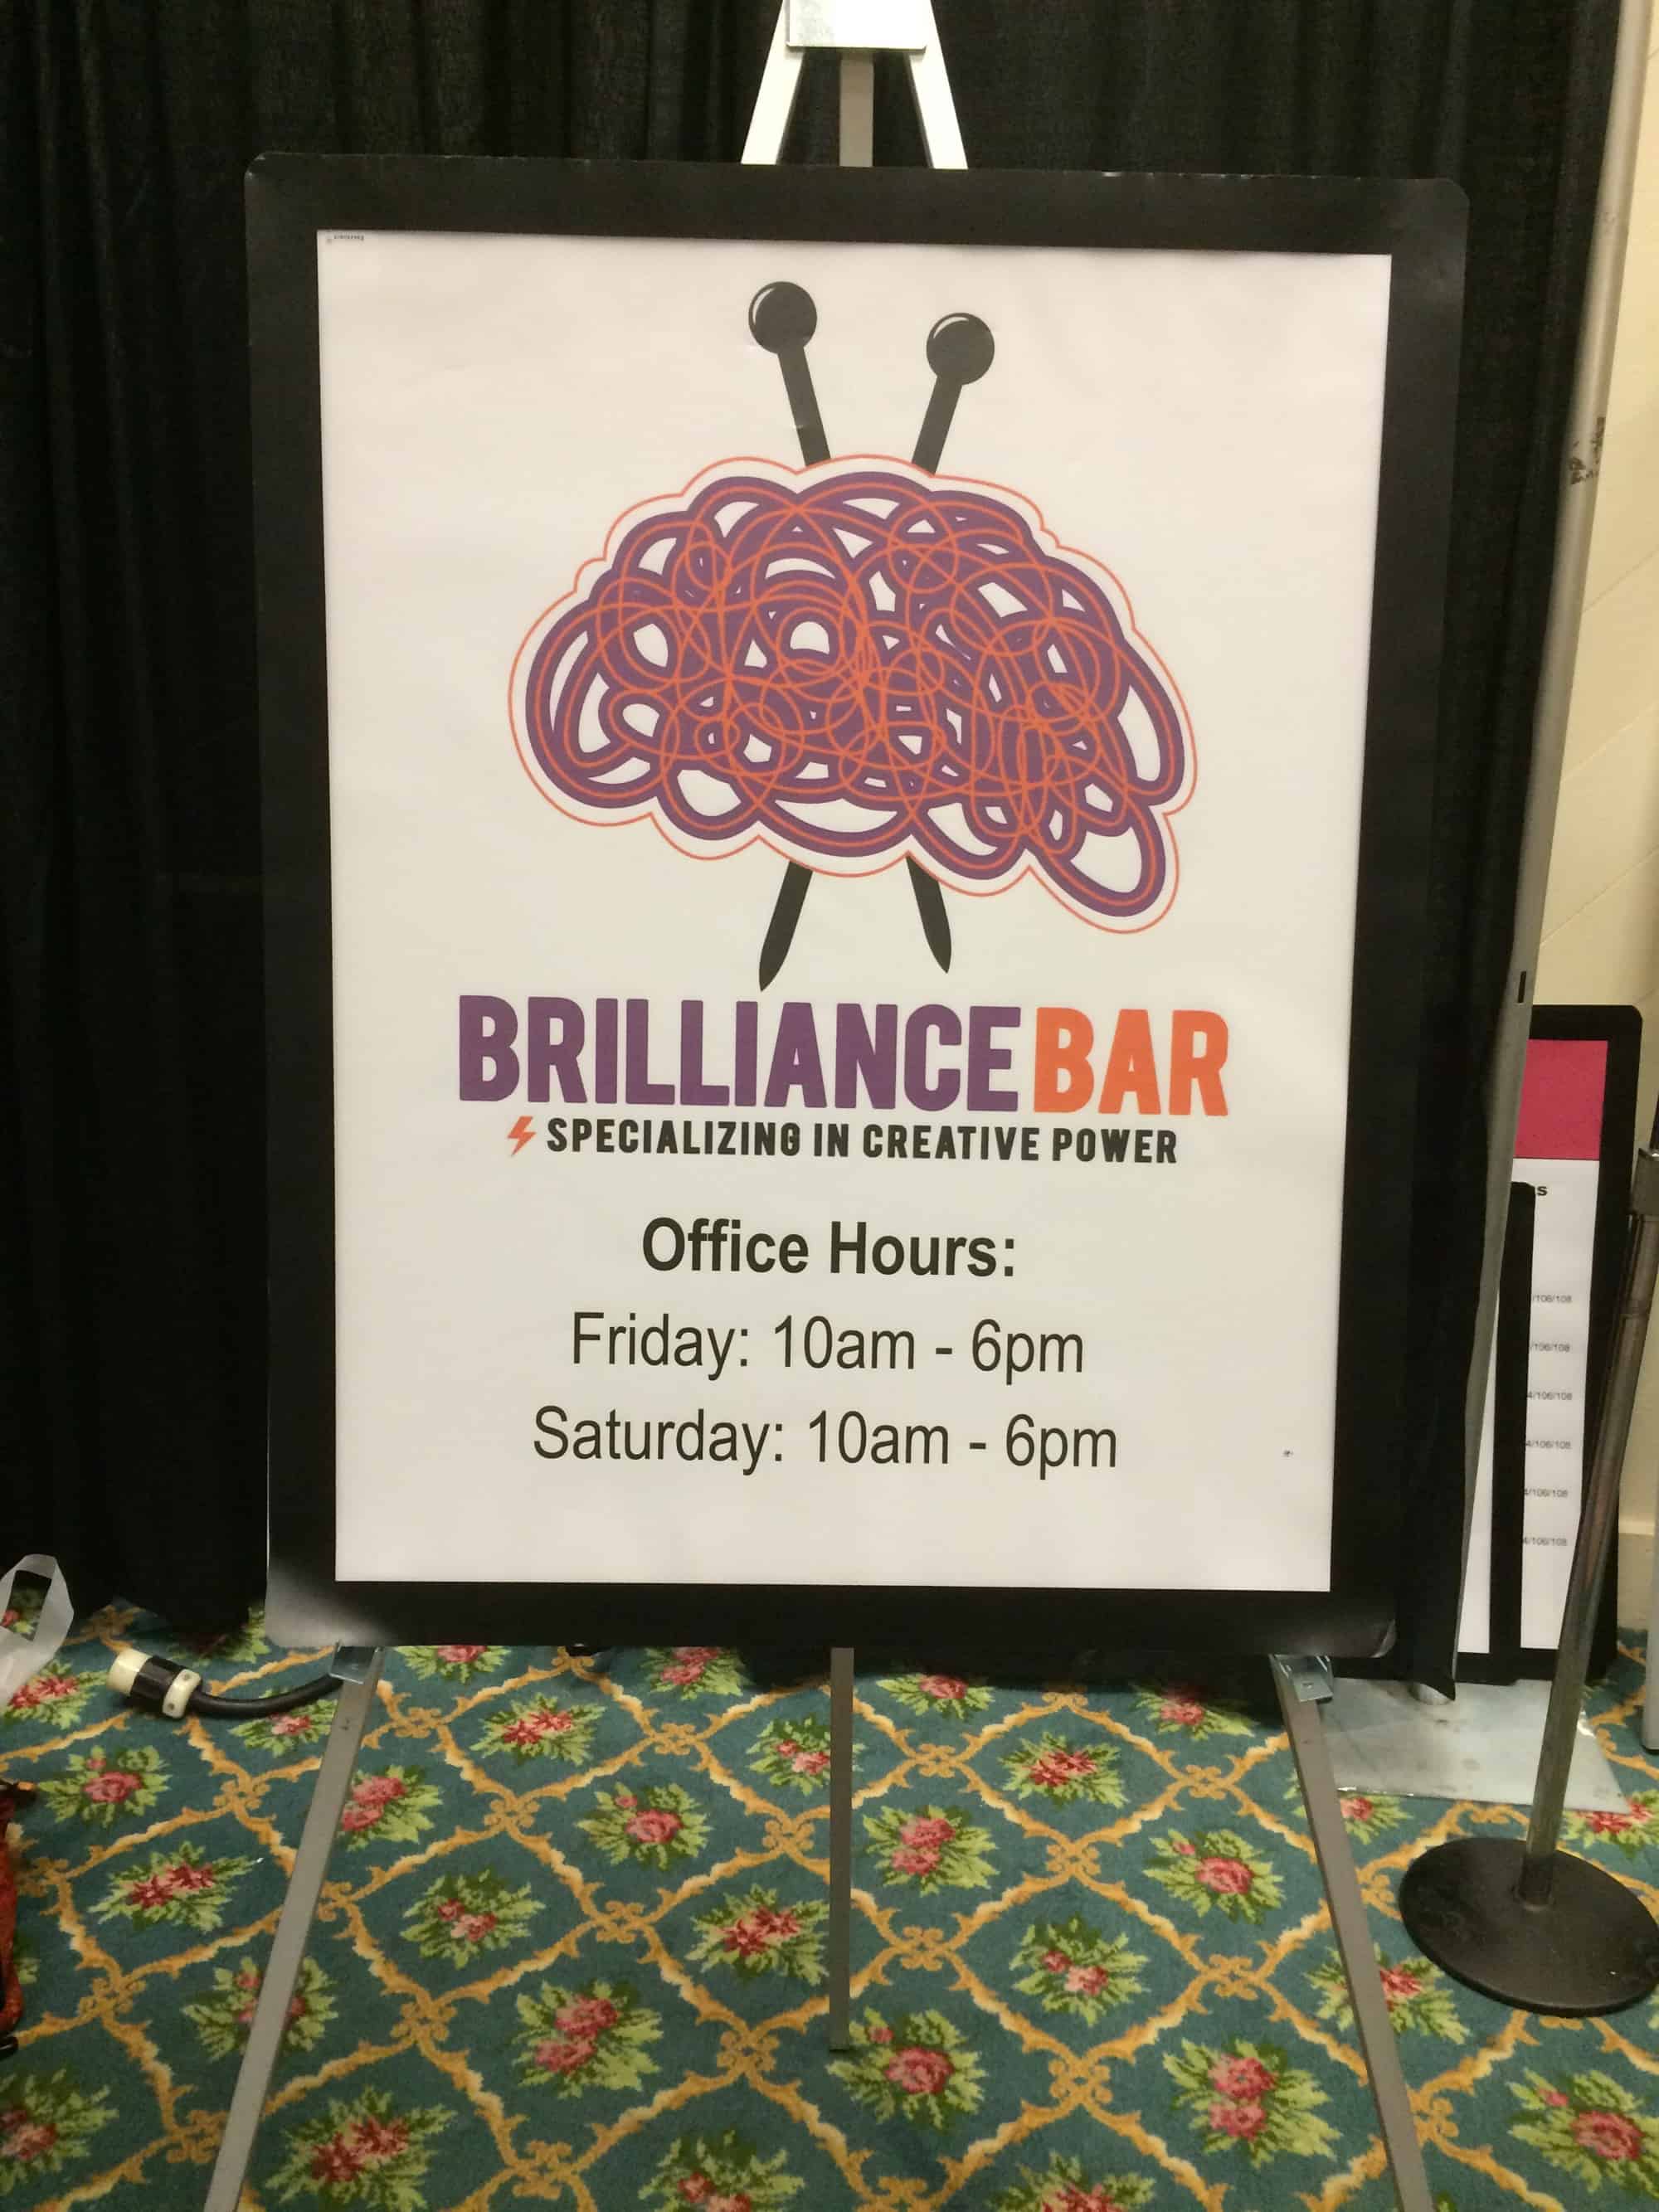
During posted Office Hours, at least two Master Hand Knitter Committee Members manned the Brilliance Bar.  Attendees could make an appointment to ask knitting-related questions.  Whether you wanted a little info on the Master Hand Knitter program or you needed help trouble-shooting a current project, this was the place to go!  I didn’t personally make an appointment — almost every class I took was taught by a Committee Member, so I had many opportunities to ask questions during the Conference.  I’d love to hear comments from people who did visit the Brilliance Bar or people who worked it.  What kind of help did you get?  What was the craziest problem anyone brought to the Bar?

image

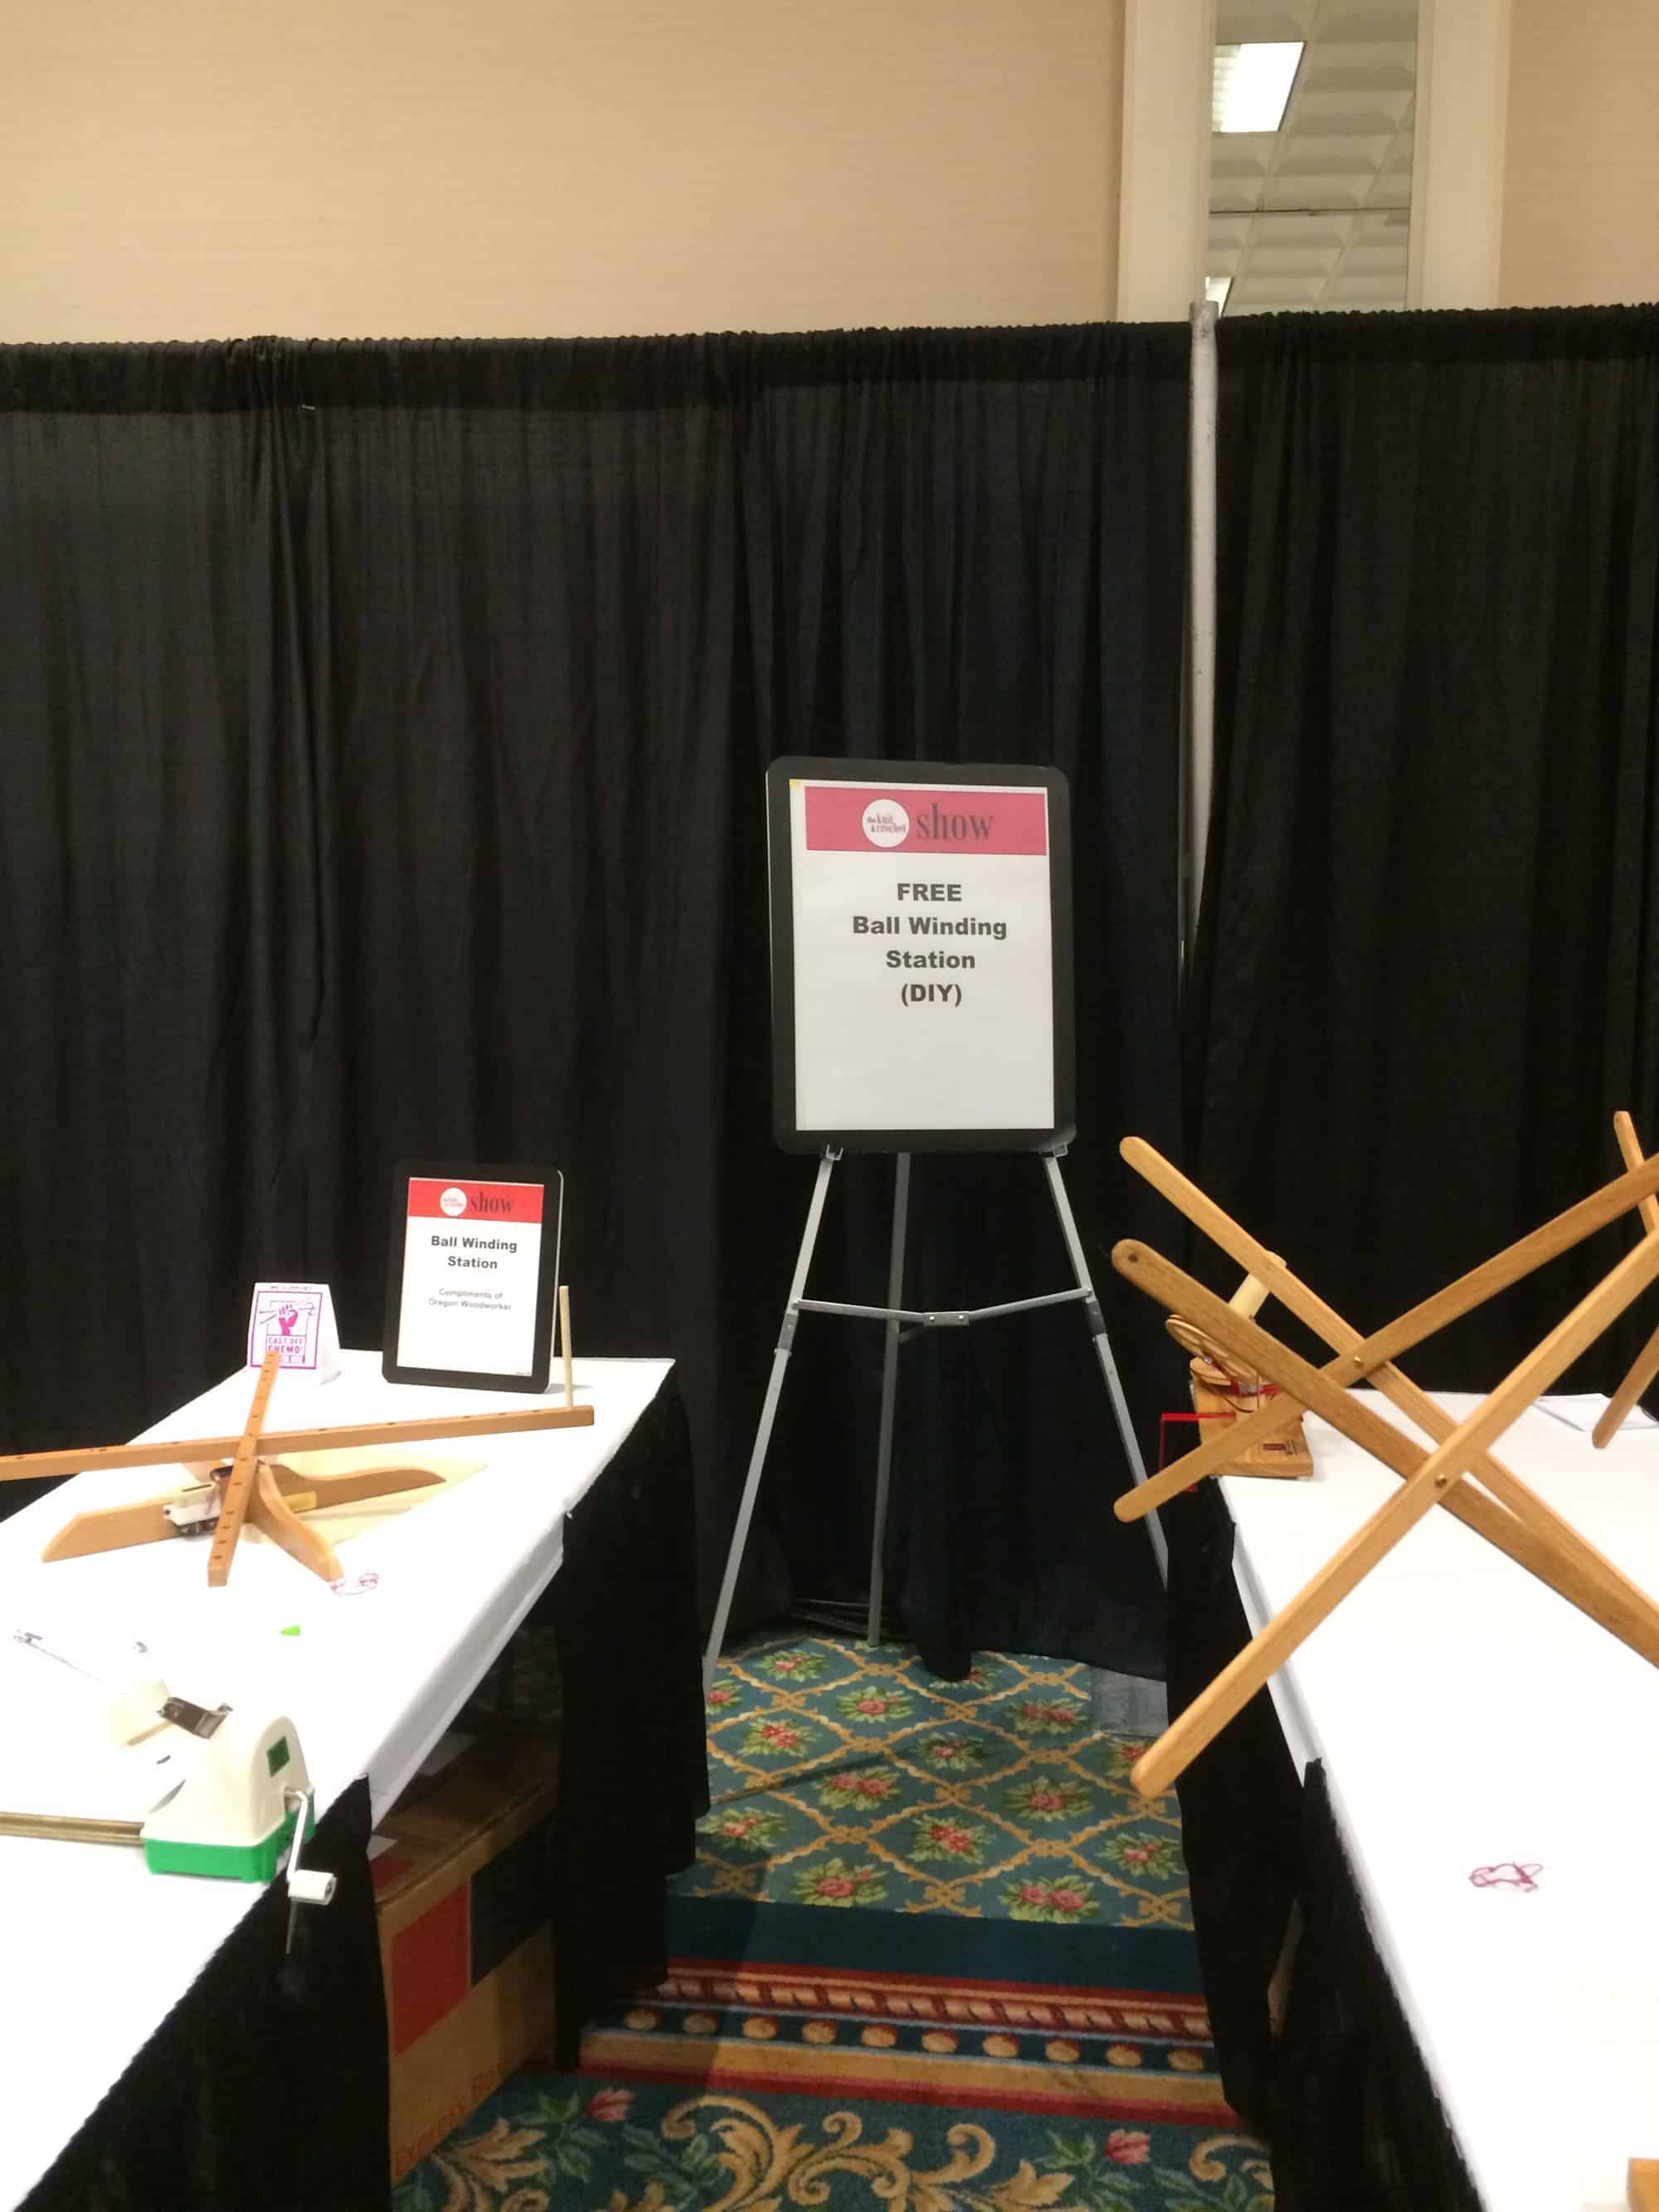
OMG.  Every fiber event should have one of these.  I realize it might not be practical for a large event like Maryland Sheep and Wool, but why haven’t I seen this at the smaller events I’ve attended?  I could knit my new yarns NOW.  I don’t have to wait to get home to my swift and ball winder!

CGOA Member Design Competition

Each year, CGOA (Crochet Guild of America) runs a Member Design Competition.  Entrants must submit their work by July 1.  Pieces are on display at the Conference Market and prizes are announced at the Saturday night banquet.  “Entries must be original designs that have not been previously entered in this competition, previously published in any print or electronic media, or otherwise publicly available before the date of competition (our judges need to have never seen this work before).  Entries do not have to be new or recently crocheted, as long as they are your own designs.” (from the Eligibility Guidelines, available on the members-only section of CGOA’s website).  This year, crocheters could enter pieces in 7 categories: Fashion, Accessories, Home Decor and Afghans, Thread Crochet, Young Designer (25 years old or younger), and First-Time Entrant / Non-Professional (no designs previously published in any form).  CGOA judges awarded prizes in each category.  Anyone attending the Market could vote for one piece for the Attendee Favorite.  Here’s a few of my favorites:

image
I though this afghan was knitted, but it is Tunisian Crochet.
image
image
I sent my newly engaged friend Stacy a picture of this and suggested she crochet it for her wedding gown. She’s a talented crocheter, but I don’t think she’s convinced that this would be the right thing for her!

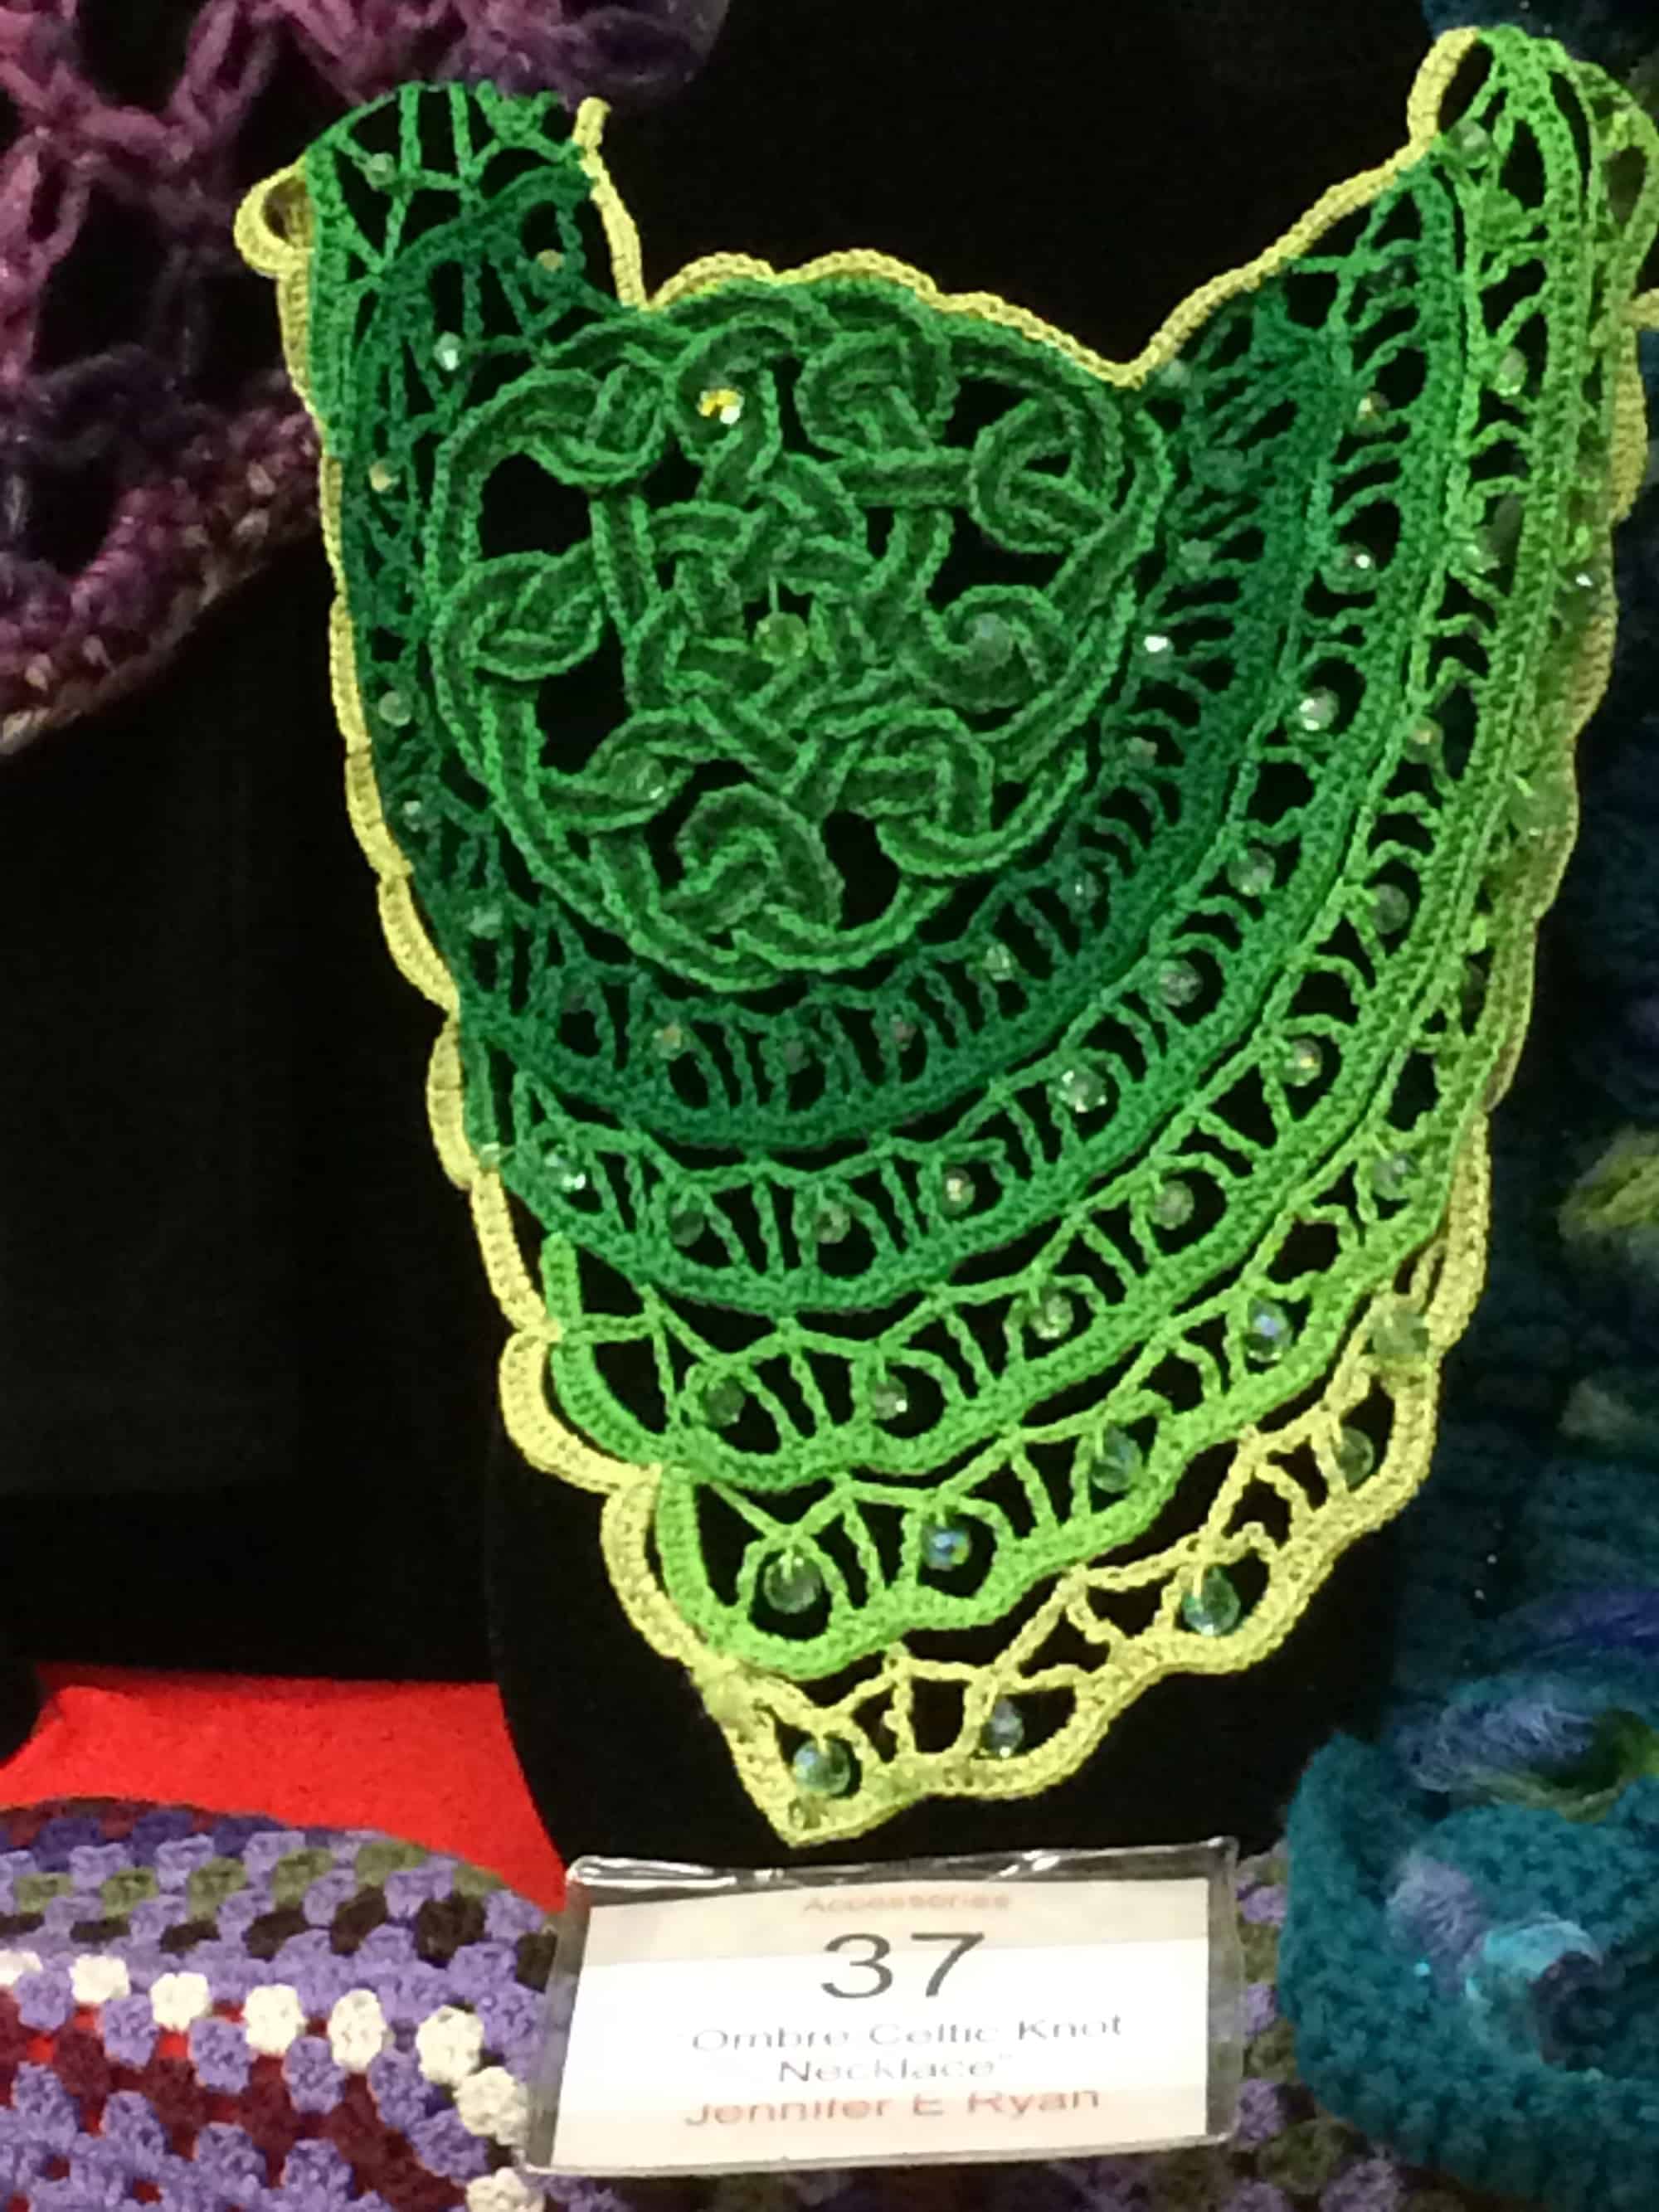
My favorite pieces were all by the same person: fiber artist Kayt Ross.  Her website (www.vivaciousart.com) is down, but she does have a Facebook page.

This crocheted cat suit probably looks unwearable:

image

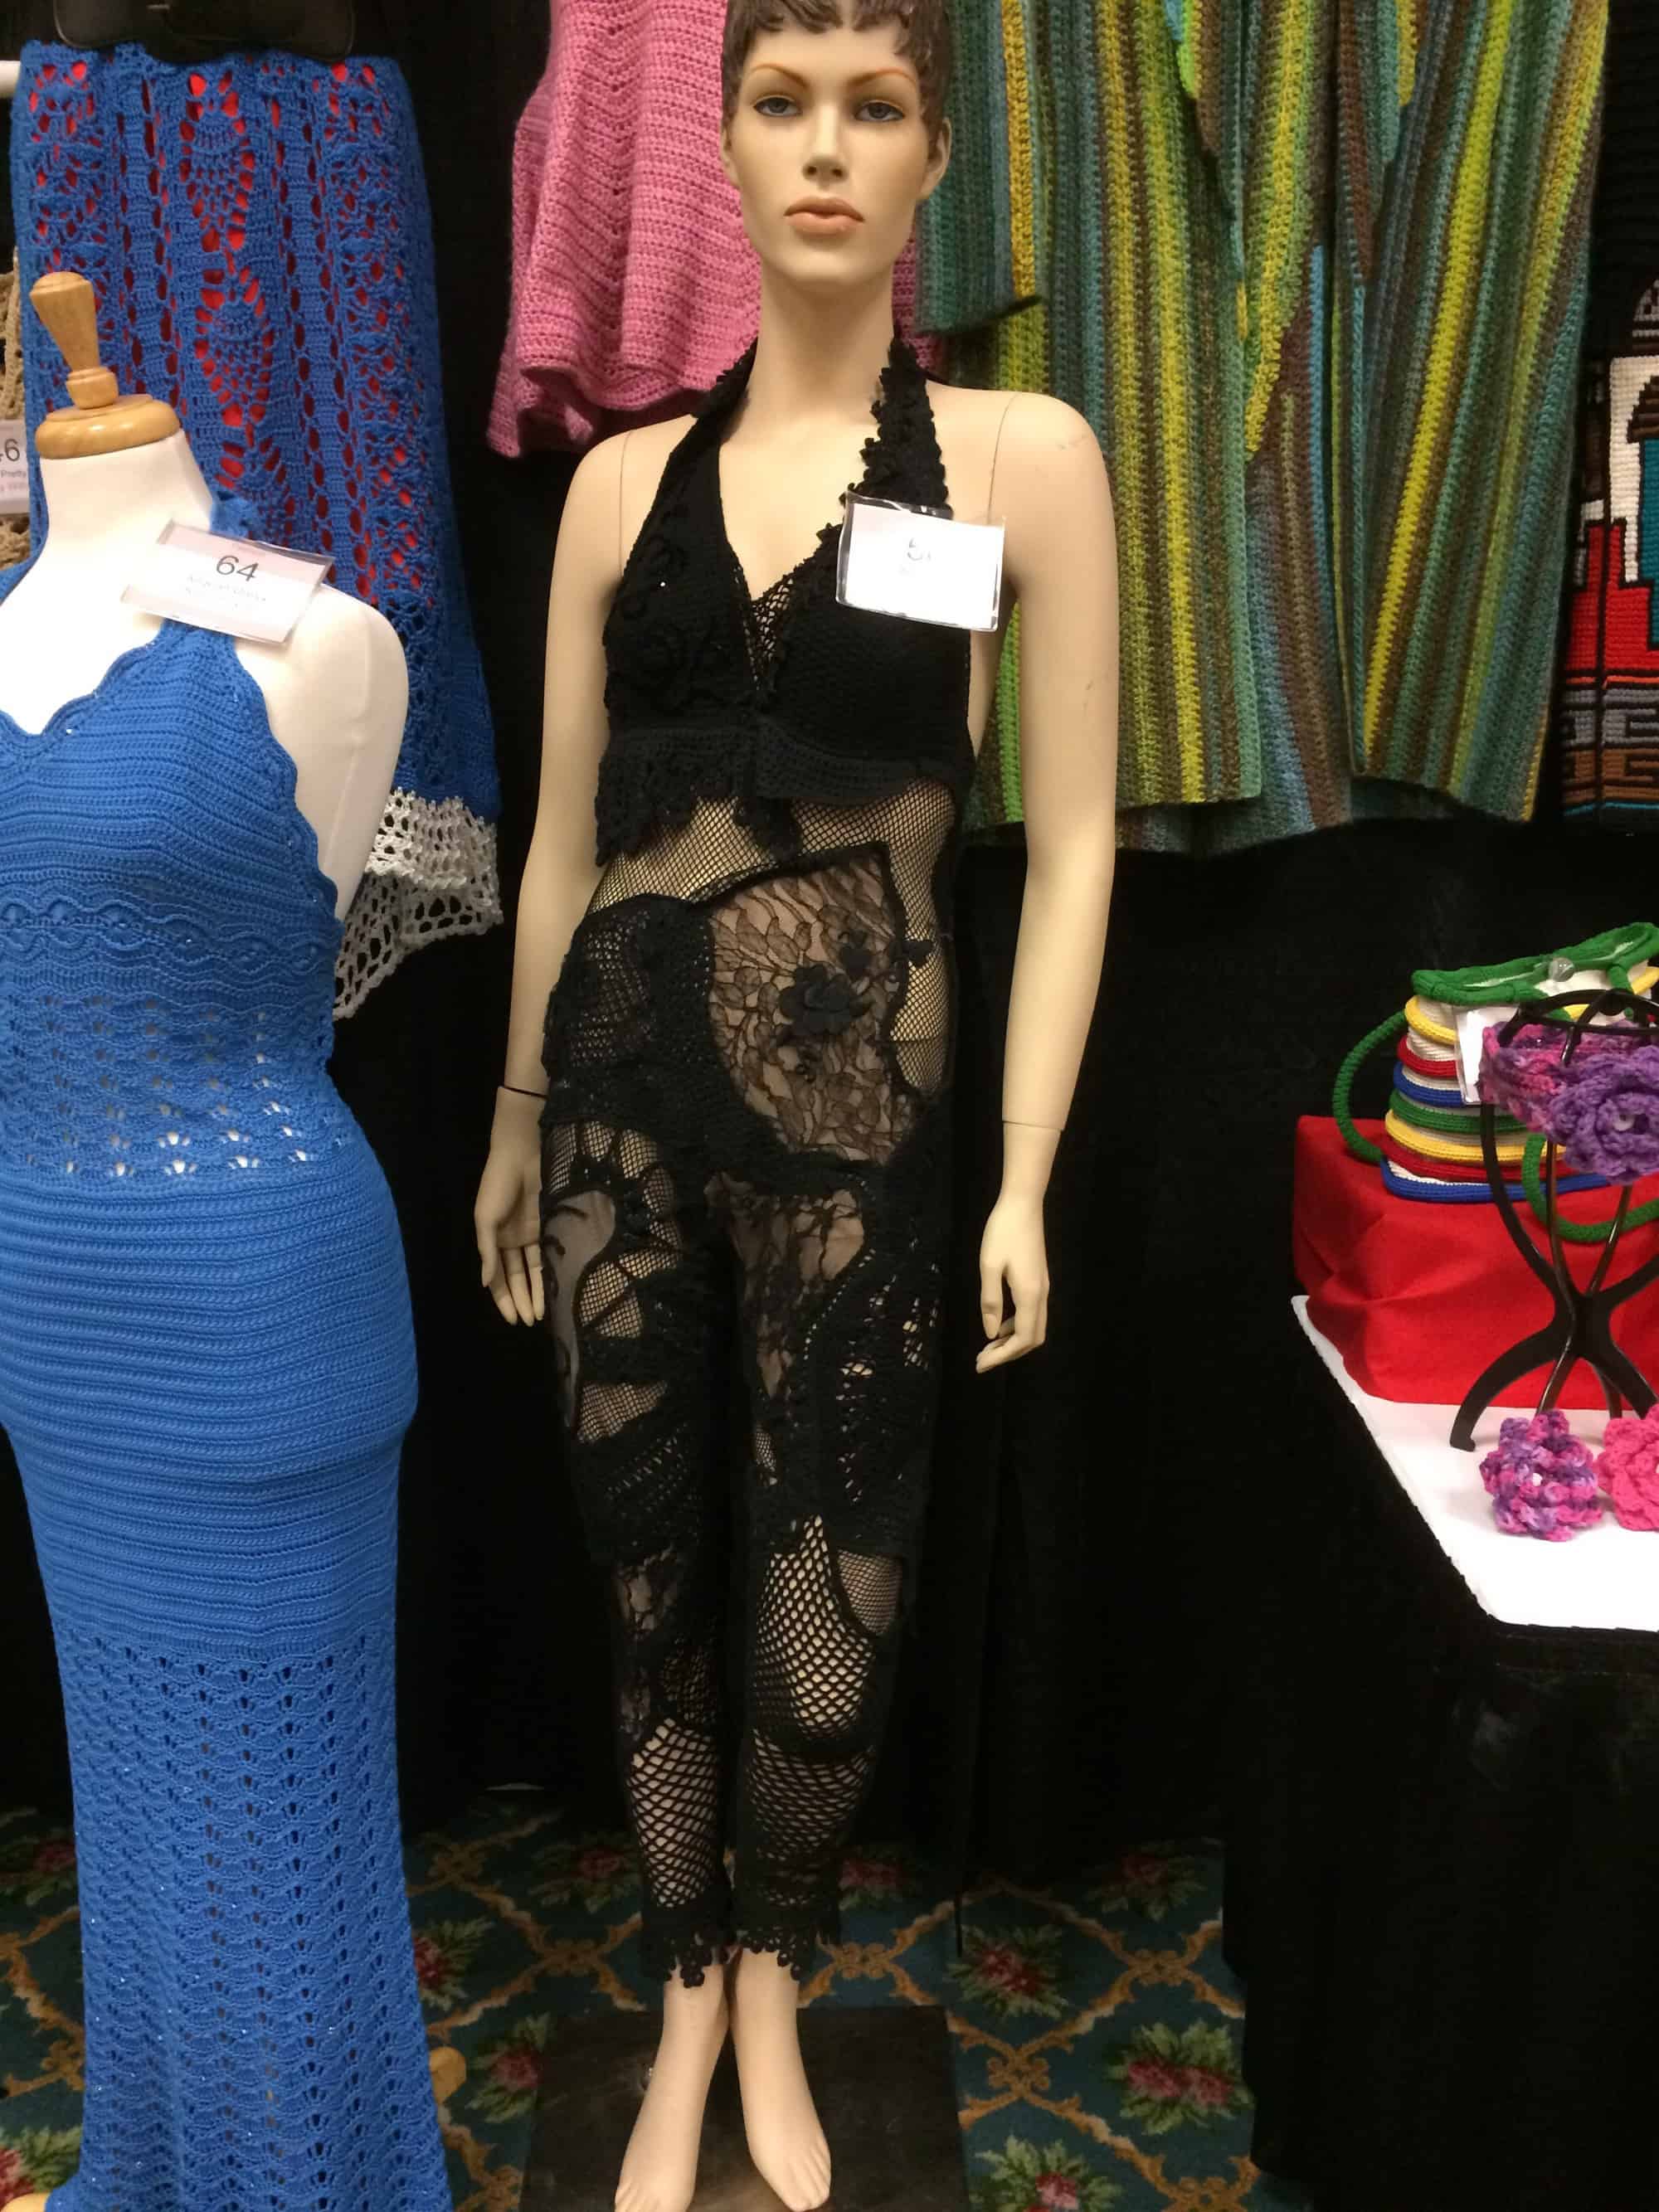
But someone has actually worn it and looked amazing in it.  I found this picture on Pinterest; it was pinned from the artist’s website.

1f72e59d61de4278dab8c60440ca65d9

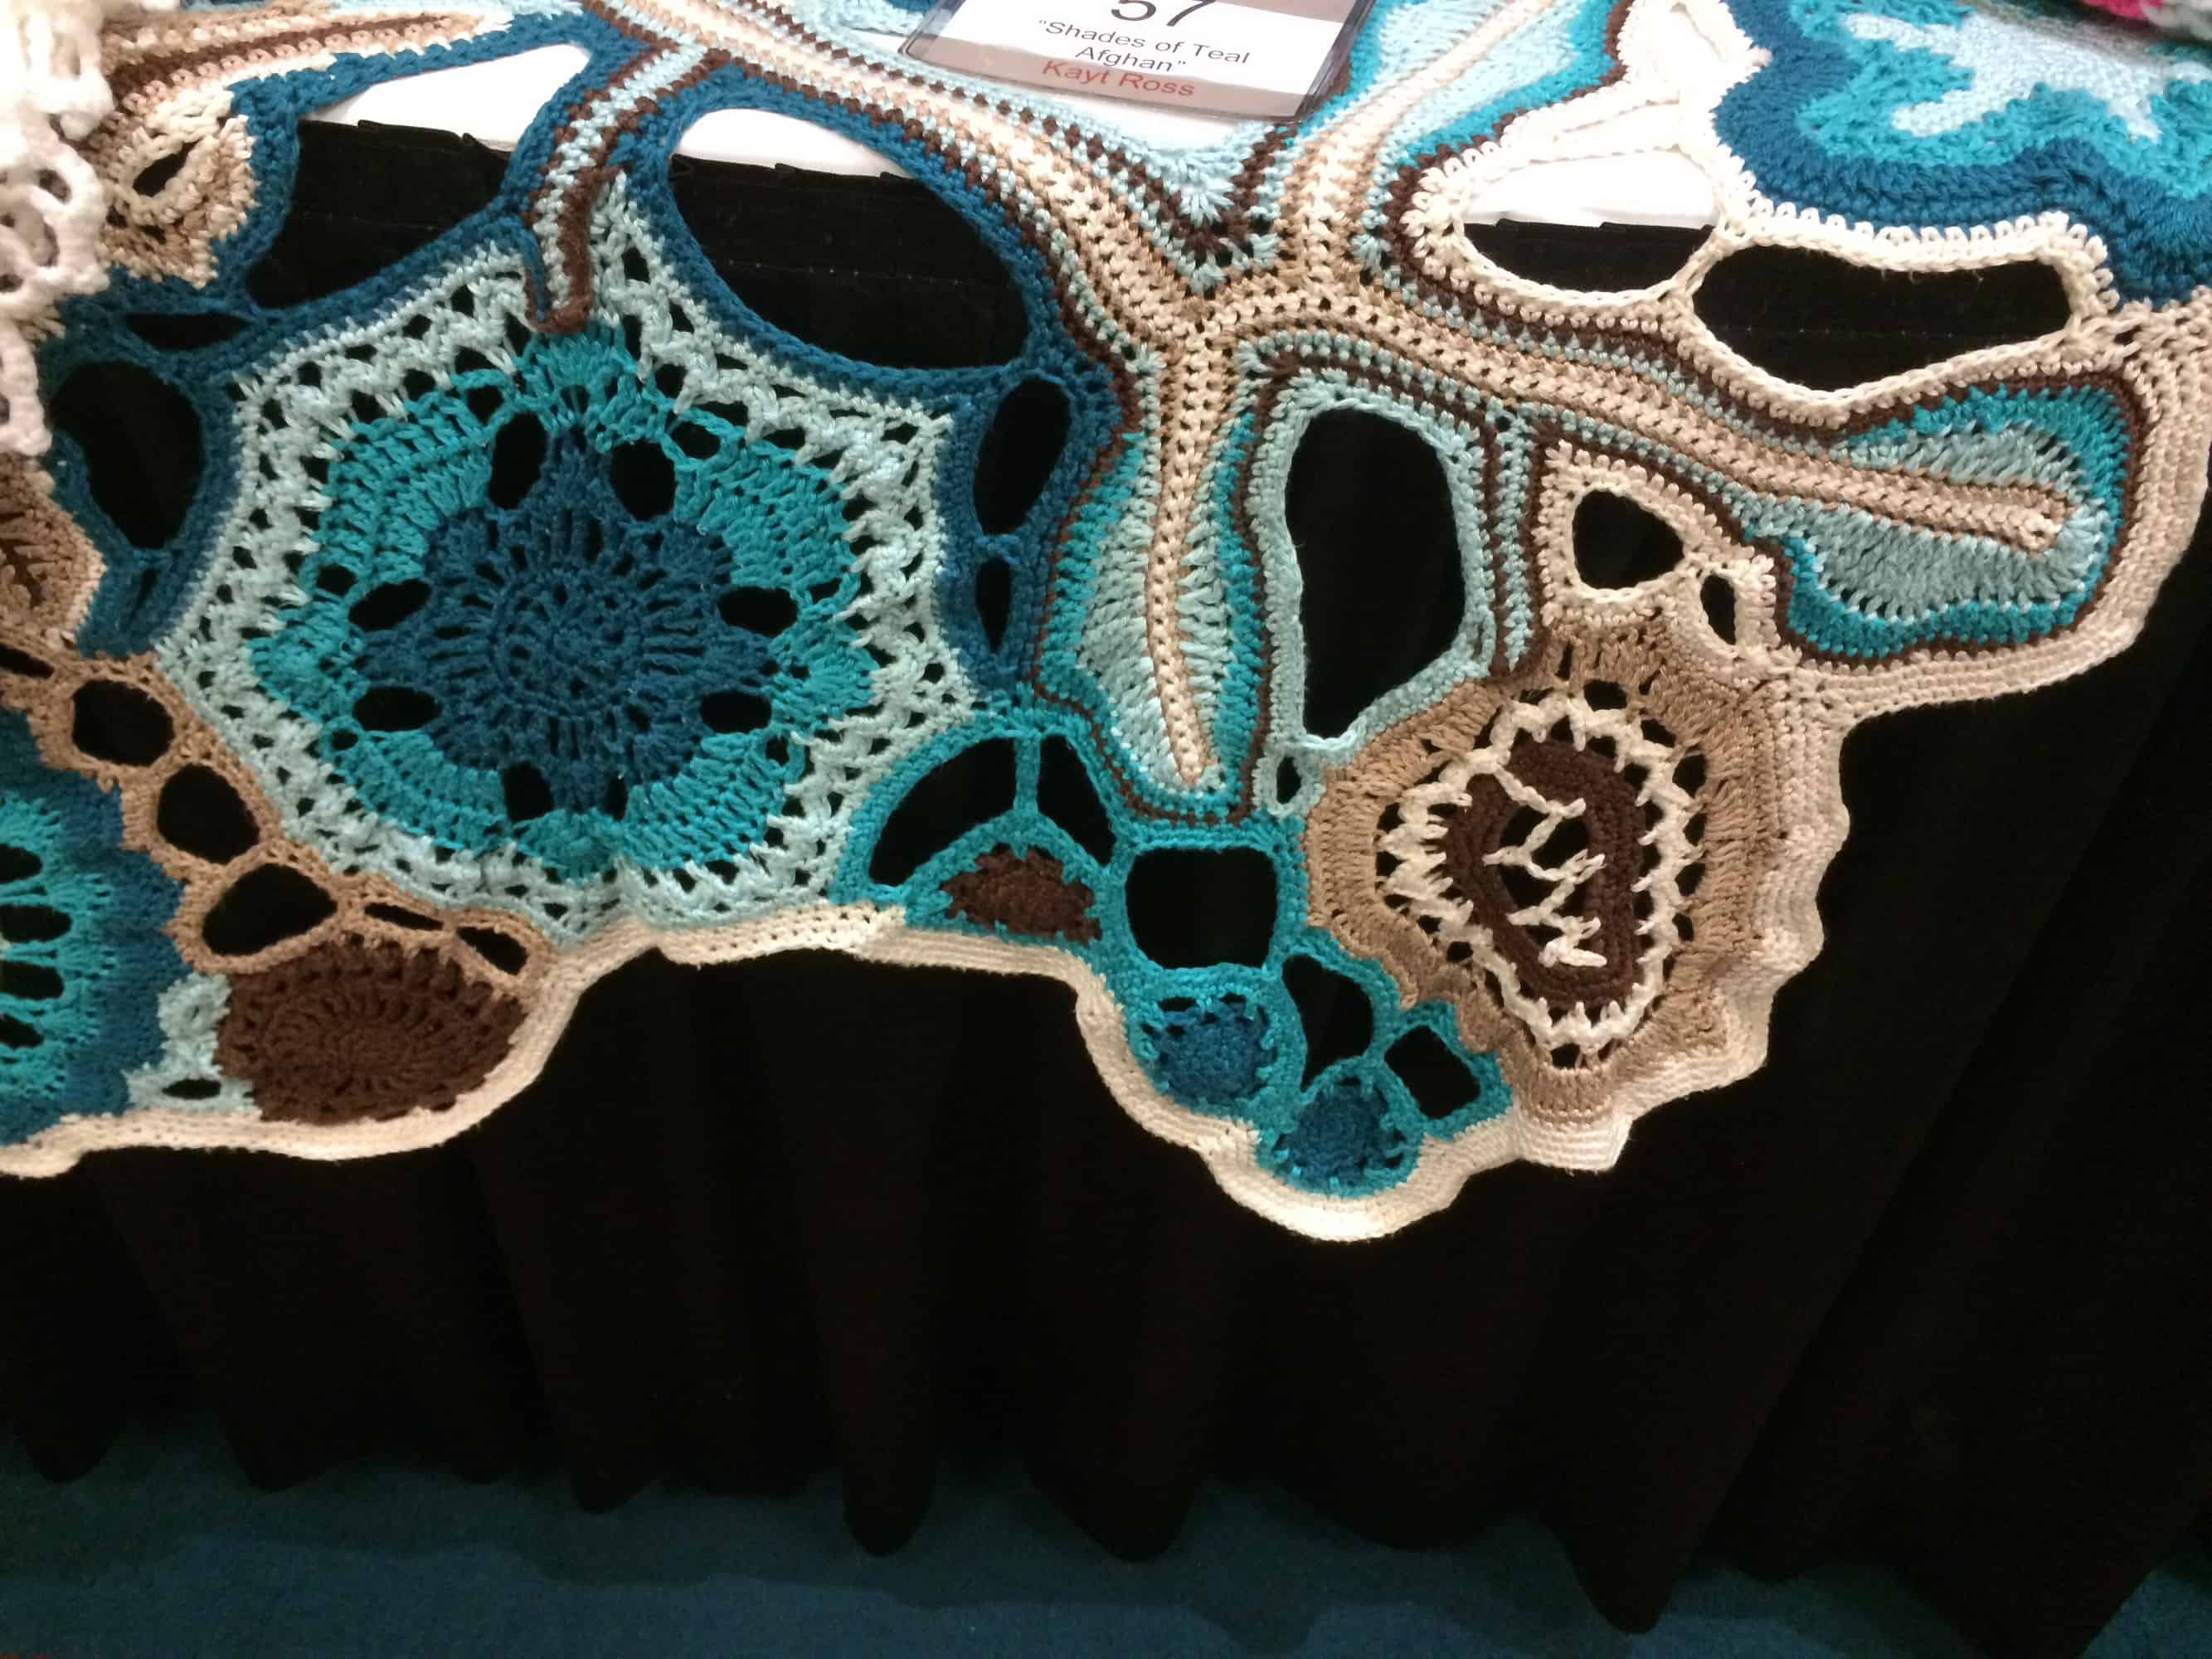
Ross’s entry in the Afghan category was only partially visible under the other afghans.  I love the color combination and the freeform shape.

image

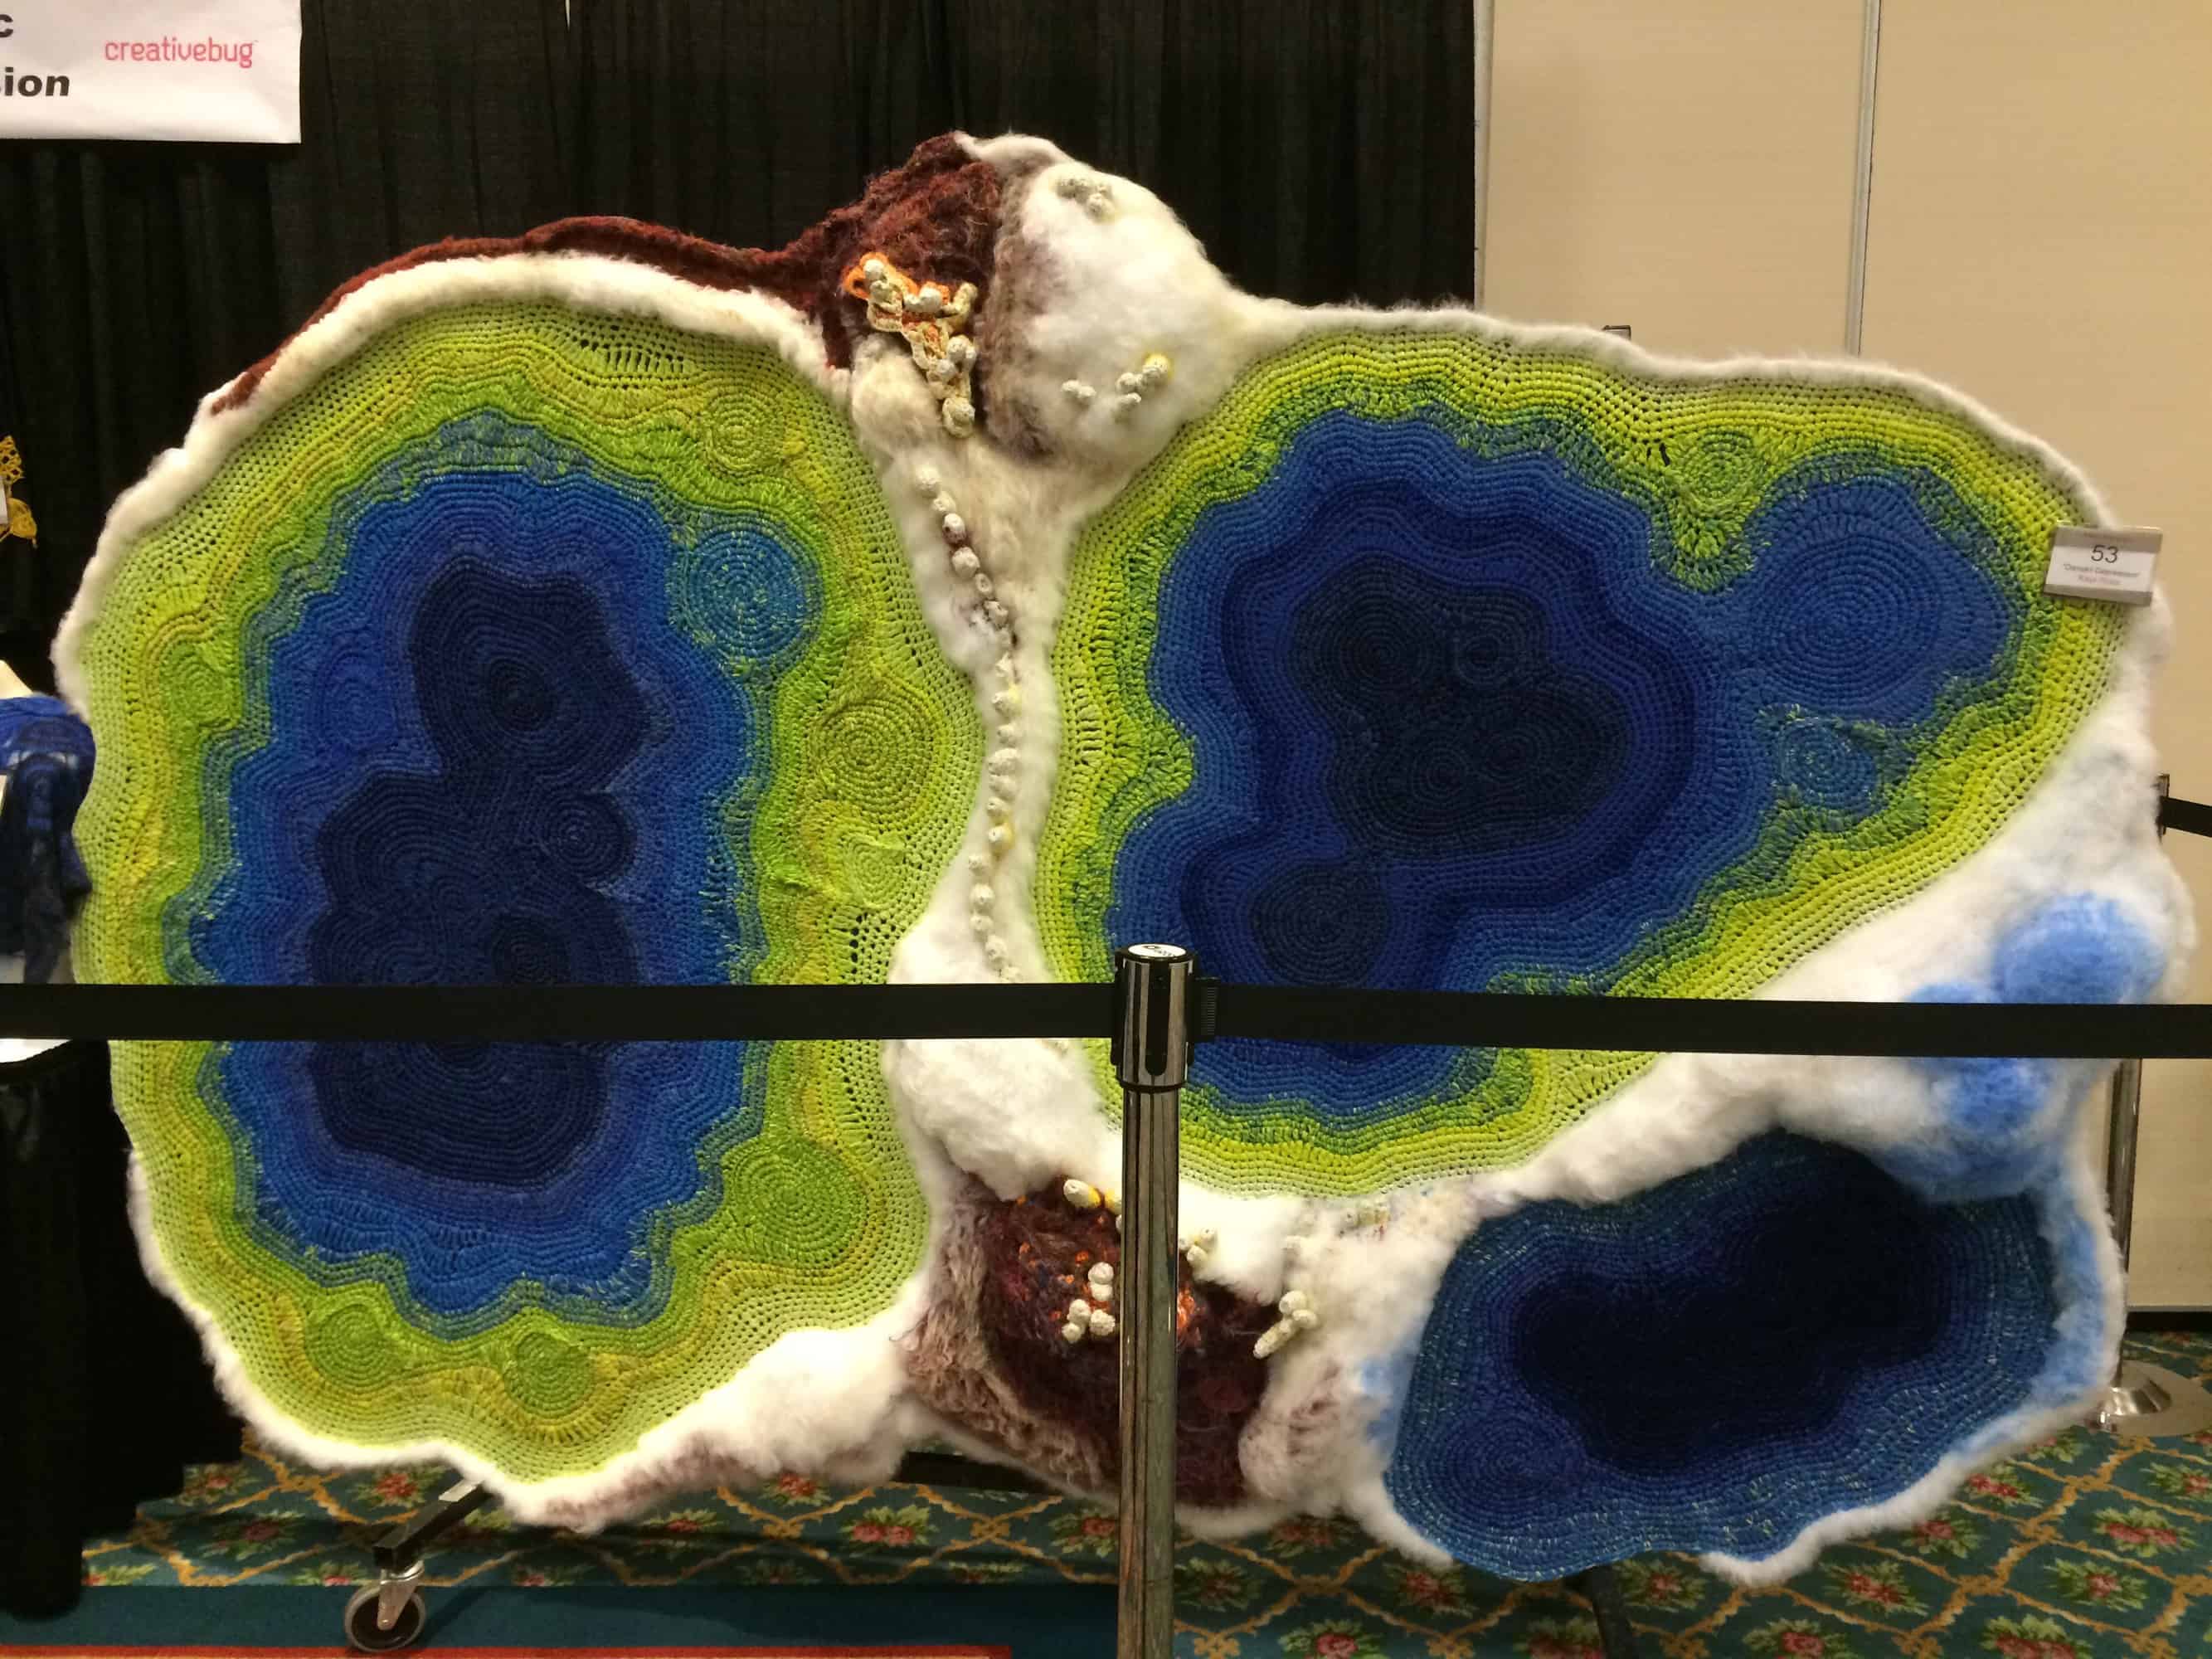
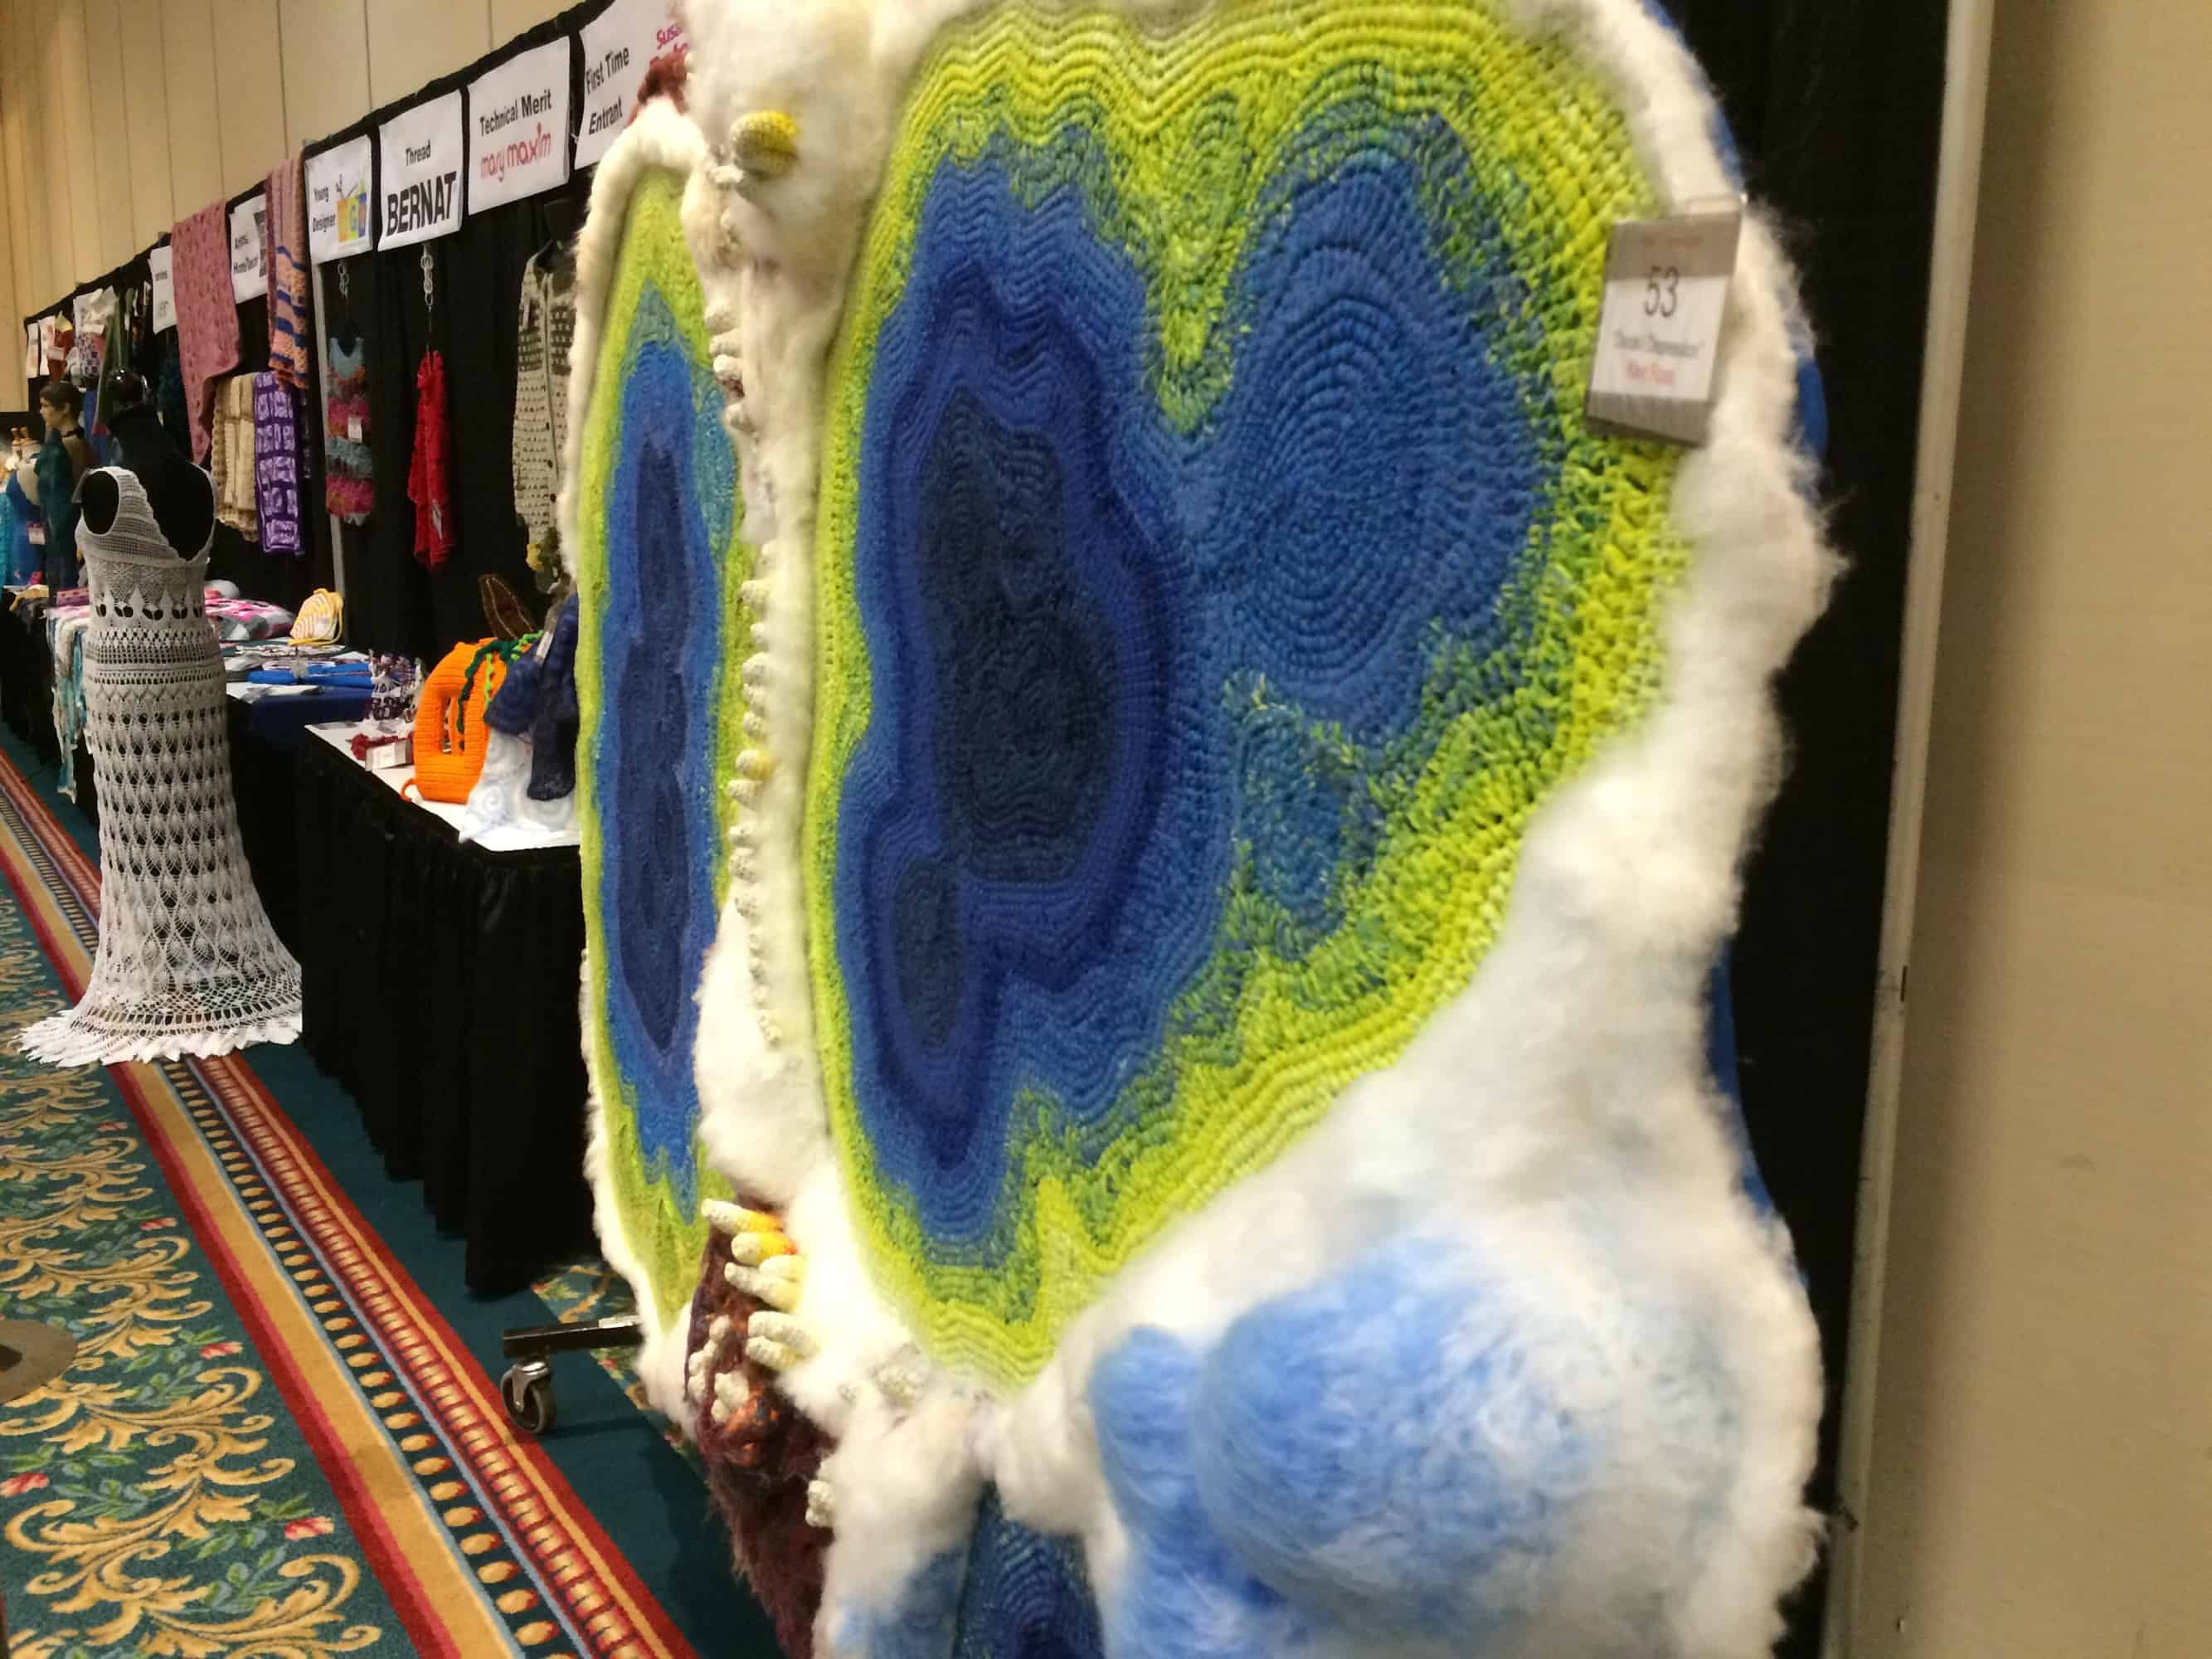
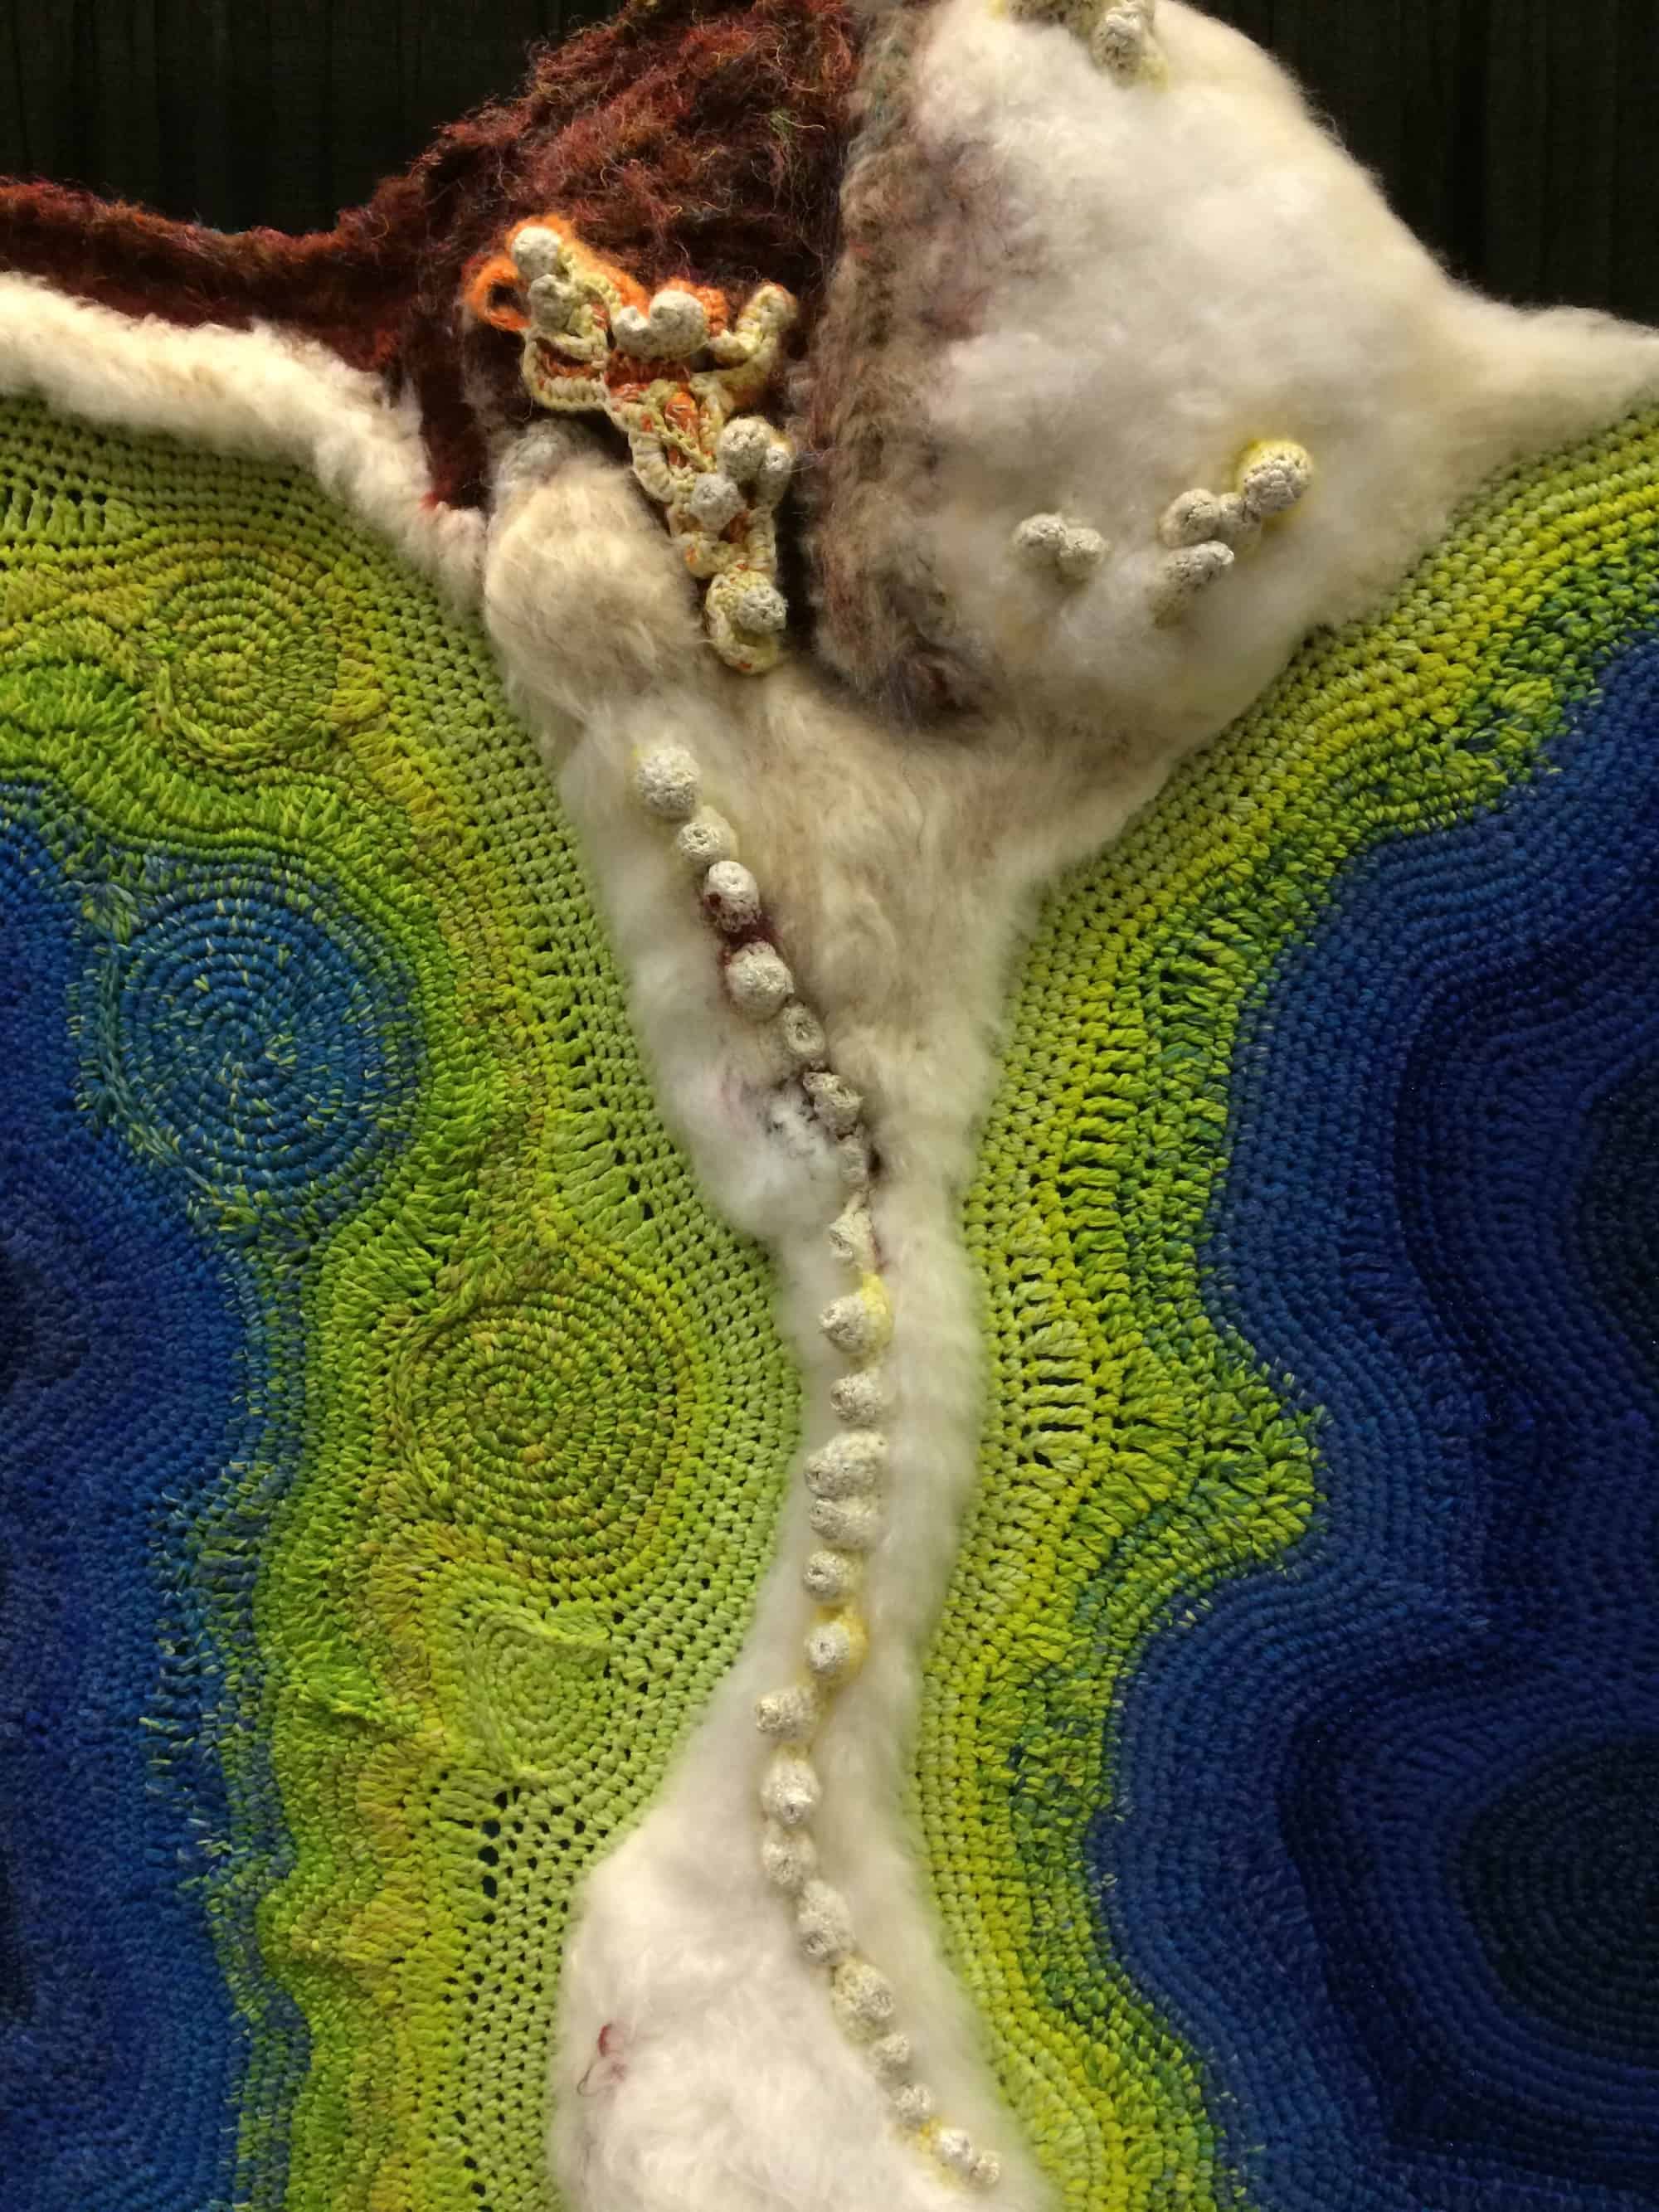
Her piece Danikil Depression won Third Place in the Artistic Expression category.  This one was so huge that it was difficult to get good pictures.  Here’s a couple of angles.

image
image
image

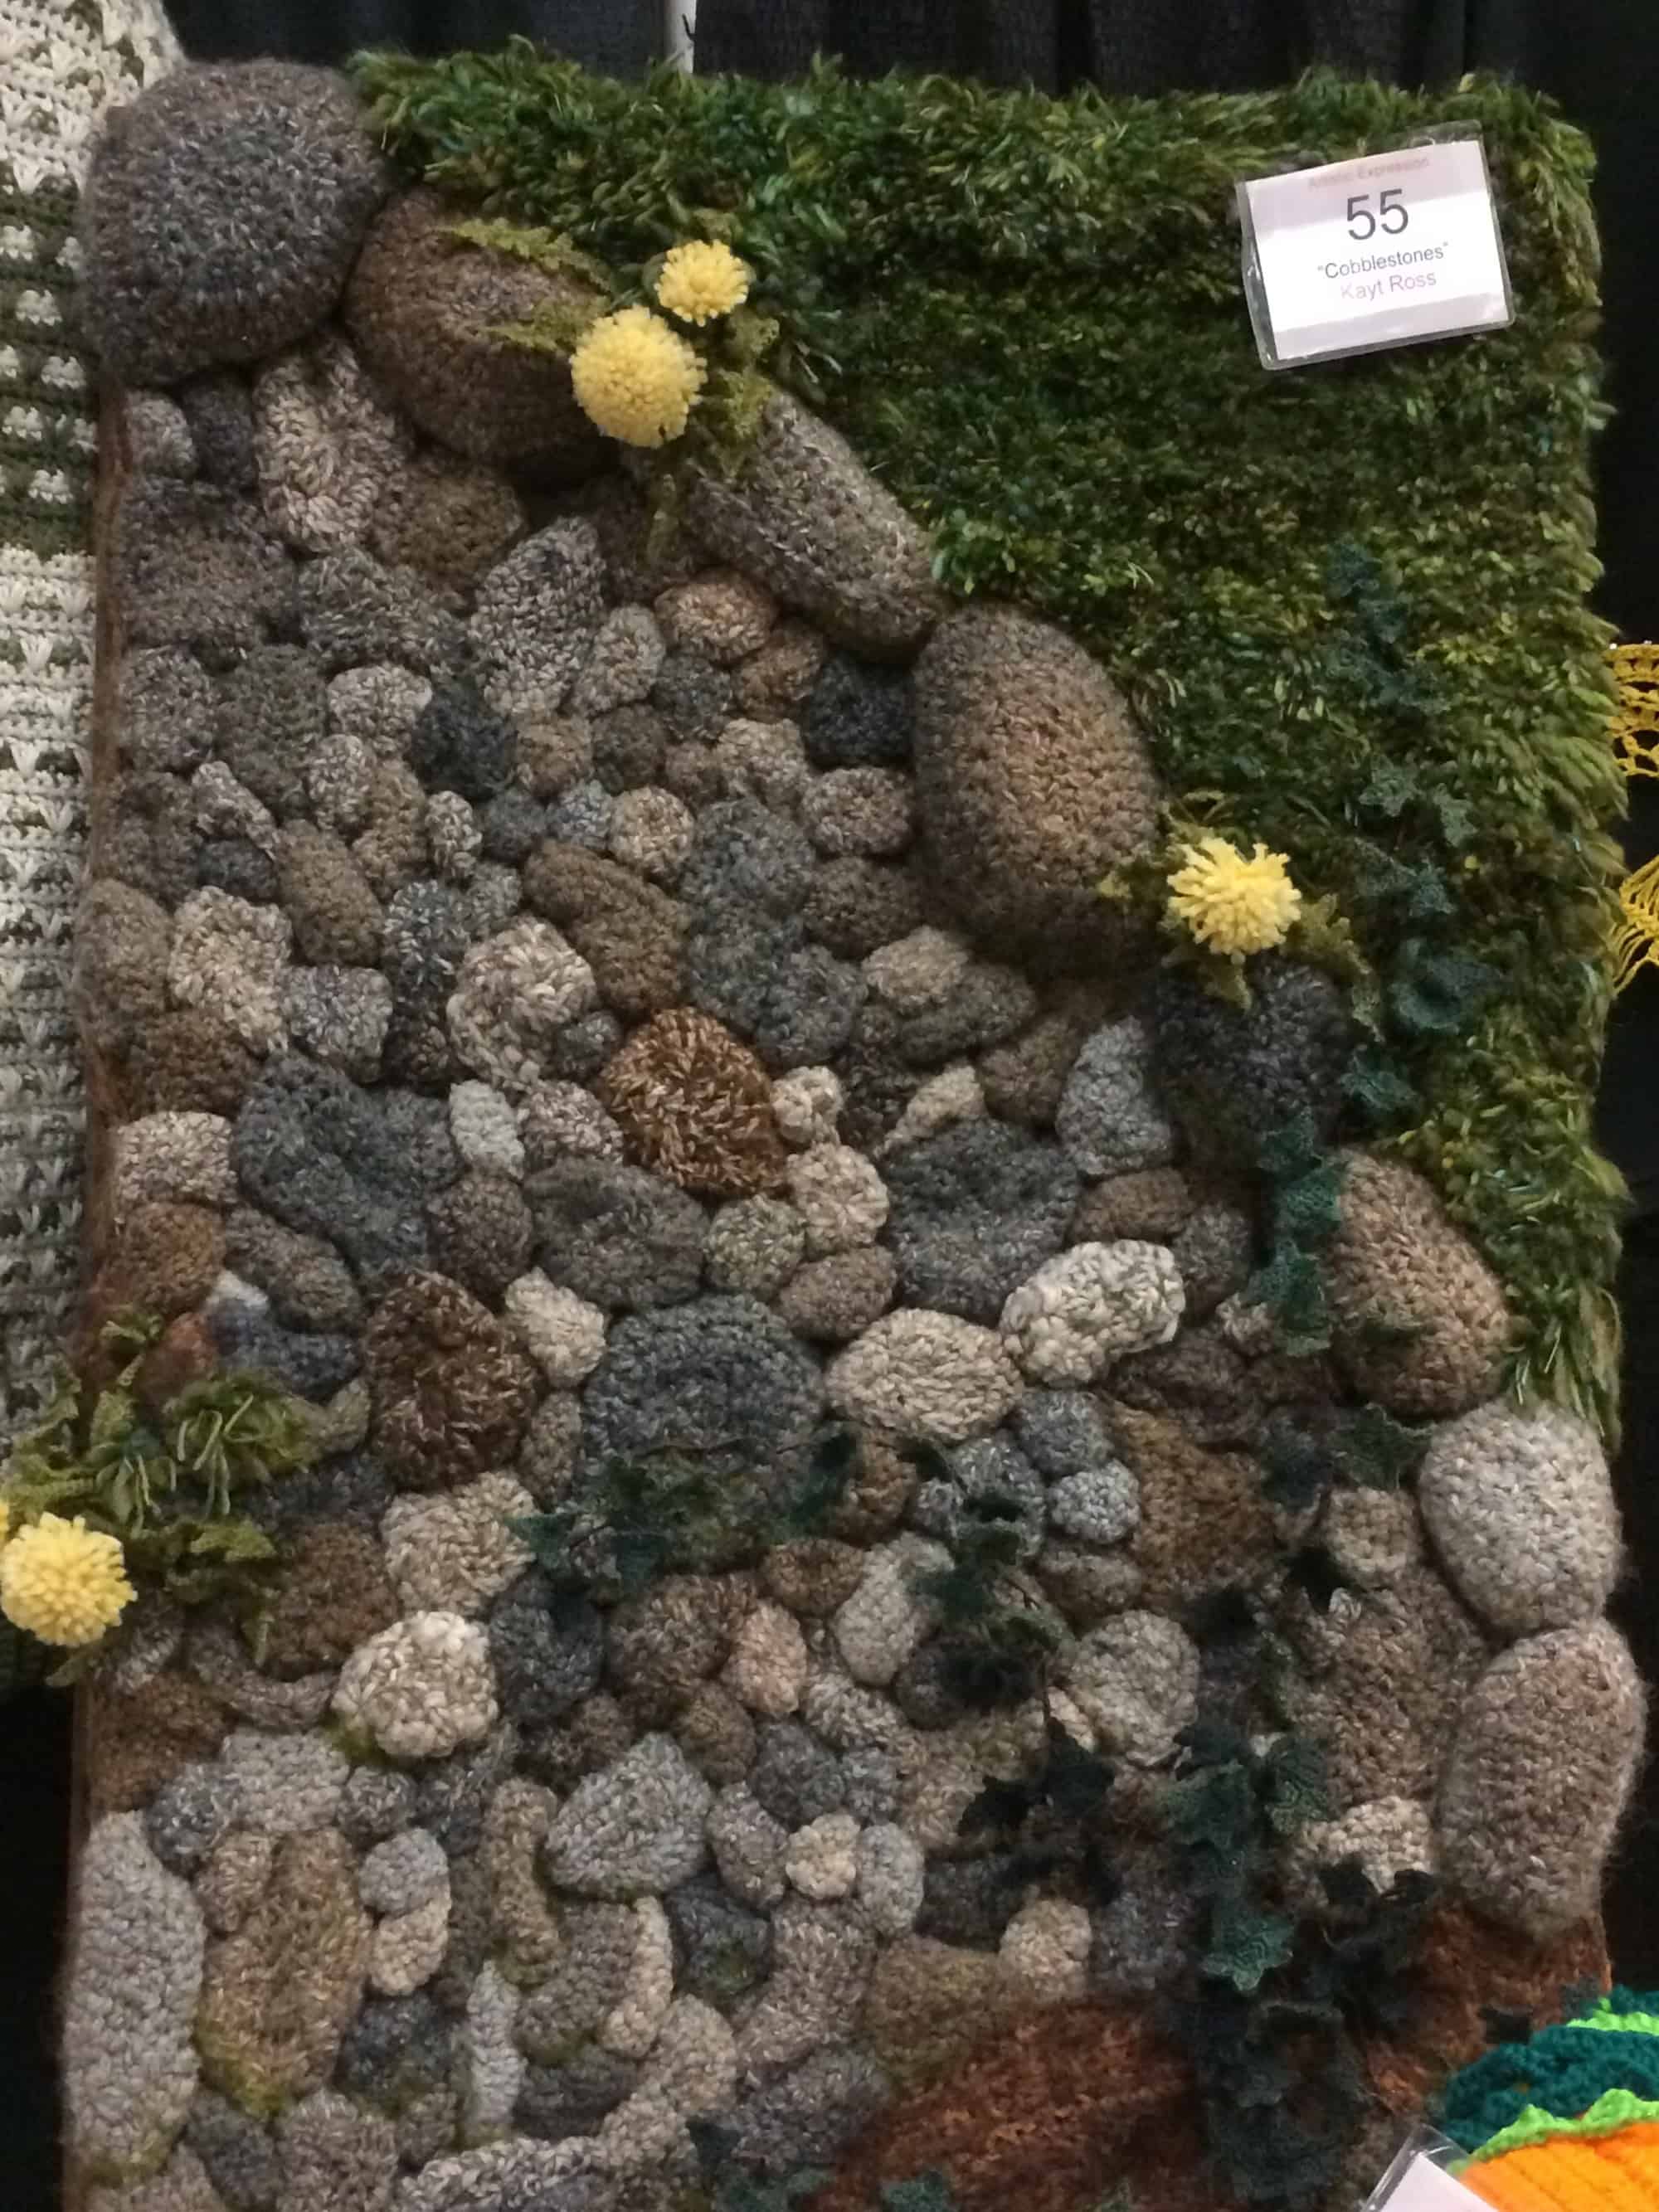
Her piece Cobblestones won Second Place in the Artistic Expression category.

image

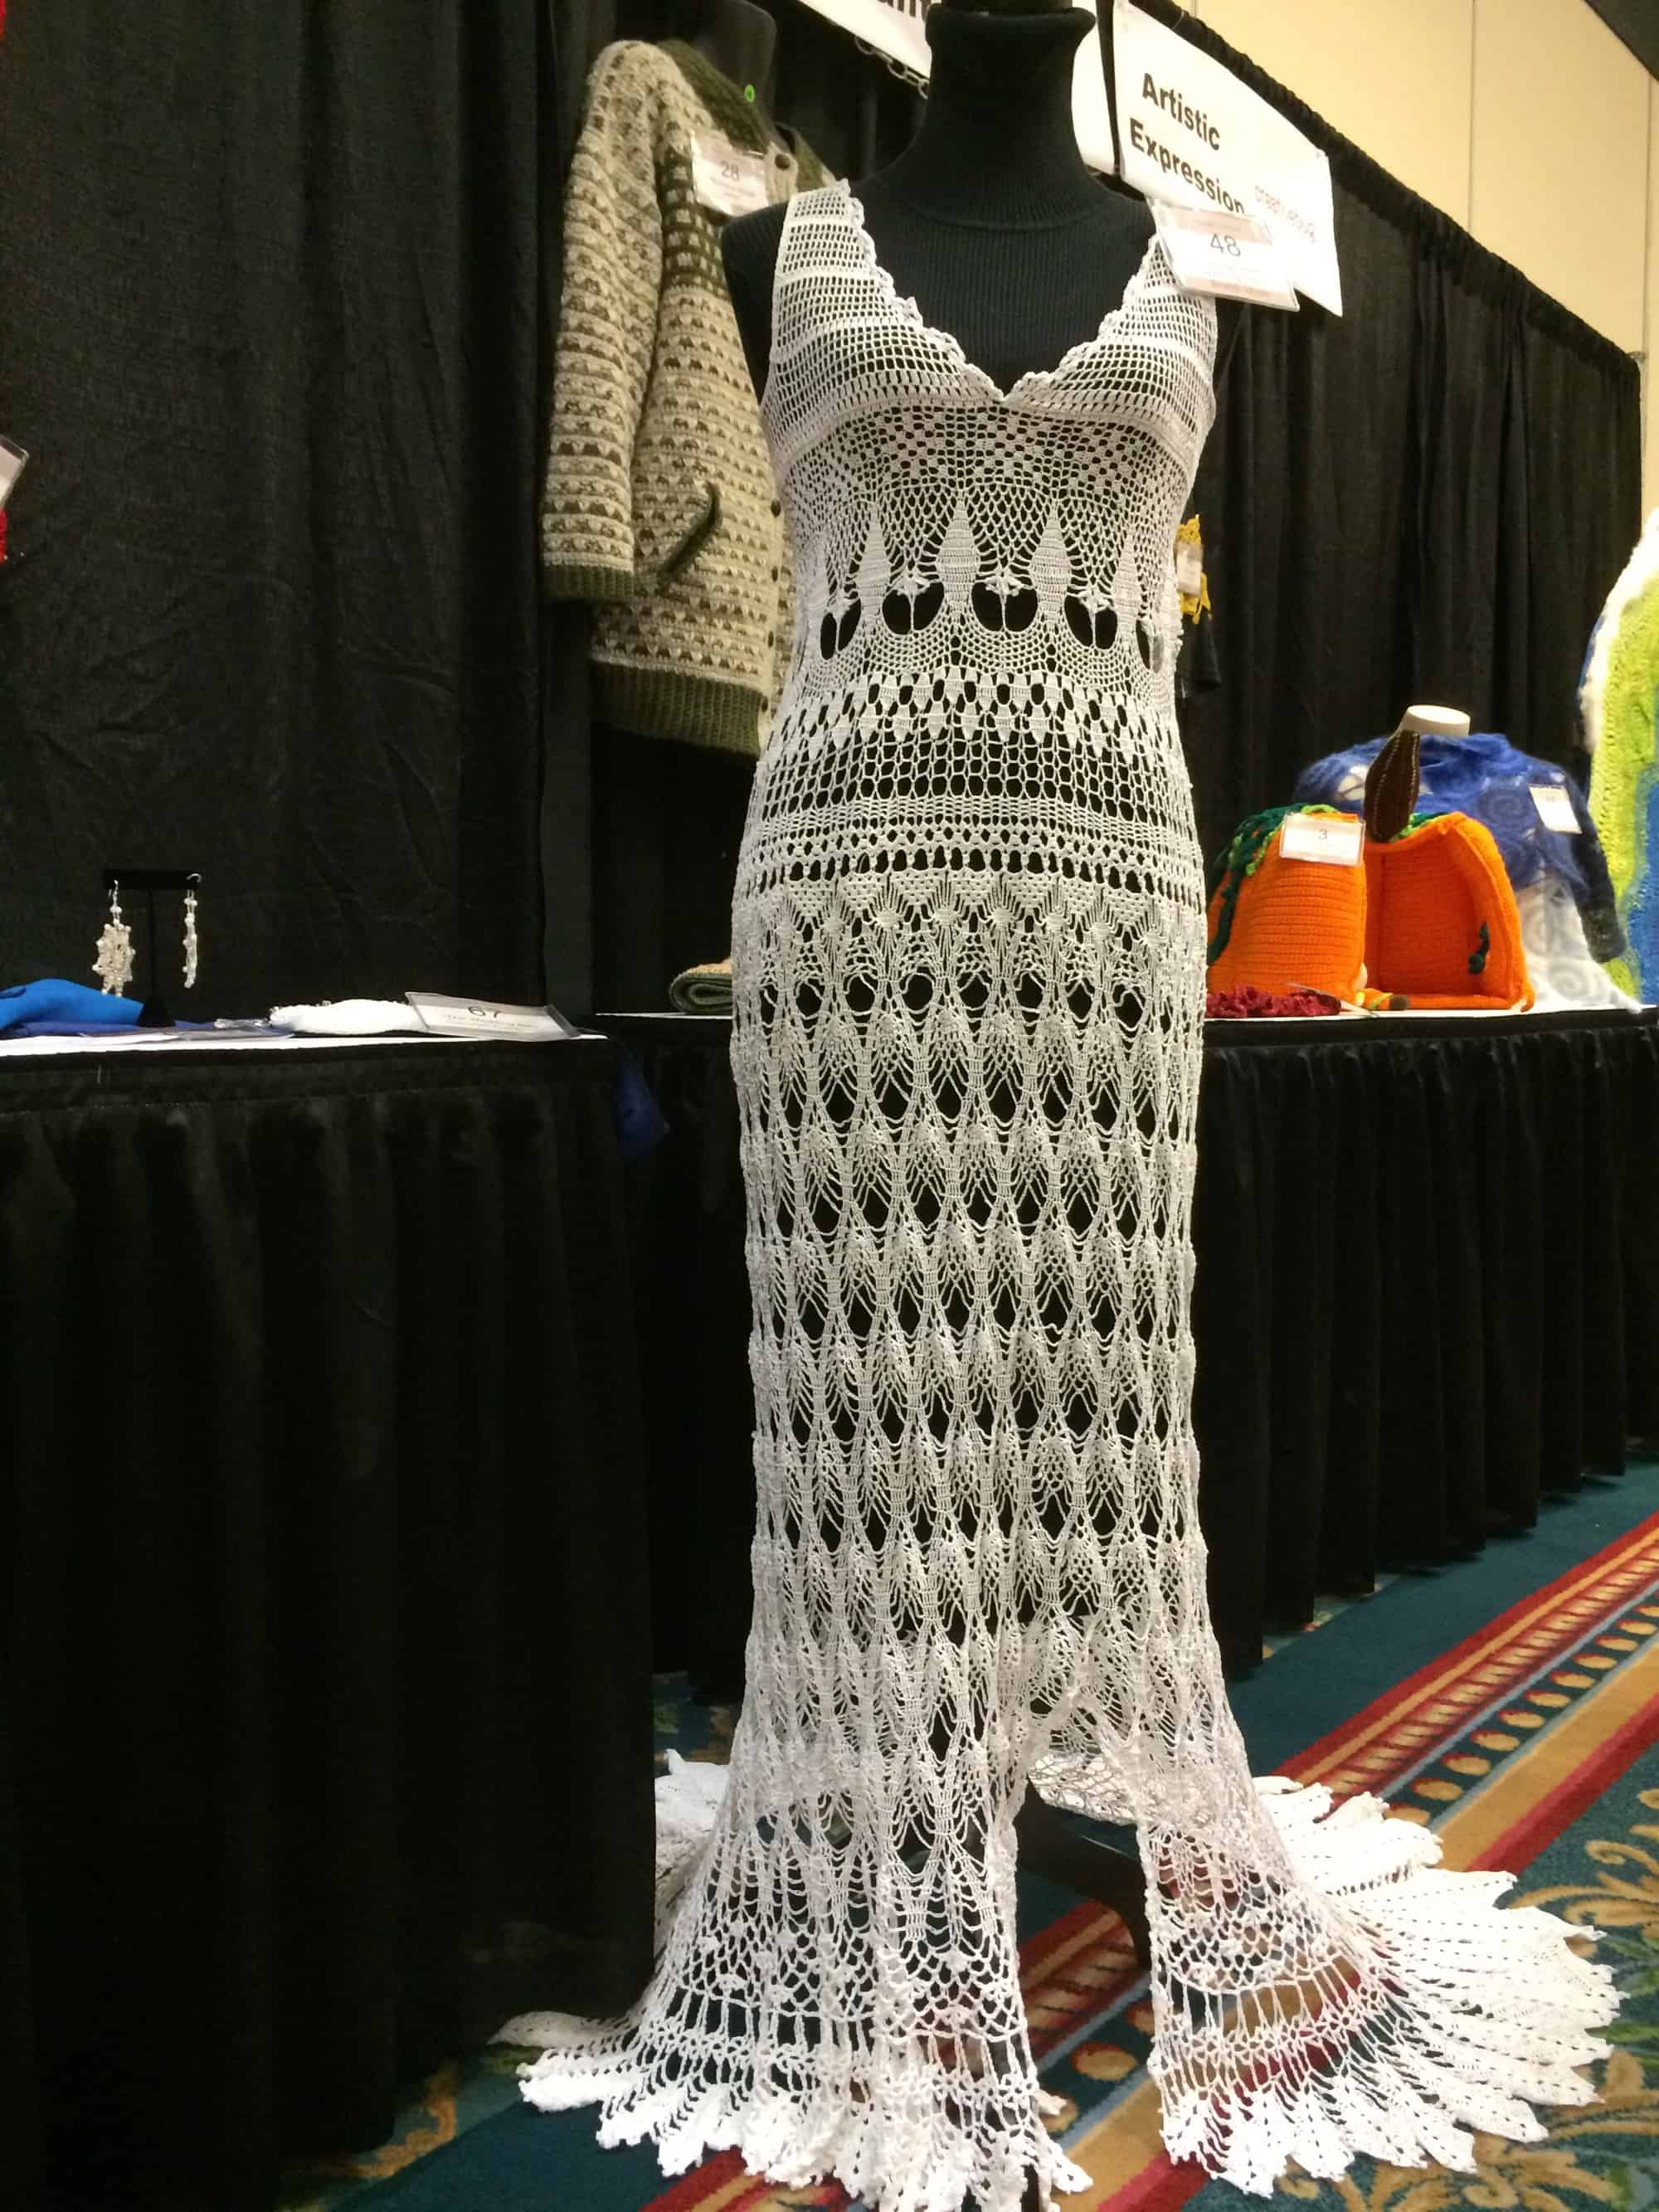
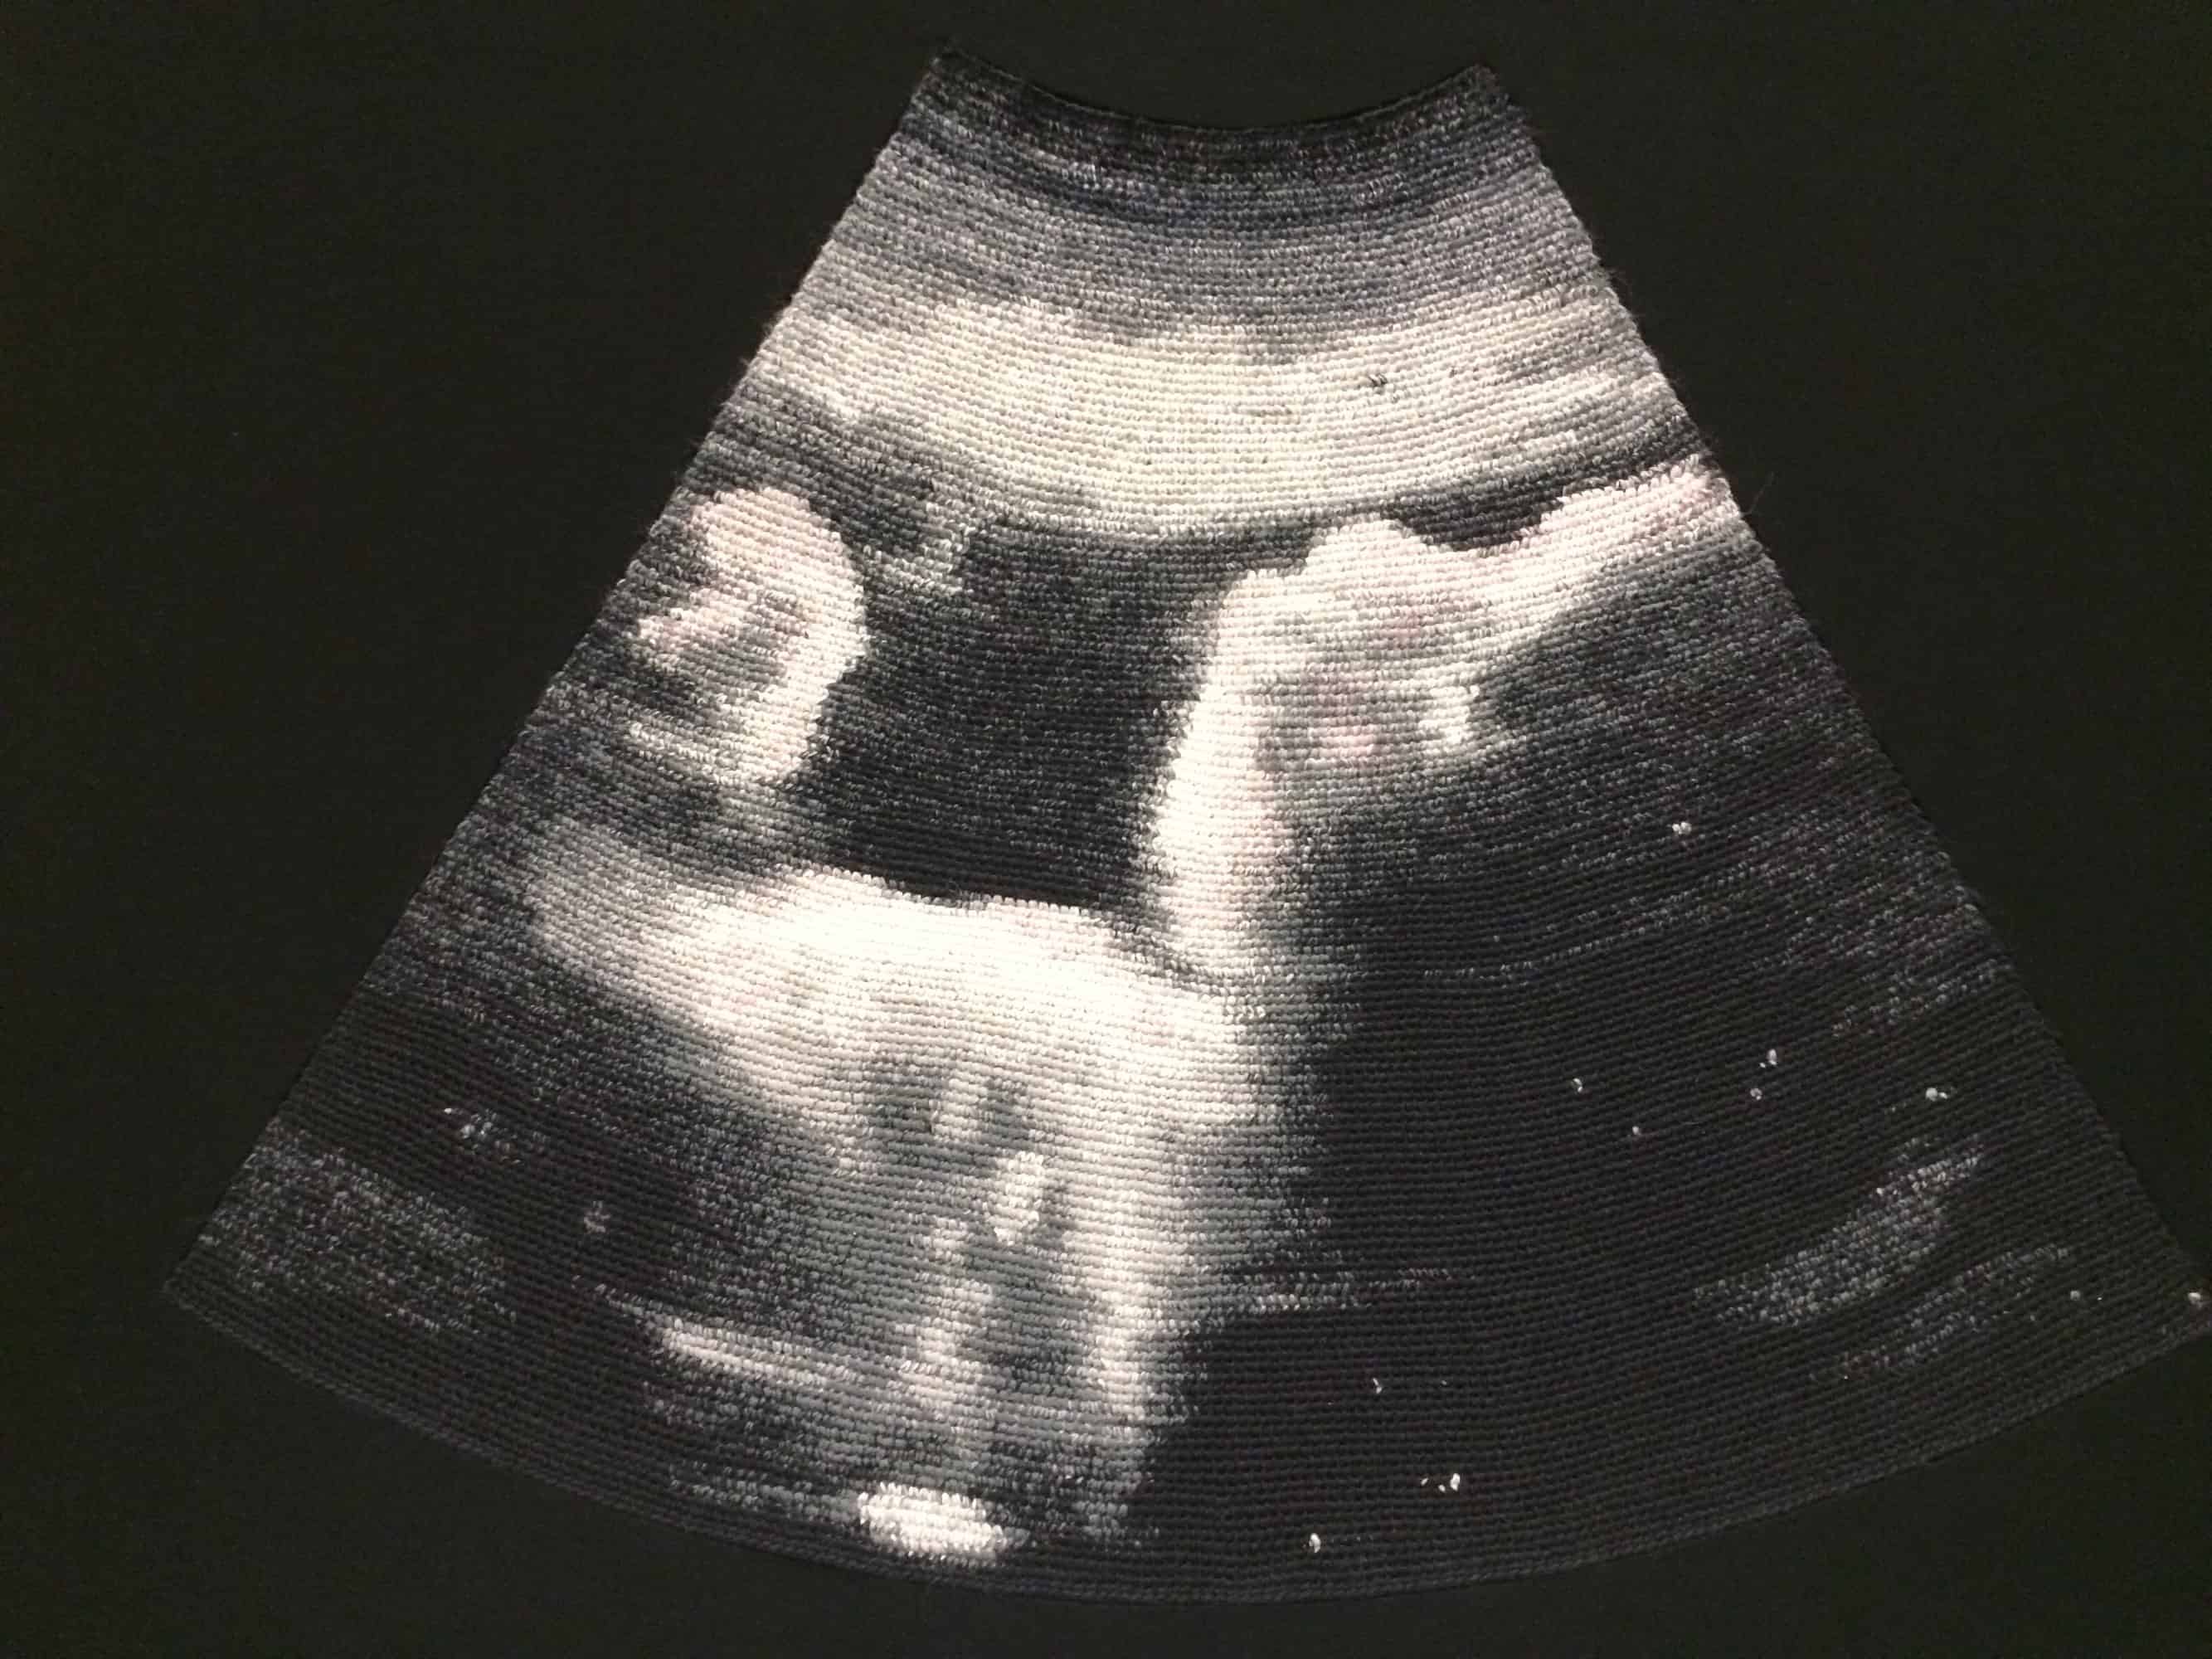
Finally, the piece that I considered the showstopper: “Emily Rose”.  I voted for this one for People’s Choice.  I don’t know if it won in that category or not, but it did win First Place in the First Time Entrant category and the overall Grand Prize.  Yes, this really is crochet.  I leaned in as close as I could get to the piece without touching it and even that close it was difficult to see the stitches.  It’s beautiful work.

image

The list of all the winners, except People’s Choice, is on MarlyBird’s website.  She was at the show and did book signings.  I believe she was also one of the Design Competition Judges.

The Breakfast of Brilliance

The Breakfast of Brilliance started at 7:30 am Friday.

image

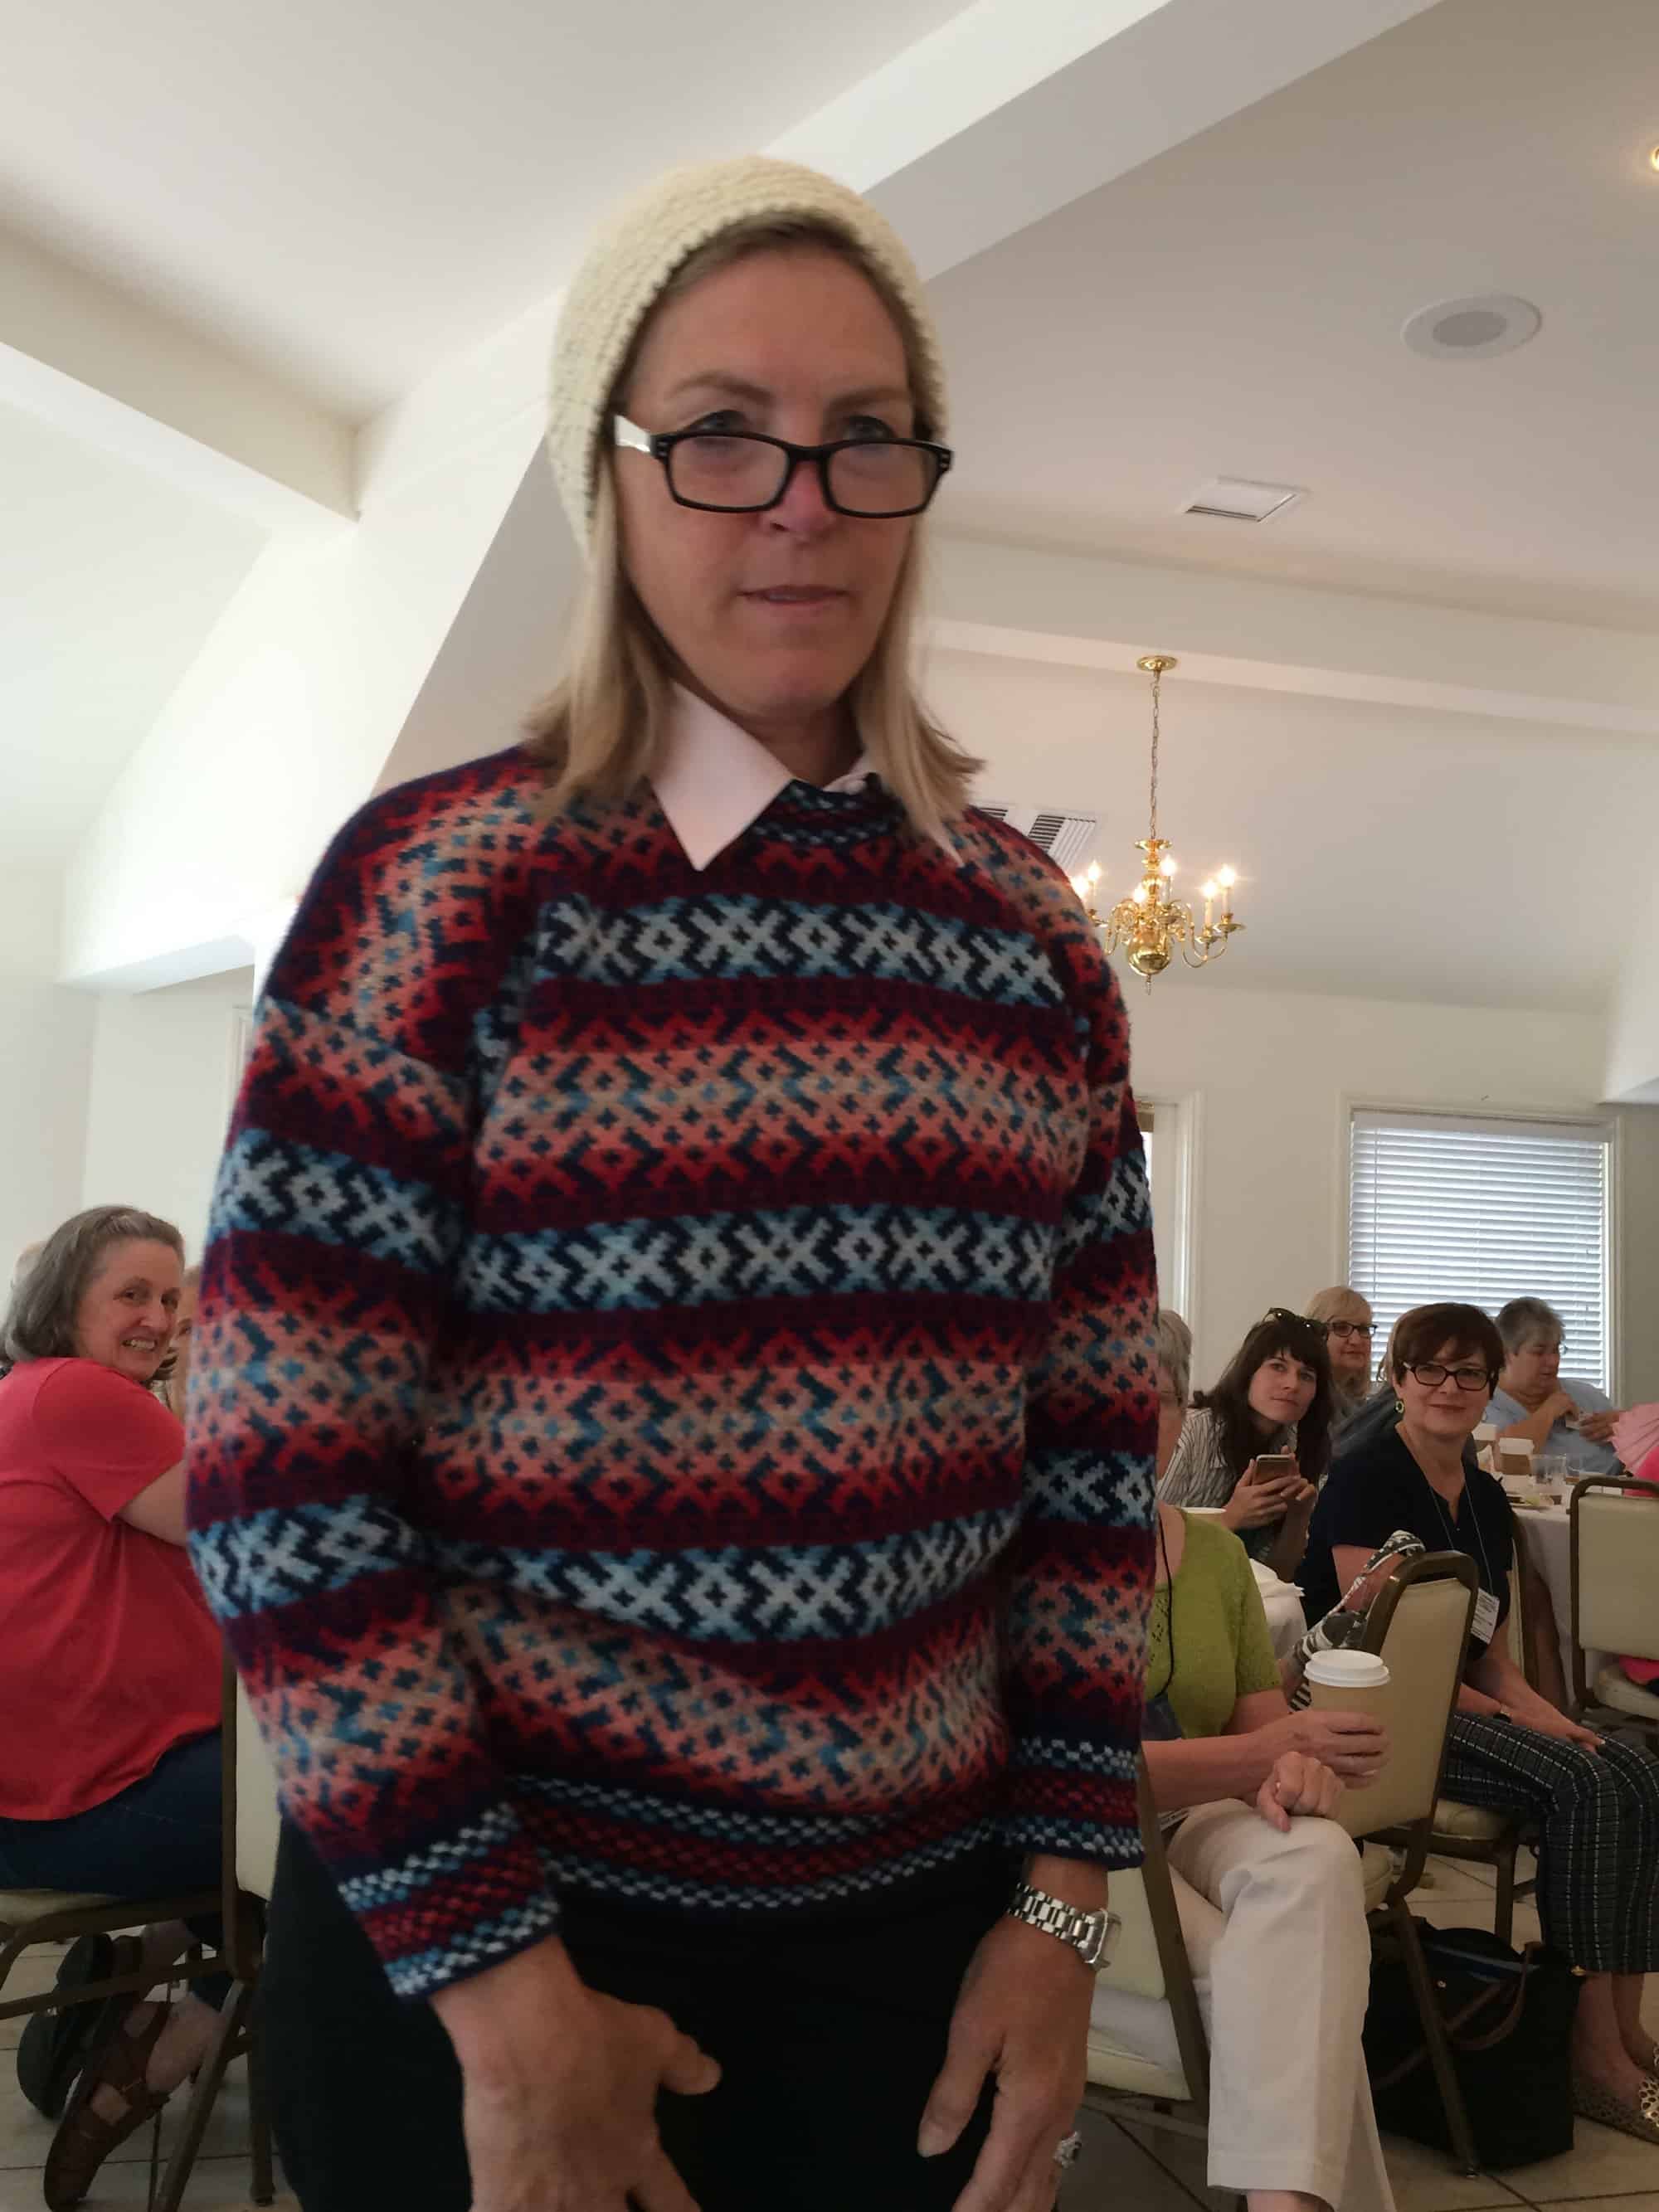
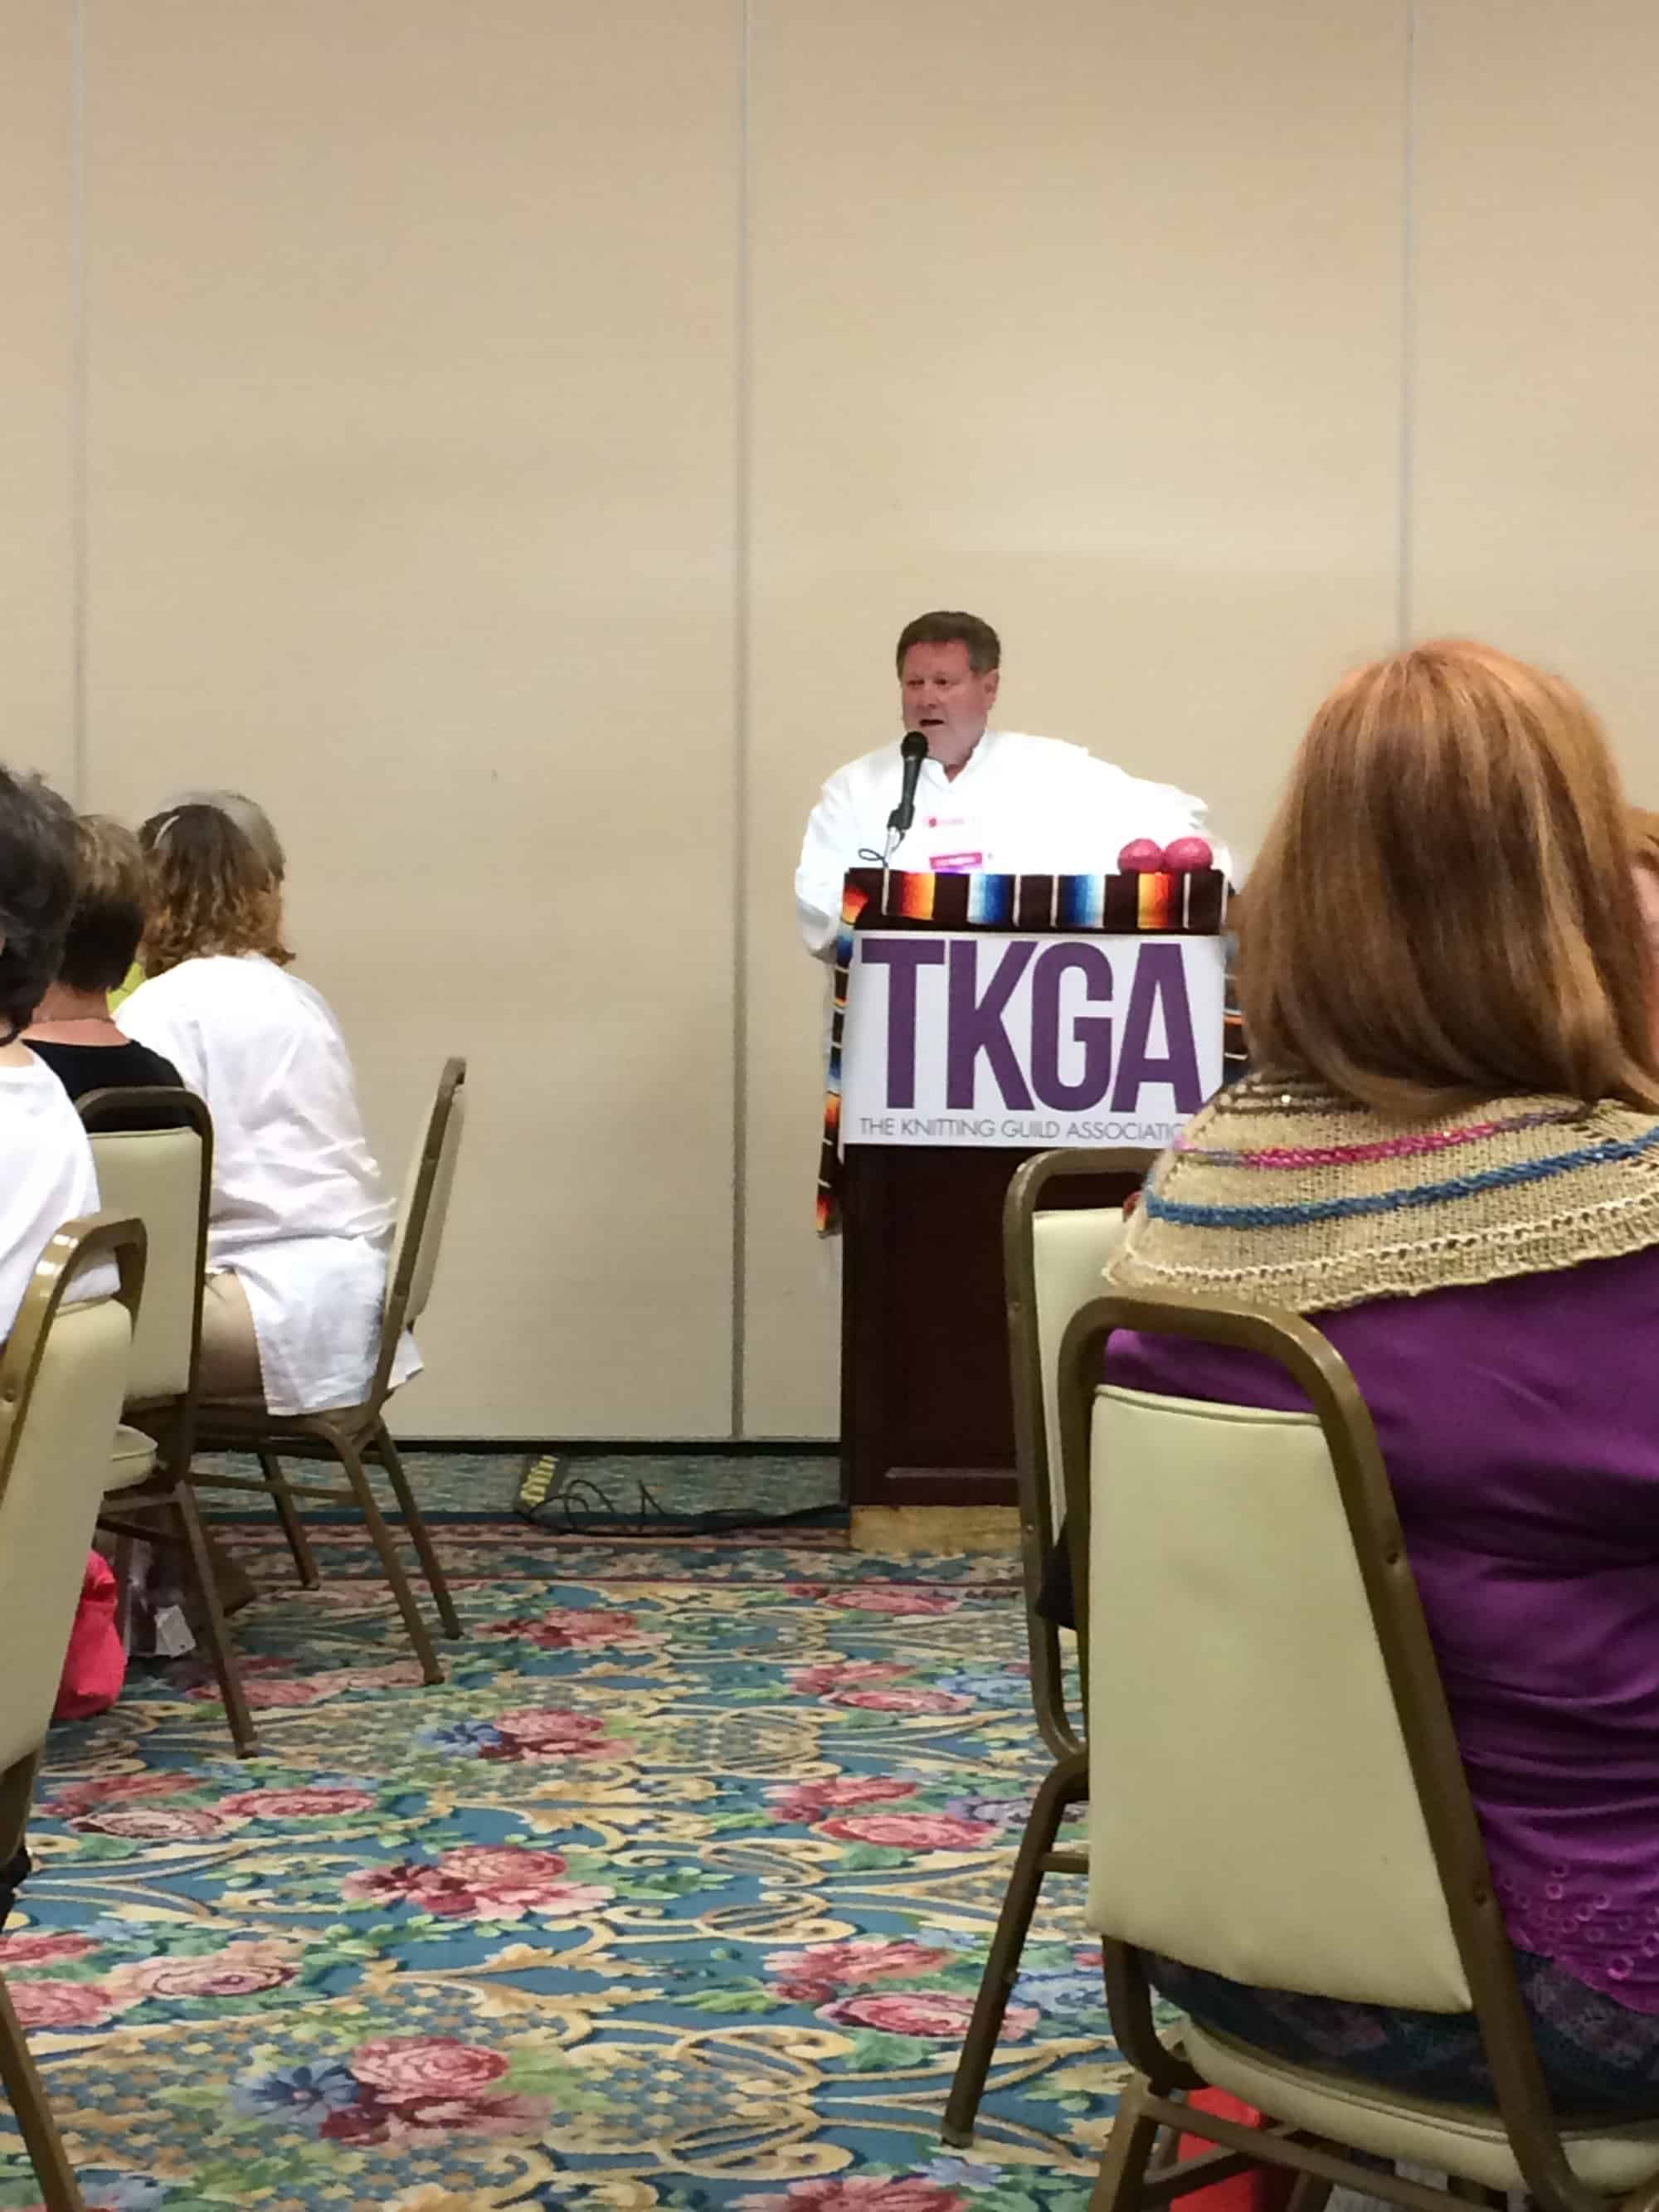
At this event, anyone who finished Master Knitter Level 3 (the final level) since the last Knit & Crochet Show received a pin from current Committee Chair Suzanne Bryan.  A total of 13 people finished level 3 in the last year, but only 7 were able to come to San Diego.  I asked Arenda if this was the most people to finish level 3 in one year.  She didn’t know off the top of her head, but there’s no doubt that Master Knitters are an elite group.  (While working on this blog post I ran across a page on TKGA’s website with pictures of each pinning ceremony since 2007.  In 2007, 24 people received pins.  In 2008 and 2010, 17 graduates received them.) In the 30 years of TKGA’s existence, only 300 people have completed Level 3.  TKGA has the complete list of graduates on their website.  Congratulations to all the new graduates!

image

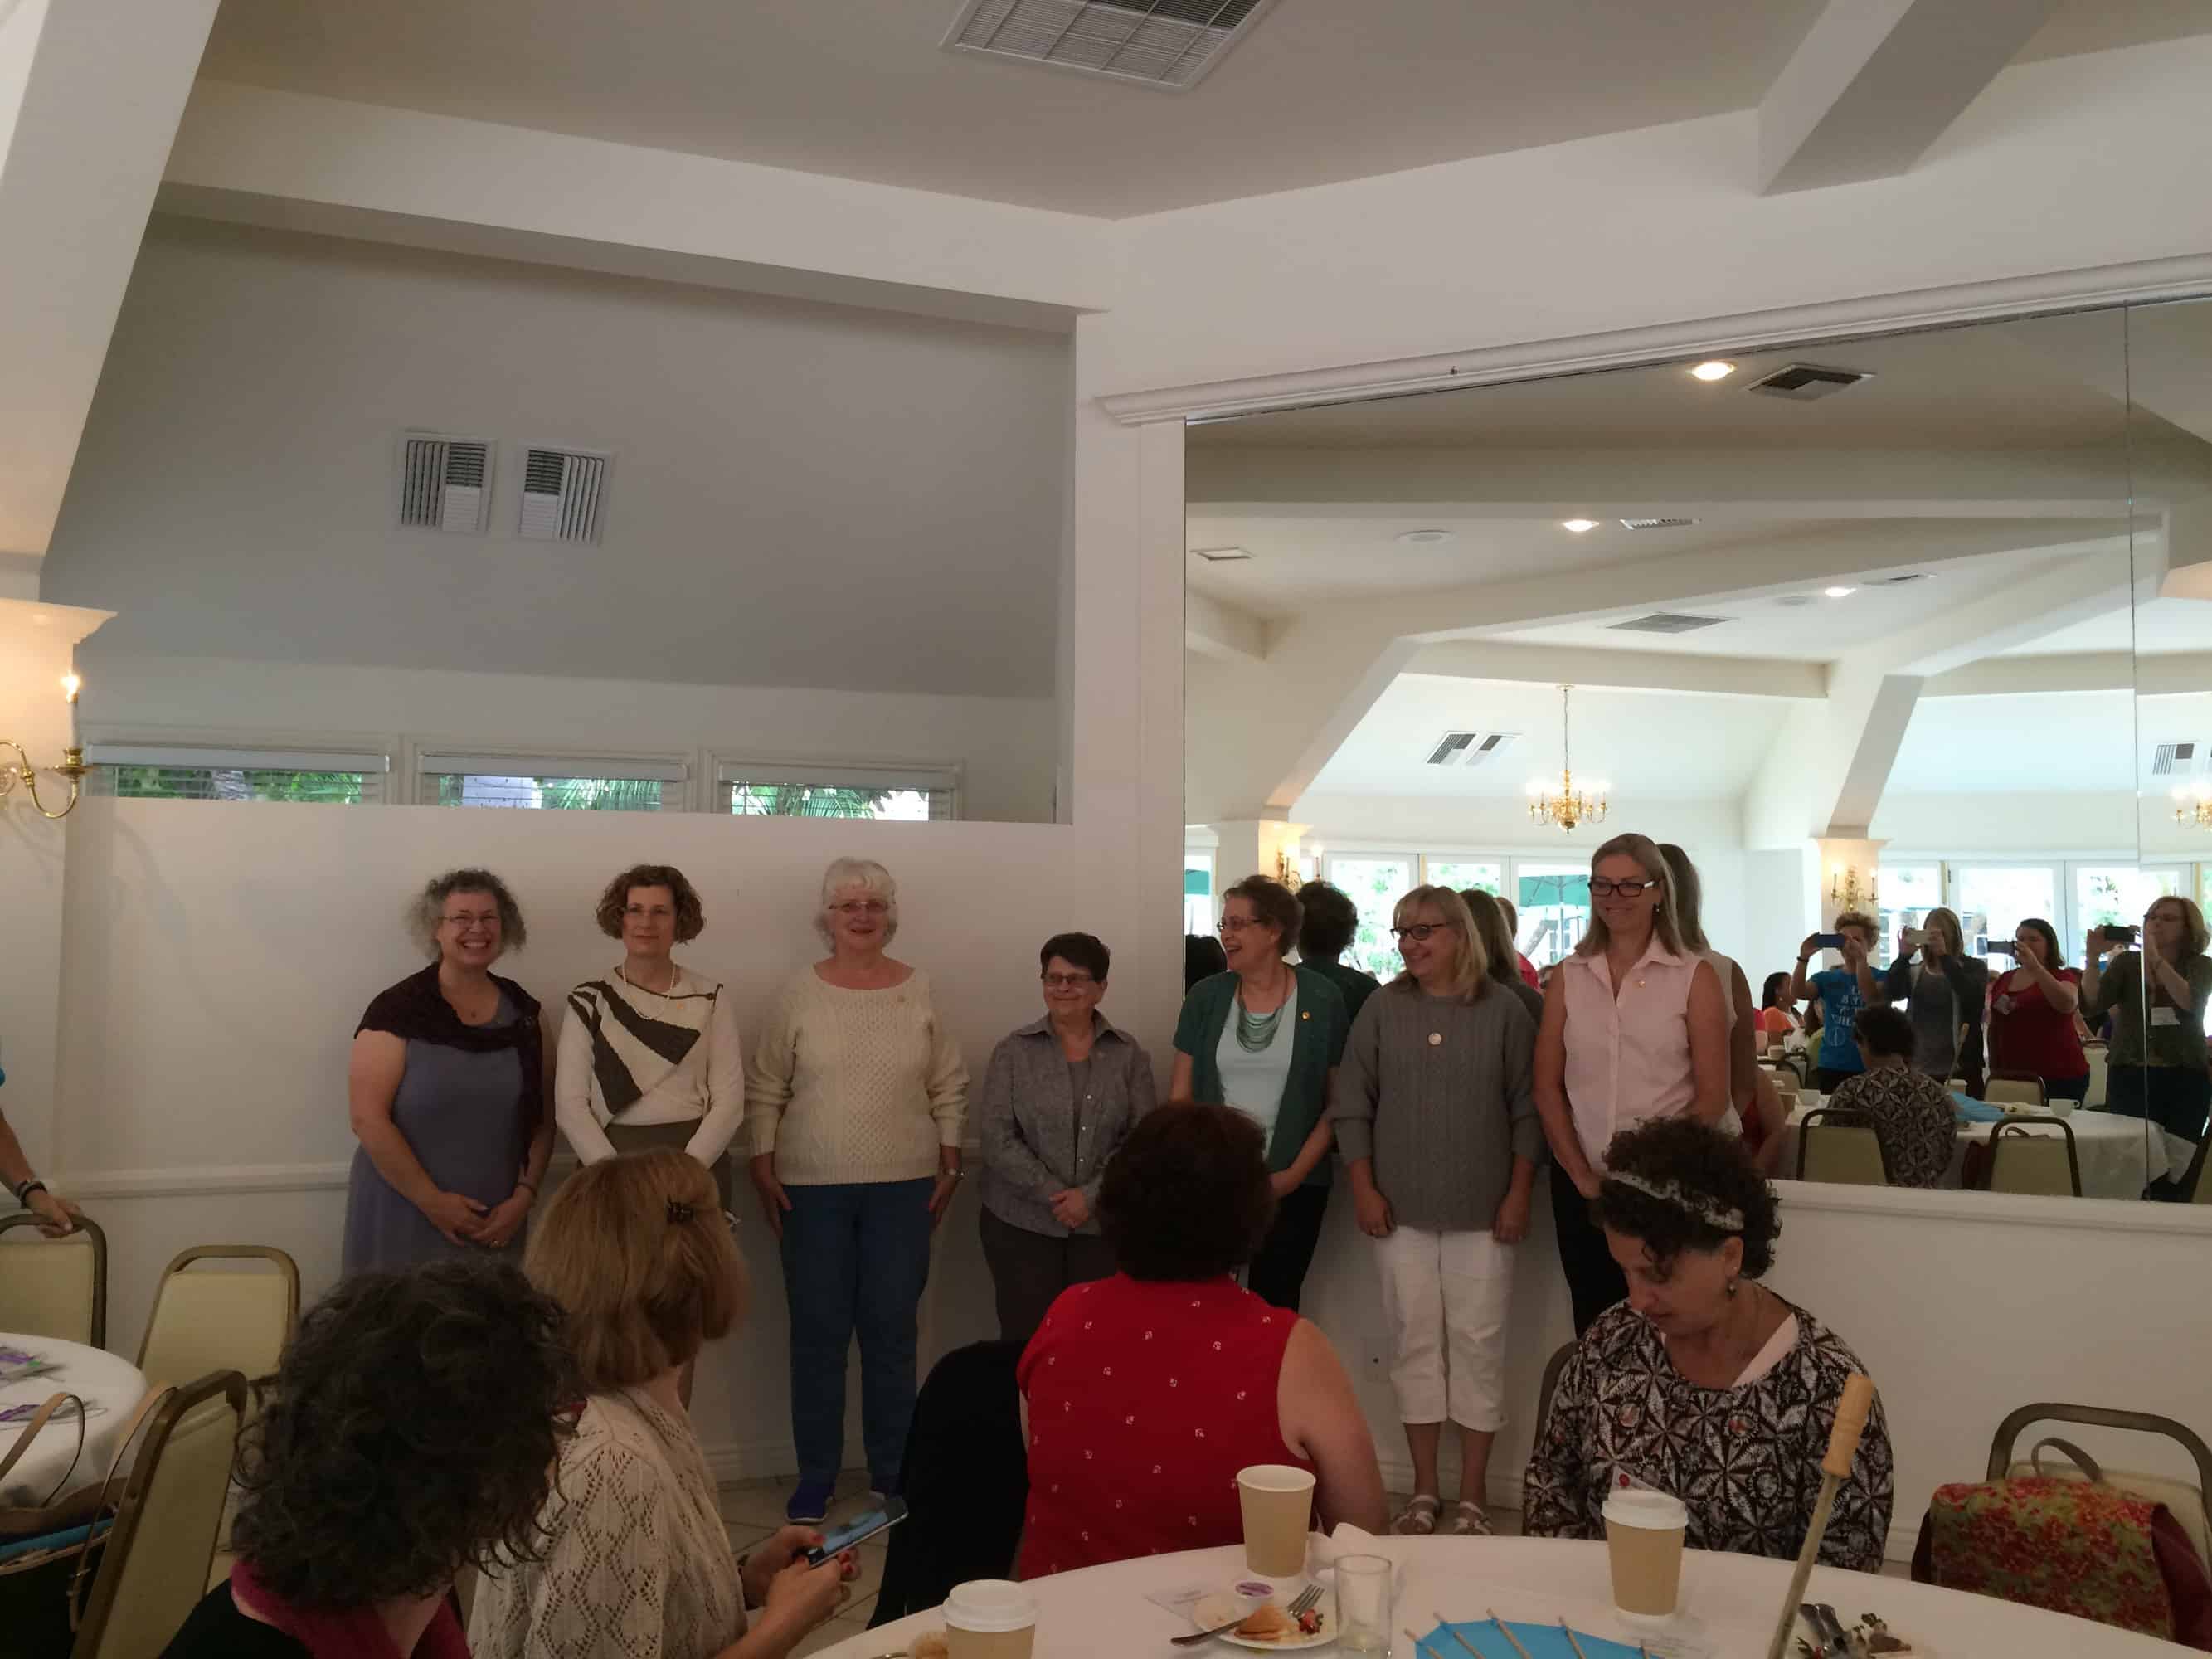
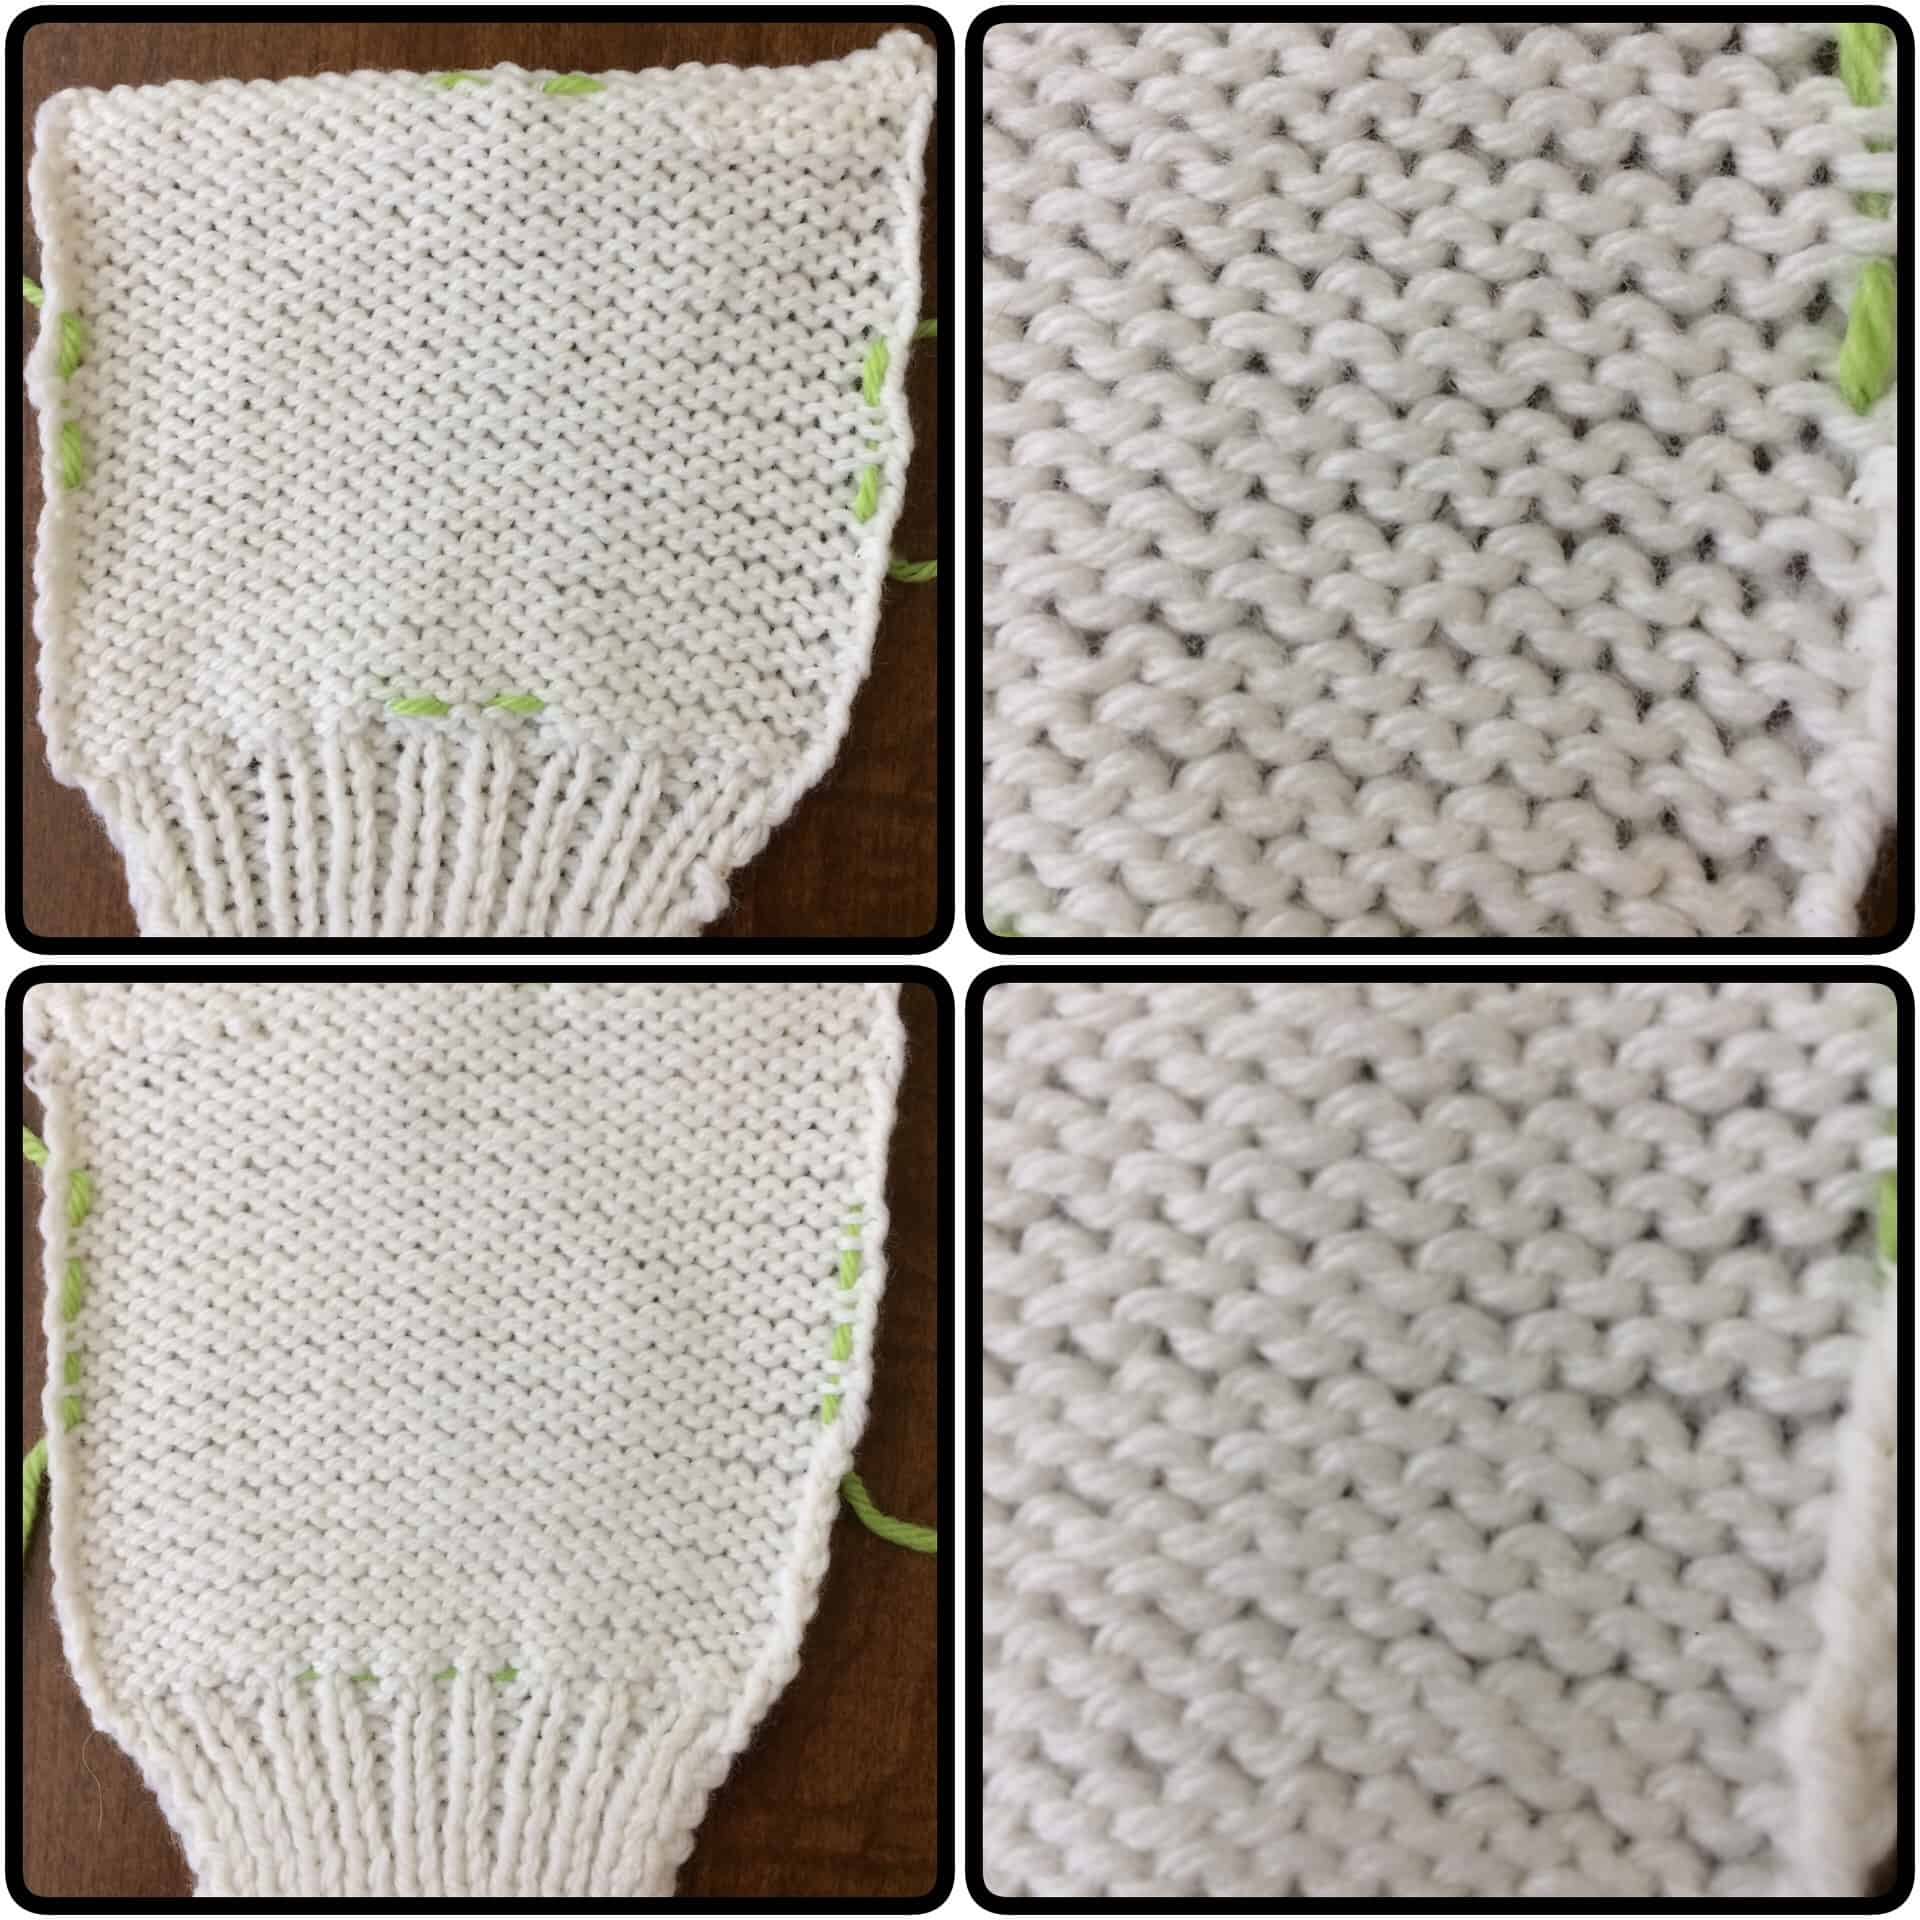
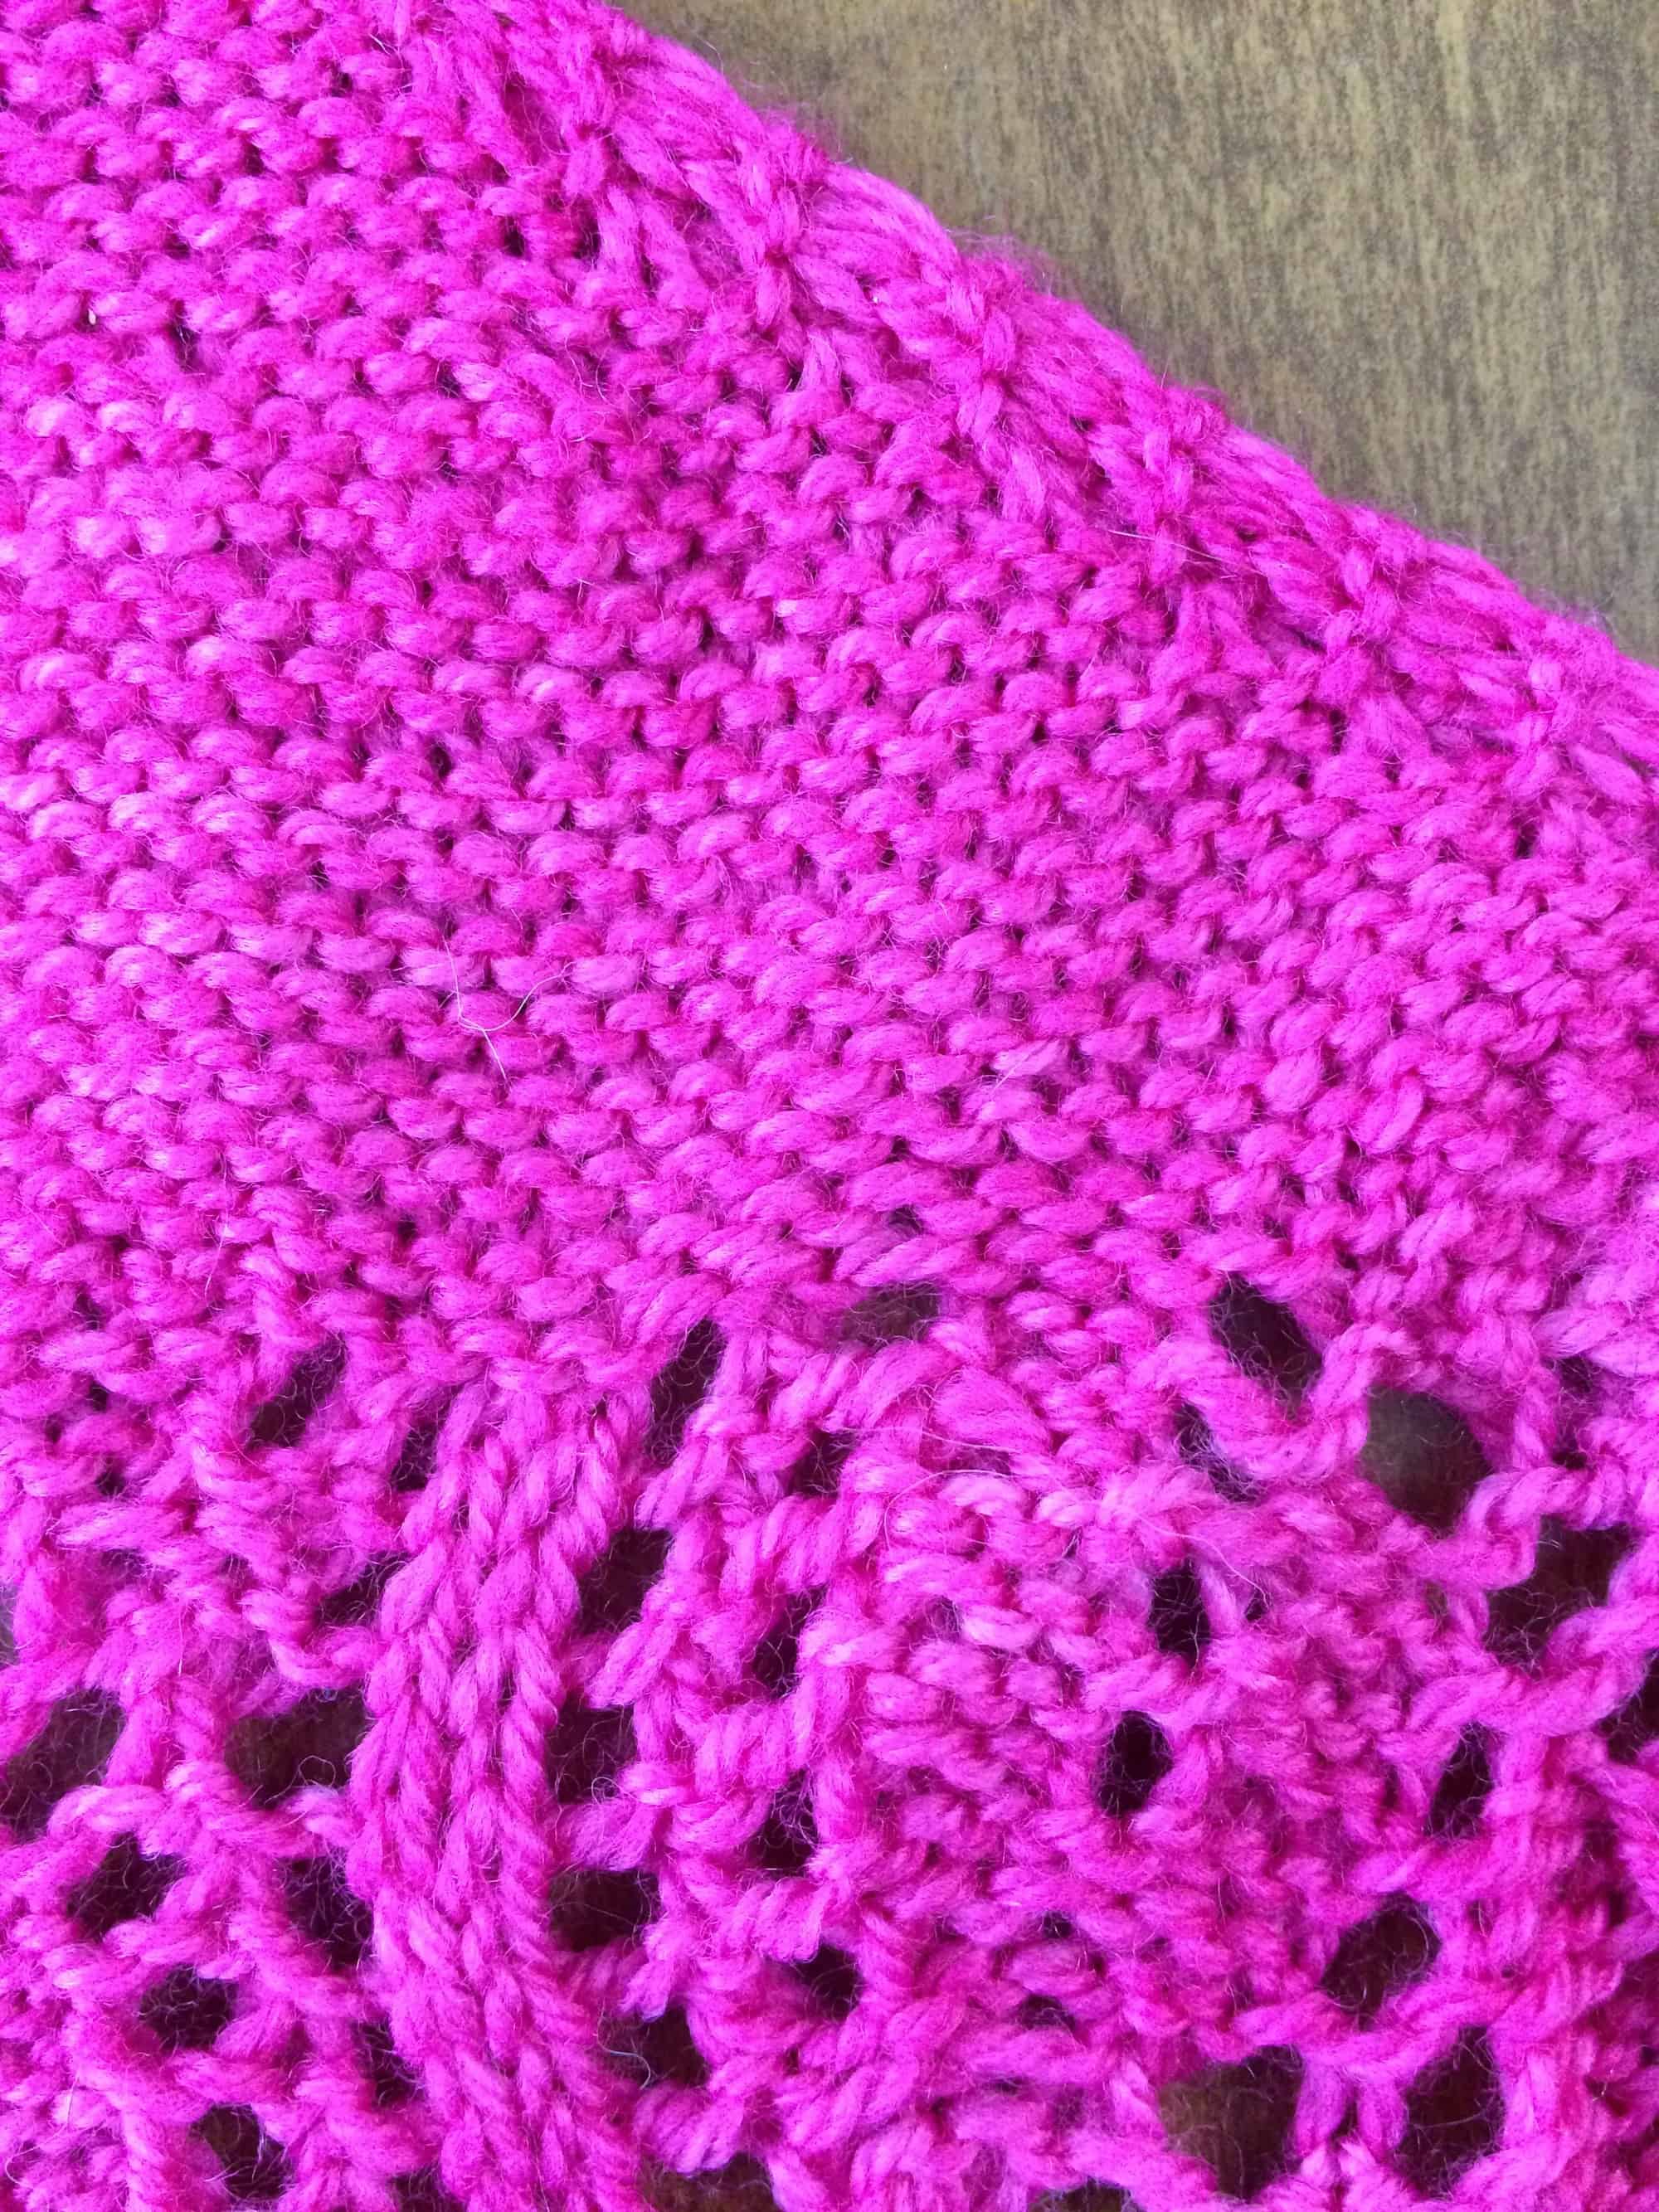
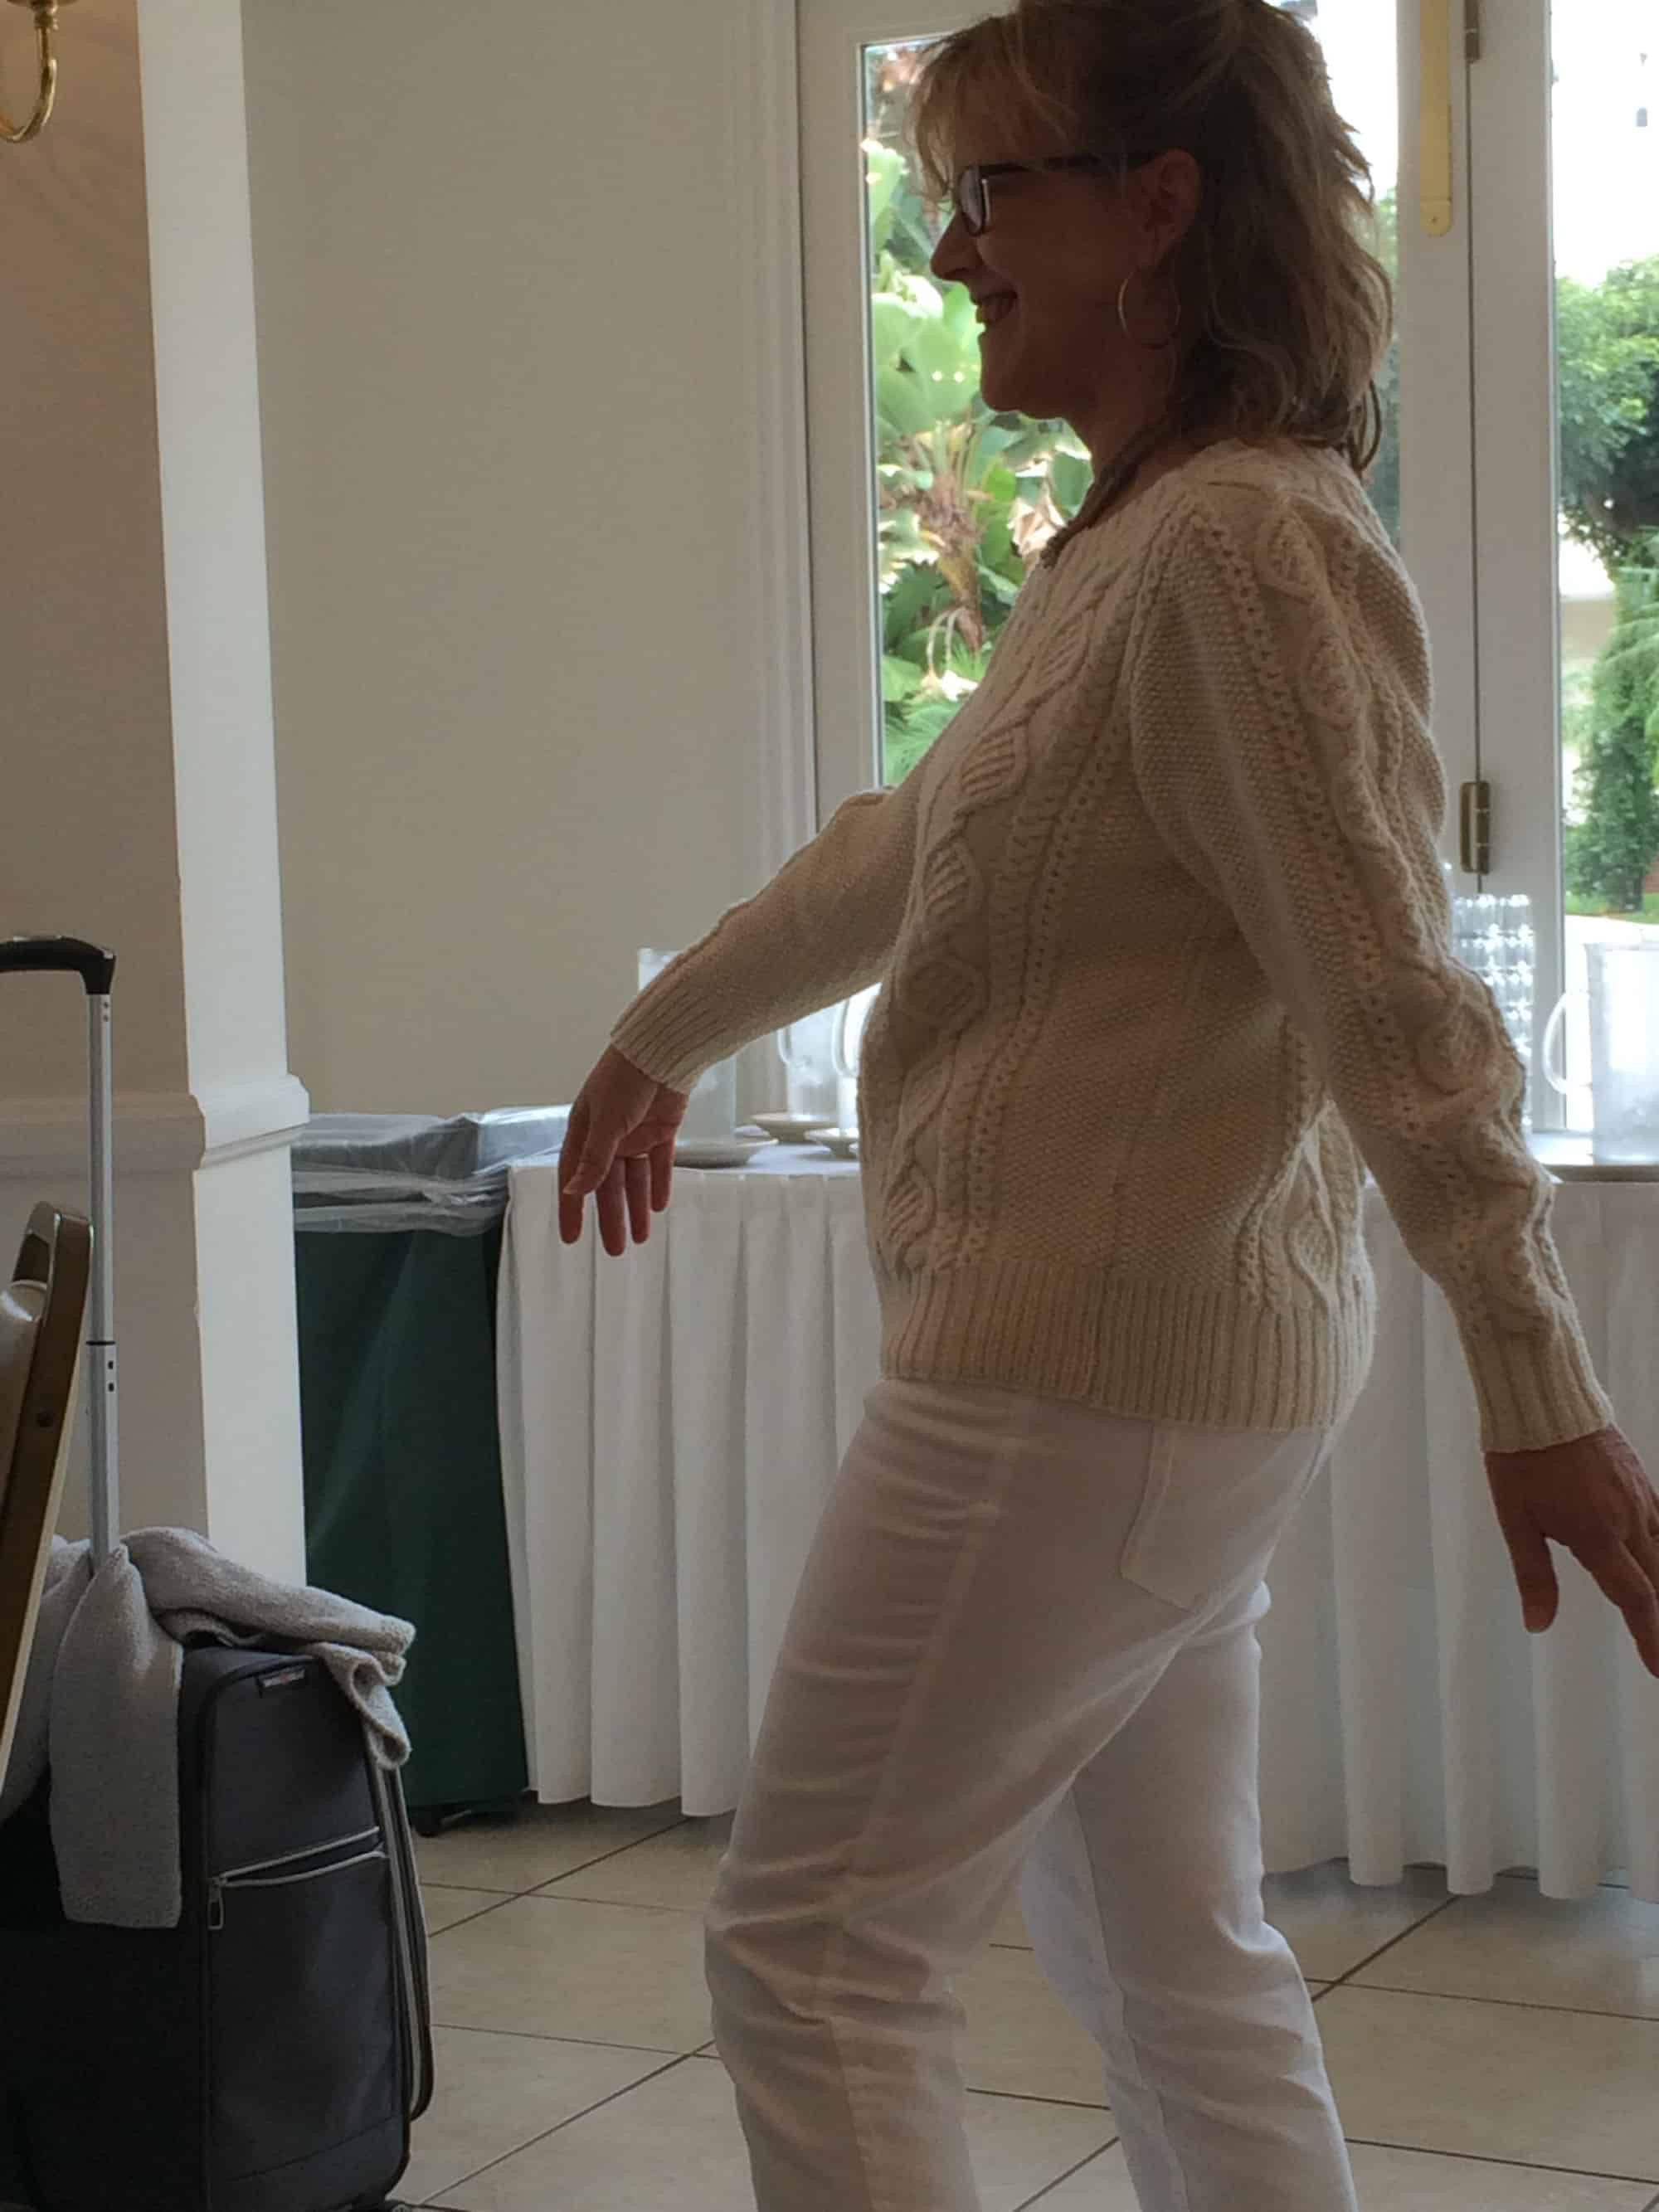
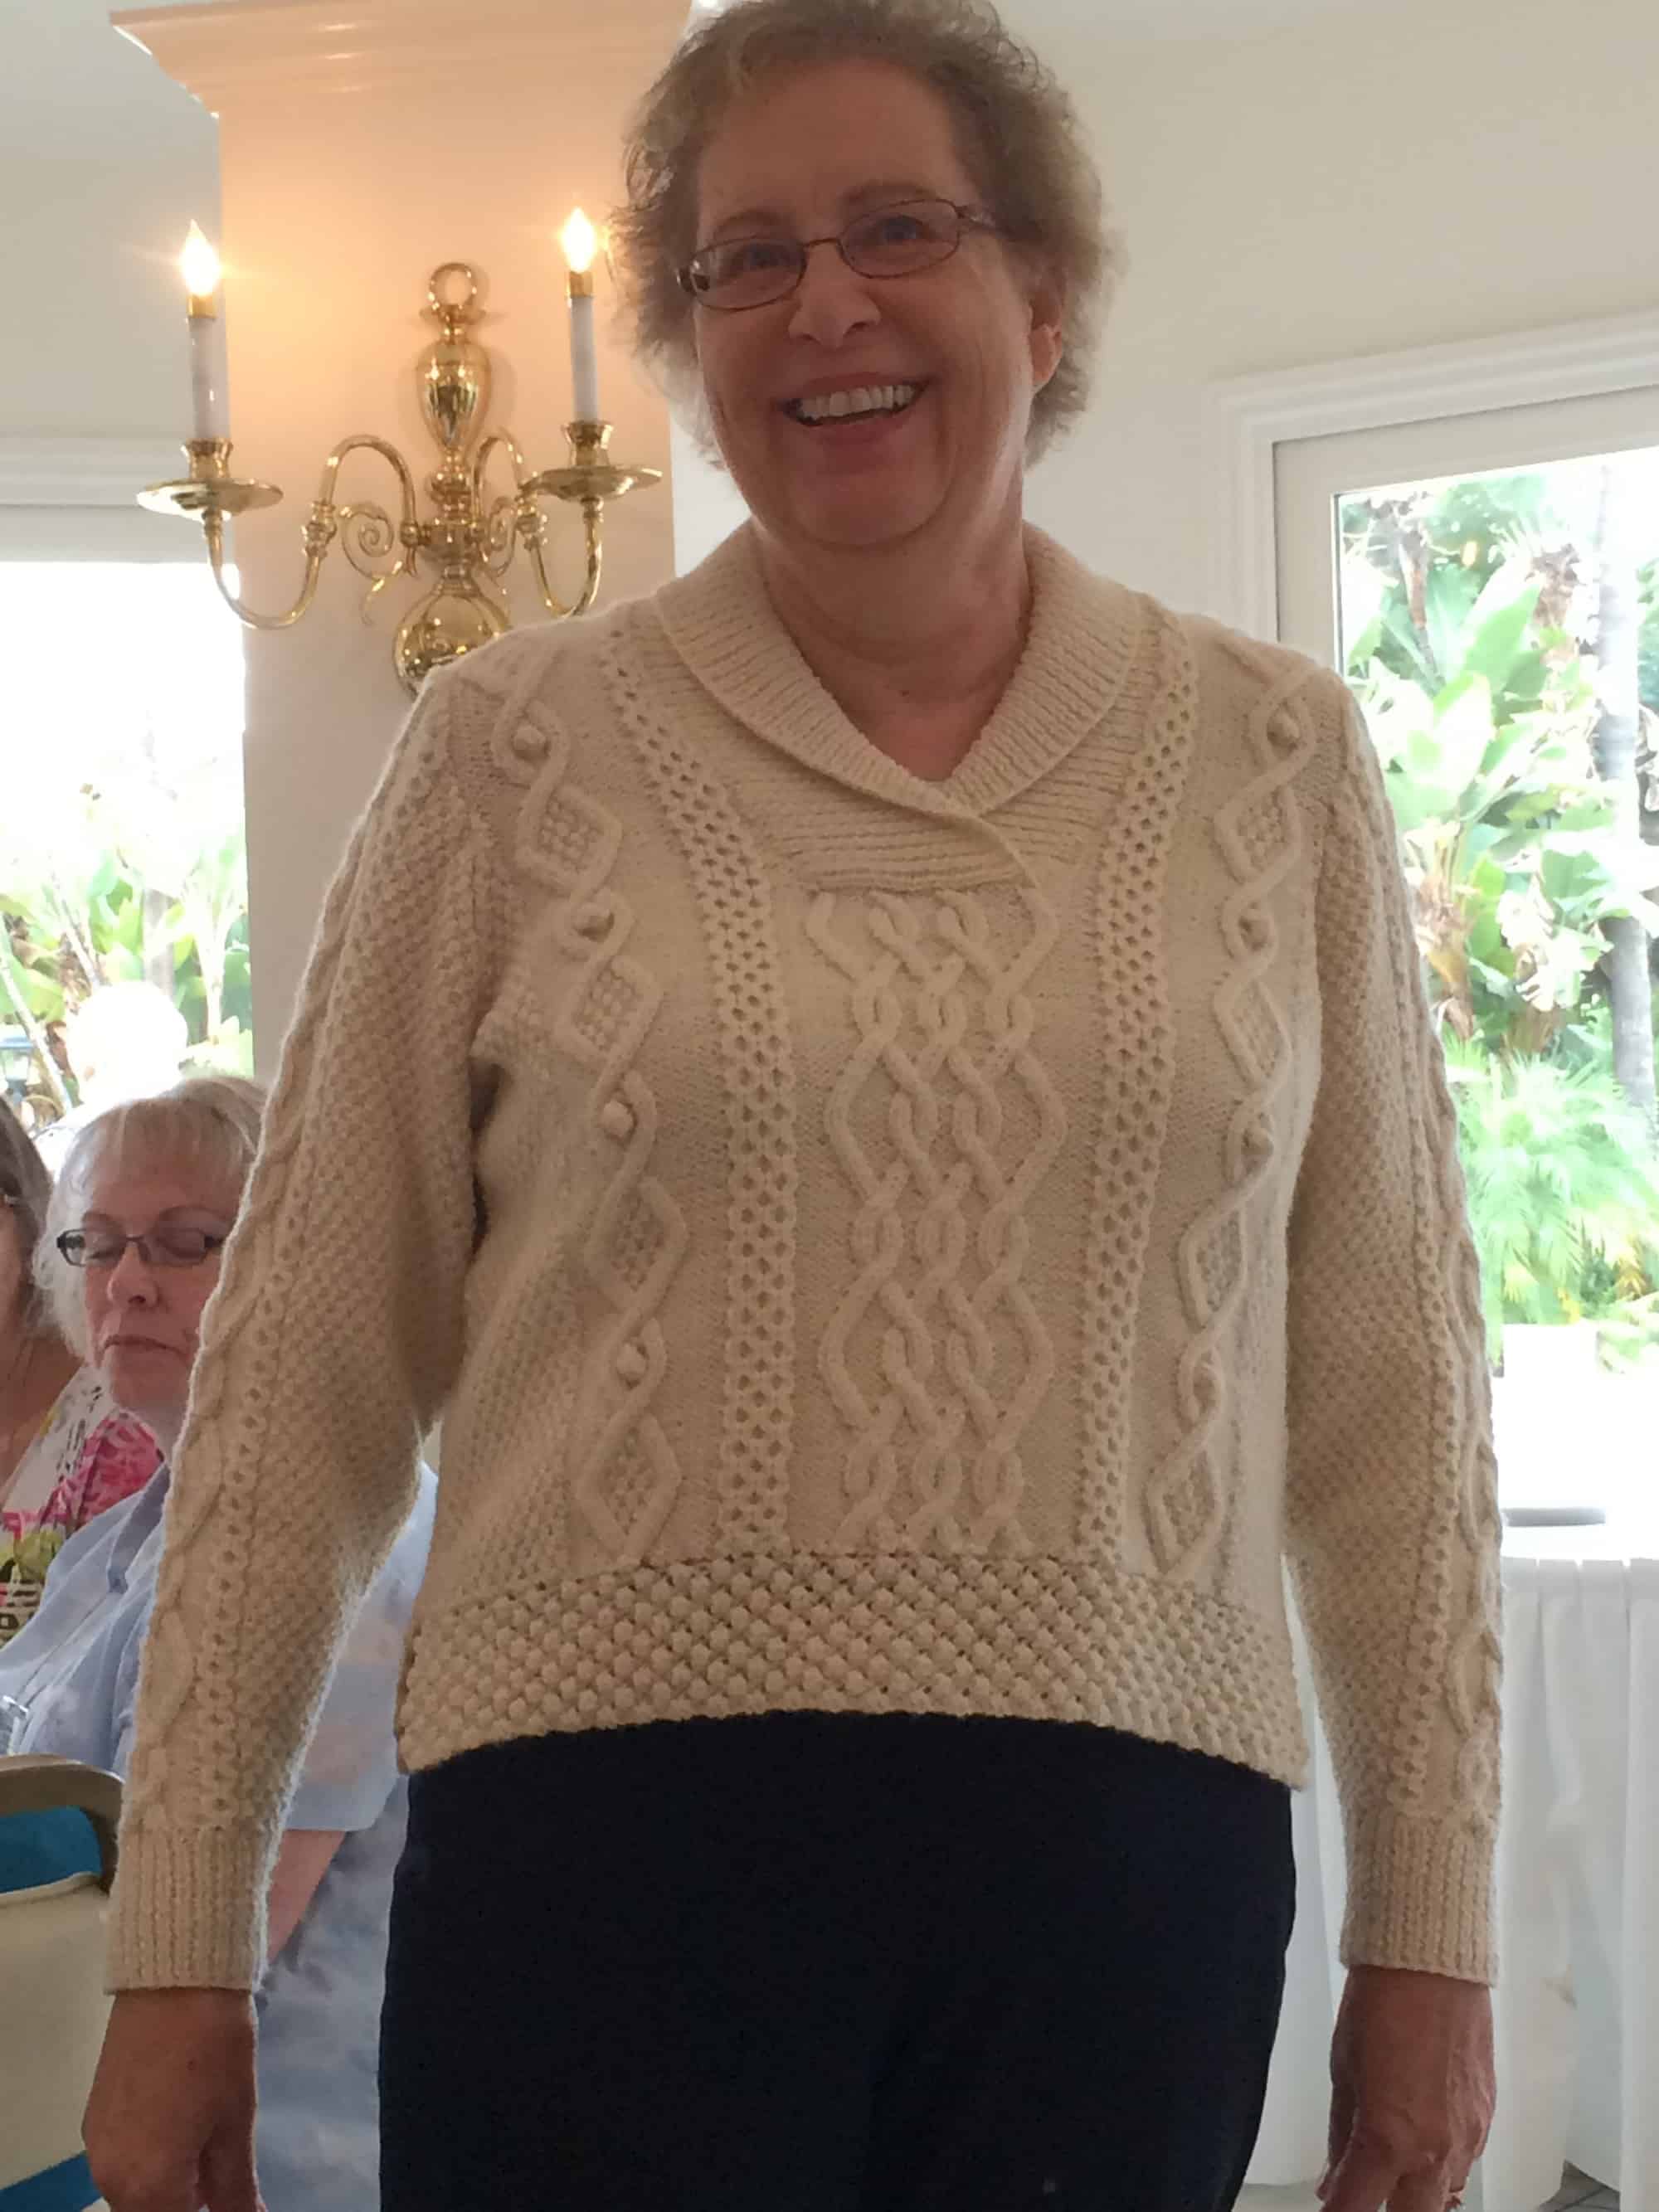
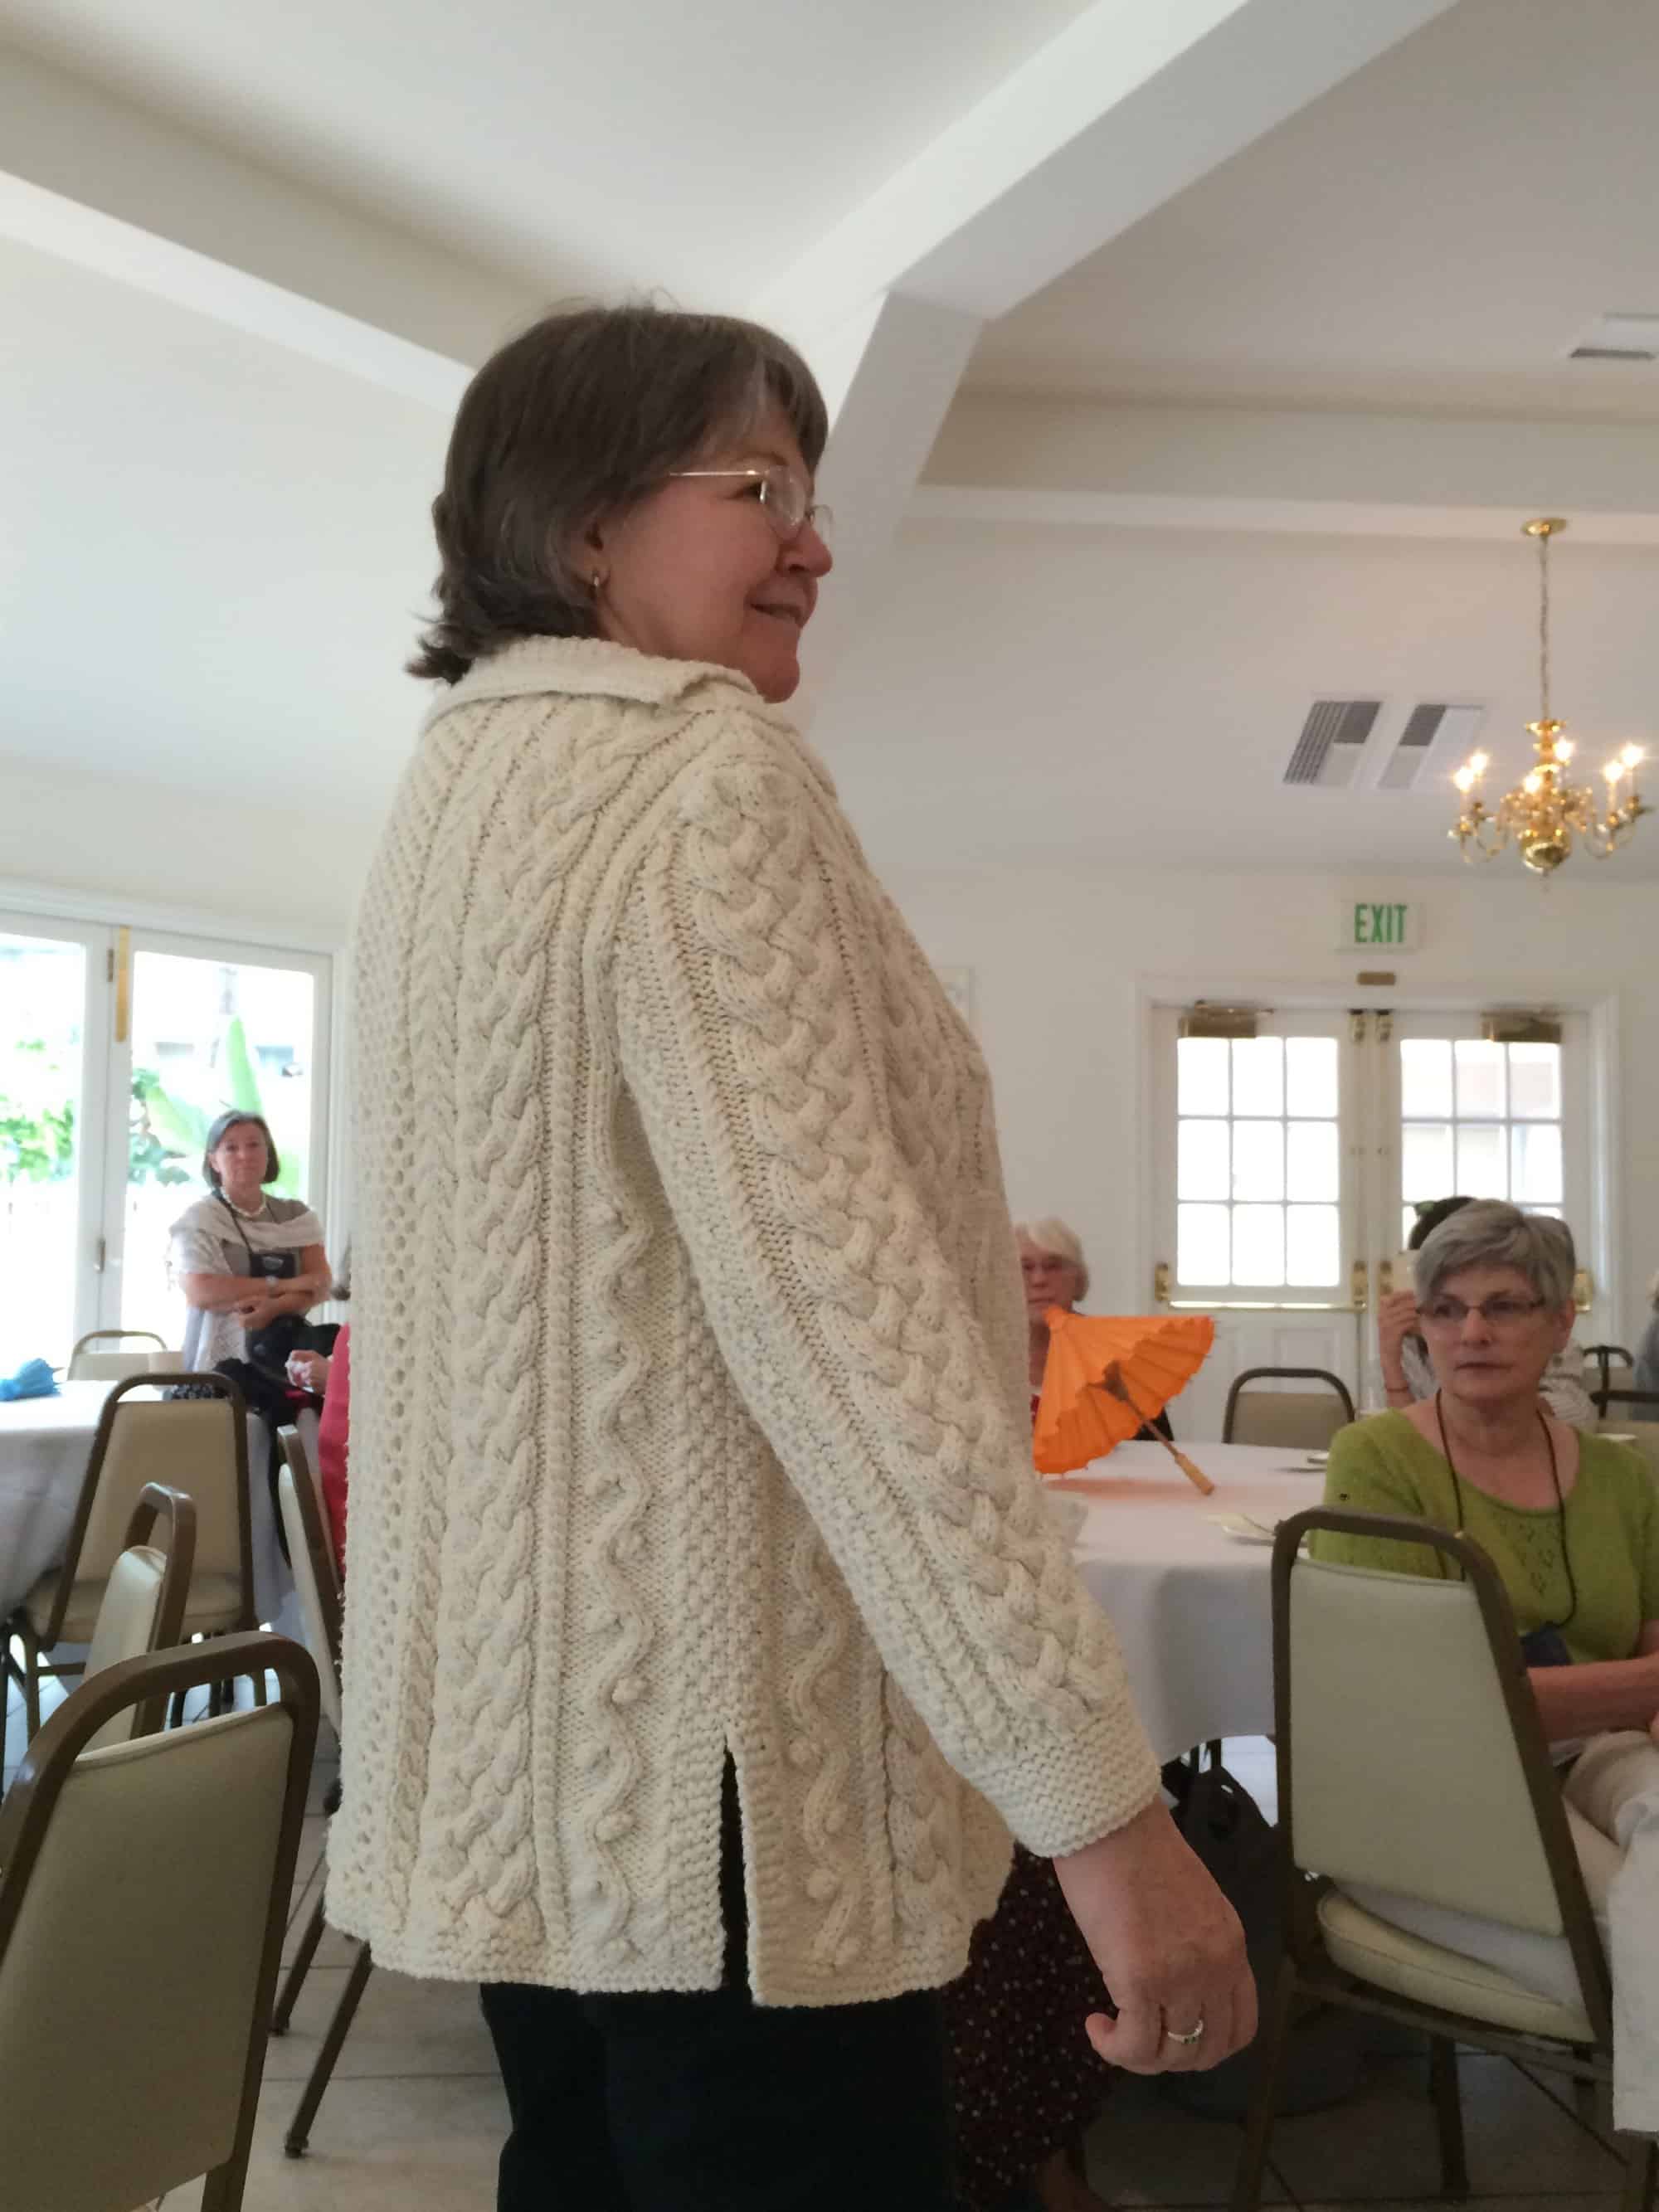
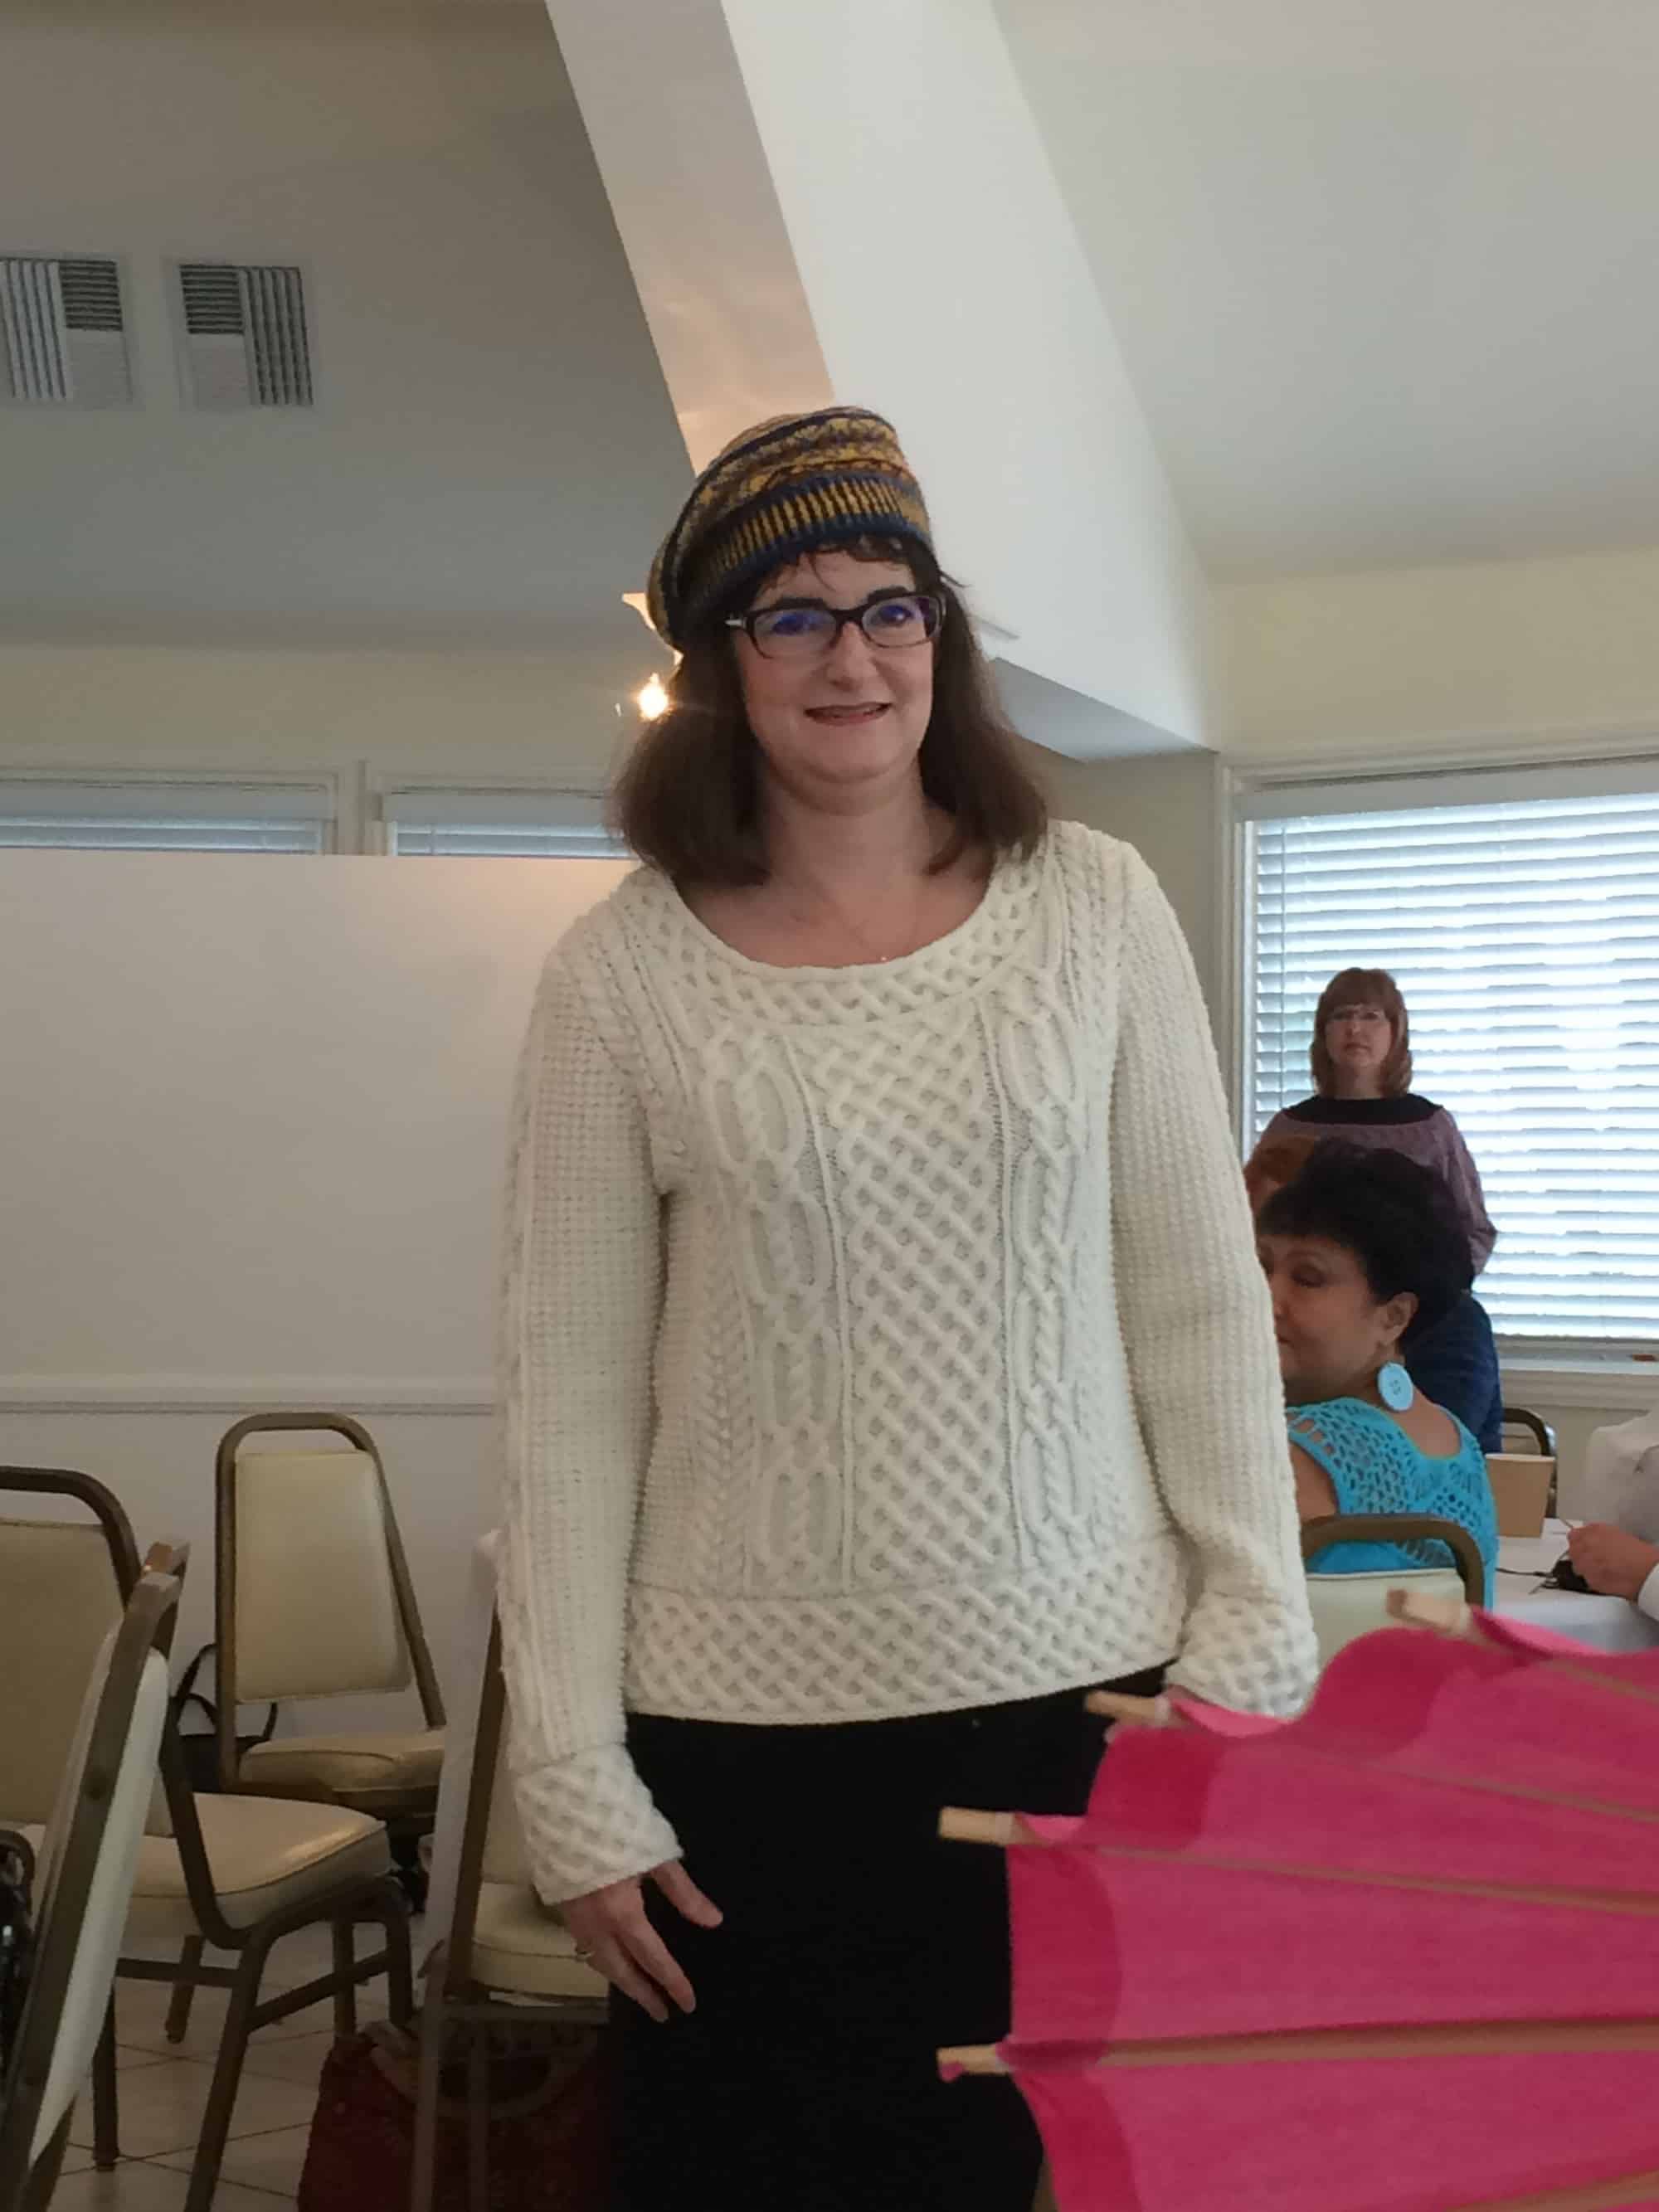
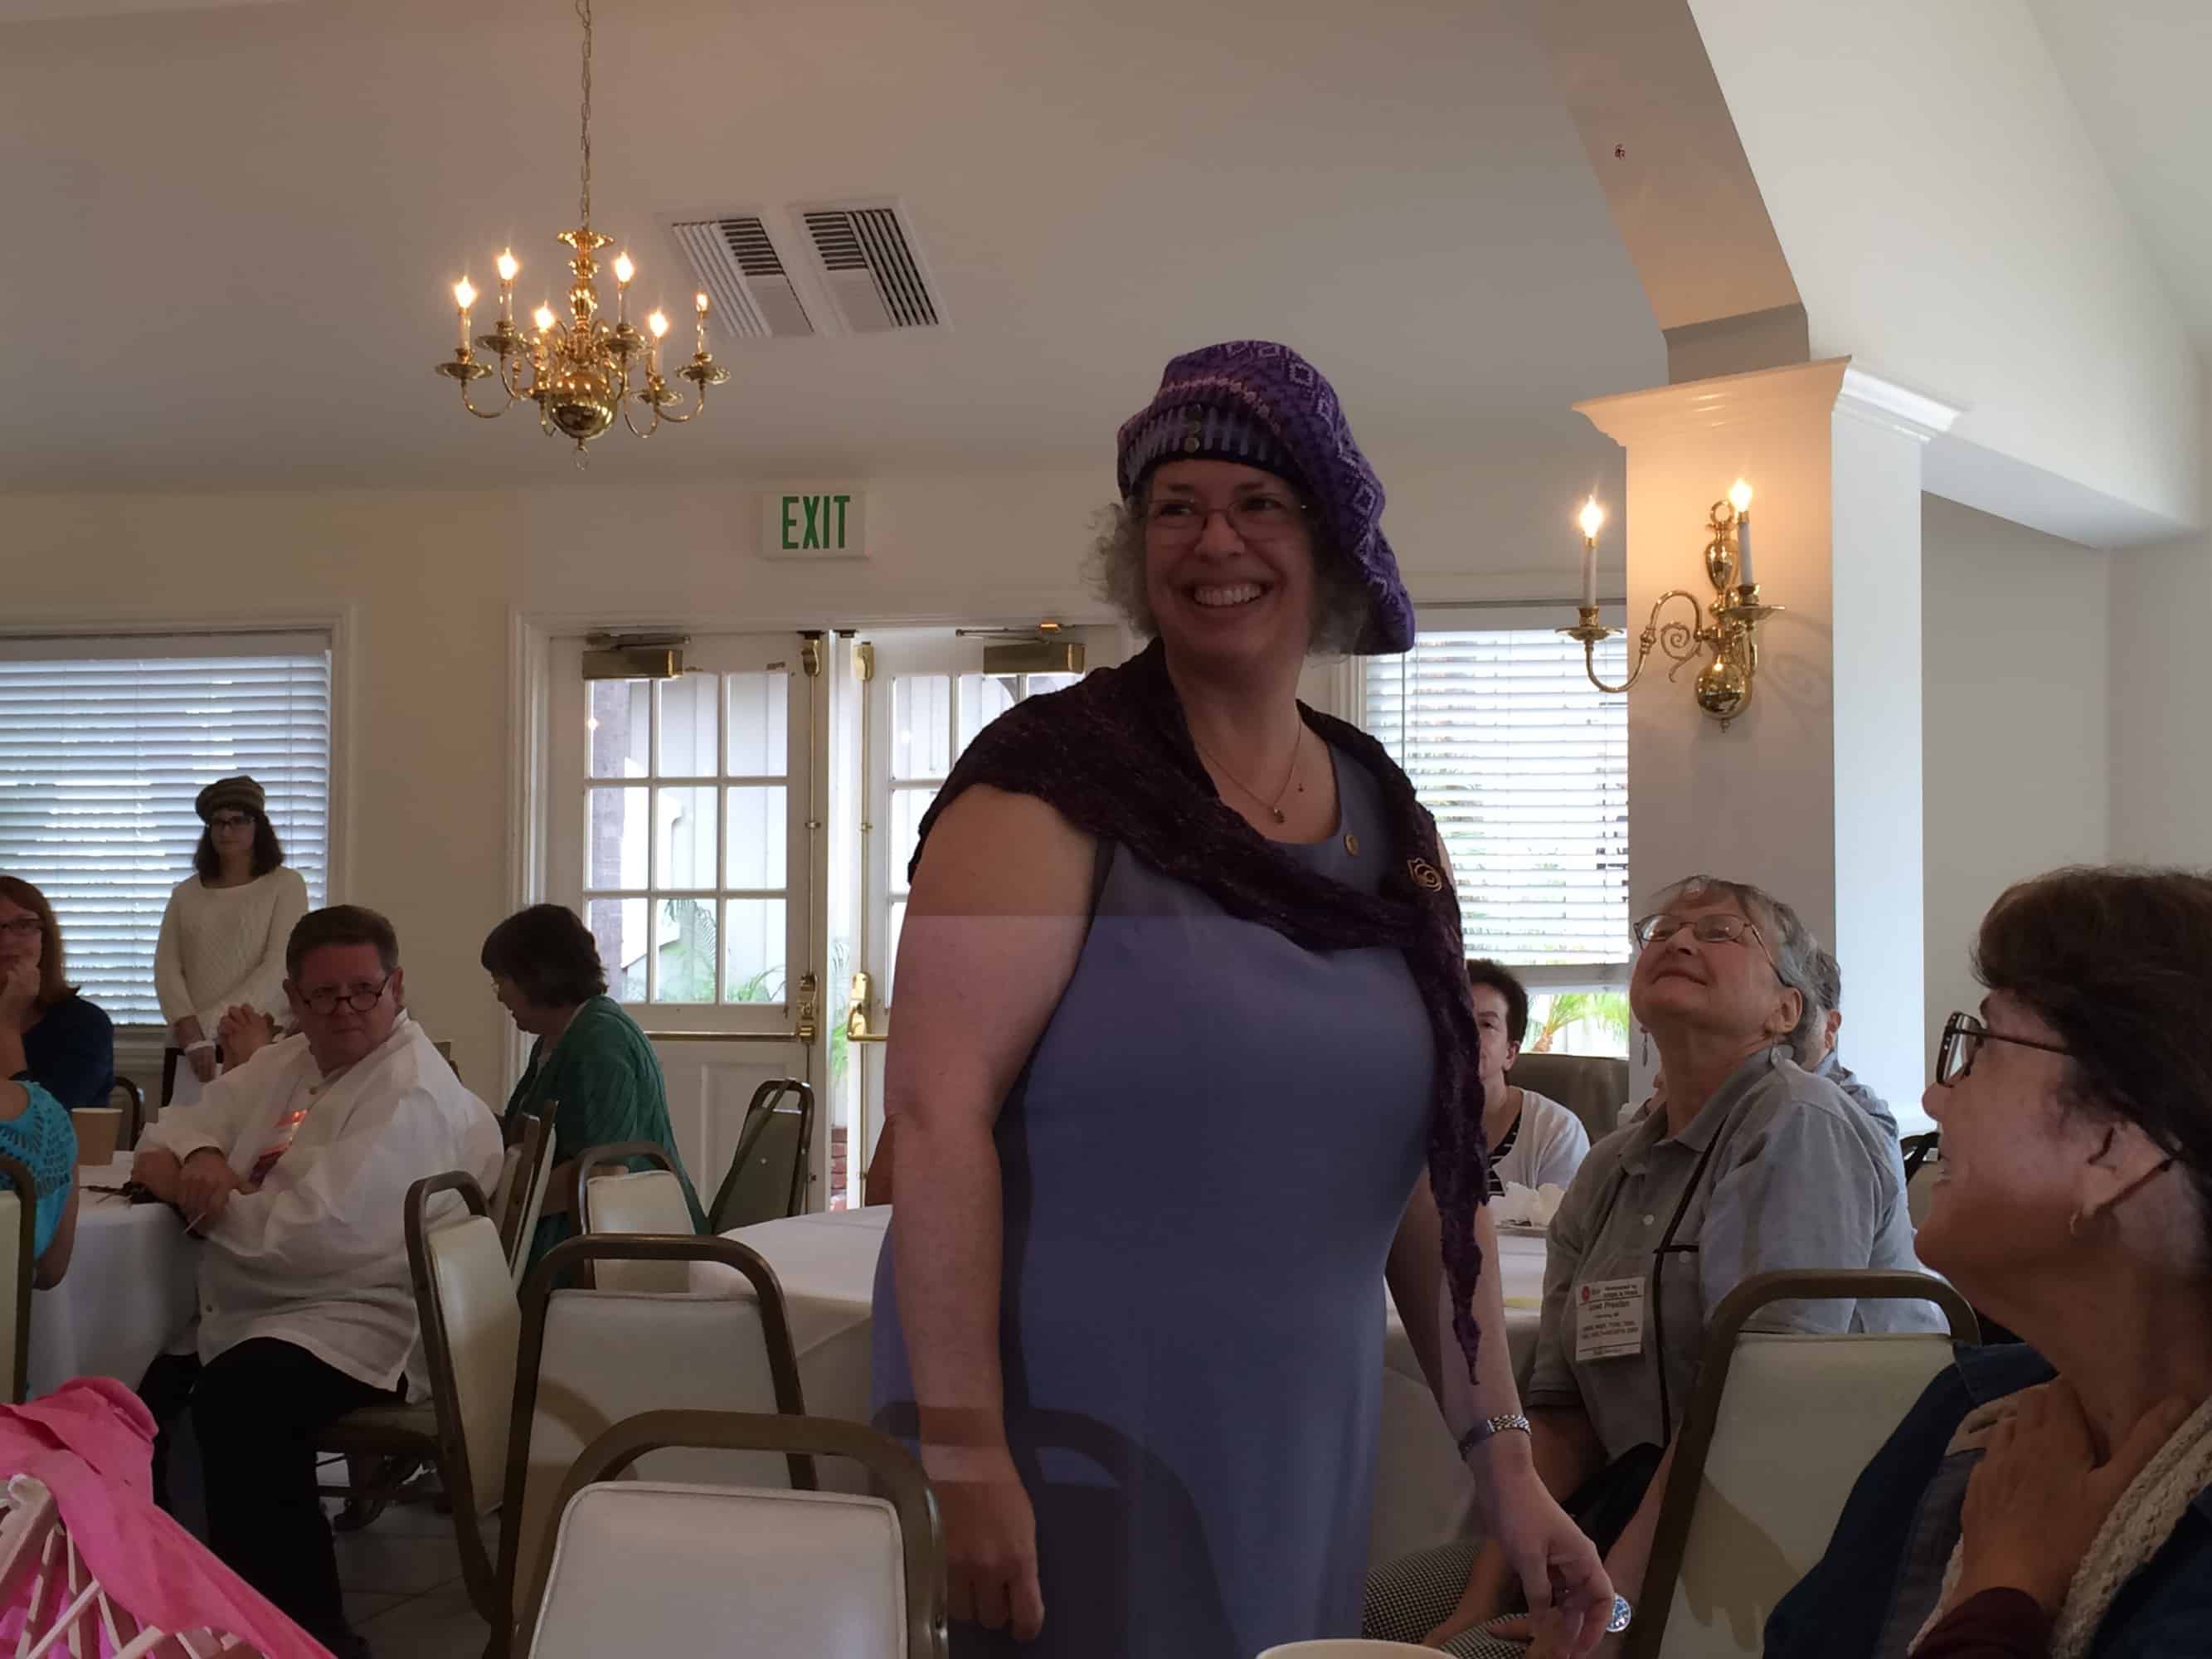
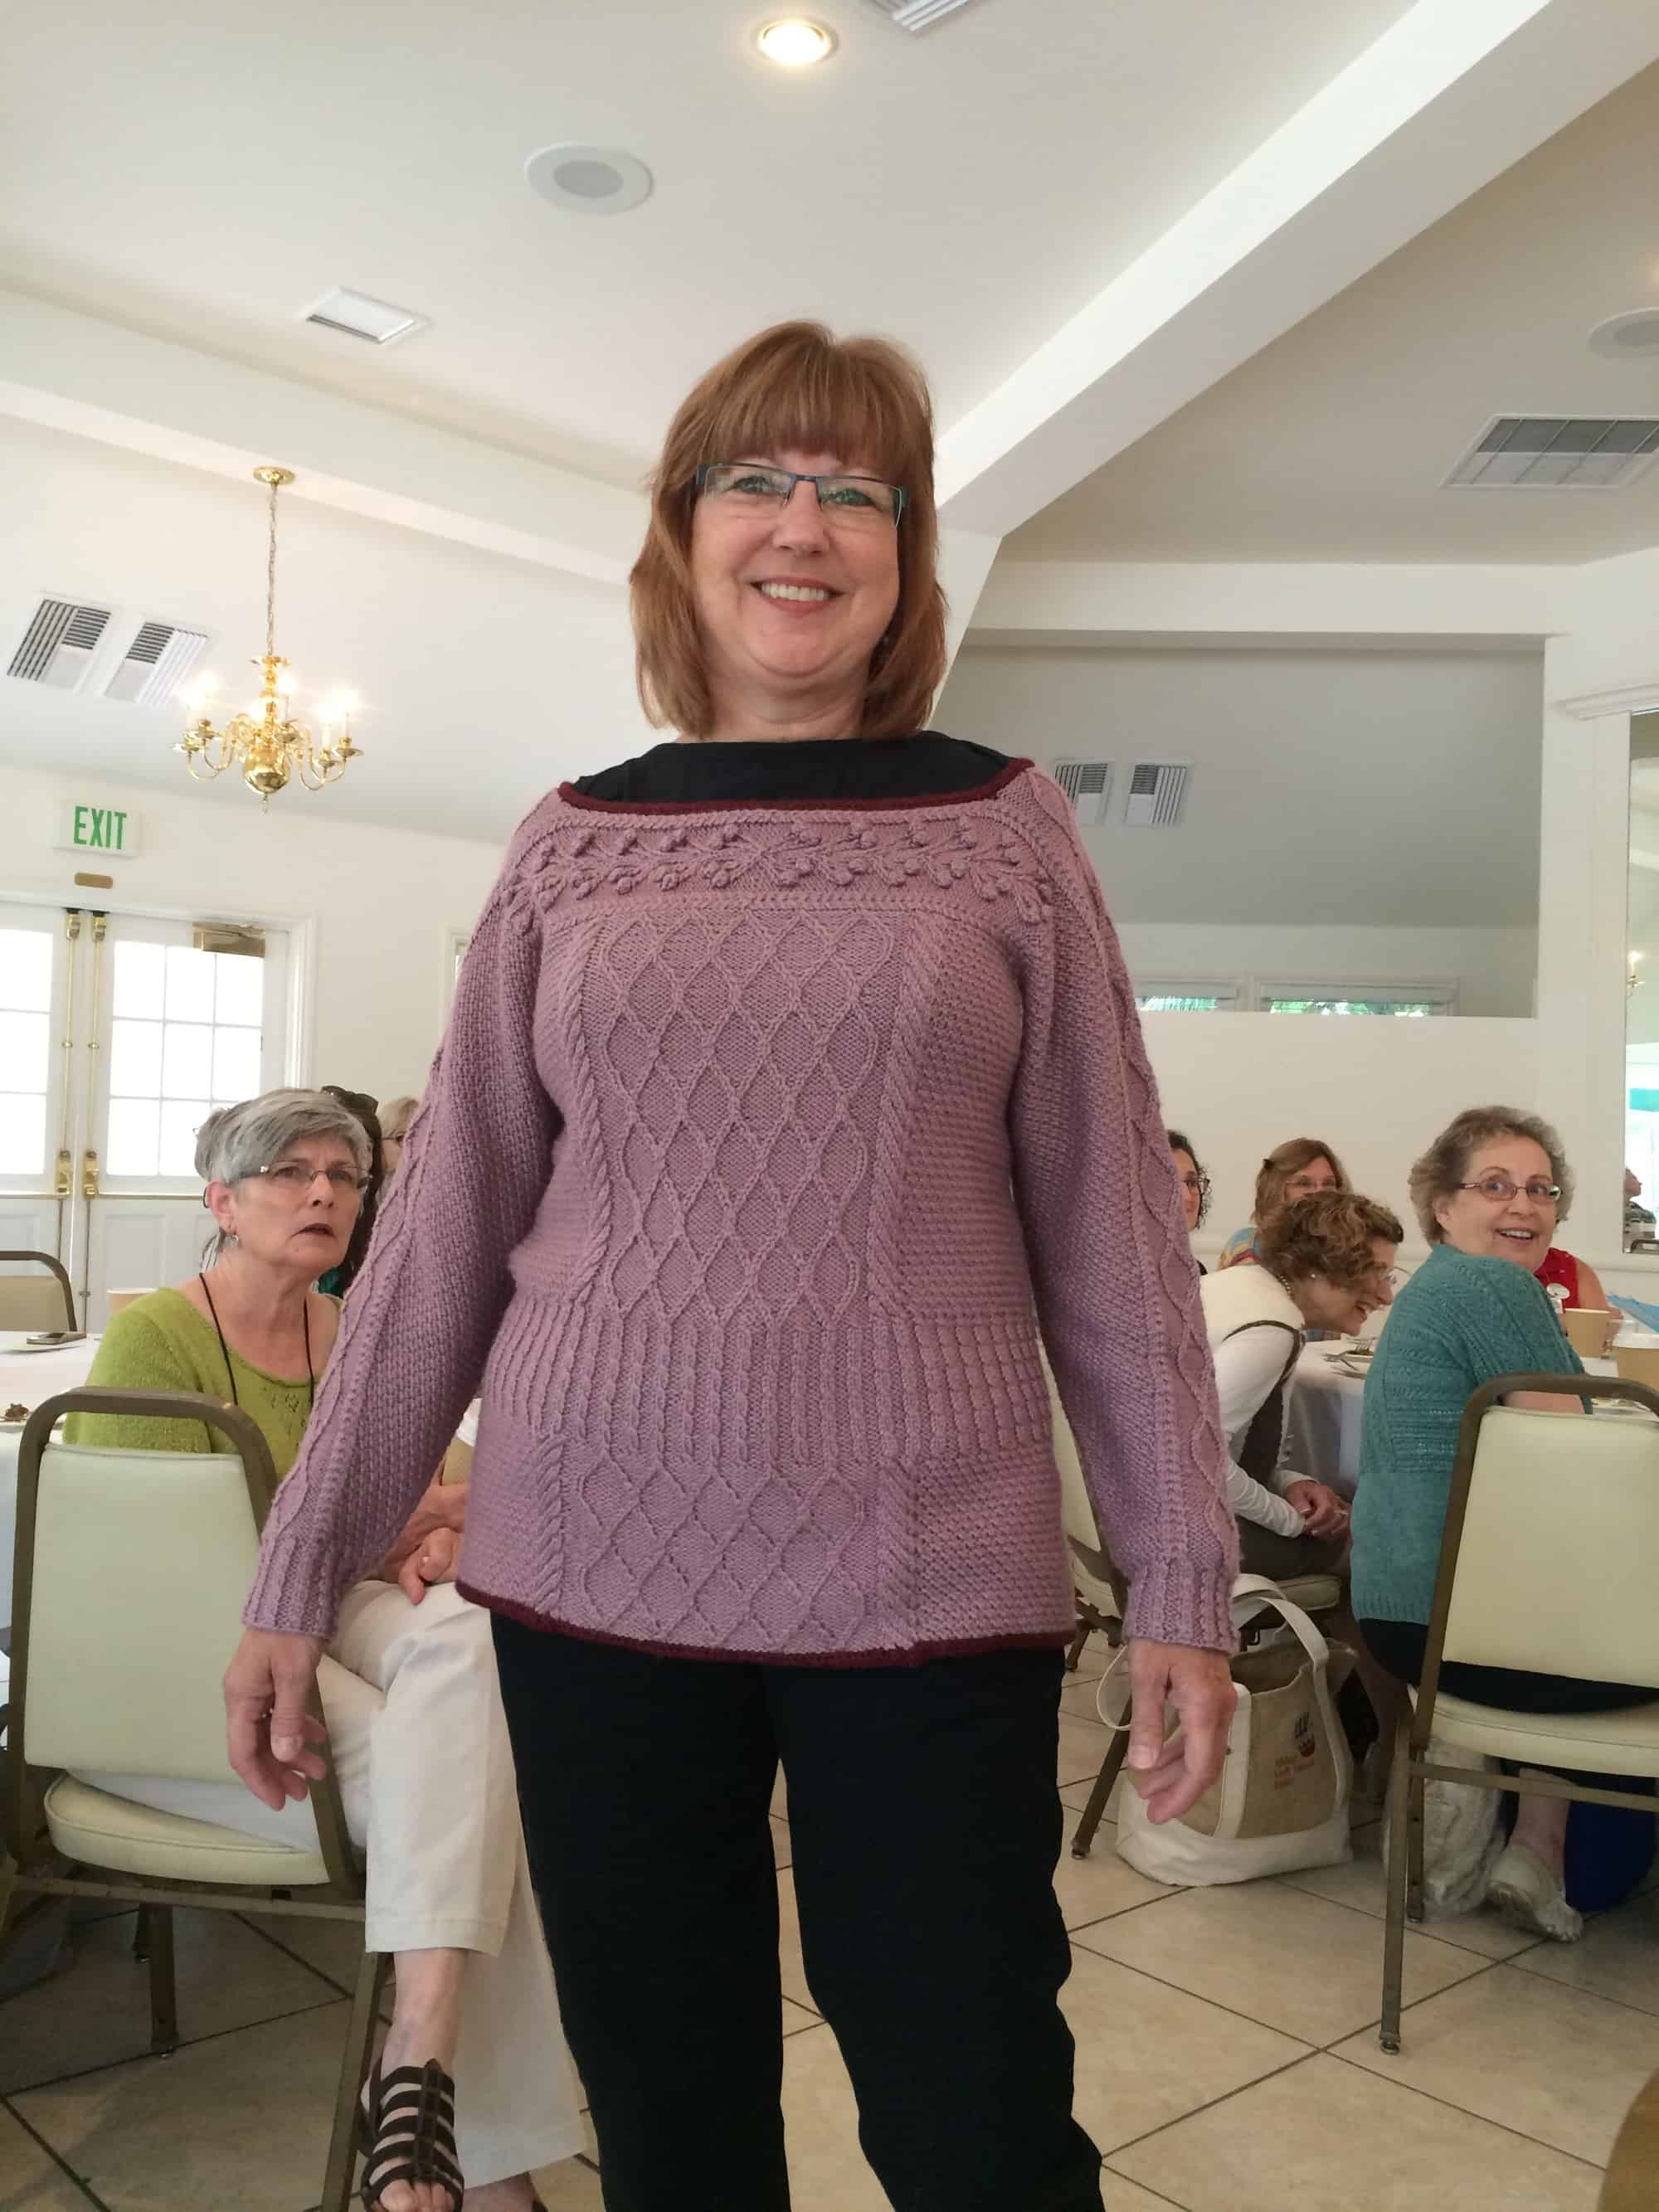
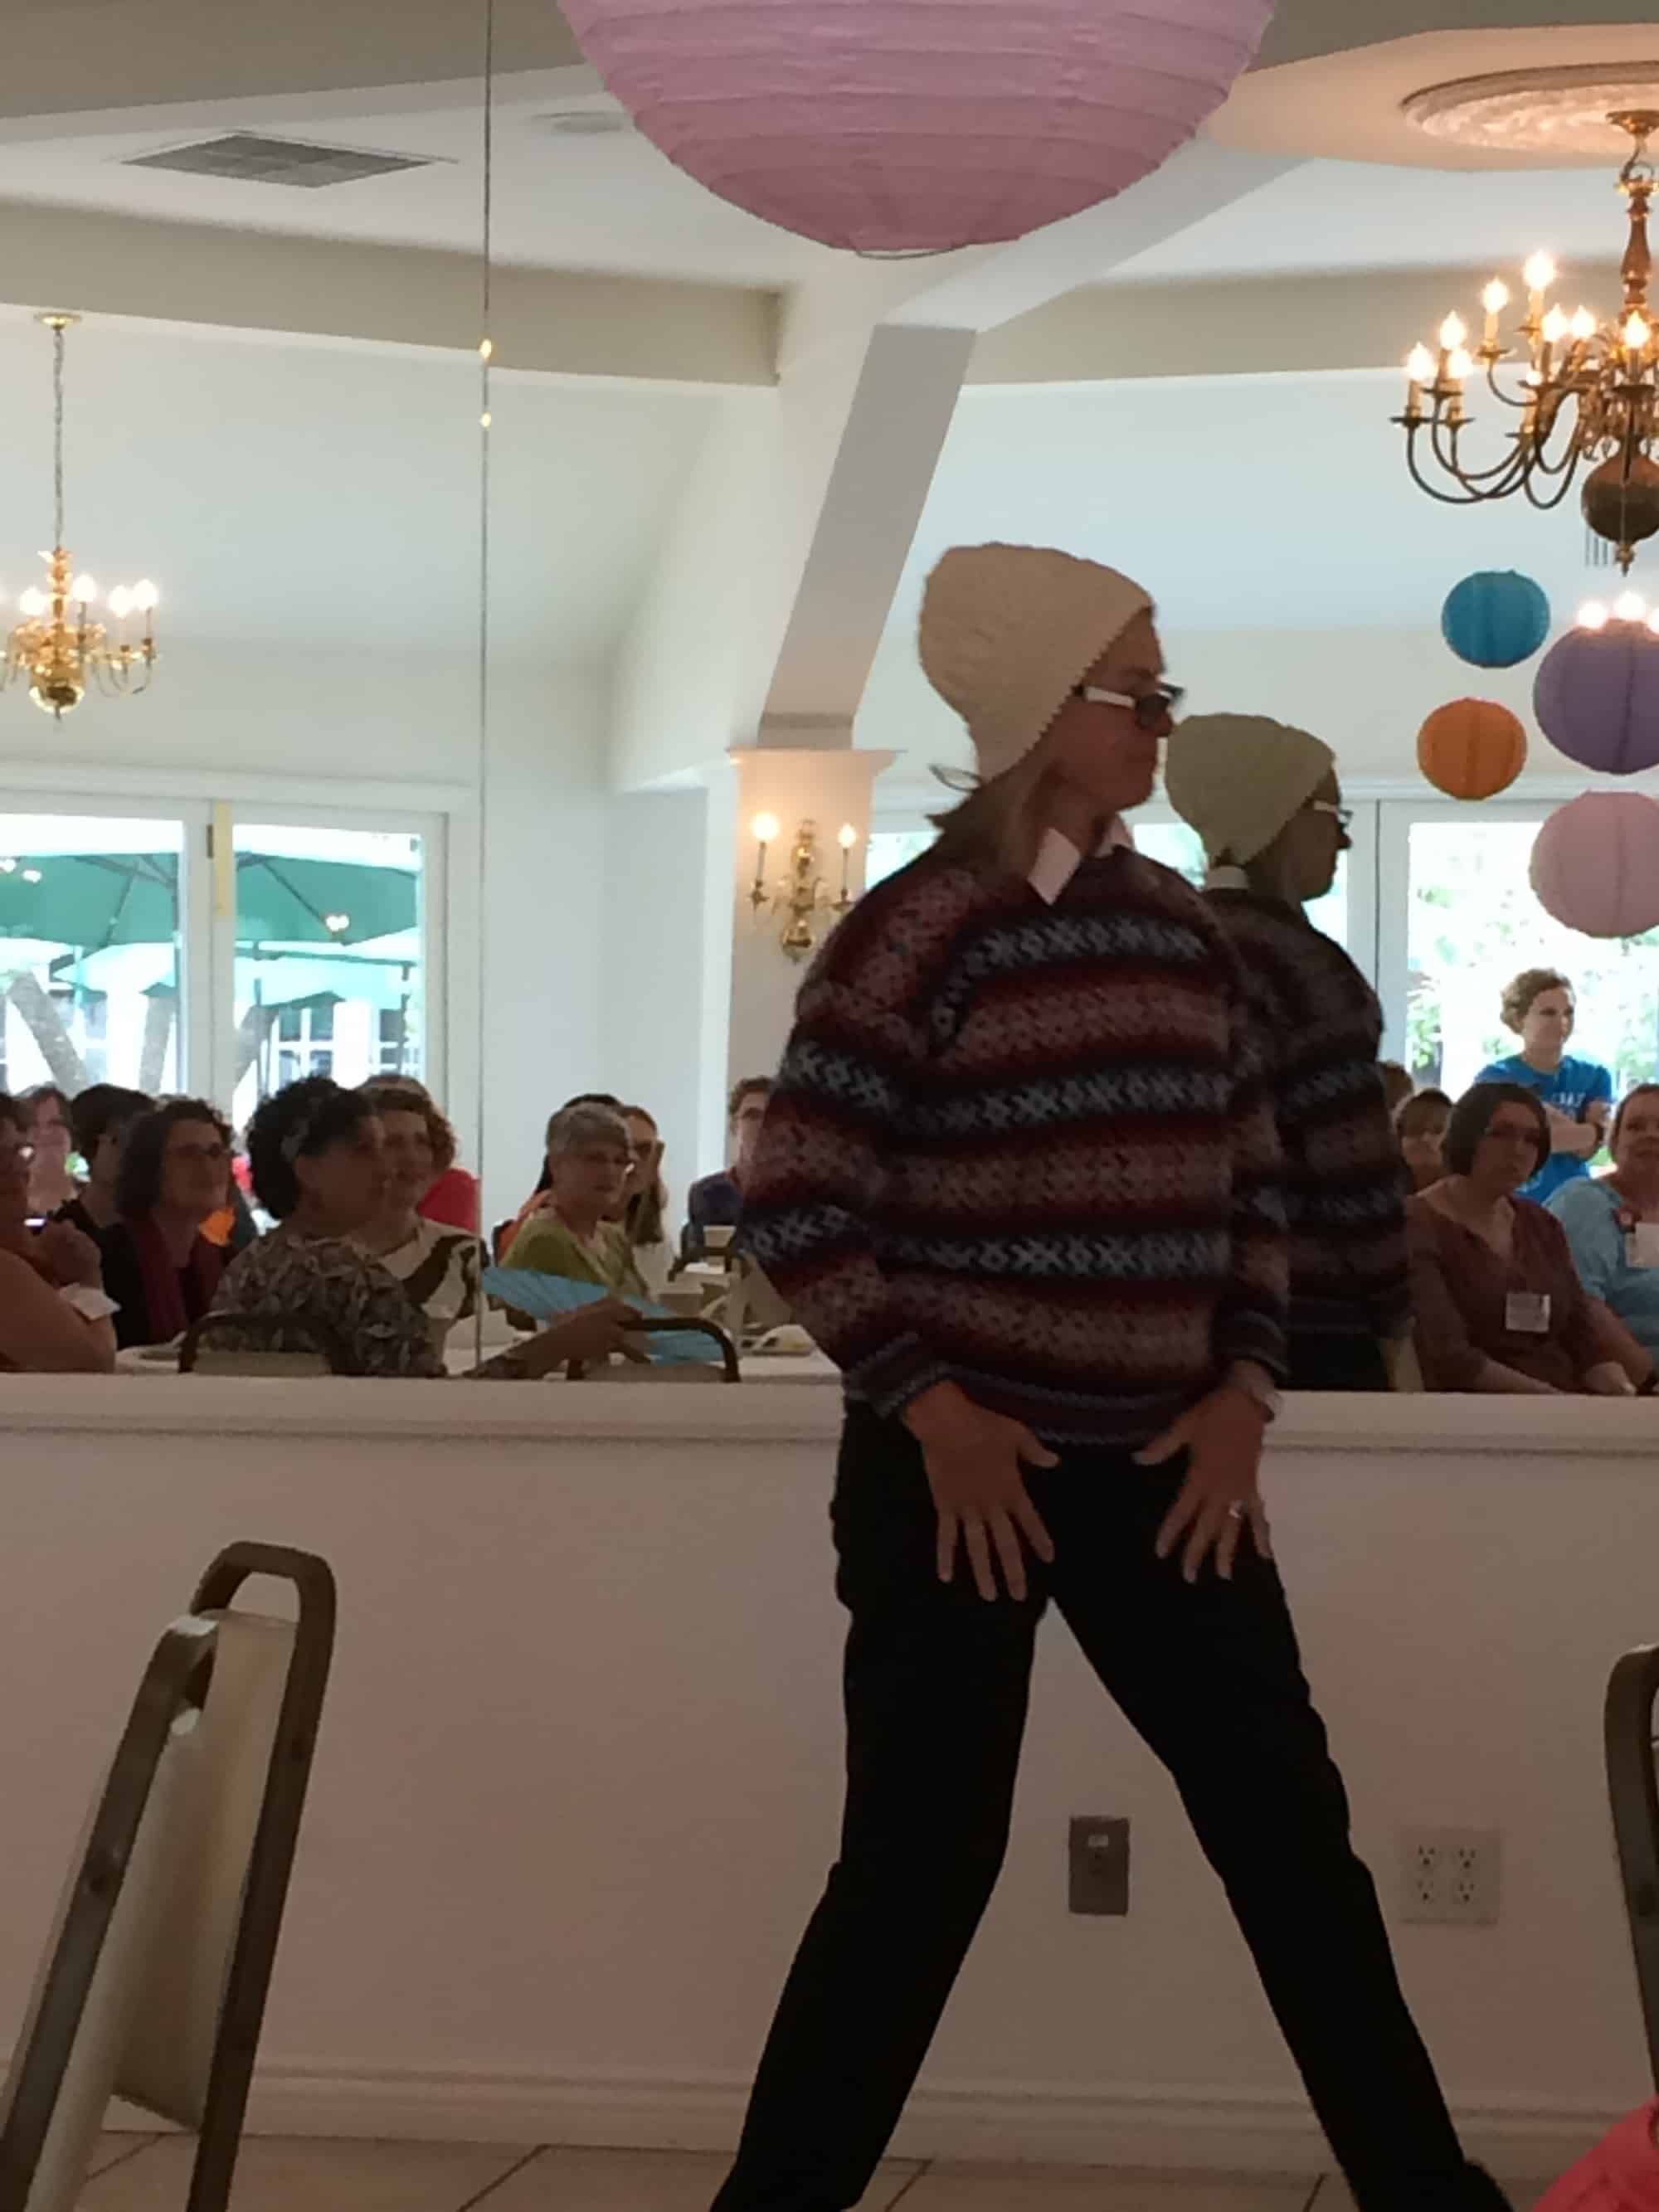
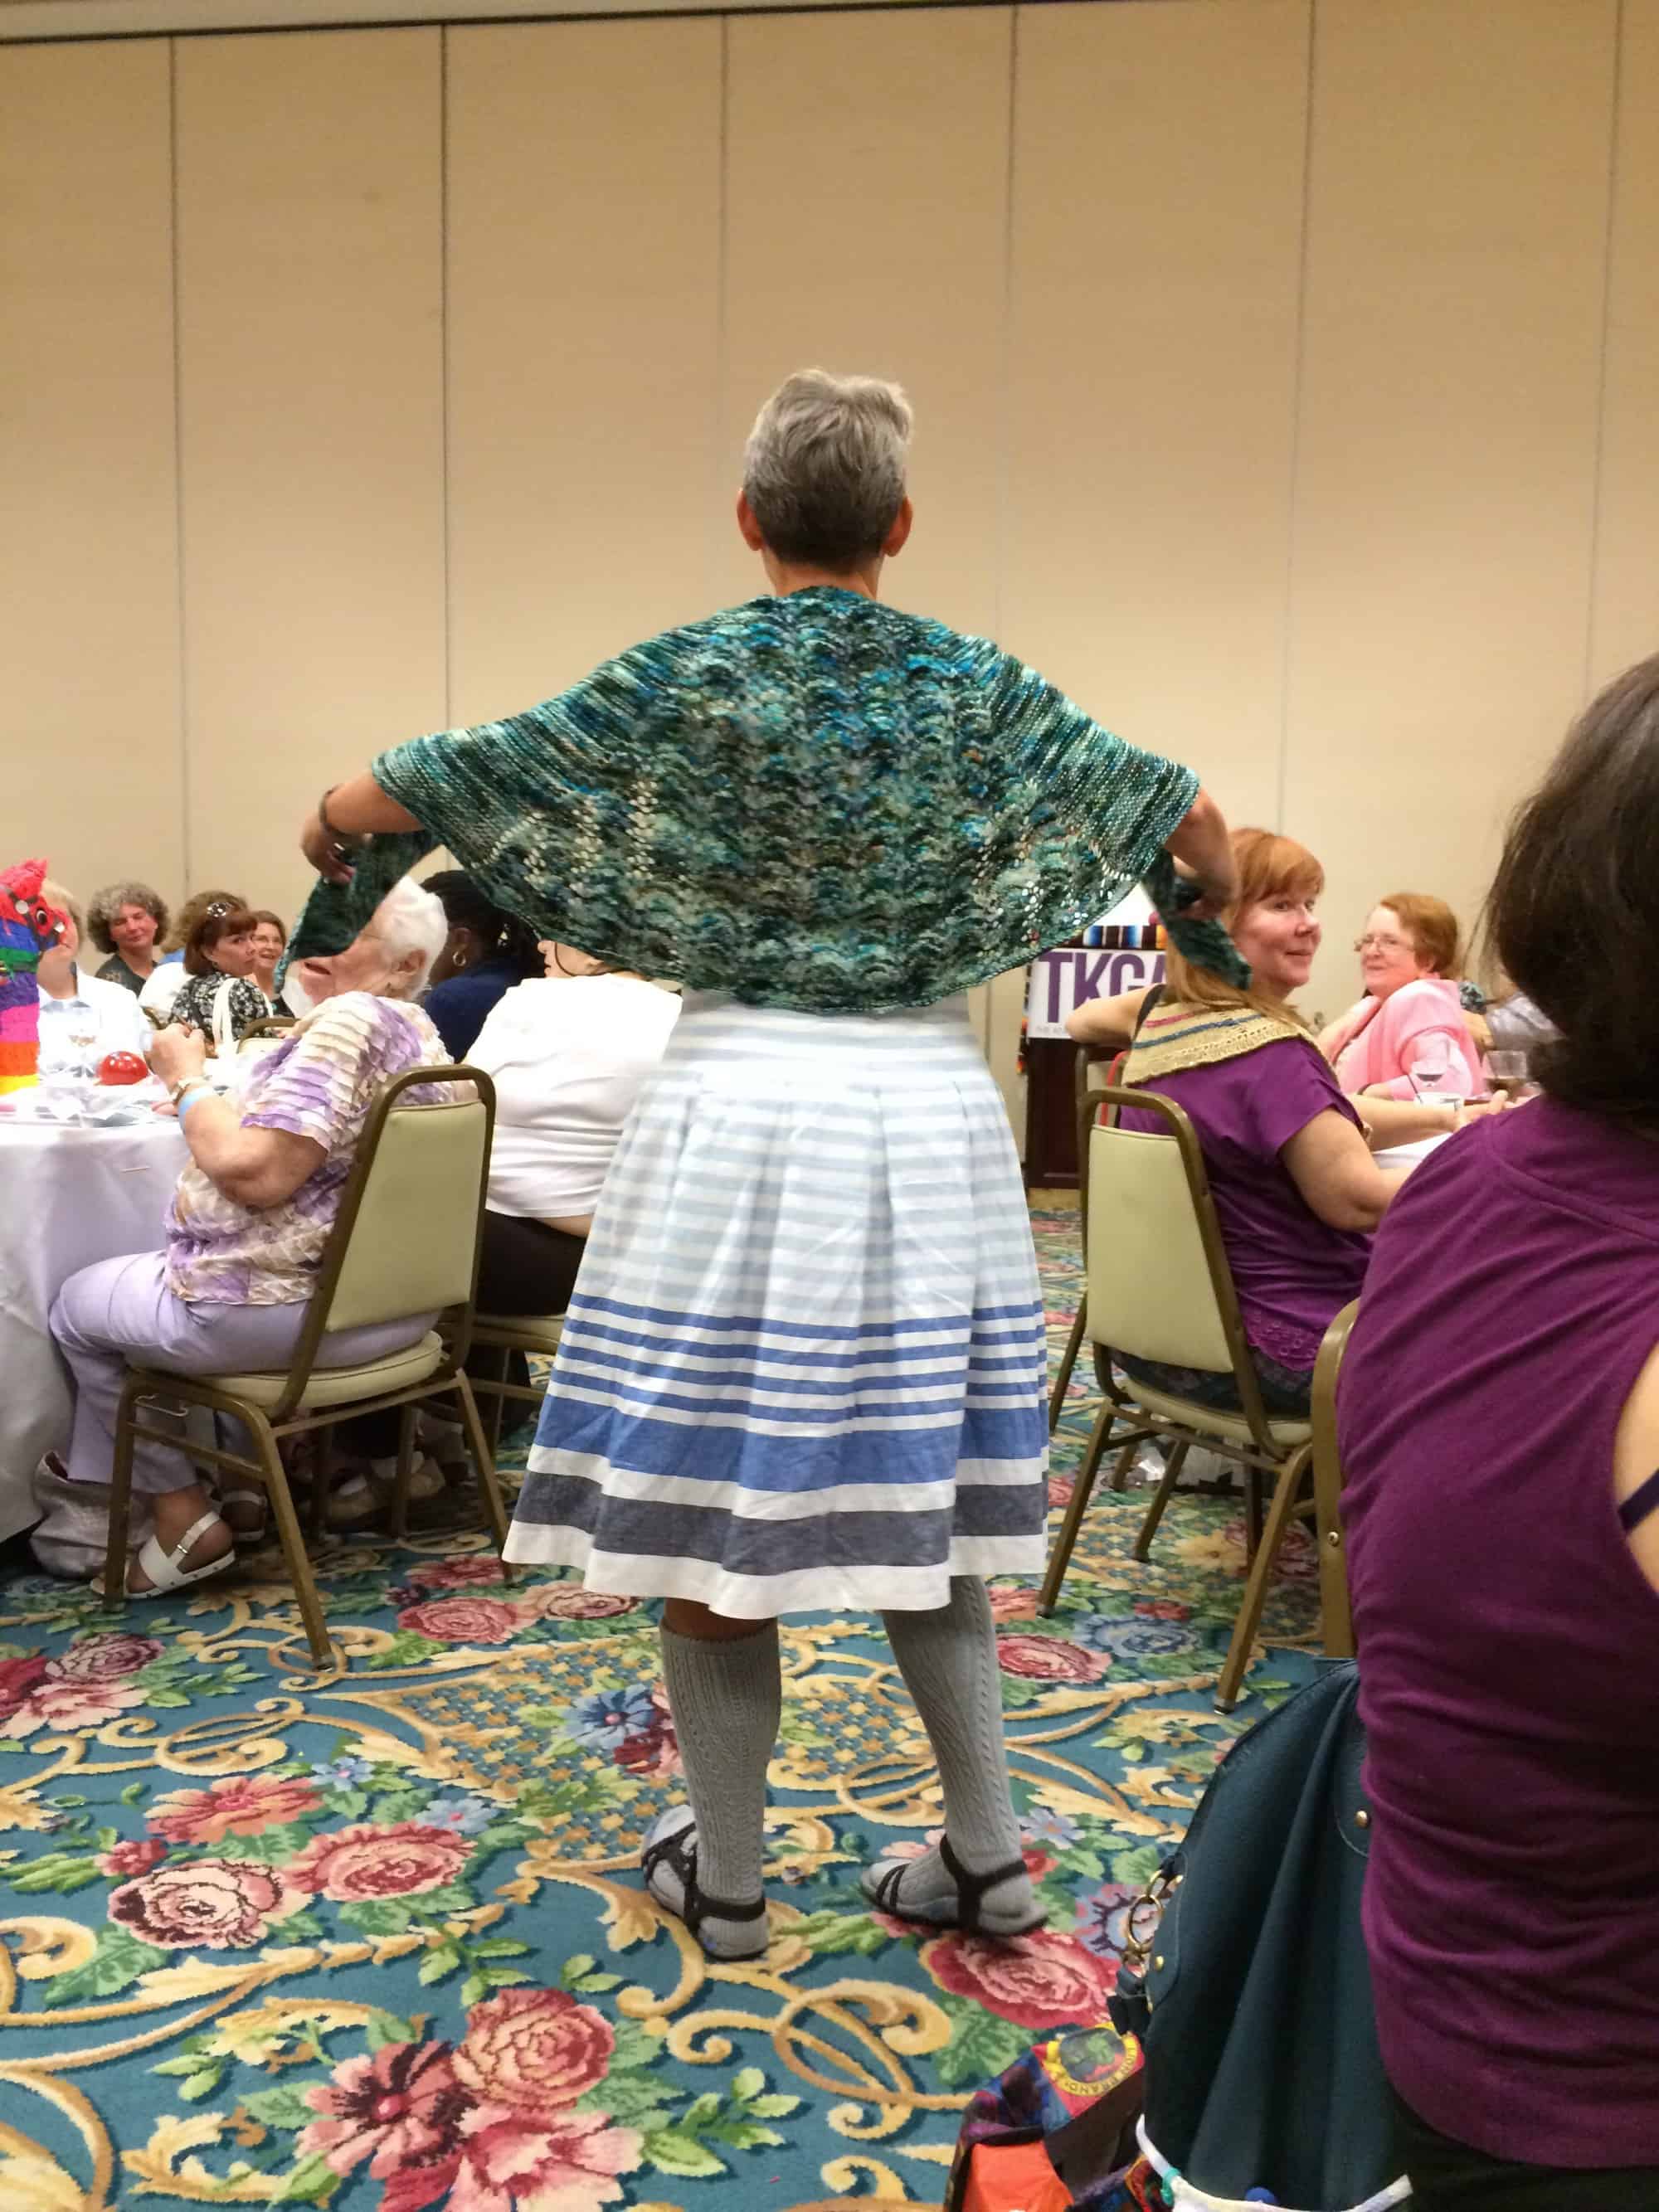
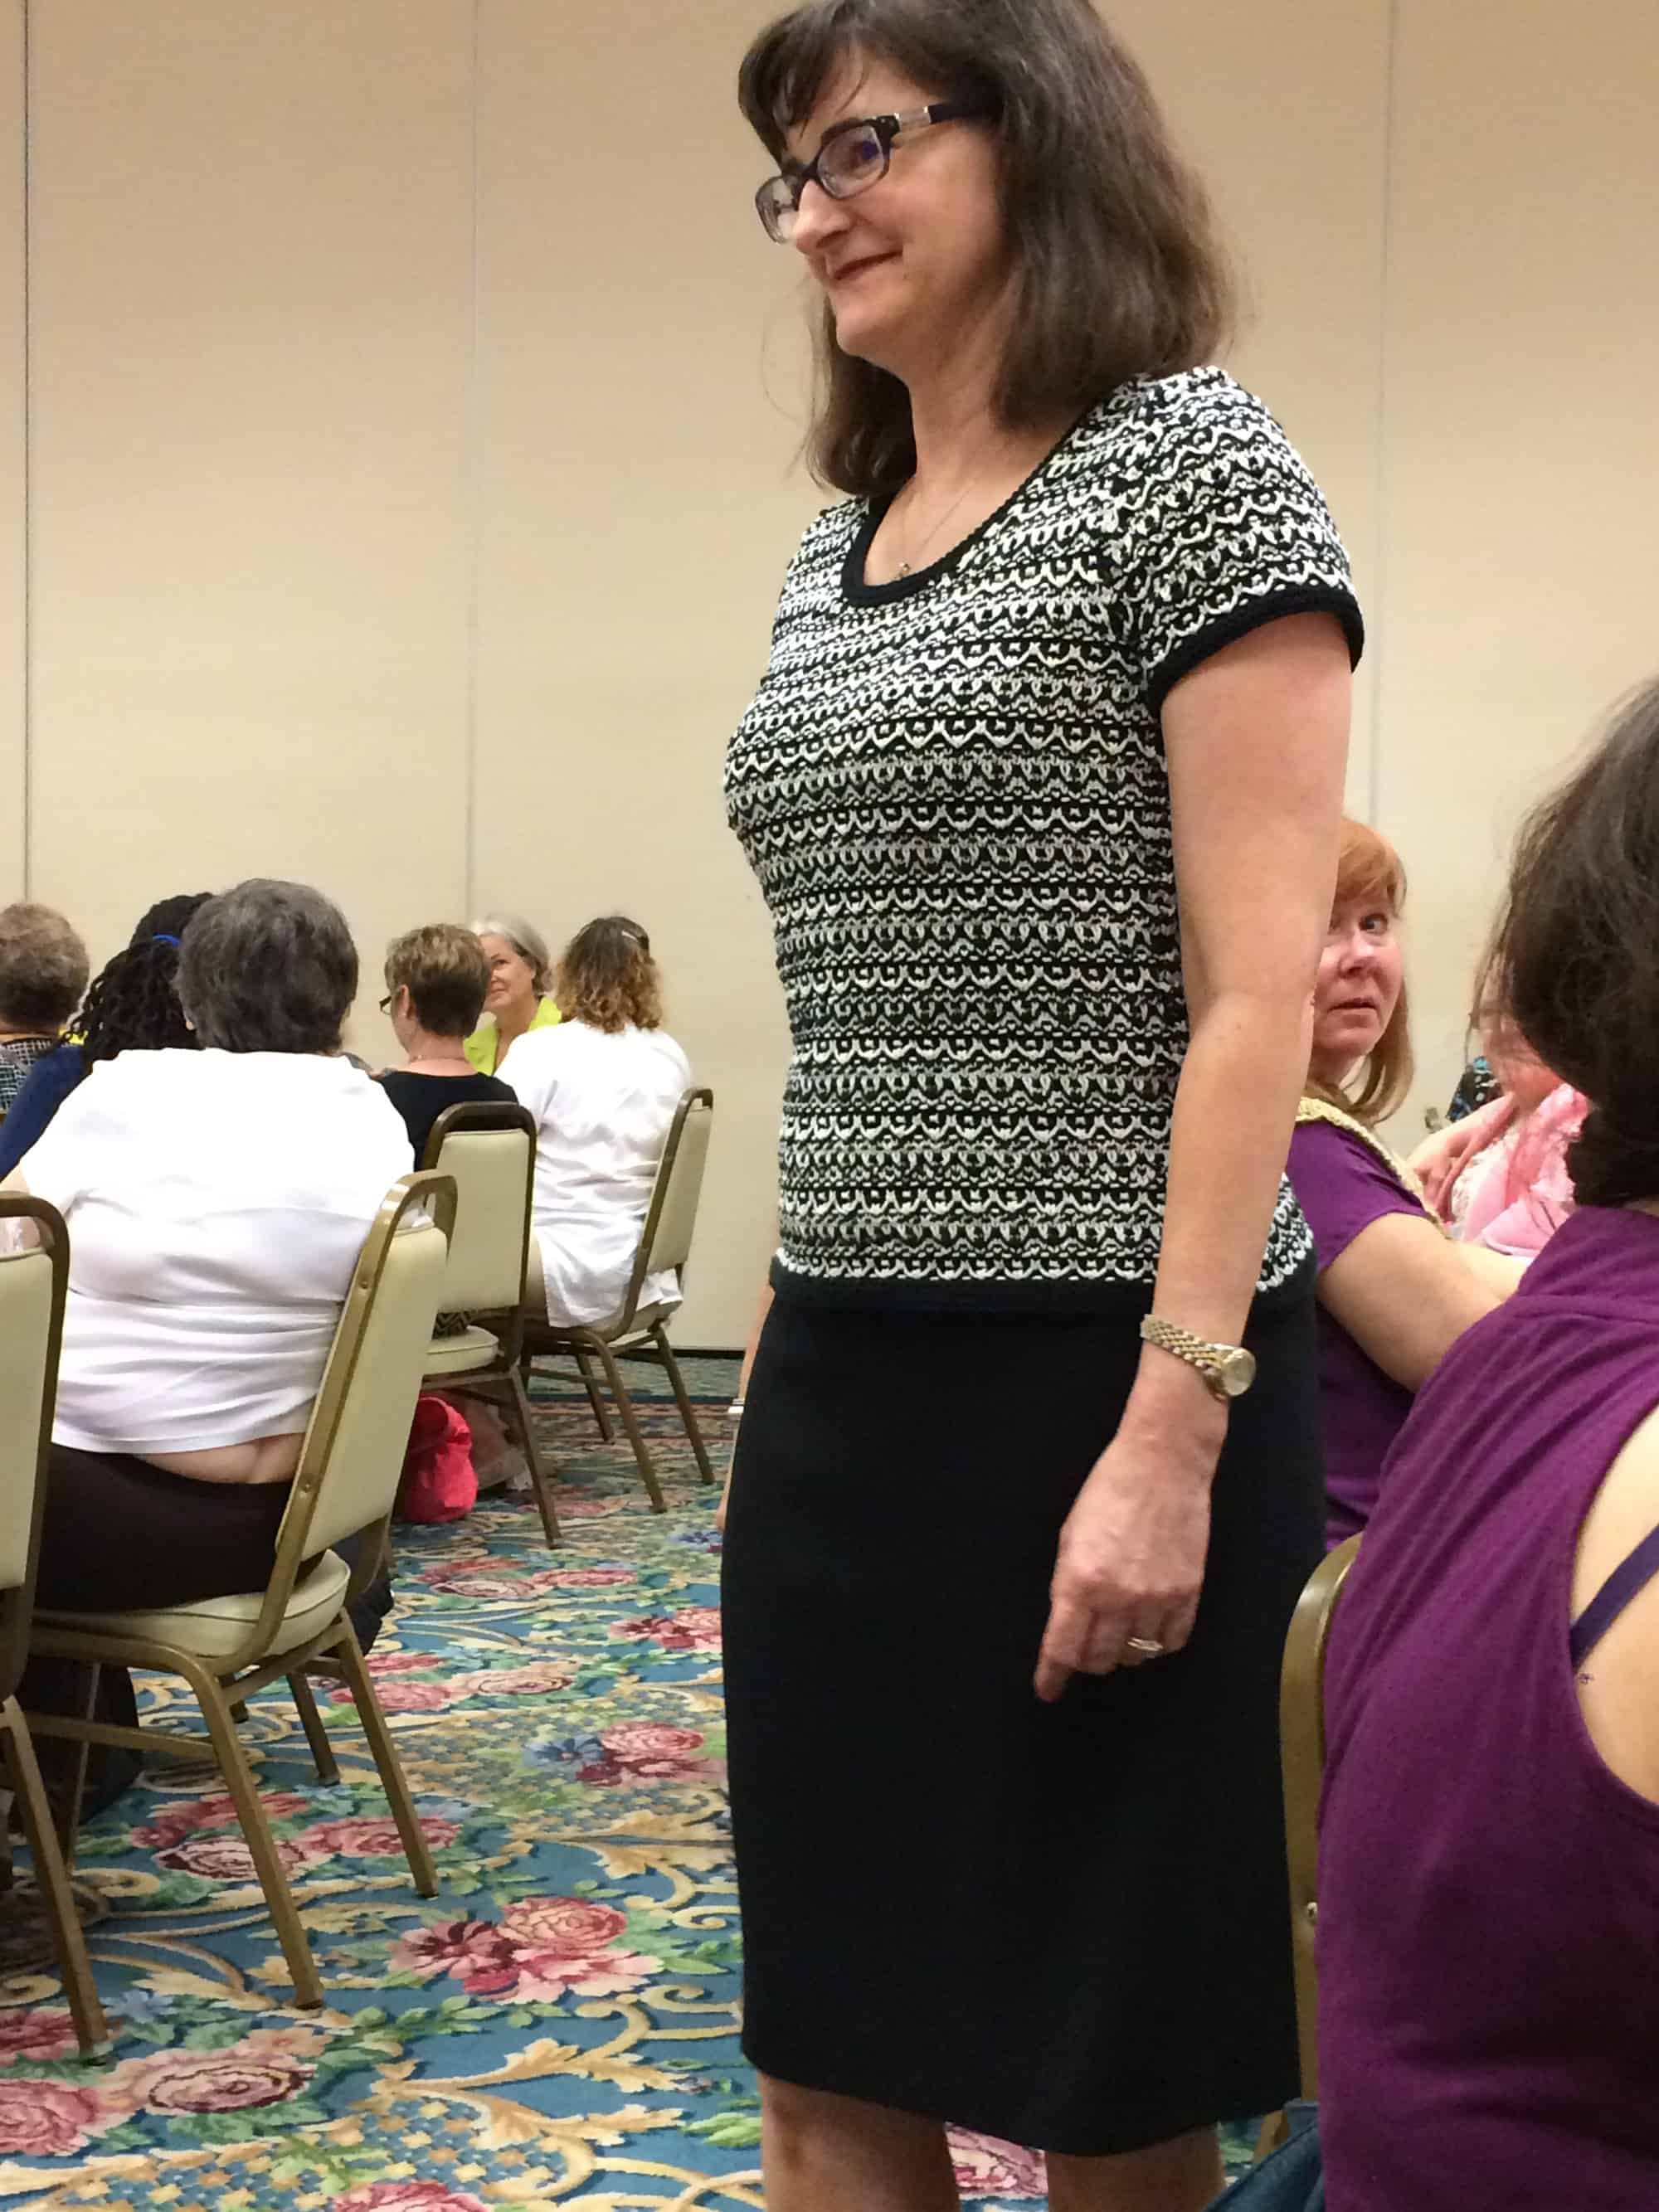
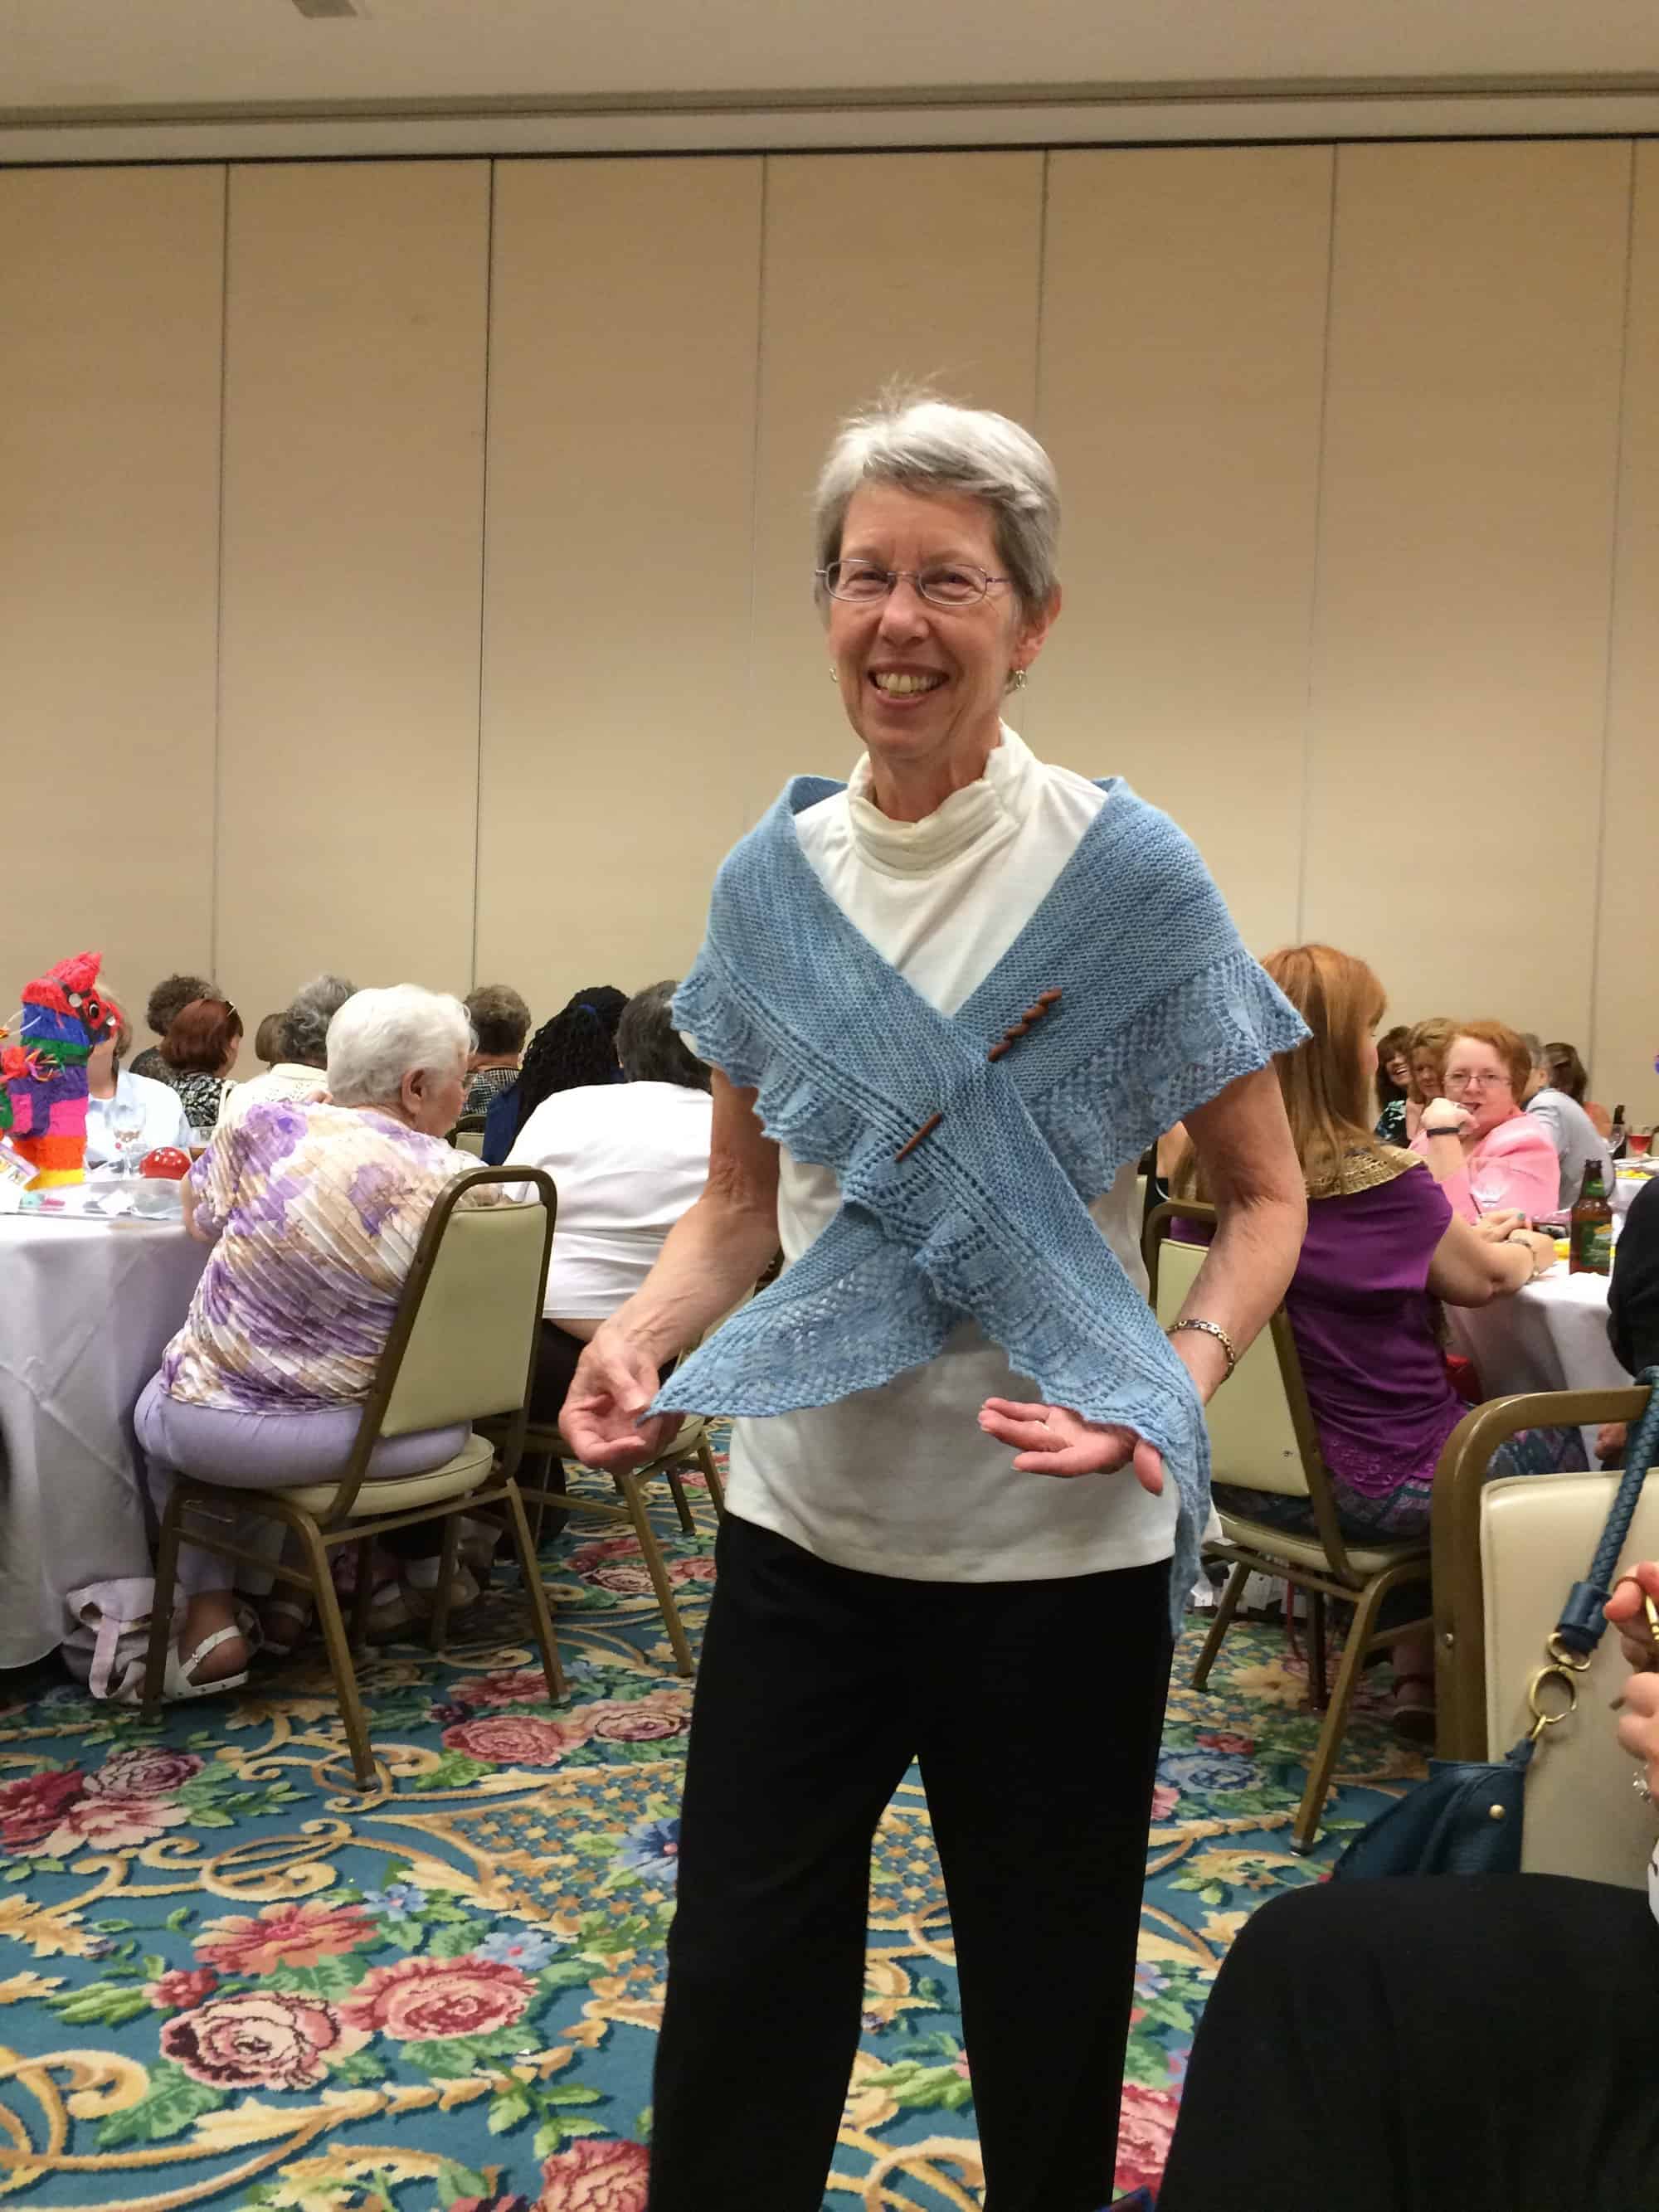
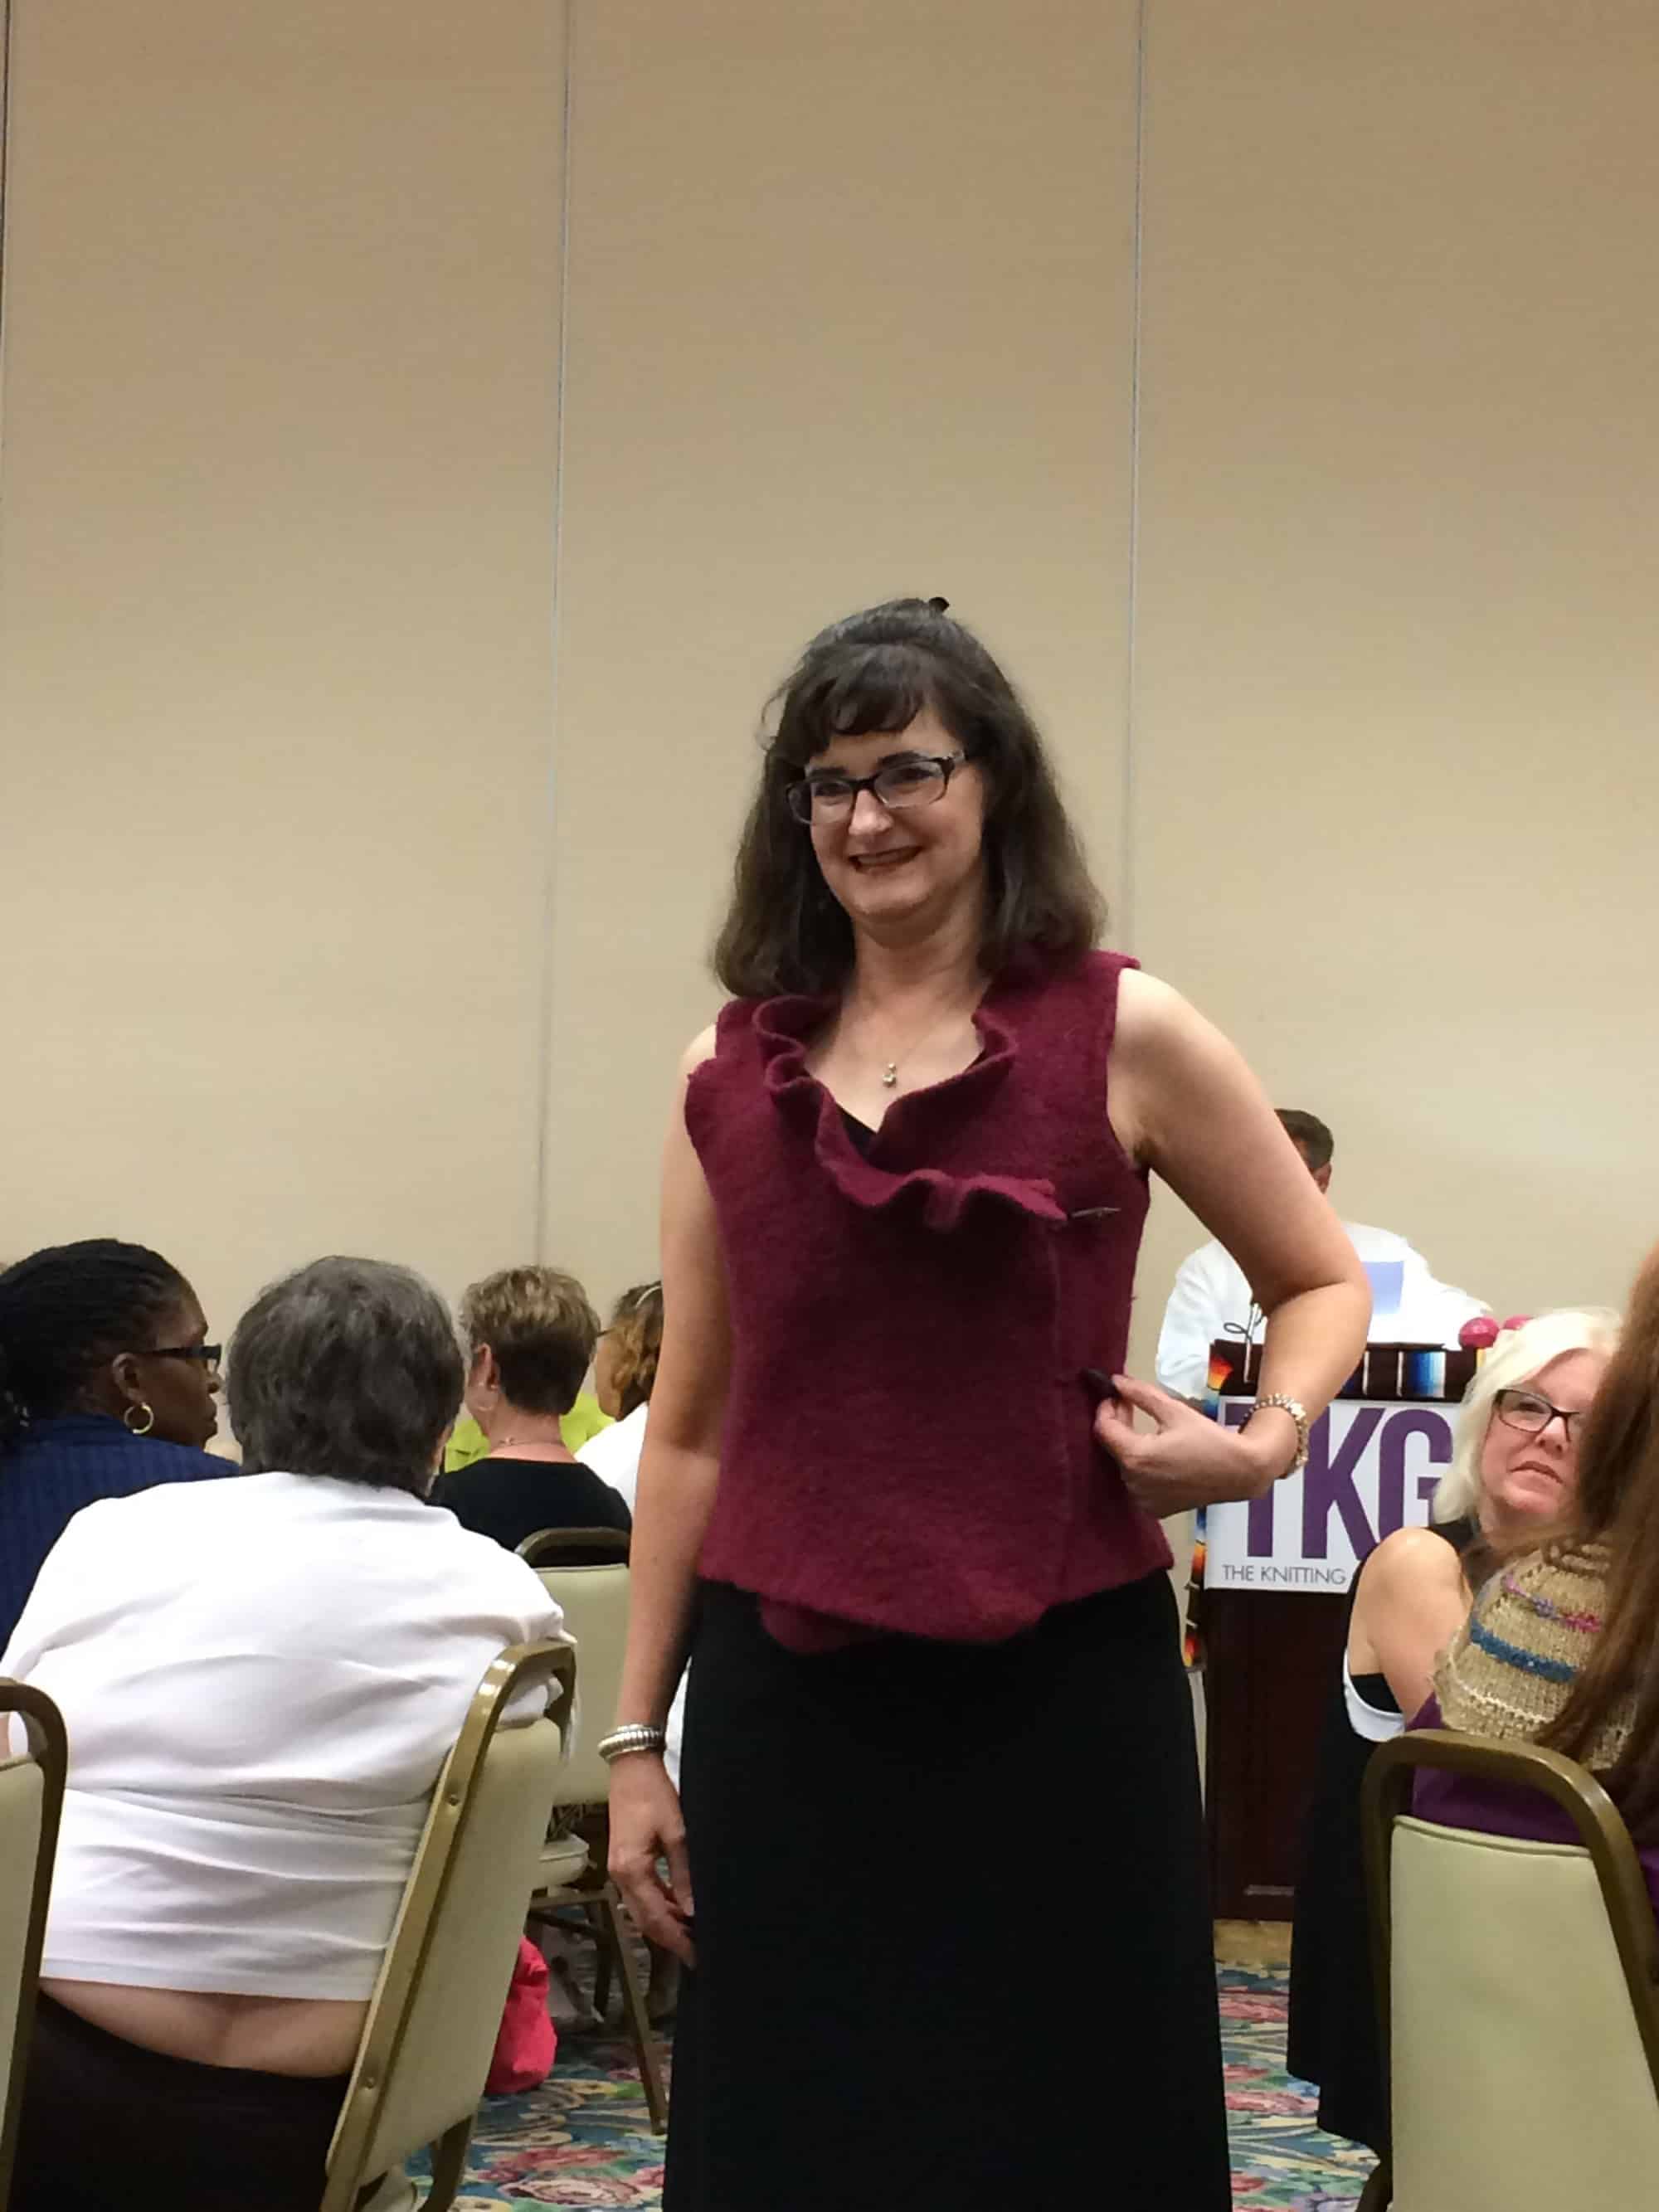
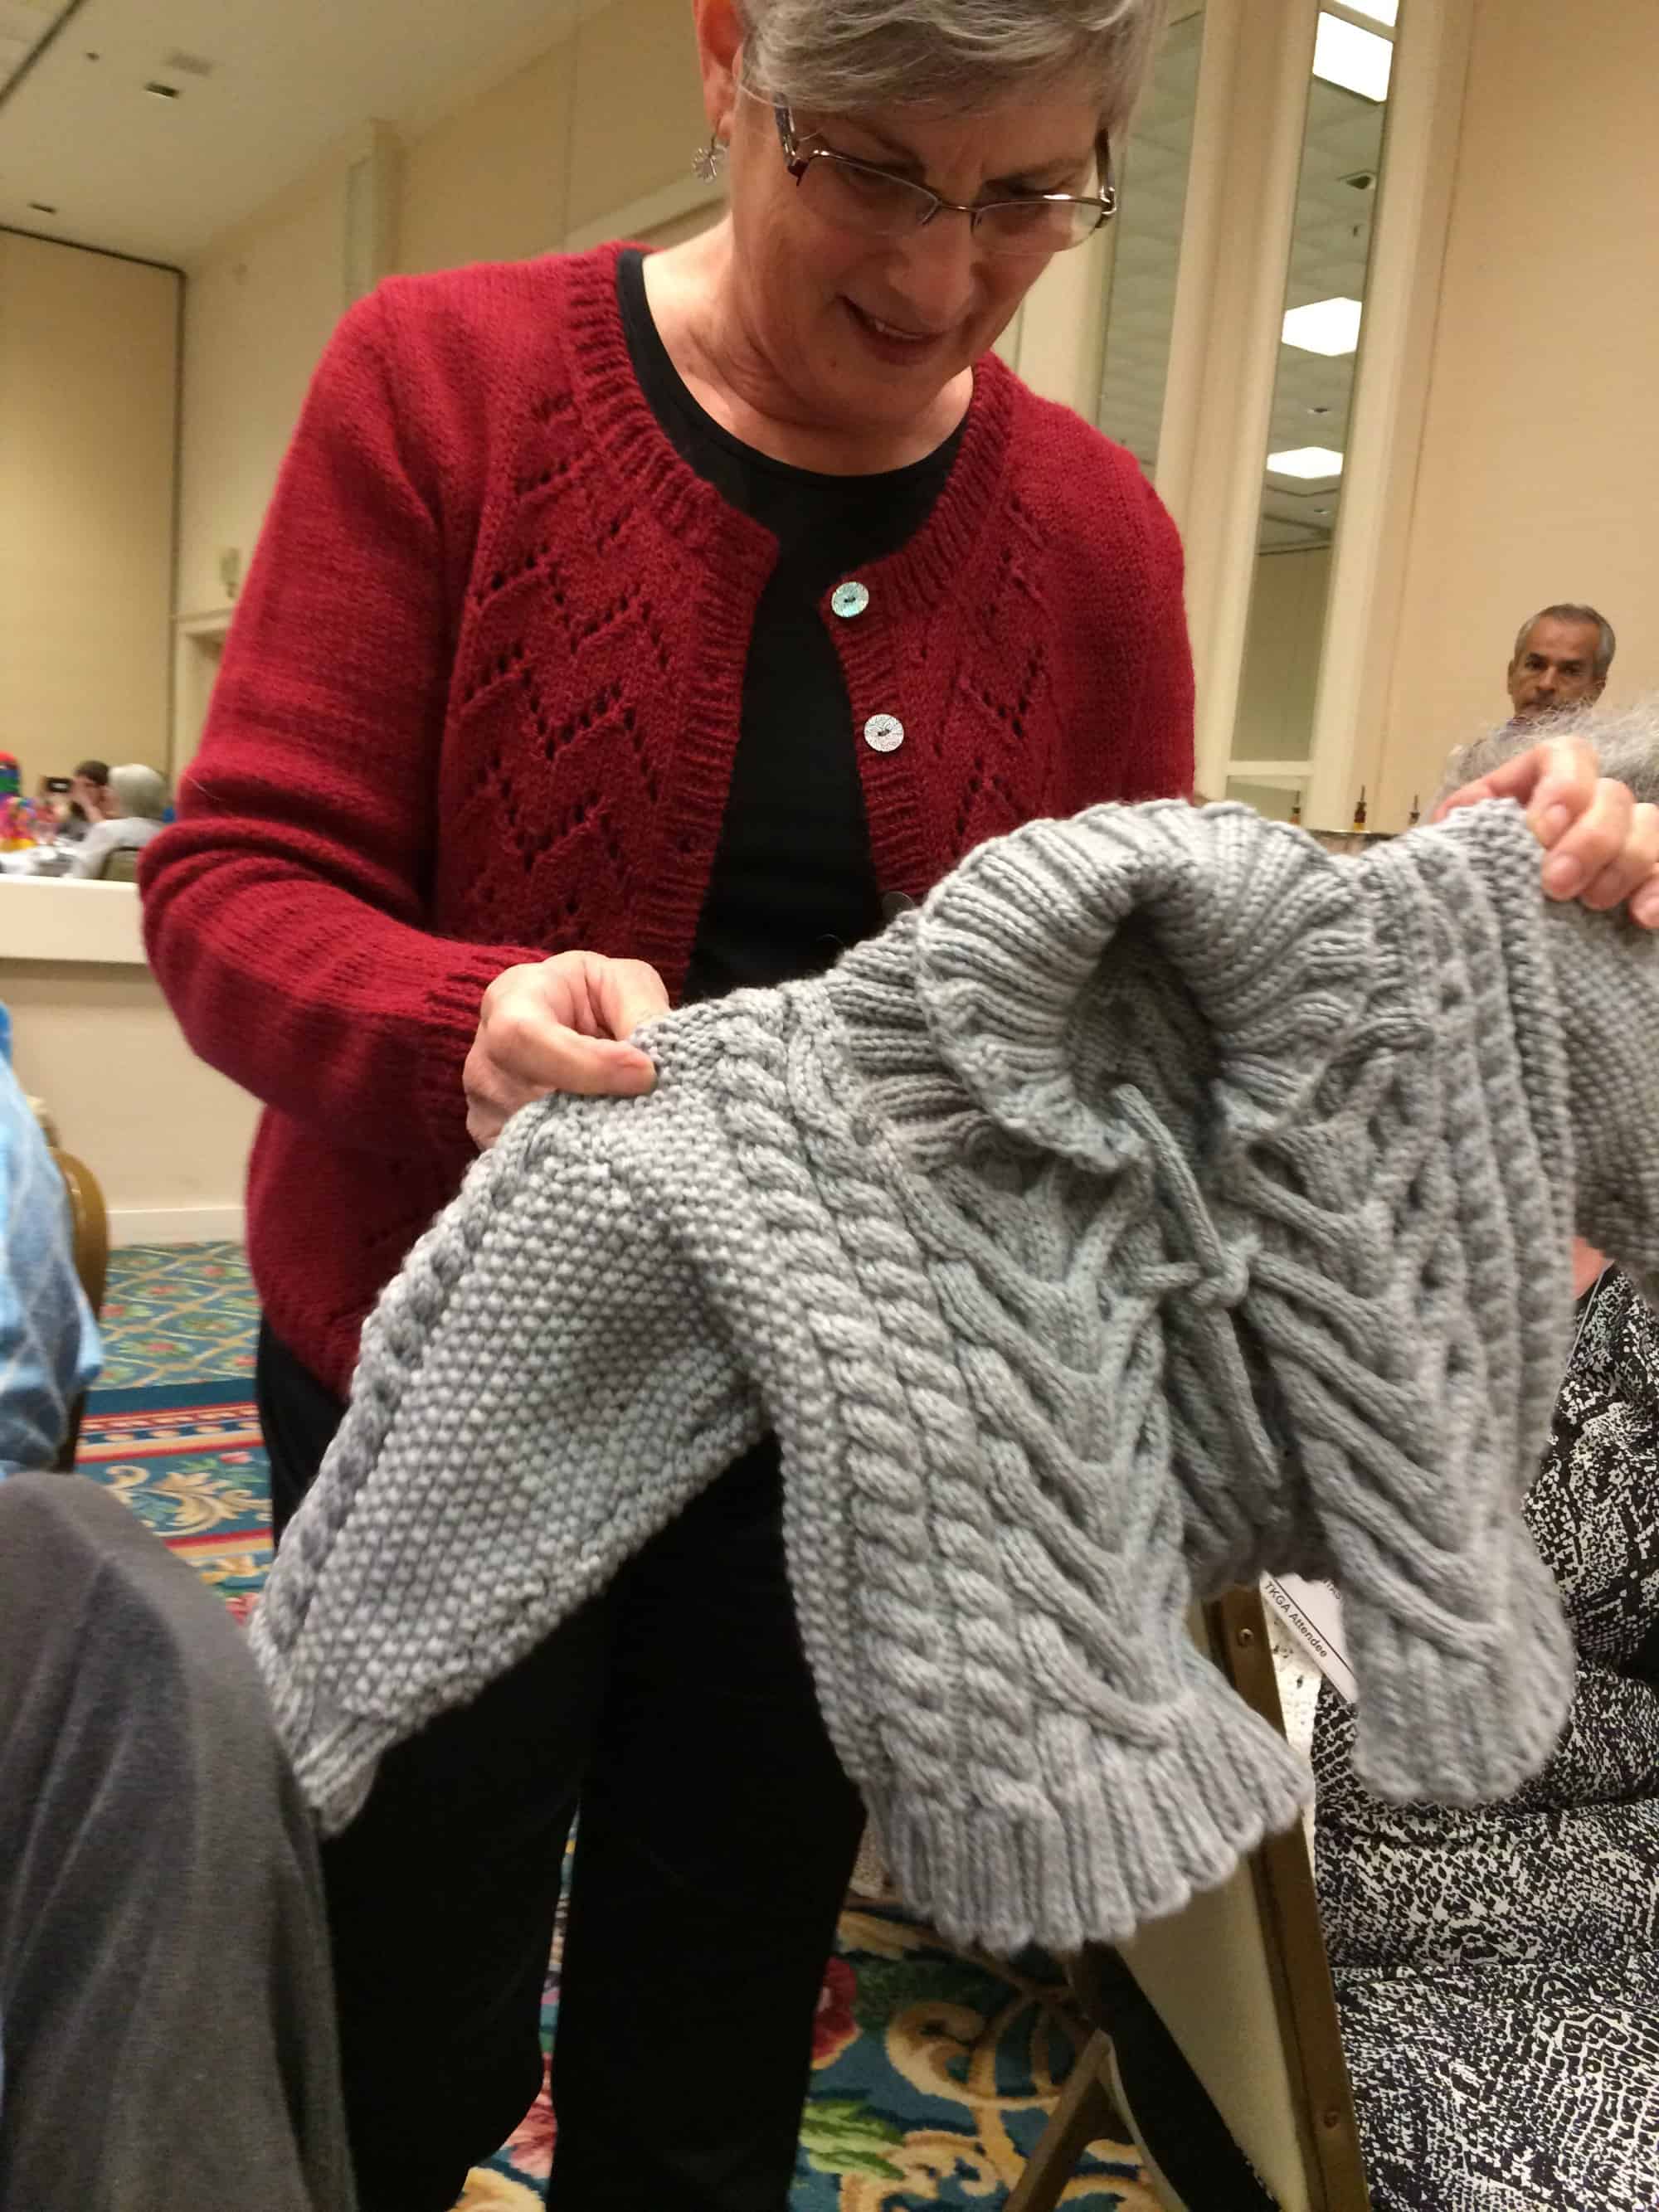
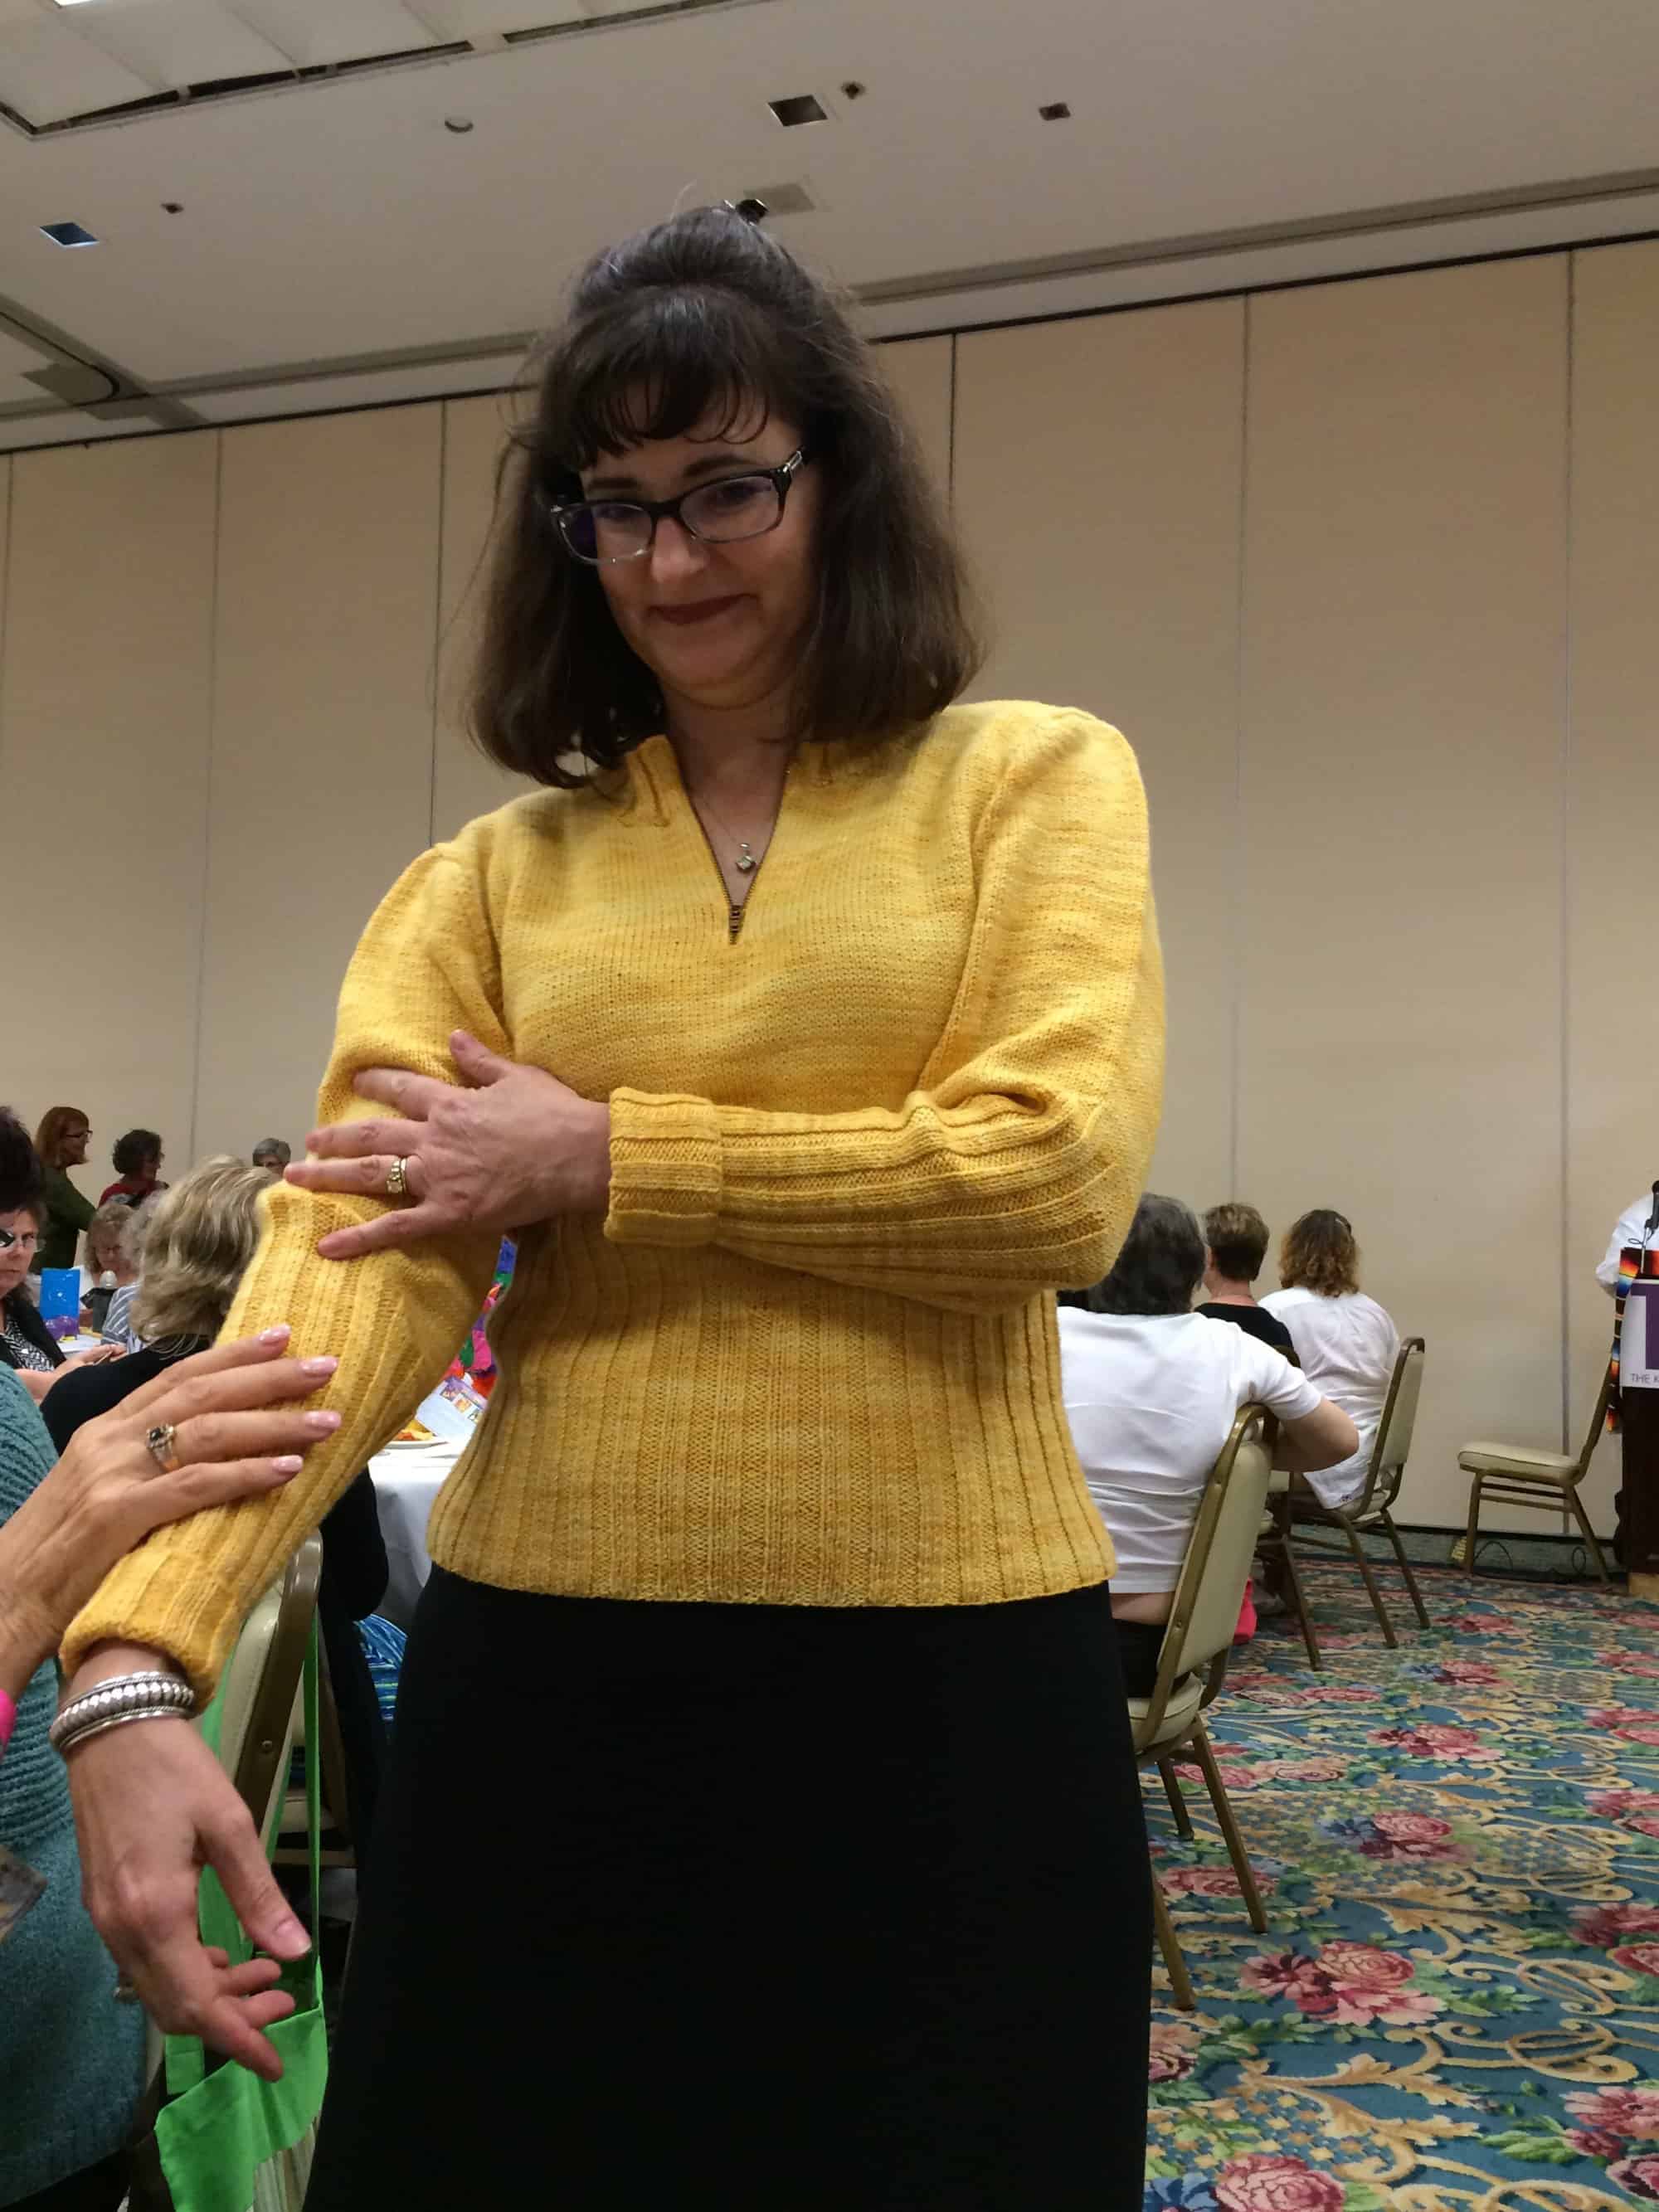
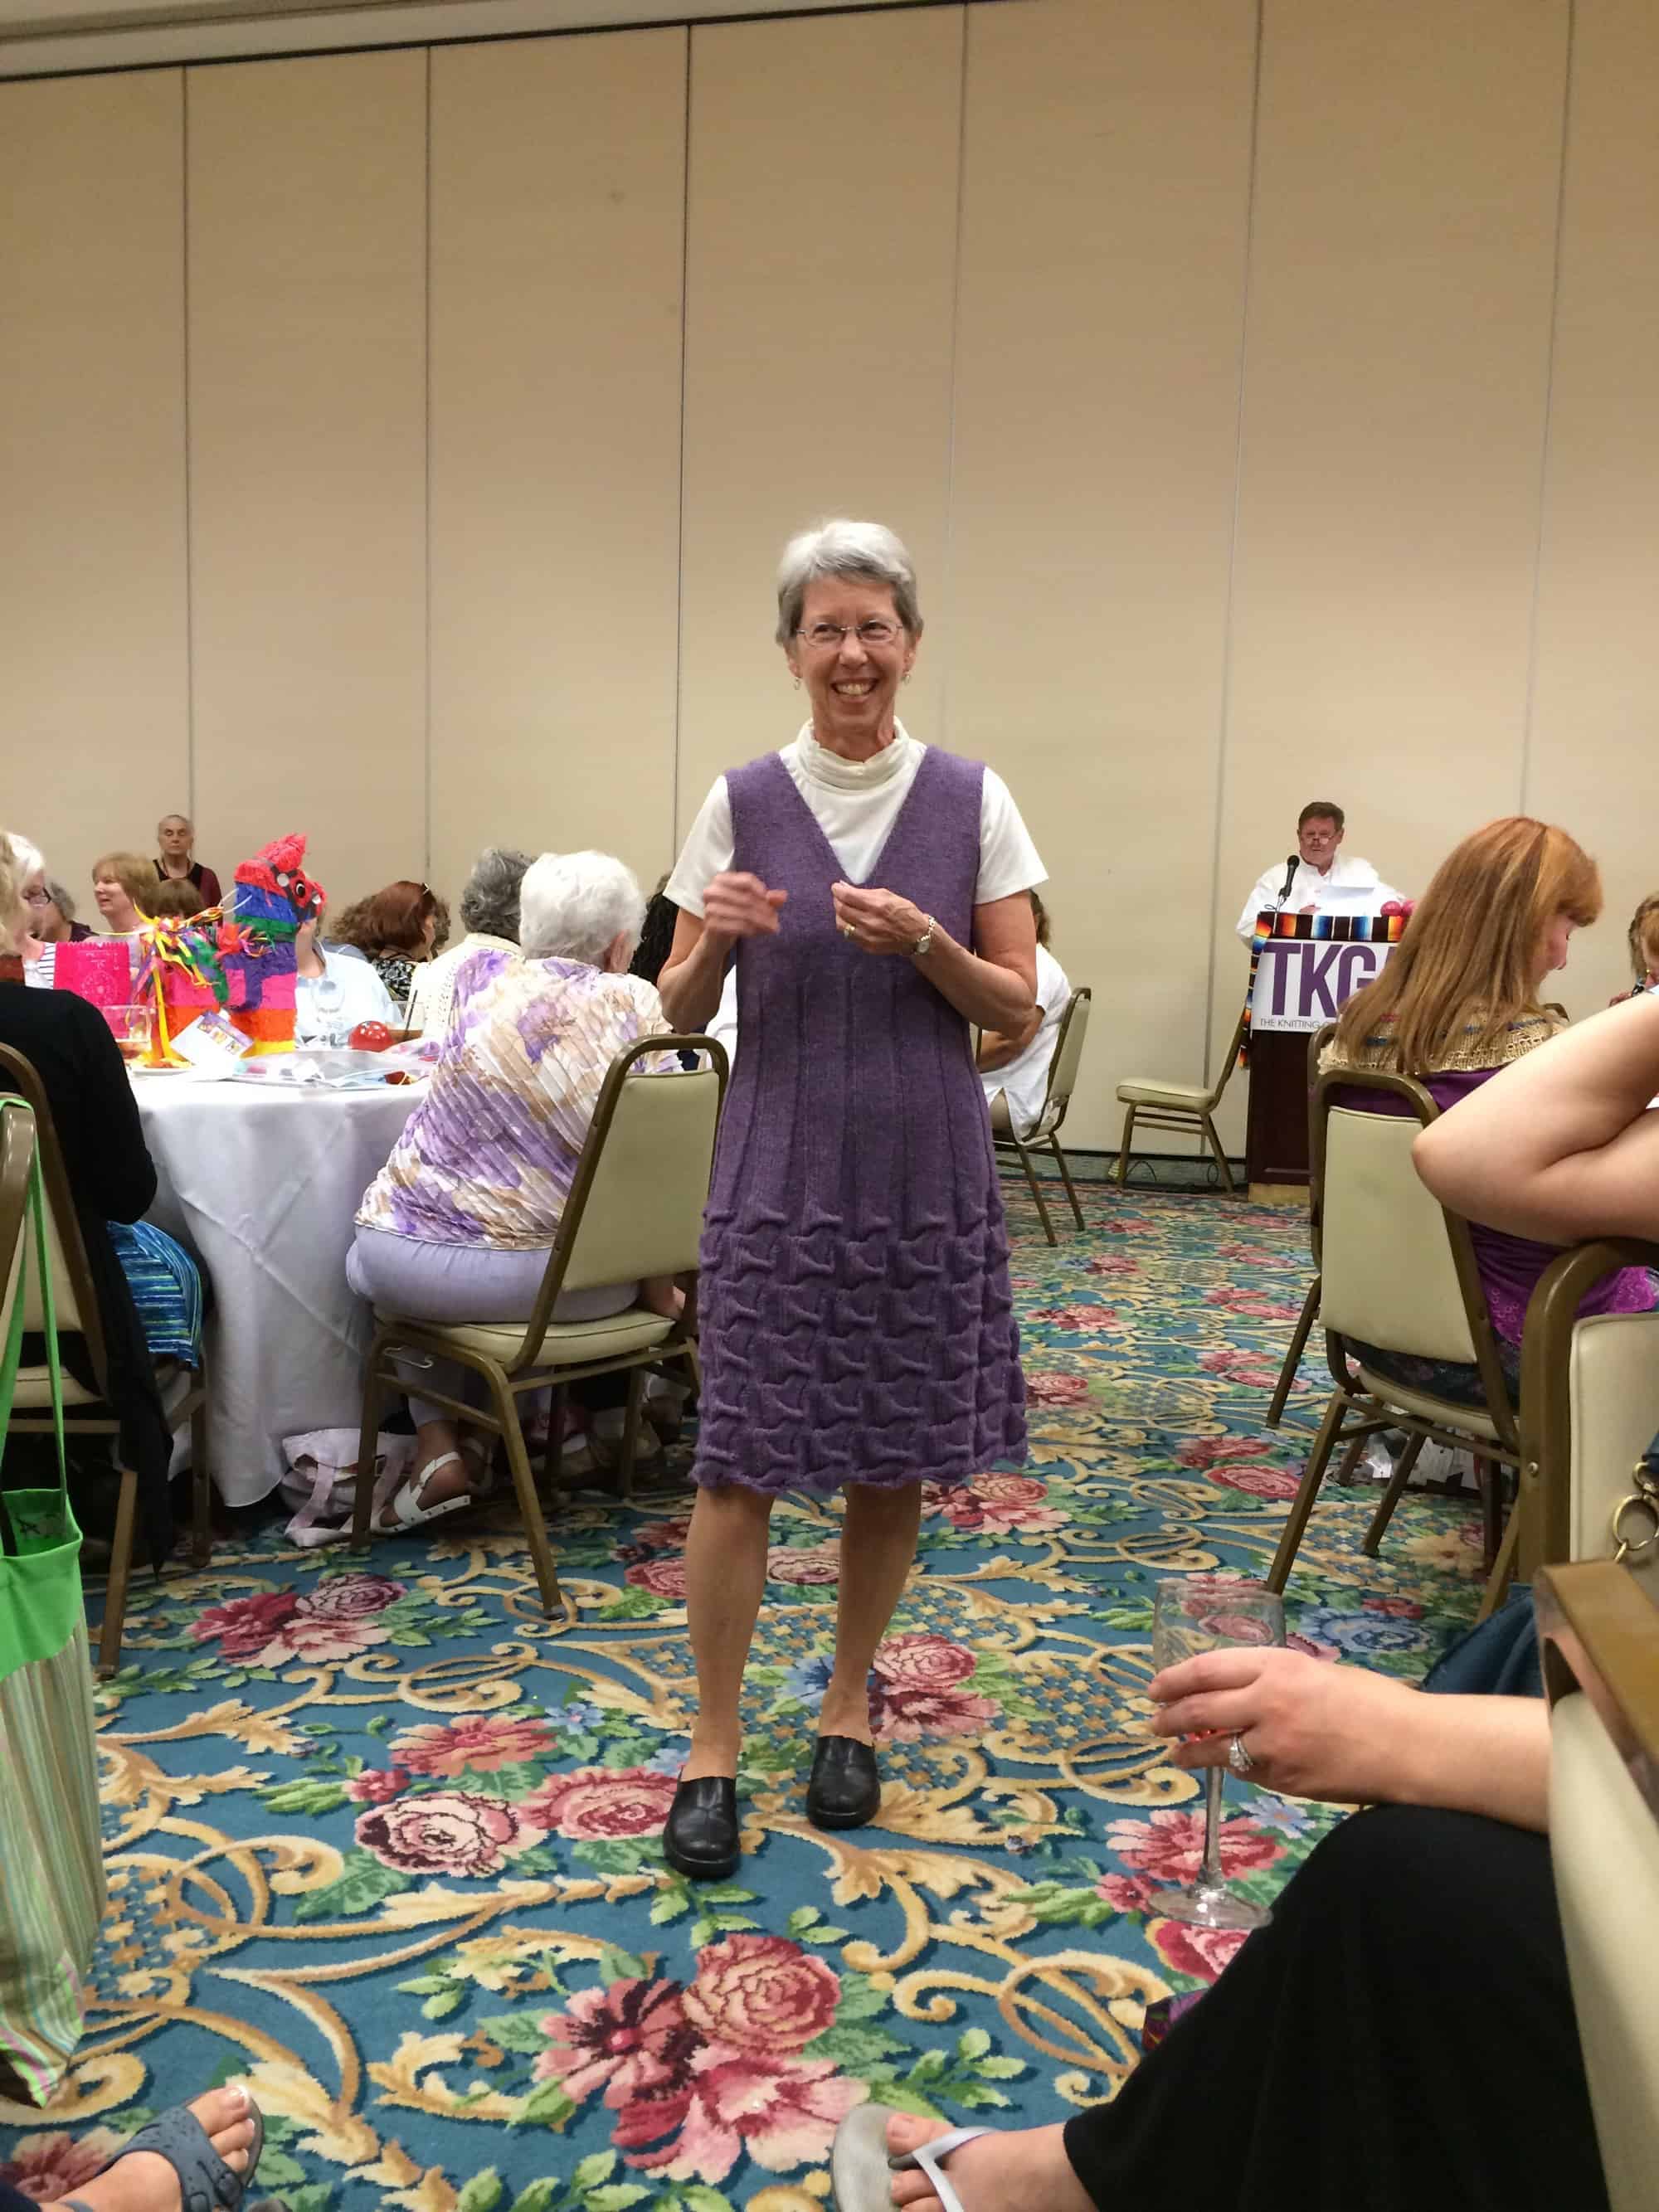
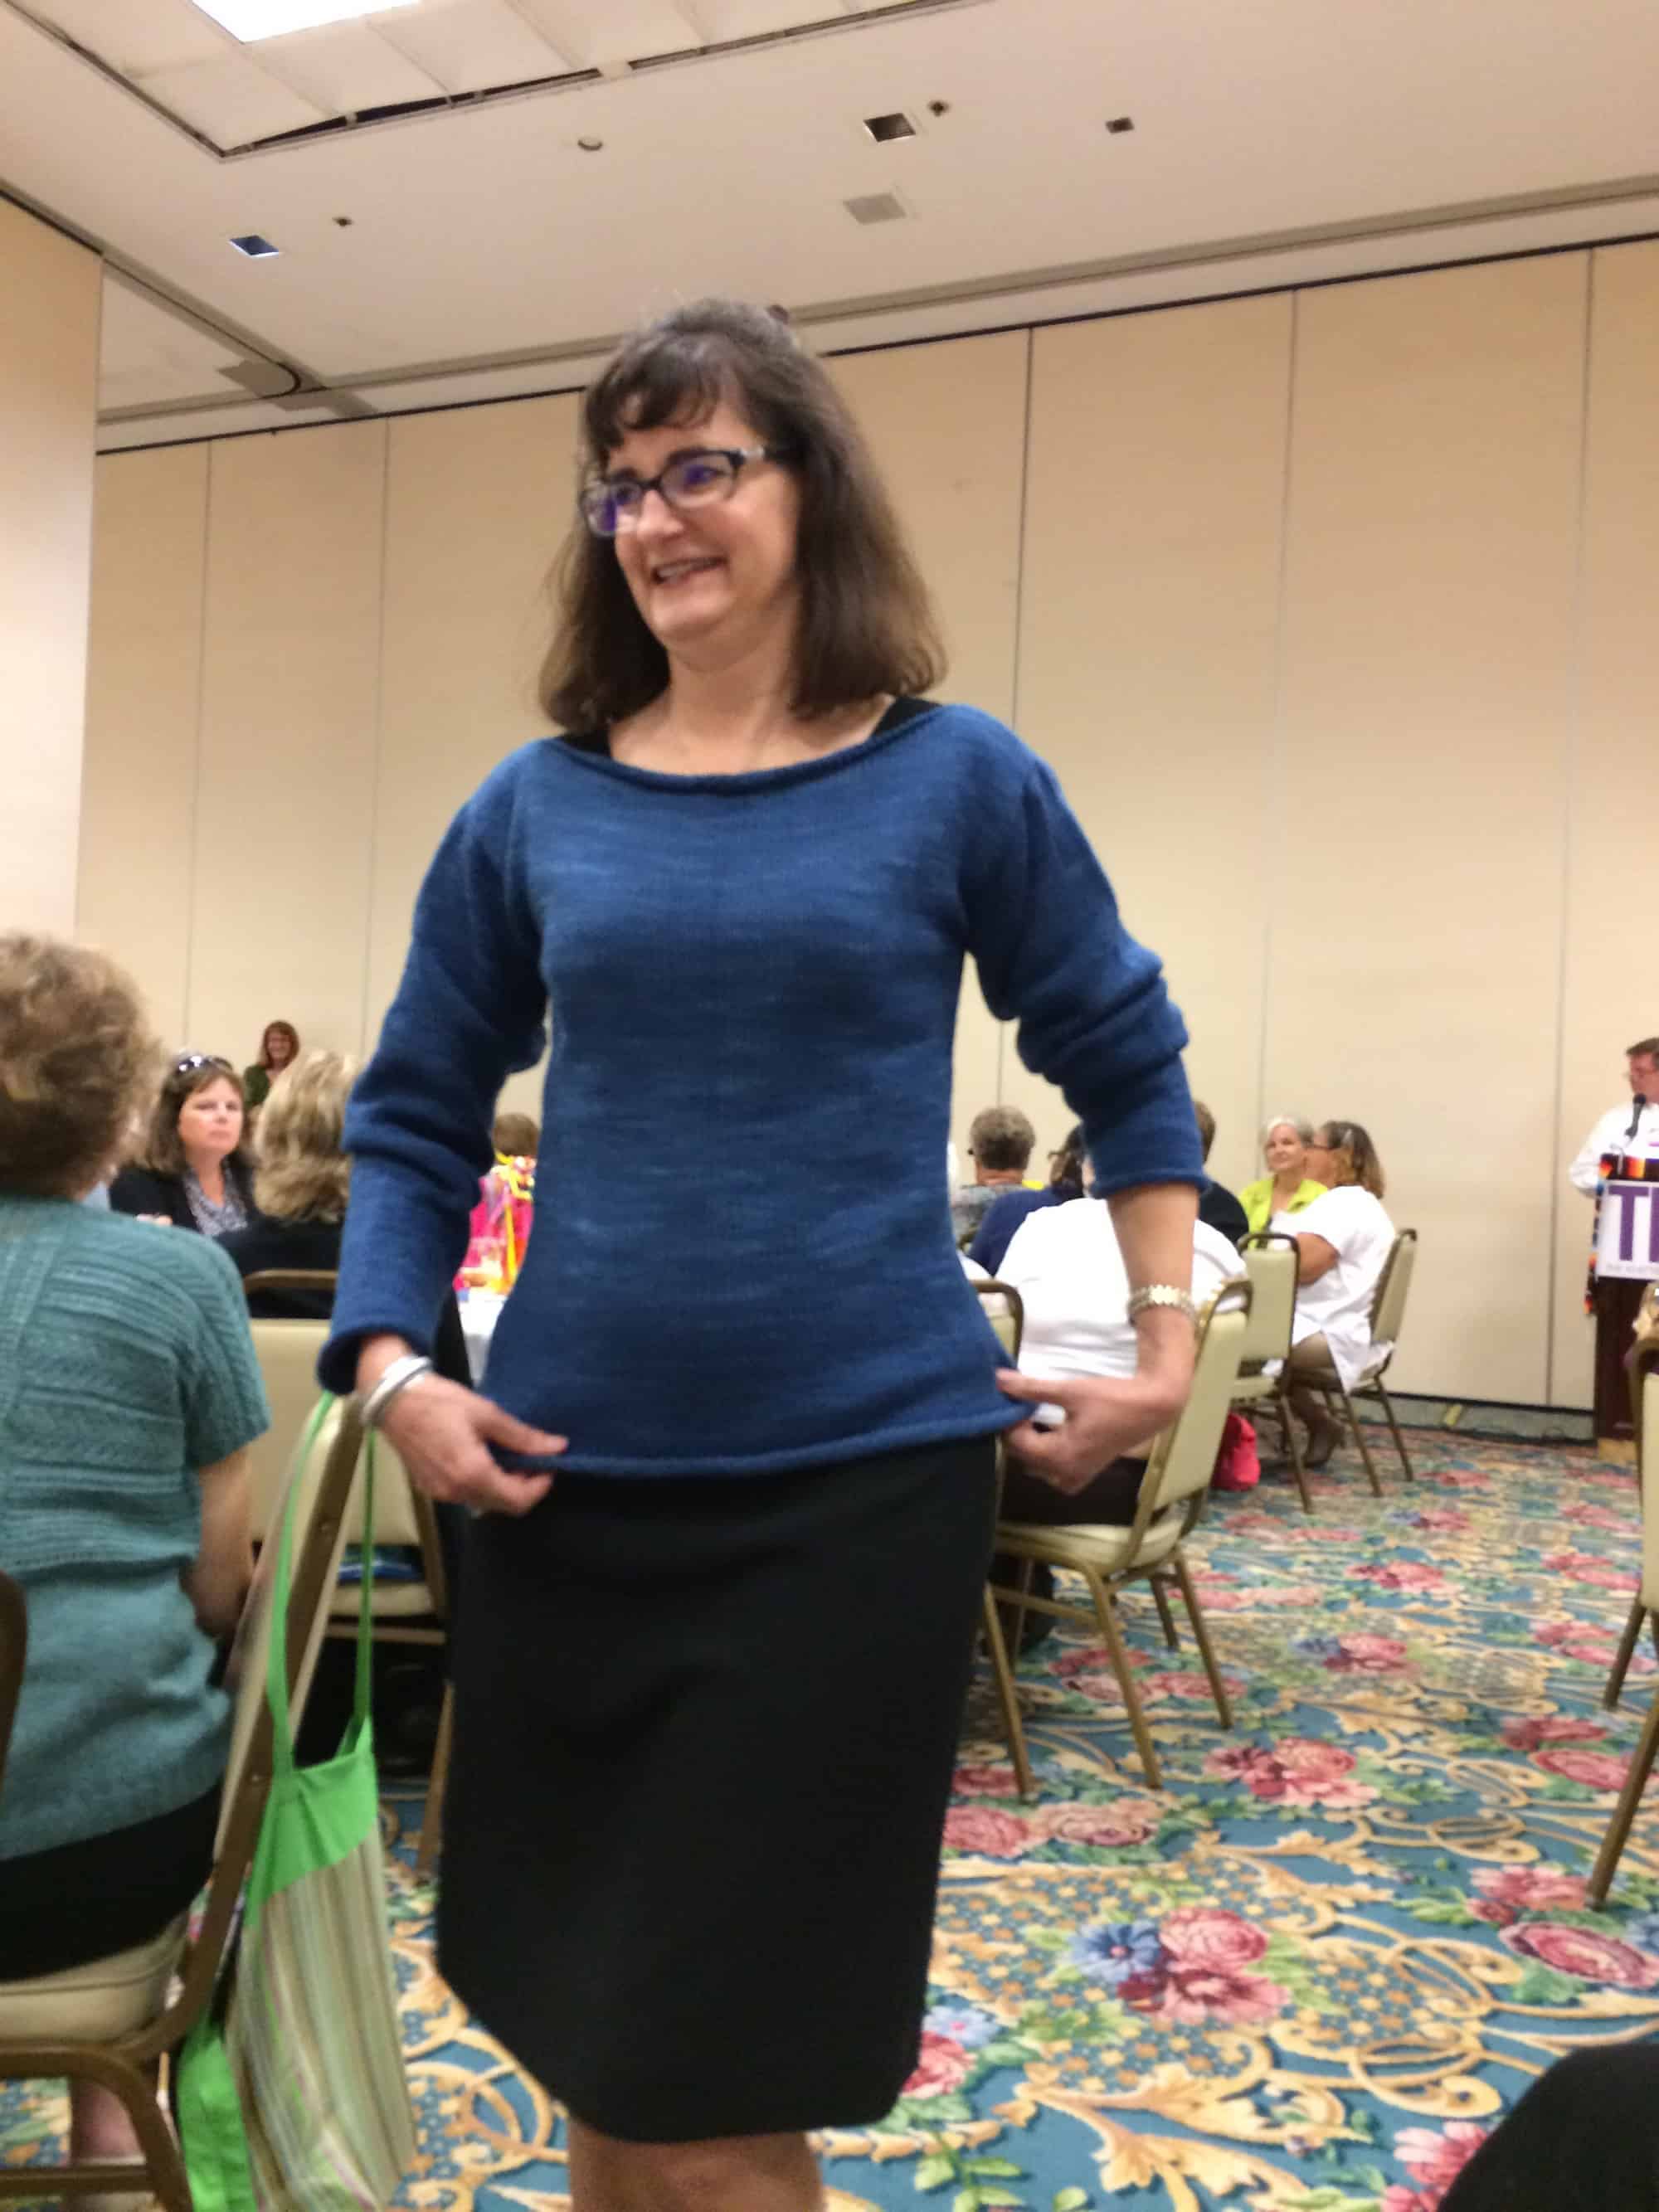
Level 3 requires knitters to design two projects: a hat and a sweater.  One must be Aran (that’s one color, with lots of cables, bobbles, and texture) and the other must be Fair Isle (that’s color work).  The knitter can decide if he or she wants to make an Aran hat and Fair Isle sweater or vice versa.  During breakfast, we had a fashion show of the new graduates’ final pieces.  Some graduates modeled their own pieces.  Master Hand Knitter Committee members modeled the rest.  Each piece was beautiful!  I didn’t get everyone’s names to match with the pieces and I didn’t get good pictures of all the pieces.  These are the best pictures and information that I got during the event!

image
I particularly loved the double-helix look of the cables on this sweater and the seed stitch in the center of the cables. Seed stitch with cables is my new obsession.
image
image
image
image
Graduate (and new Committee Member) Carla Pera modeling her own hat.
image
Committee Member Joyce Jones modeling Carla Pera’s Sweater. I loved the vine detail at the neckline and the way the way the narrow cables emphasize the waist.
image
This graduate is modeling her own hat and sweater. She was the only one in the Fashion show to choose a Fair Isle Sweater and Aran Hat.
image

At the end of the Breakfast, we had a drawing for door prizes.  Emma won a bag full of yarn.  It was like Mary Poppins magical bag but full of yarn instead of mirrors or hat stands.

I'm not exaggerating -- the bag held a wall of yarn!
I’m not exaggerating — the bag held a wall of yarn!

The Yarn Tasting

The most important thing I have to say about the Yarn Tasting is THANK YOU to Arenda Holladay, Suzanne Bryan, Binka Schwan, and Charles Gandy.  One hundred tickets were available for the Yarn Tasting and the event sold out.  Each attendee left the event with 40 mini center pull balls of yarn.  Arenda, Suzanne, Binka, and Charles hand wound those mini balls.  That’s 4,000 mini balls.  Arenda makes it sound easy; she’s even got a video on YouTube demonstrating how to wind them.  I don’t care how easy they are to wind; it’s got to take a long time to wind 4,000 mini balls.  Thank you all!

image

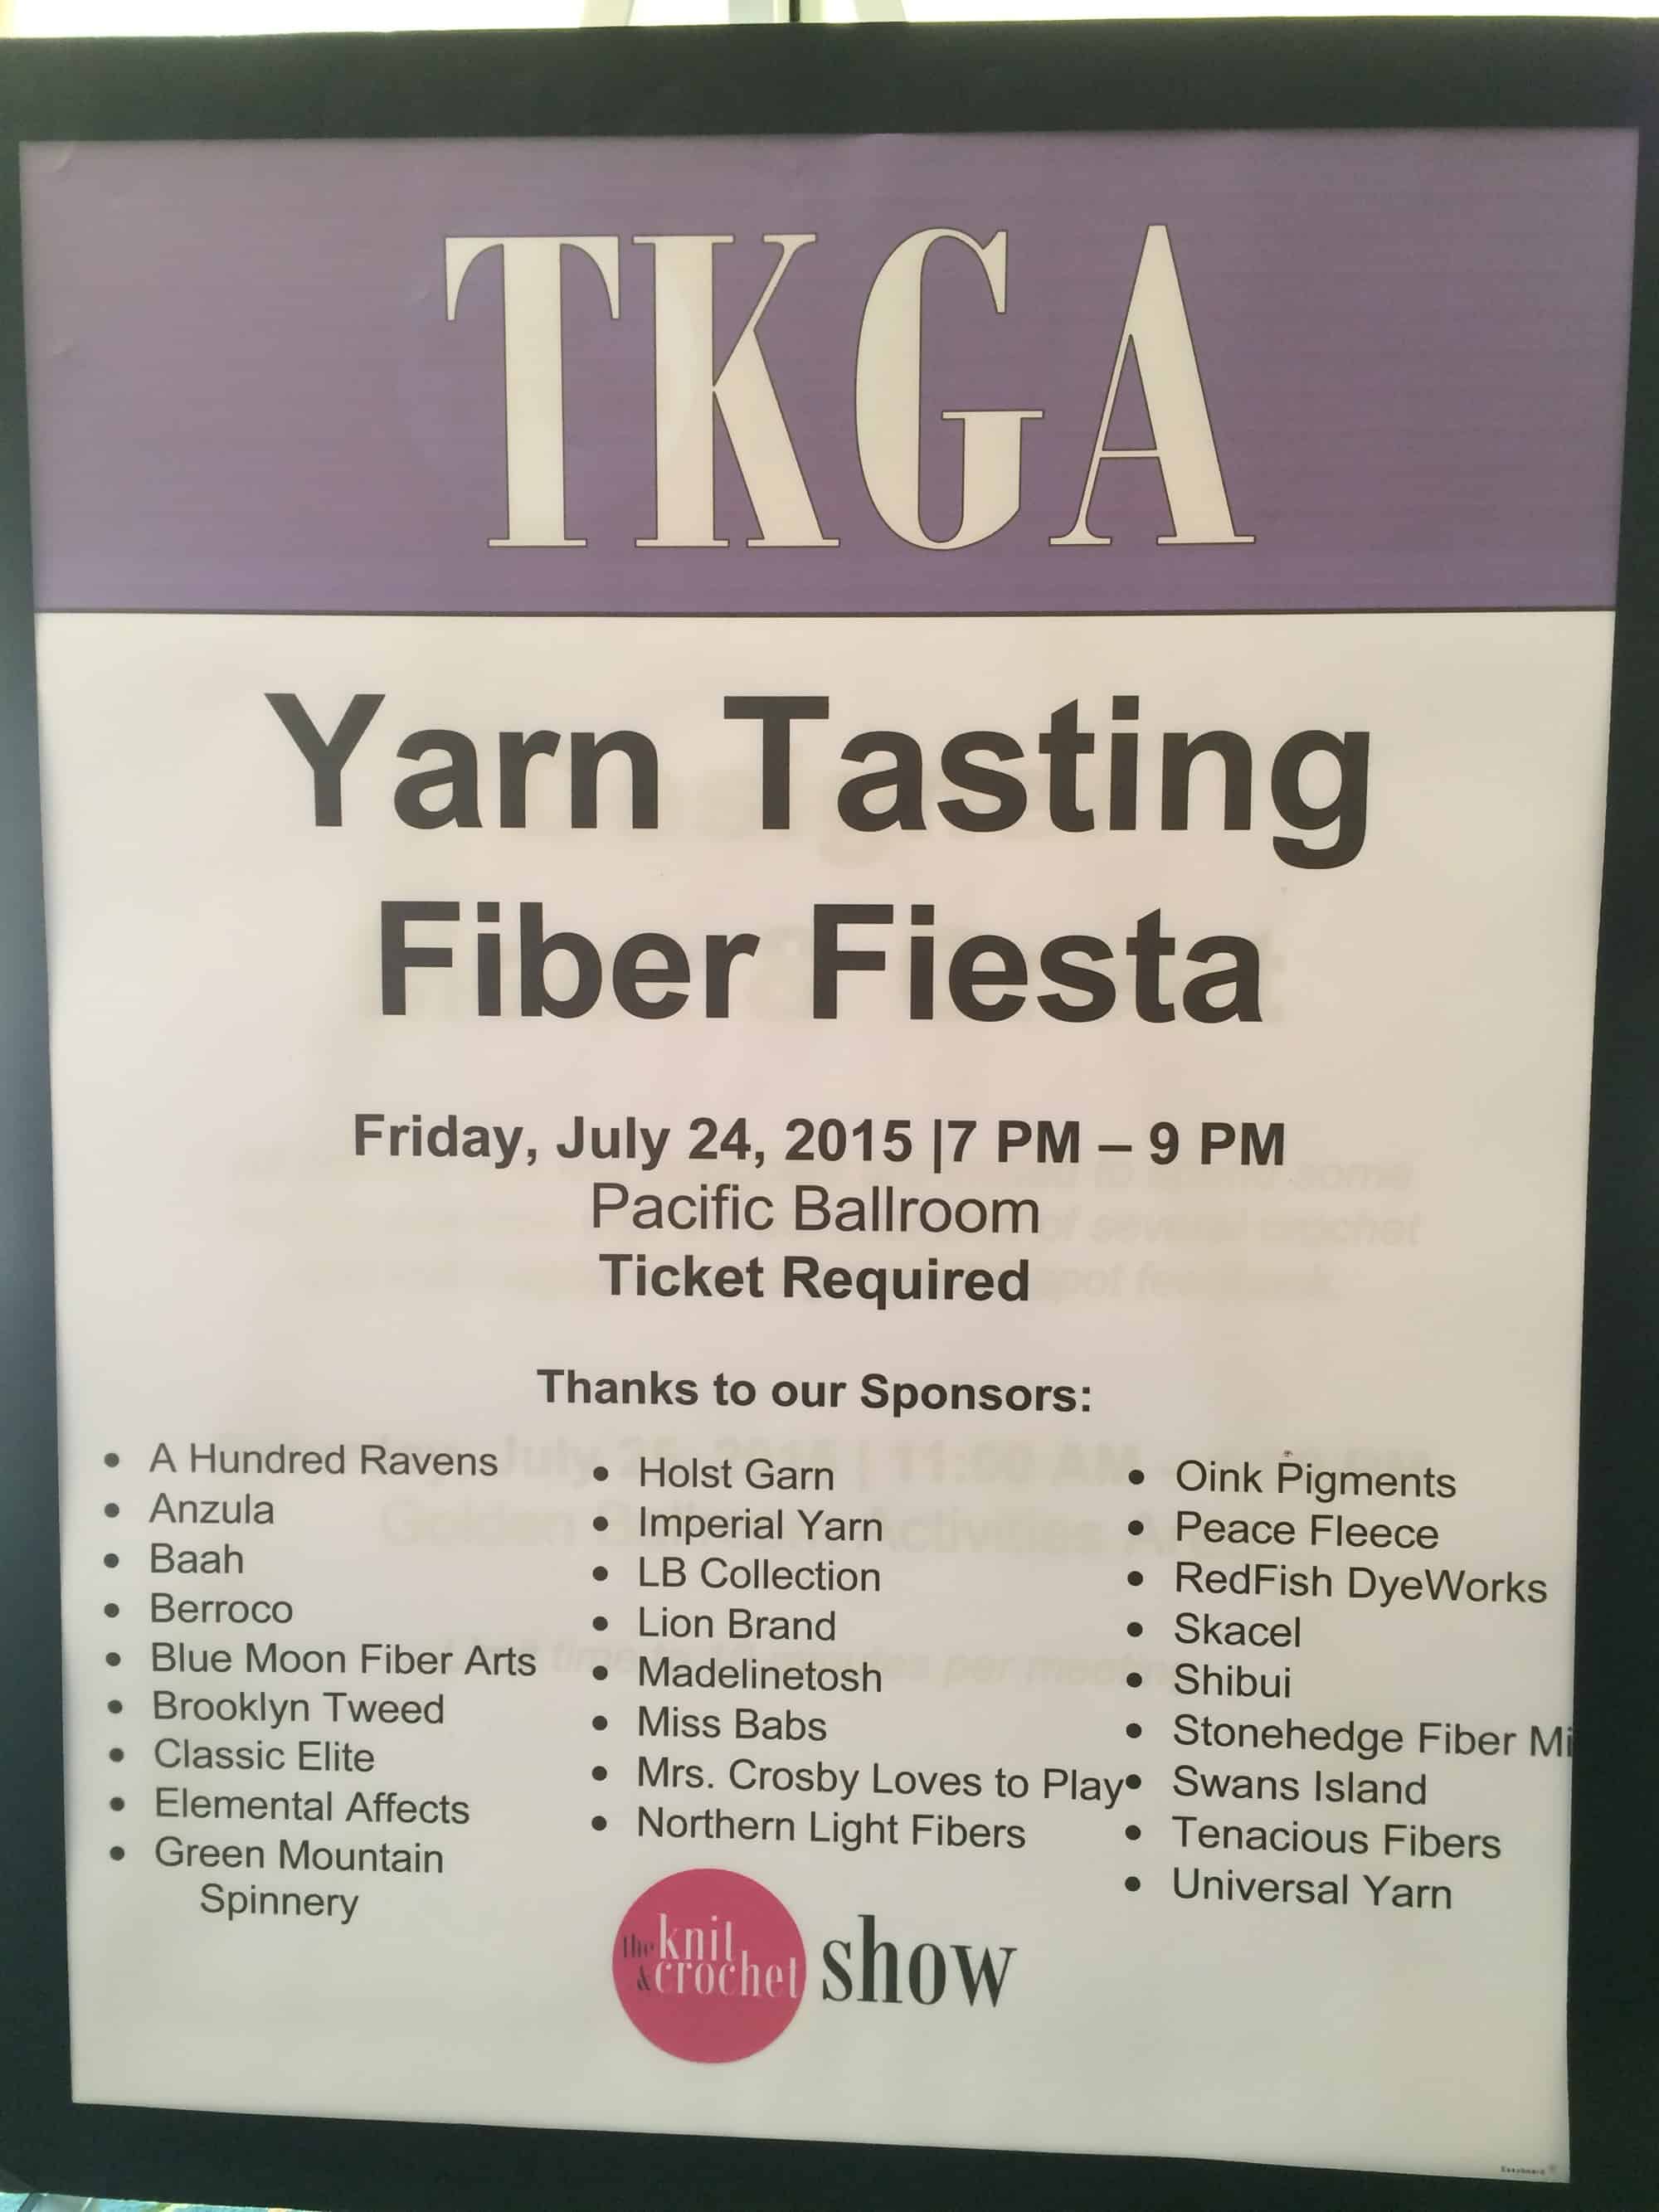
Here’s links to the sponsors’ websites: A Hundred Ravens, Anzula, Baah, Berroco, Blue Moon Fiber Arts, Brooklyn Tweed, Classic Elite, Elemental Affects, Green Mountain Spinnery, Holst Garn, Imperial Yarn, LB Collection, Lion Brand, Madelinetosh, Miss Babs, Mrs. Crosby Loves to Play, North Light Fibers, Oink Pigments, Peace Fleece, RedFish Dyeworks, Skacel, Shibui, Stonehenge Fiber Mill, Swans Island, Tenacious Fibers (blog and Etsy), and Universal Yarns.

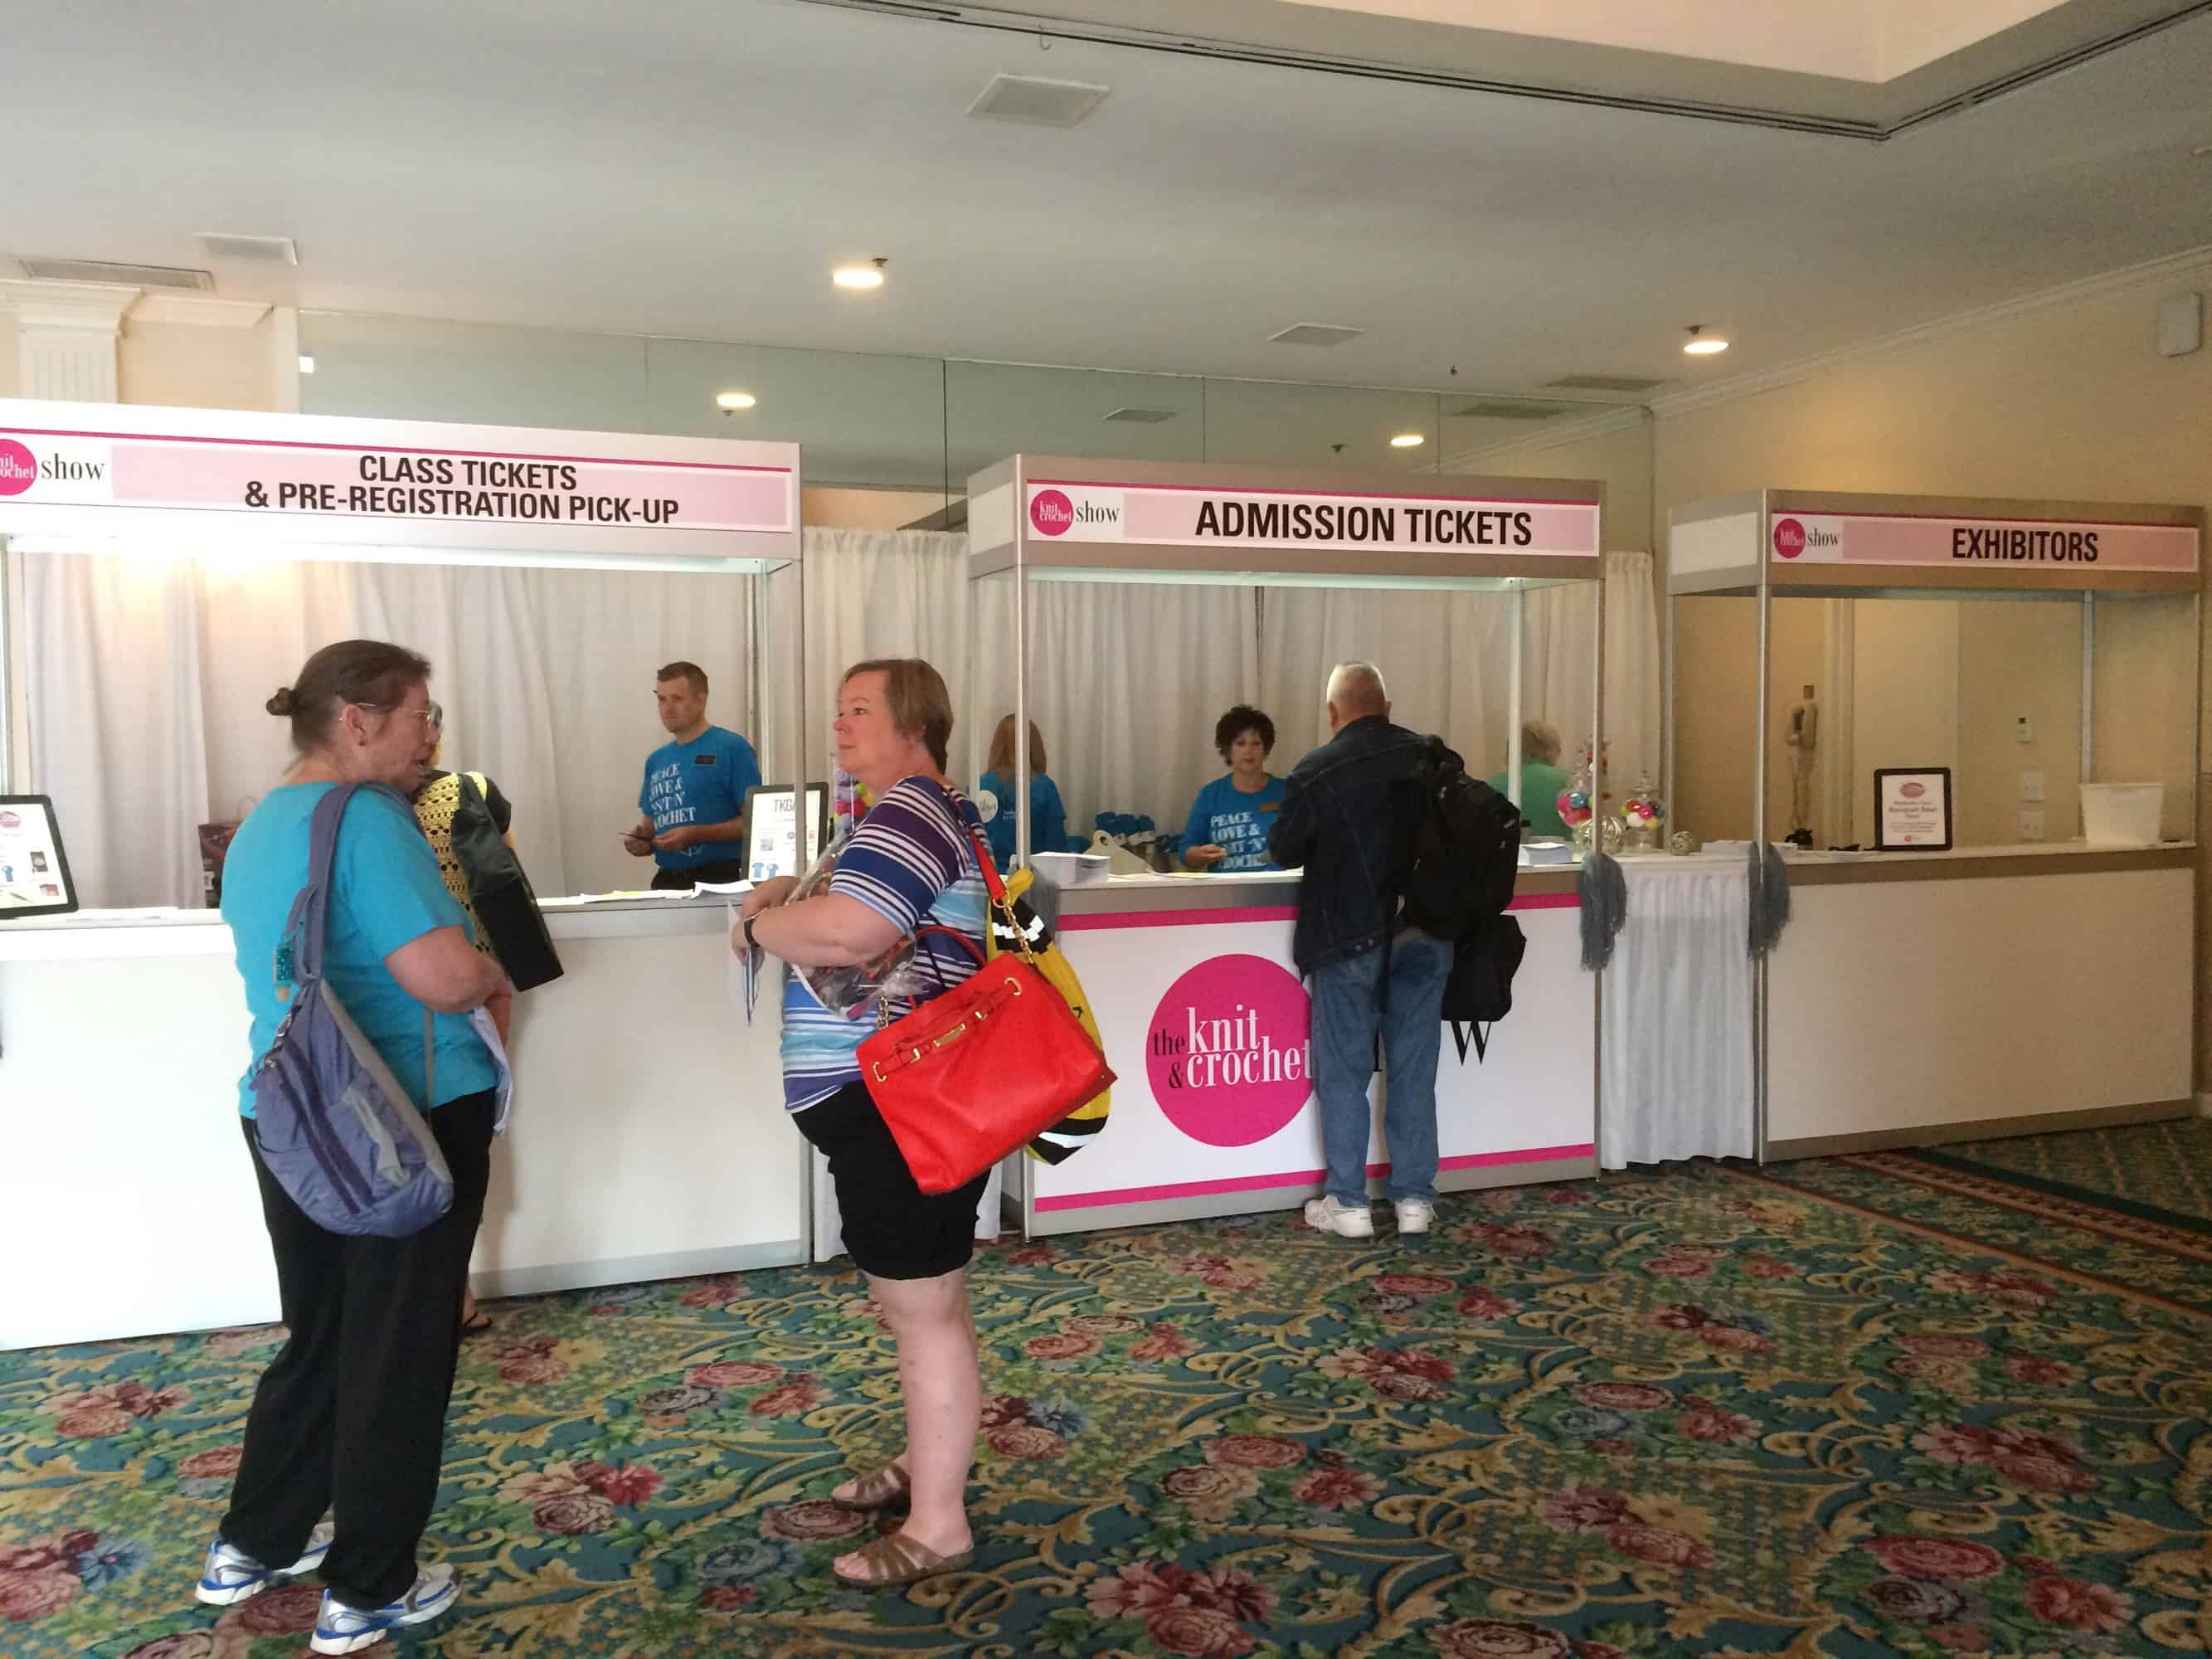
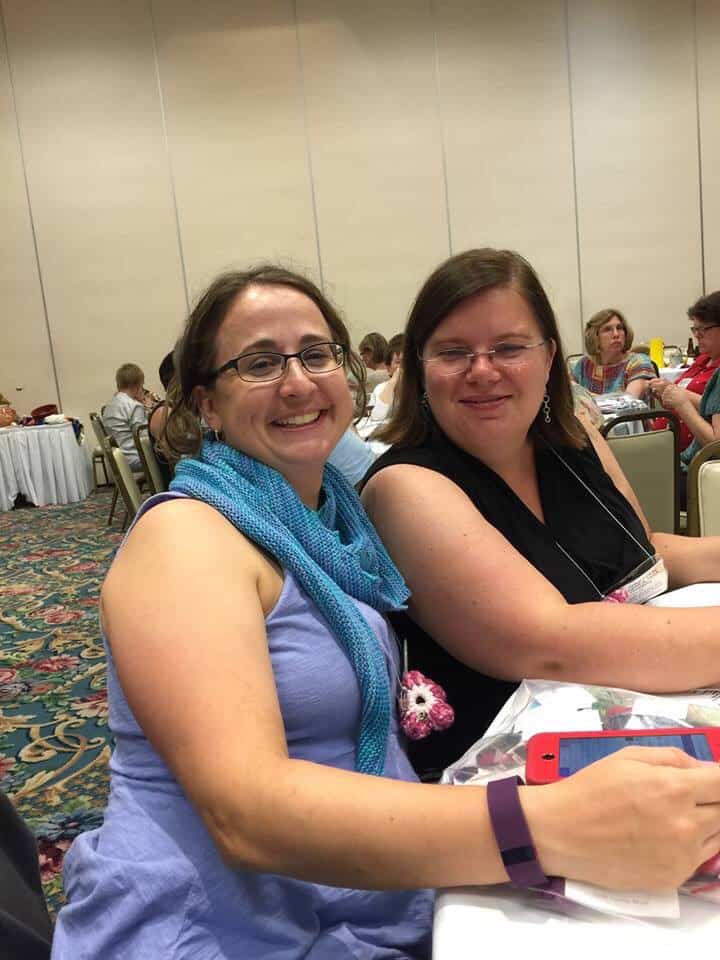
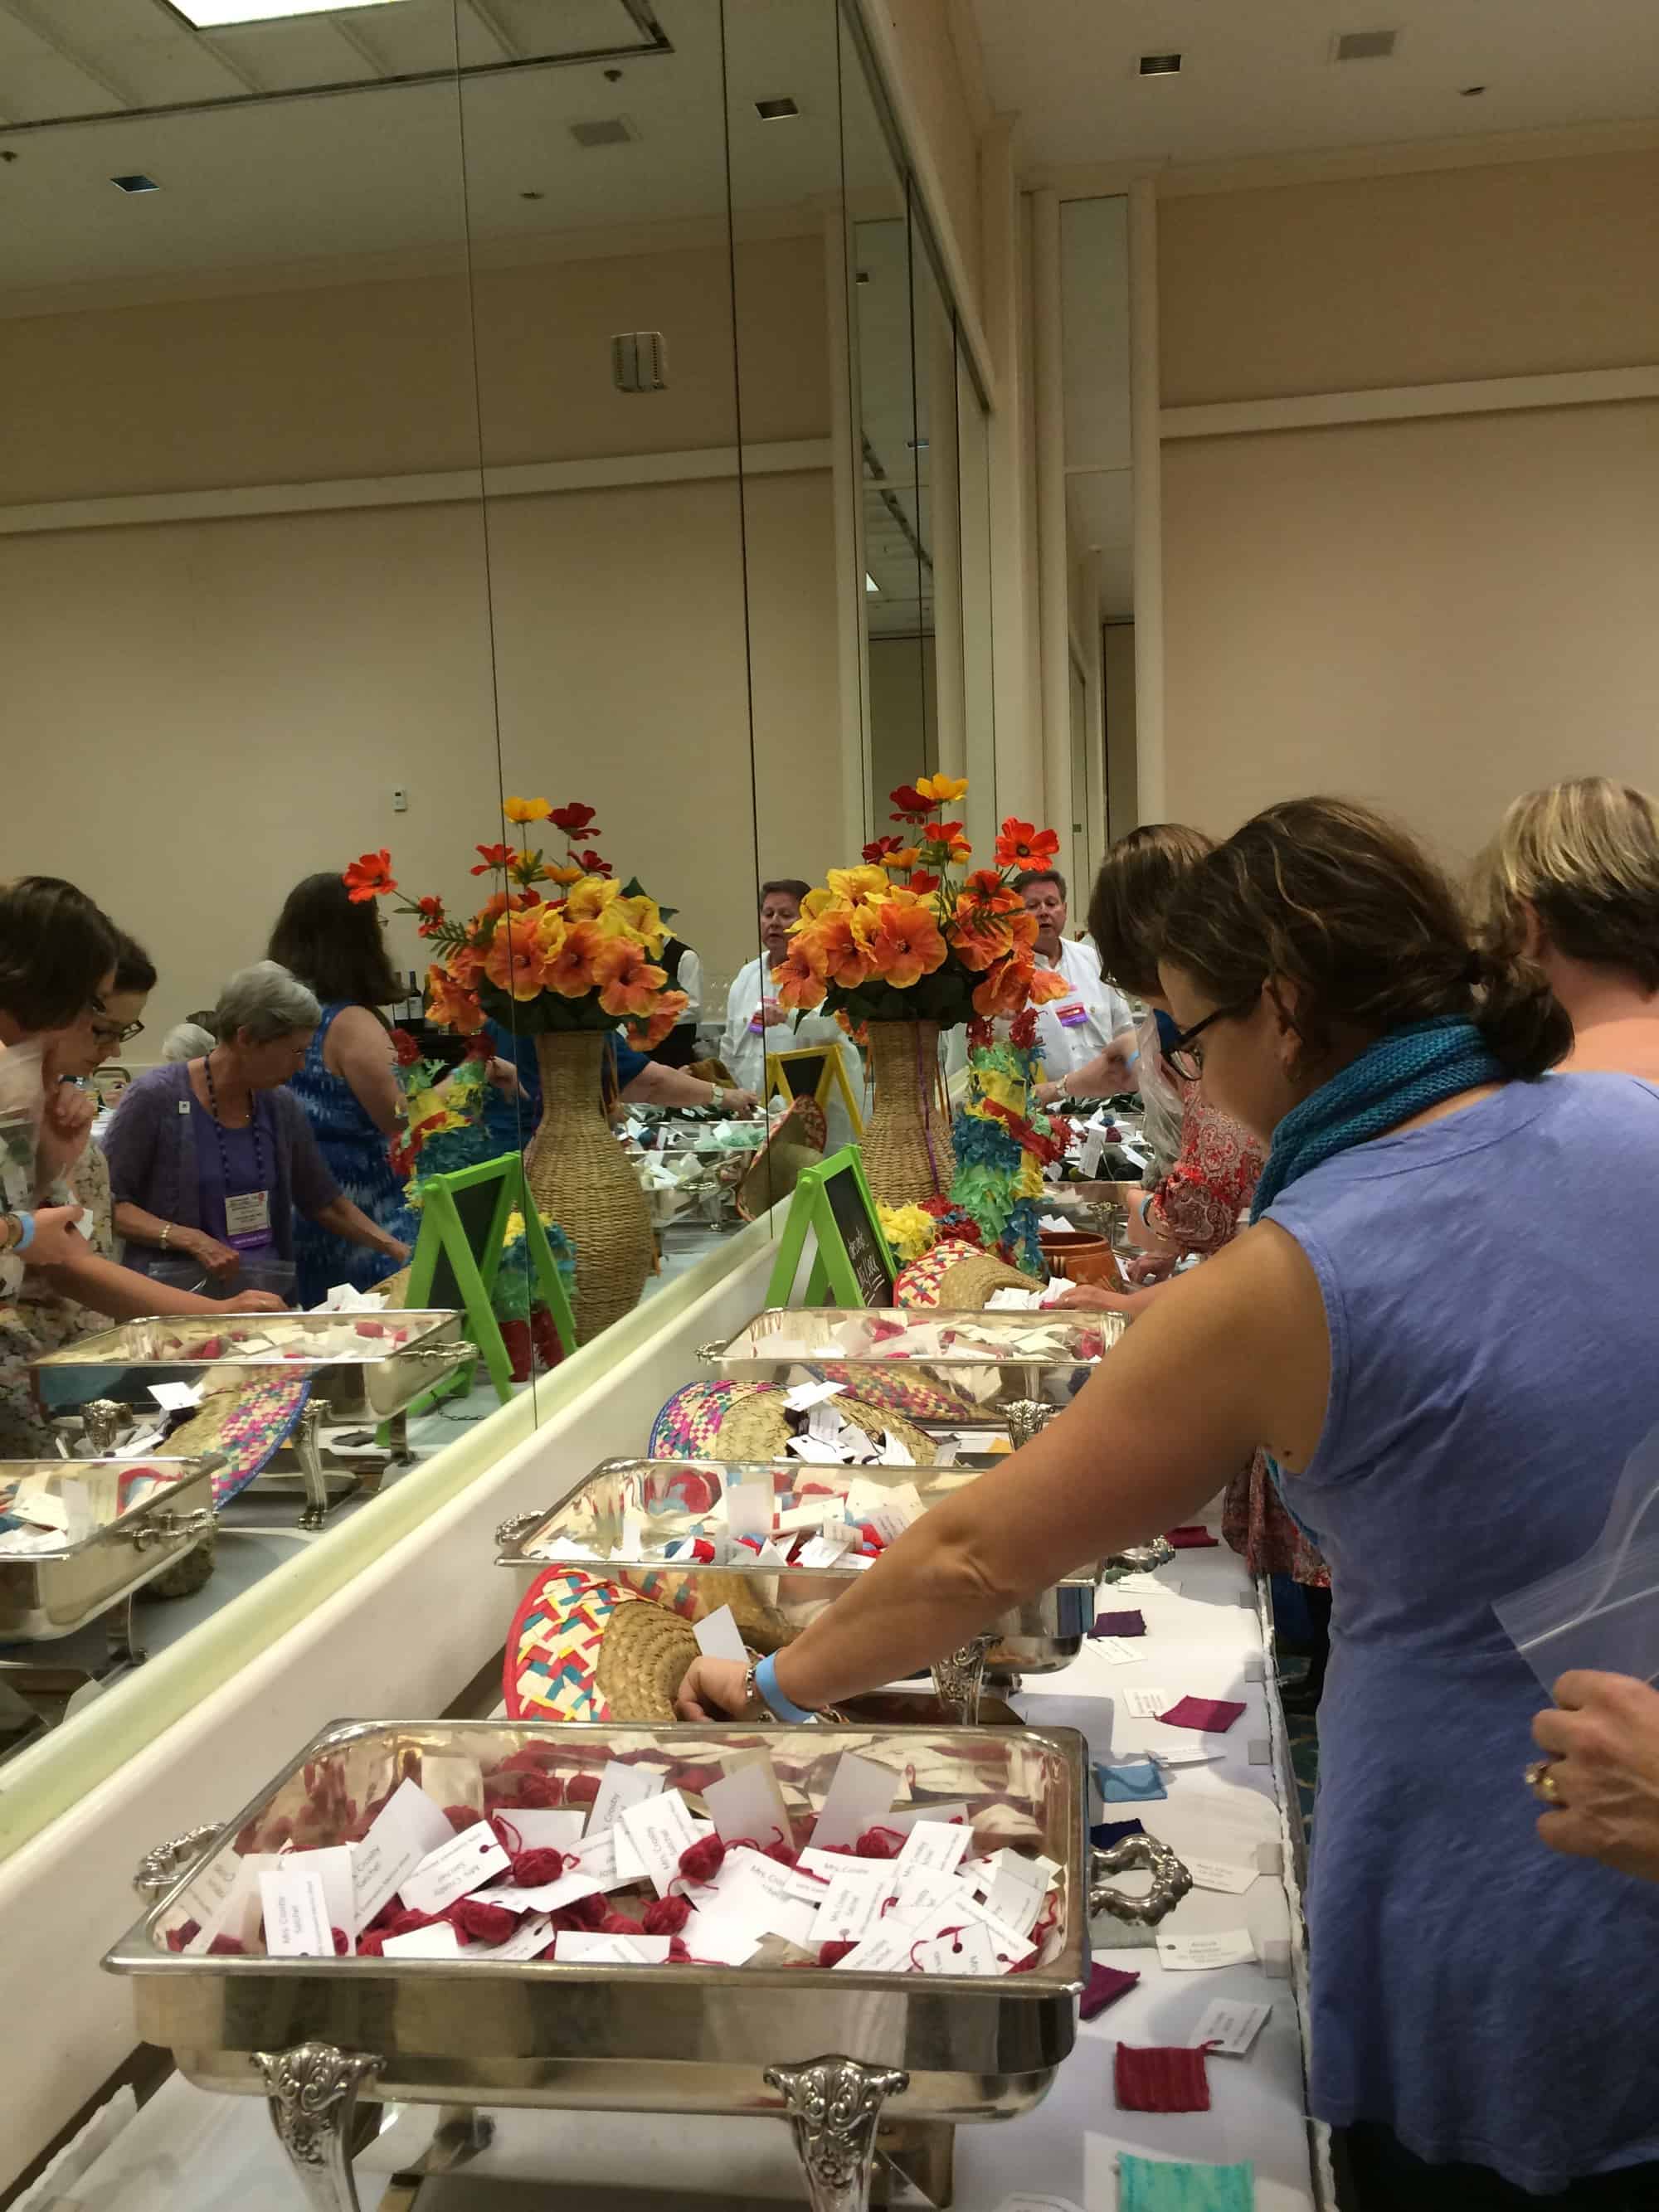
The Yarn Tasting was spectacular.  There’s just no other word for it.  I’ve never been to an event like this one and had only the vaguest idea what it would be like.  We got to the ballroom 15 minutes before the doors opened, so of course there was a line.

image

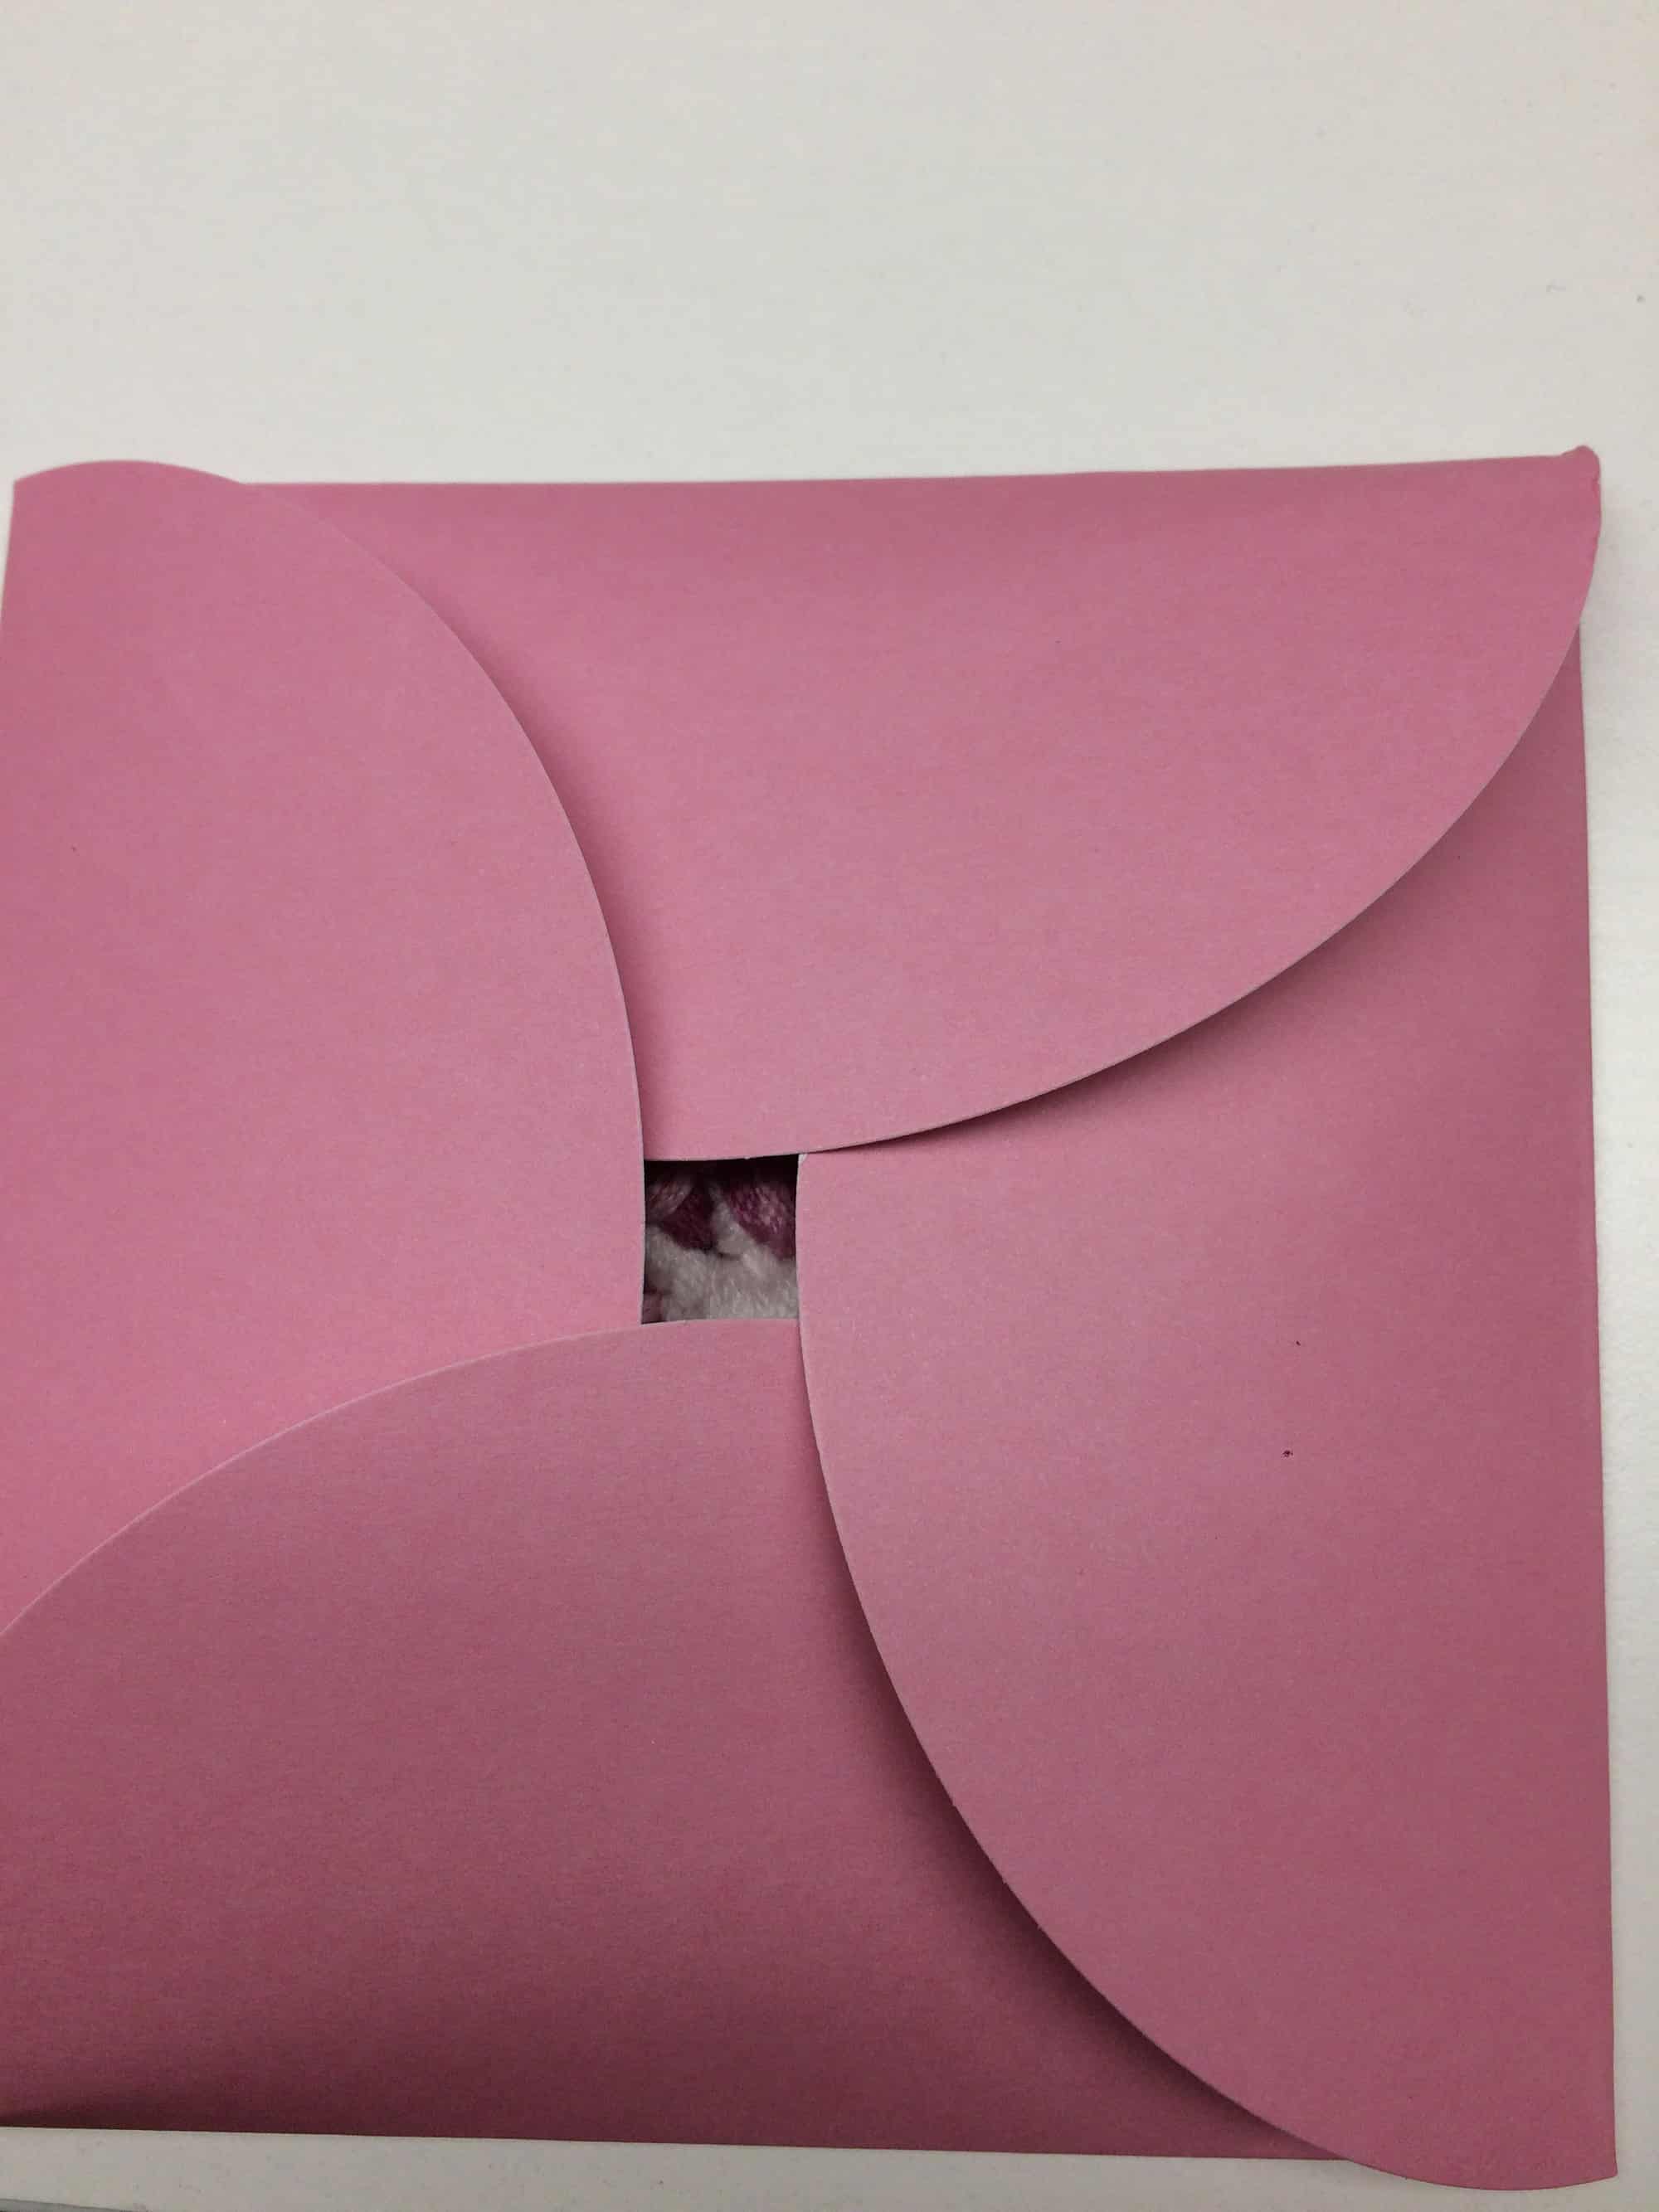
When the doors opened, we all filed into the room.  Committee members handed each attendee a goodie bag:

image

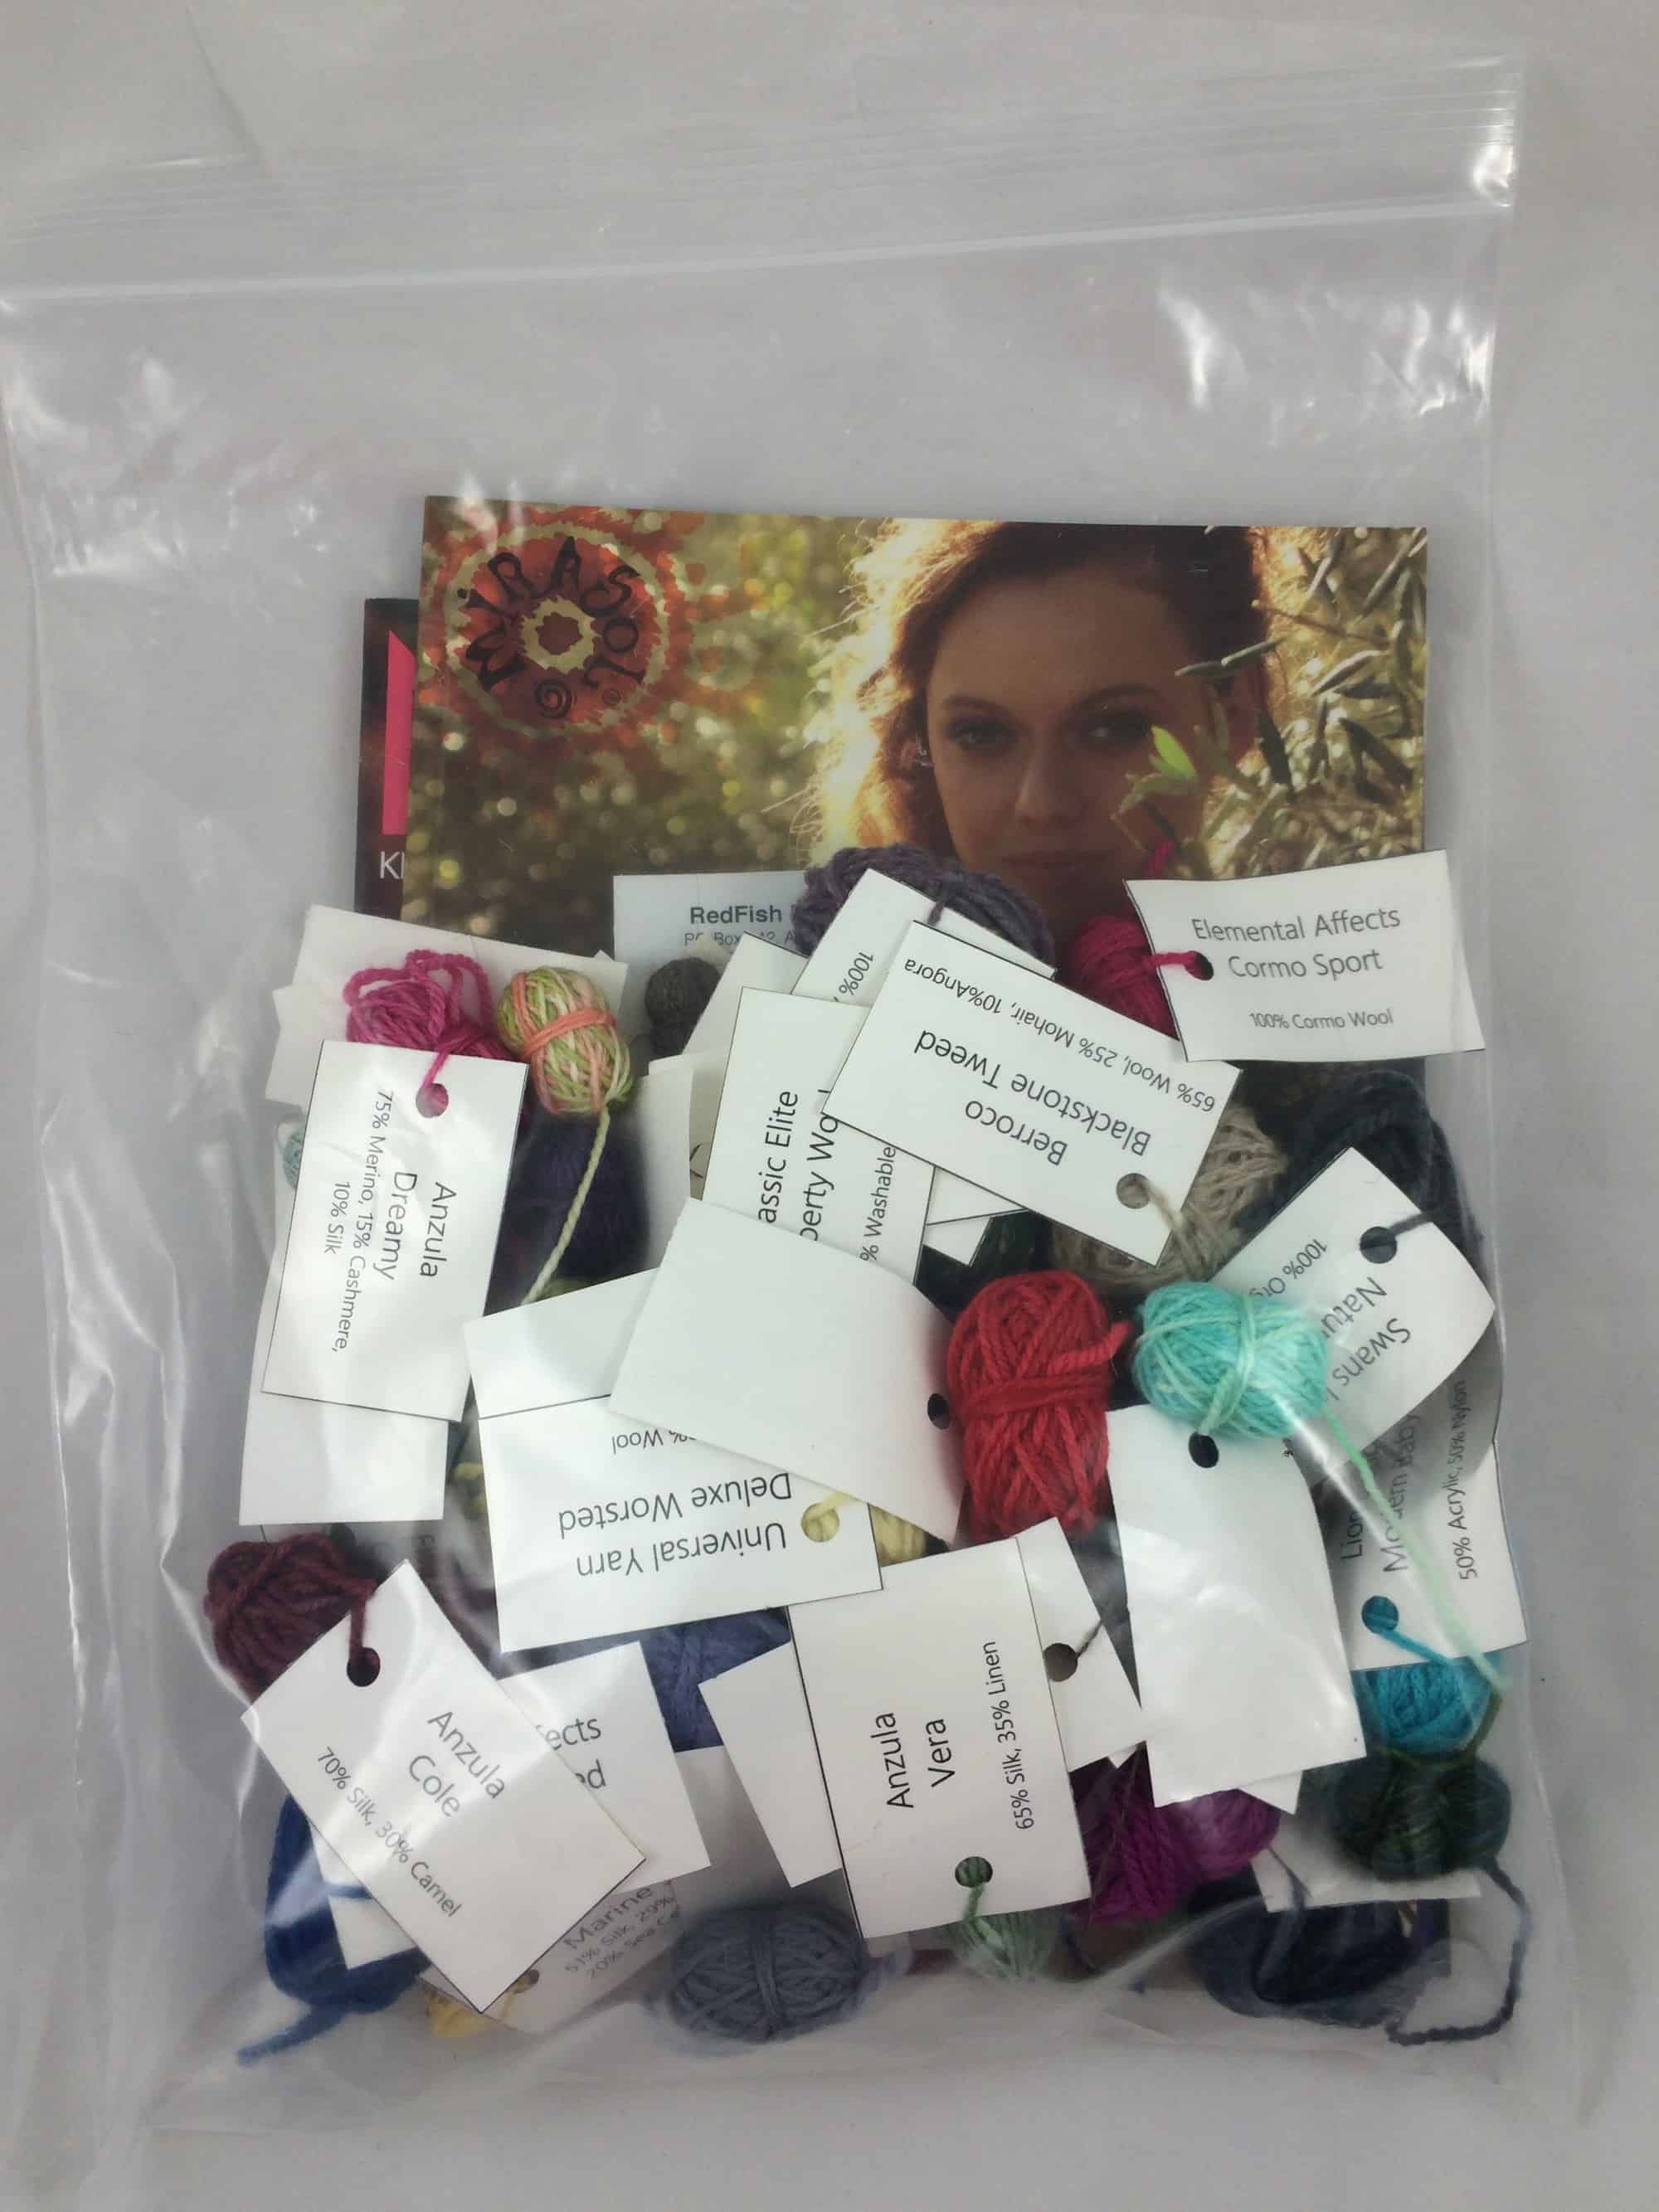
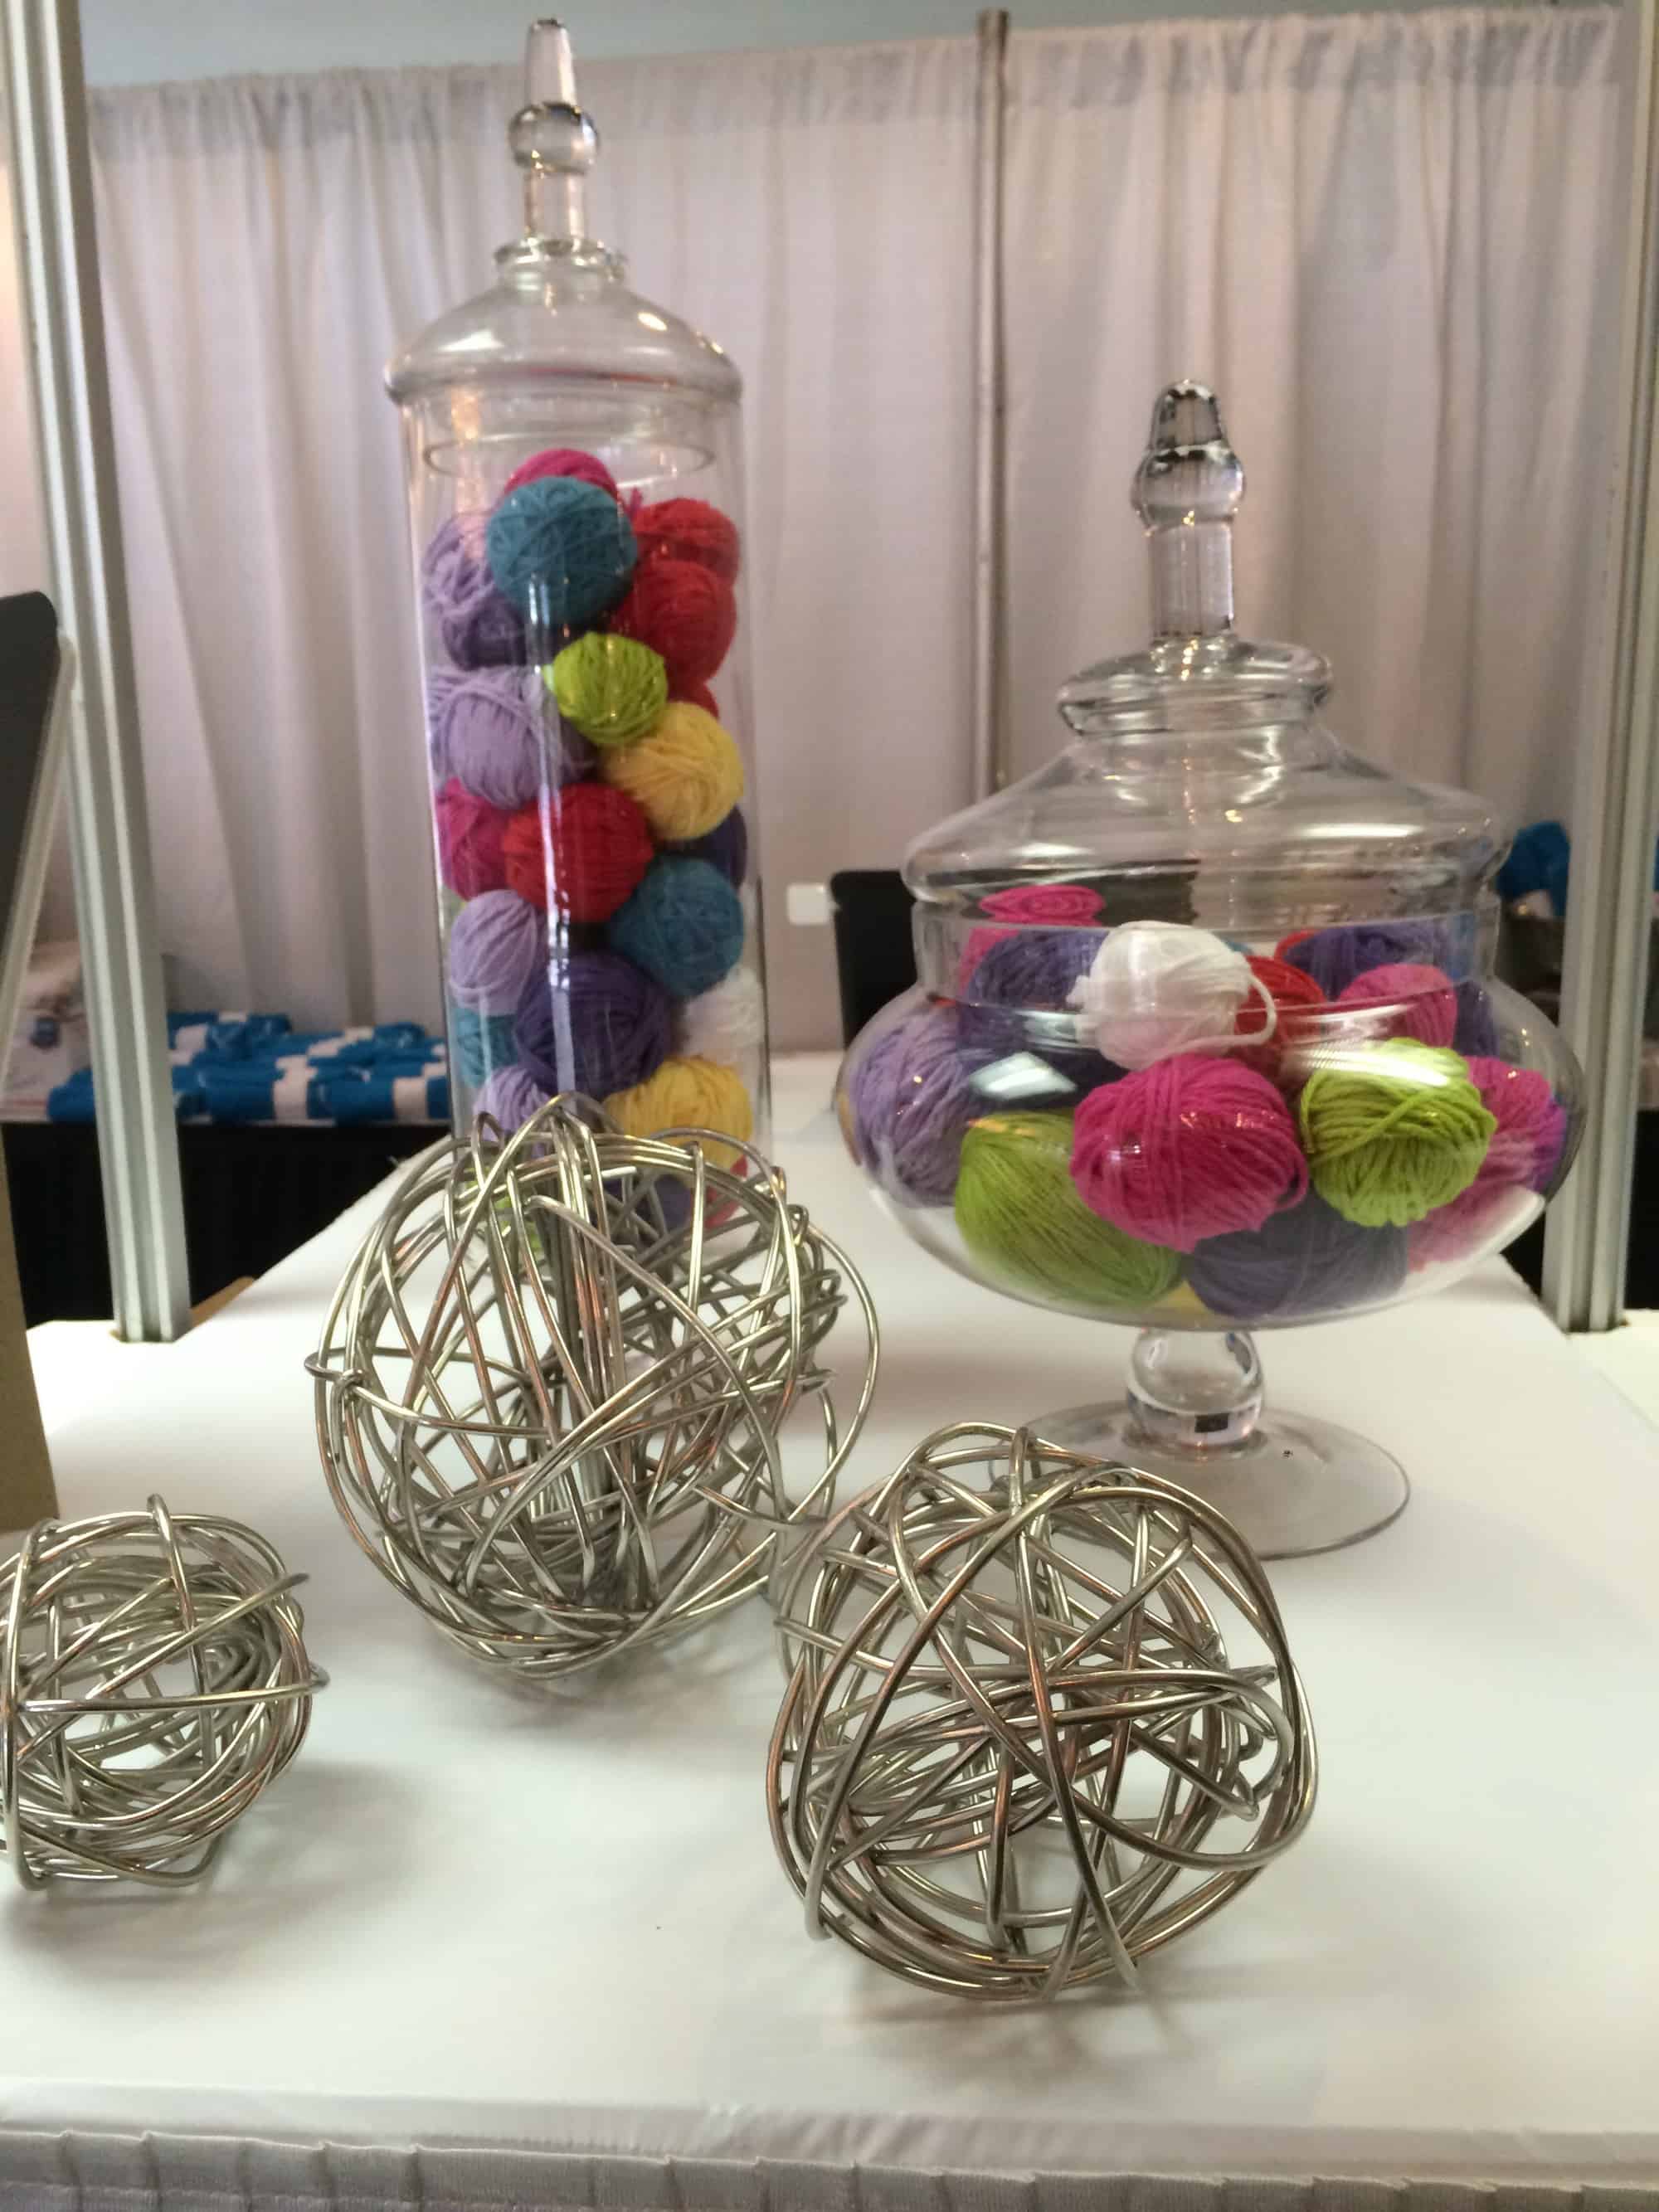
We used the goodie bags to collect our mini yarn balls during the event.  When we got the bag, it only had 8 yarn balls in it.

image

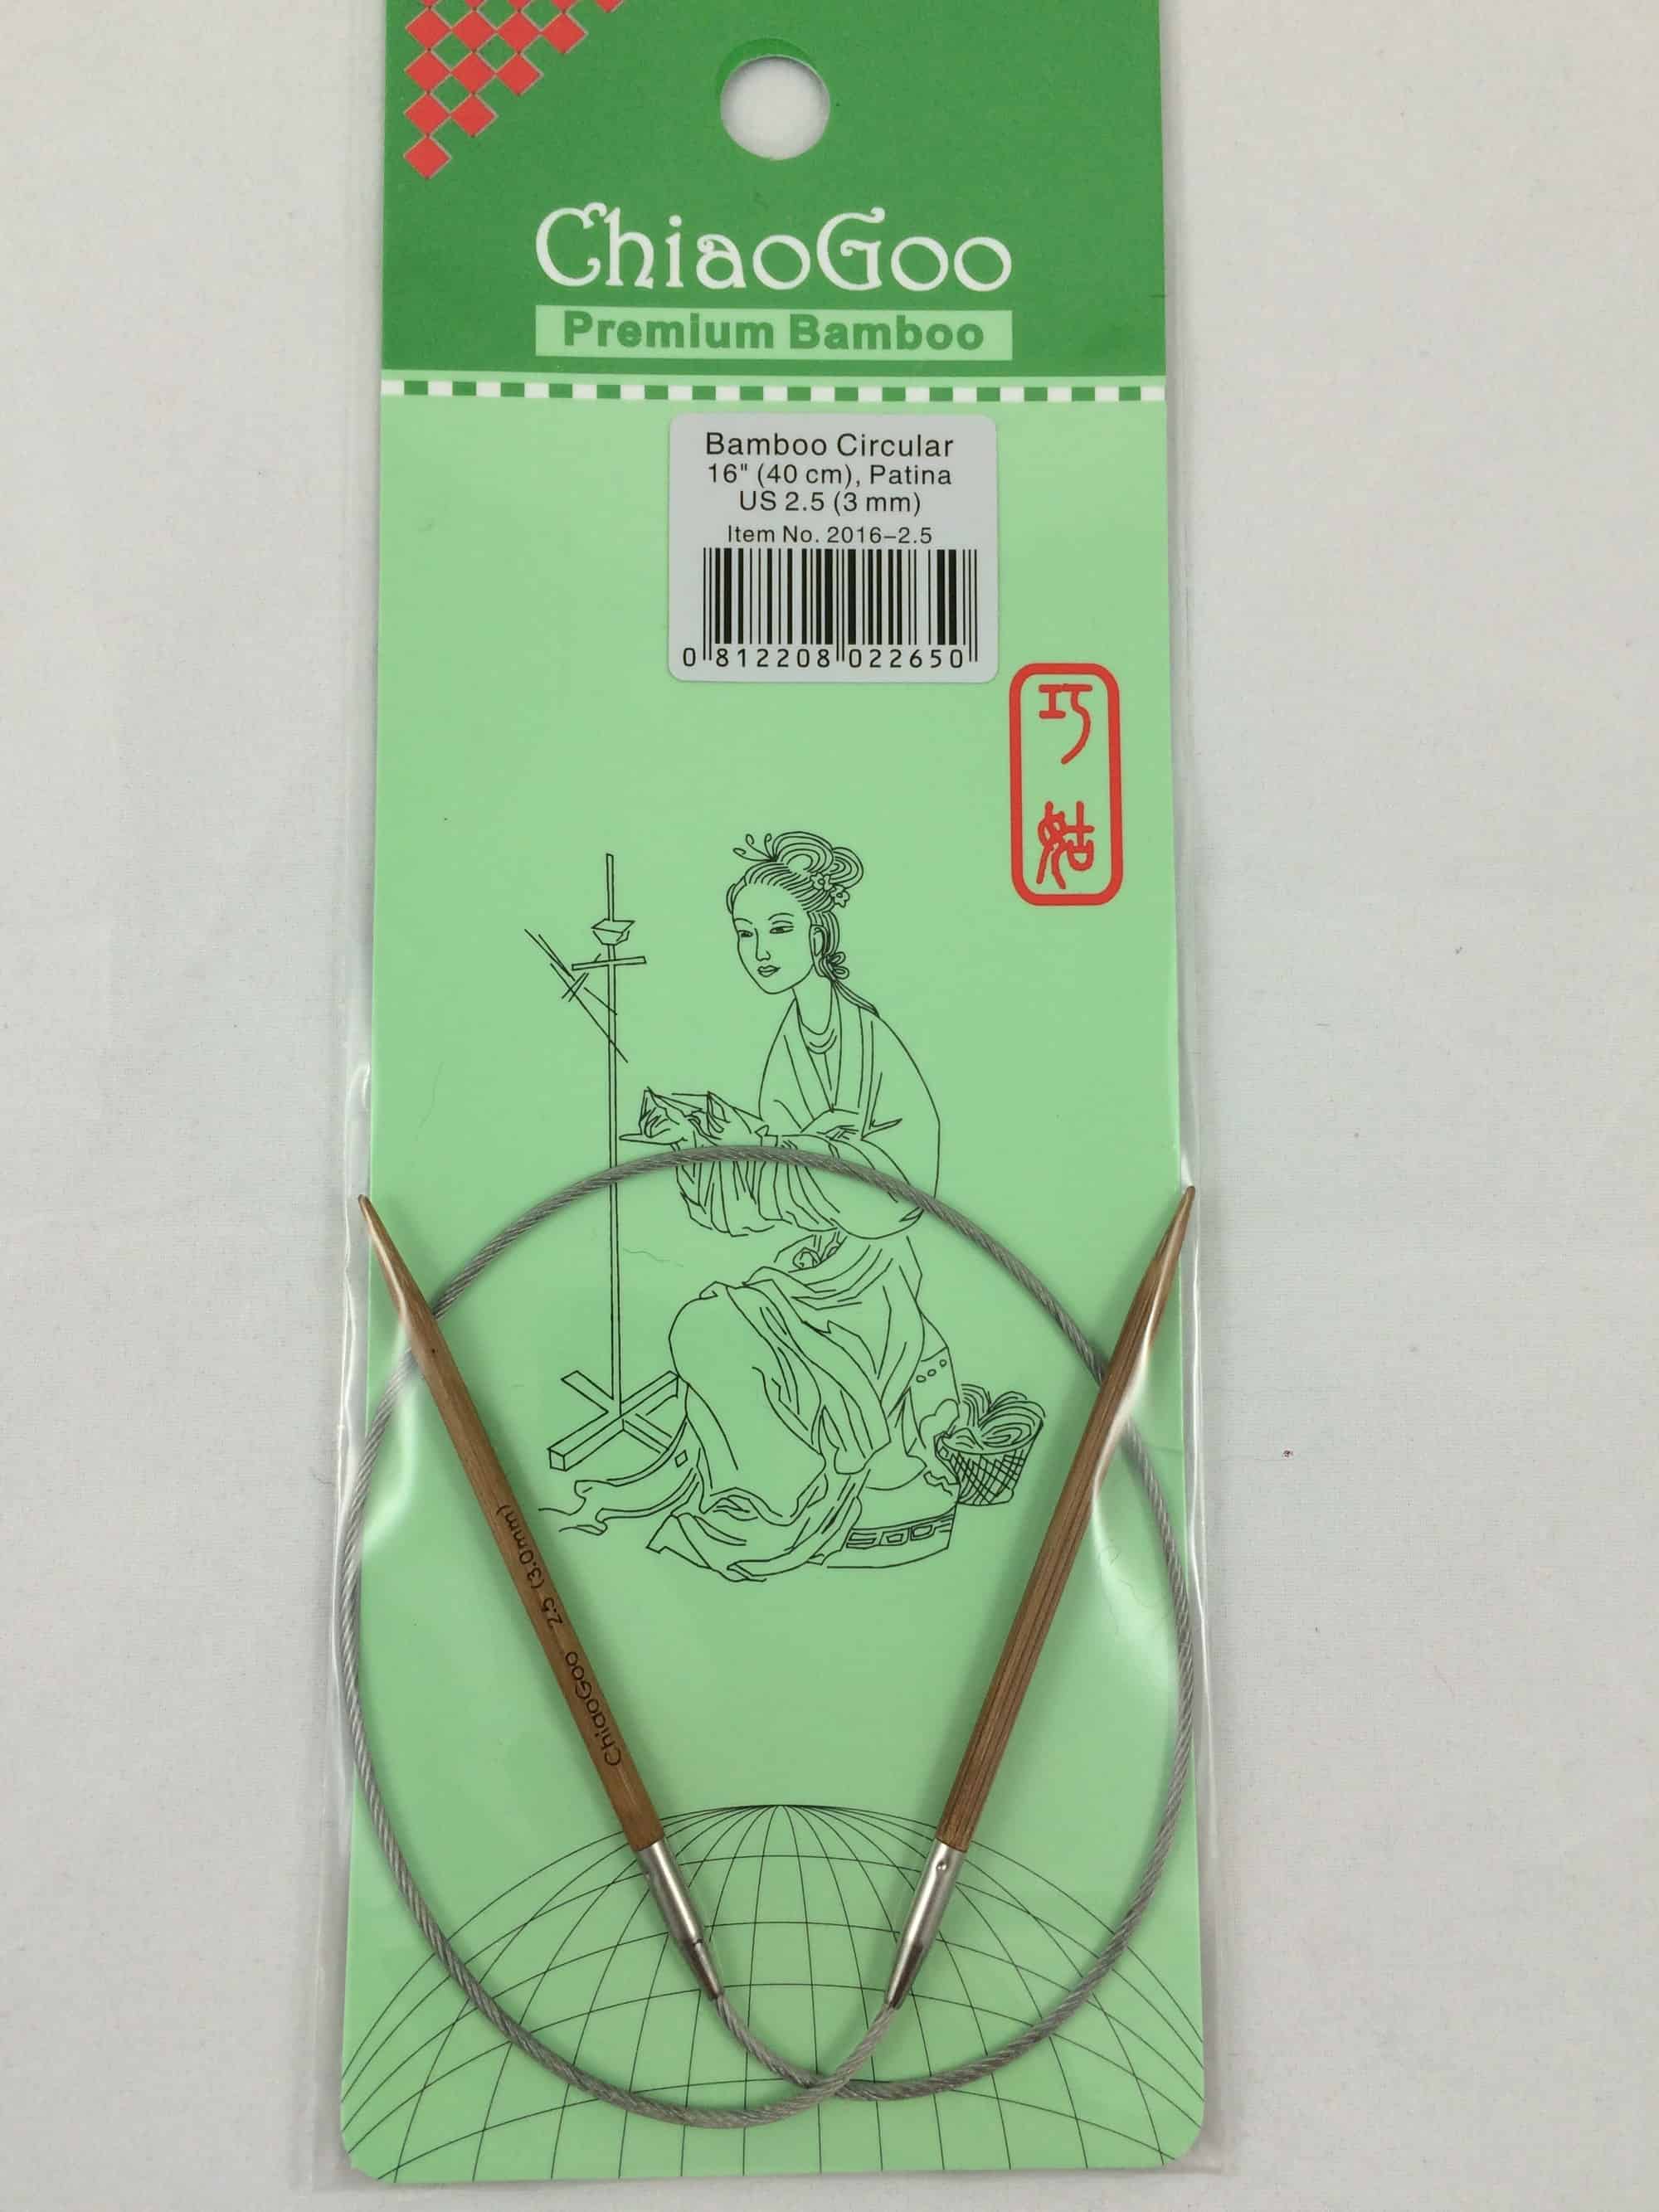
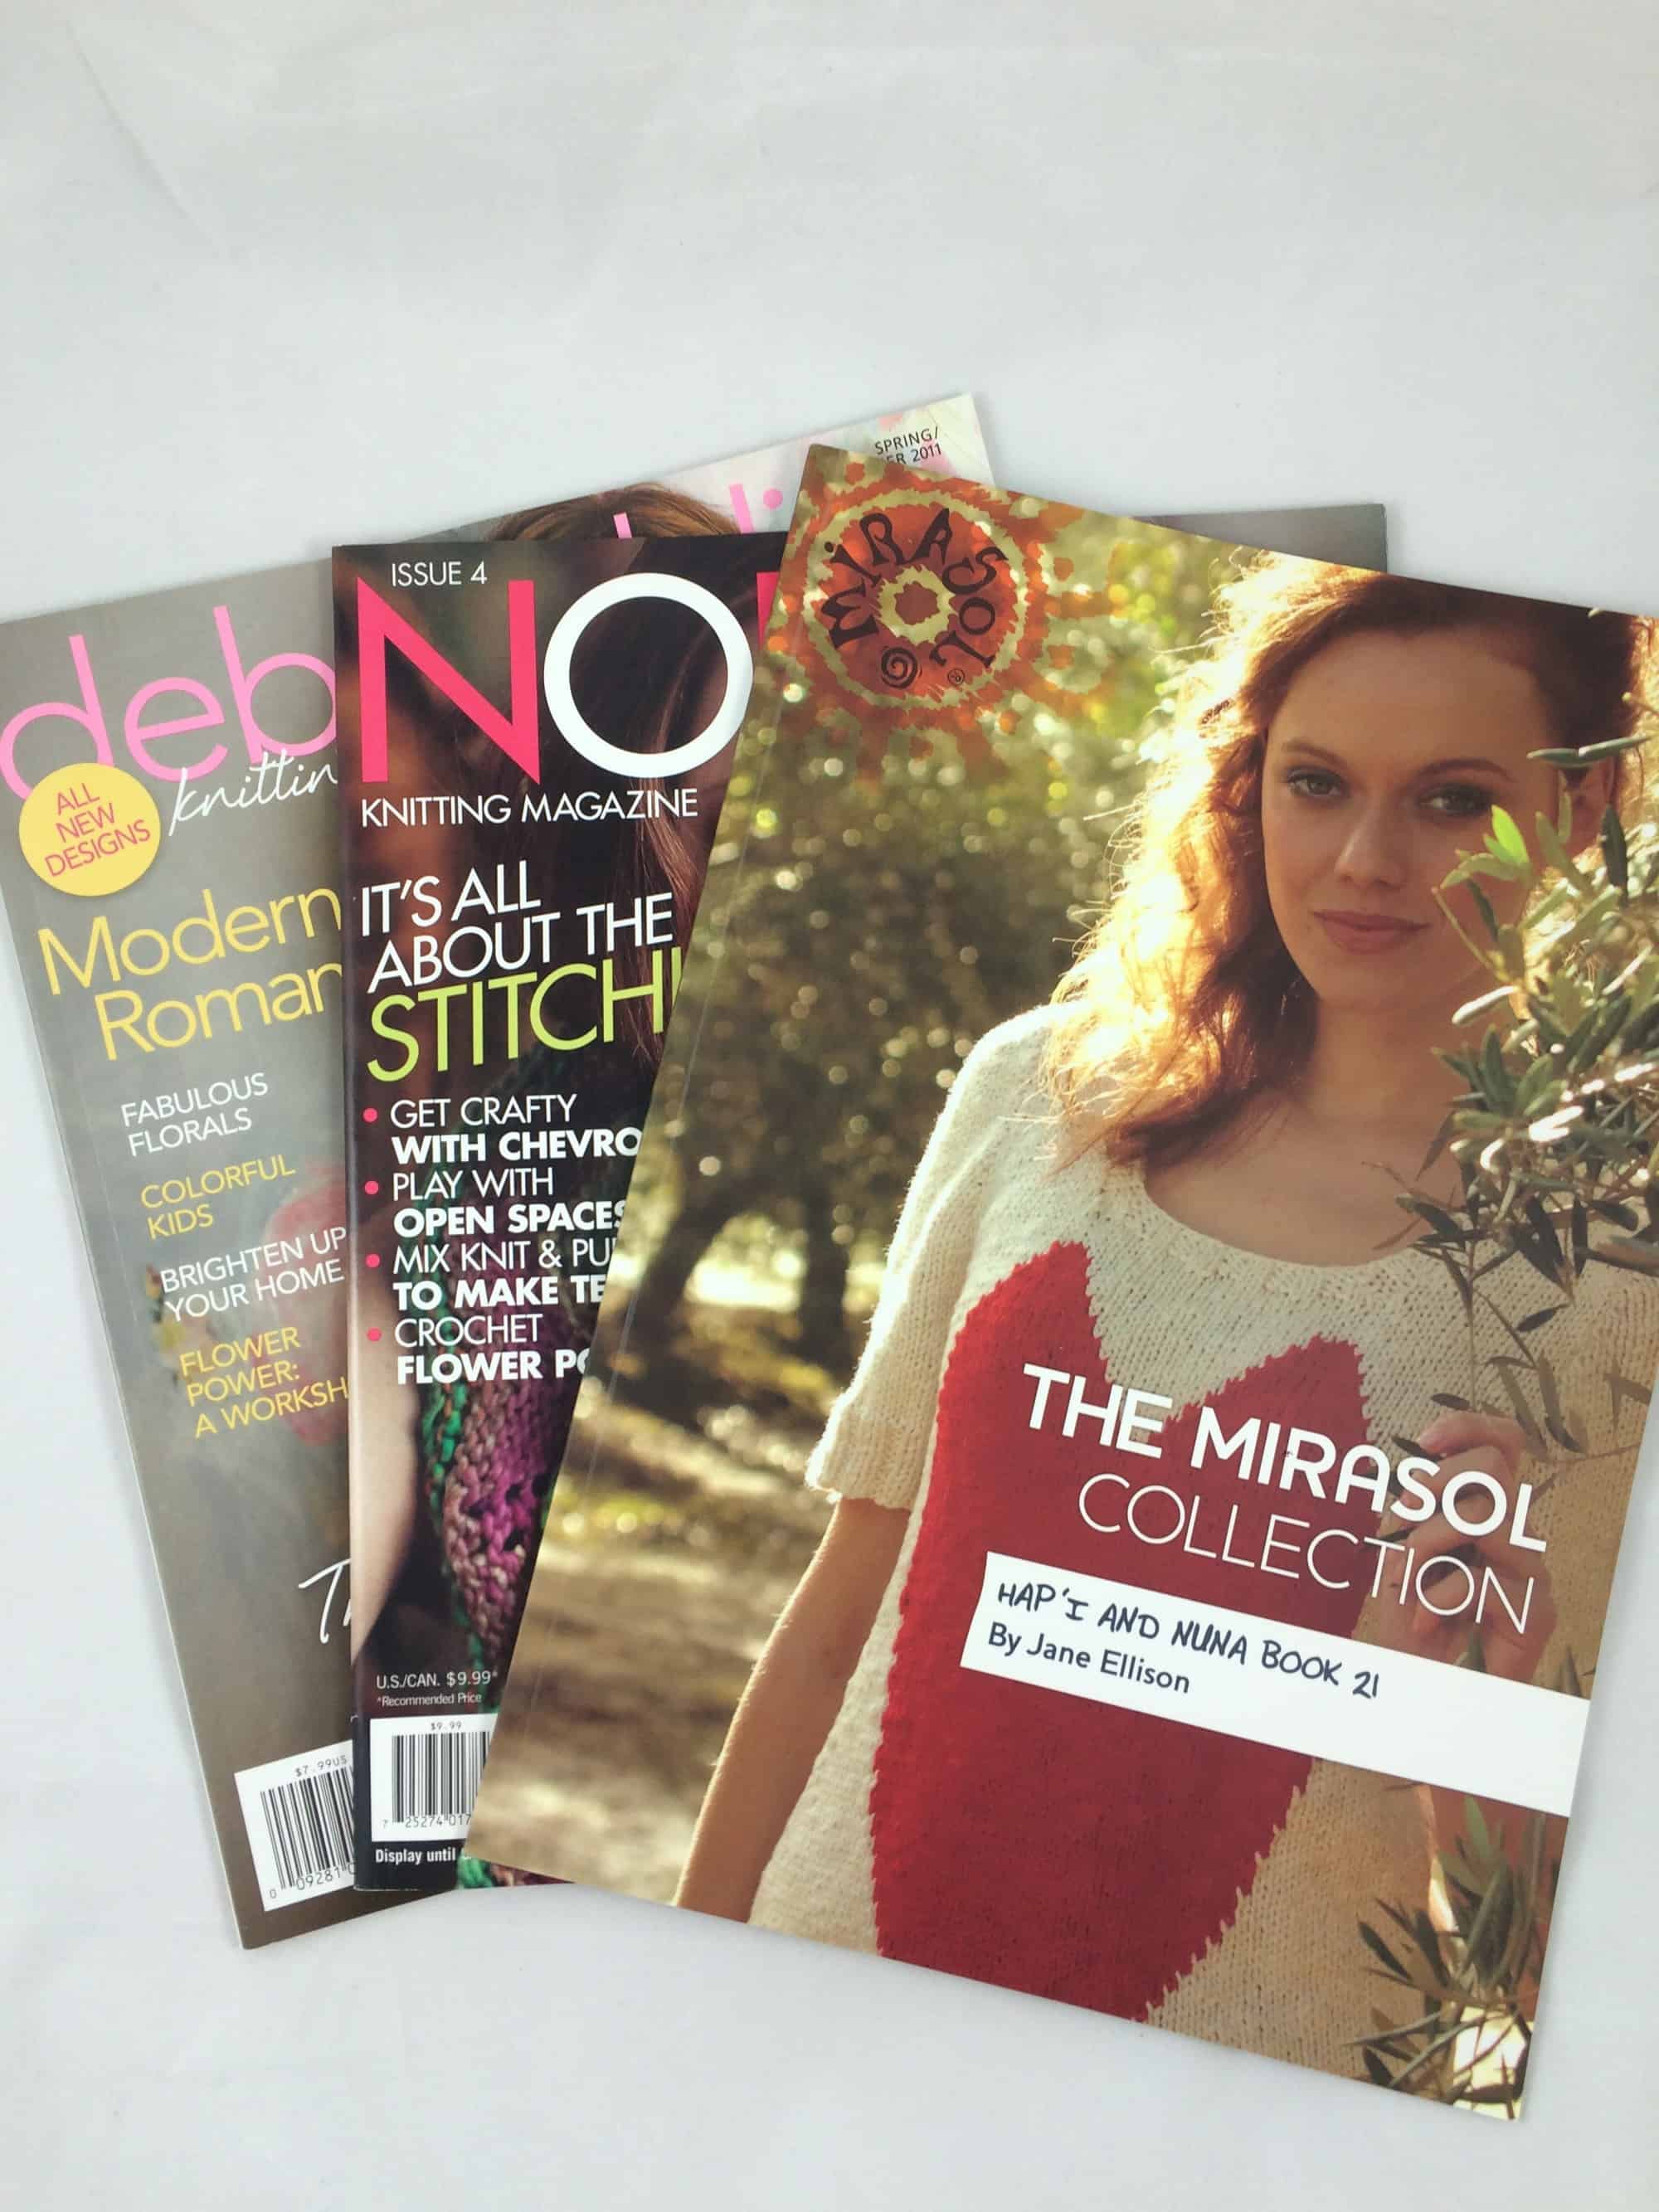
The bag itself is part of our gift — it is moth-proof 4 mil plastic!  In addition to the 8 yarn balls, each bag held coupons from several sponsors, a 16″ bamboo Chiao Goo needle in either US size 2 or US size 2.5, and 3 magazines.

image
image

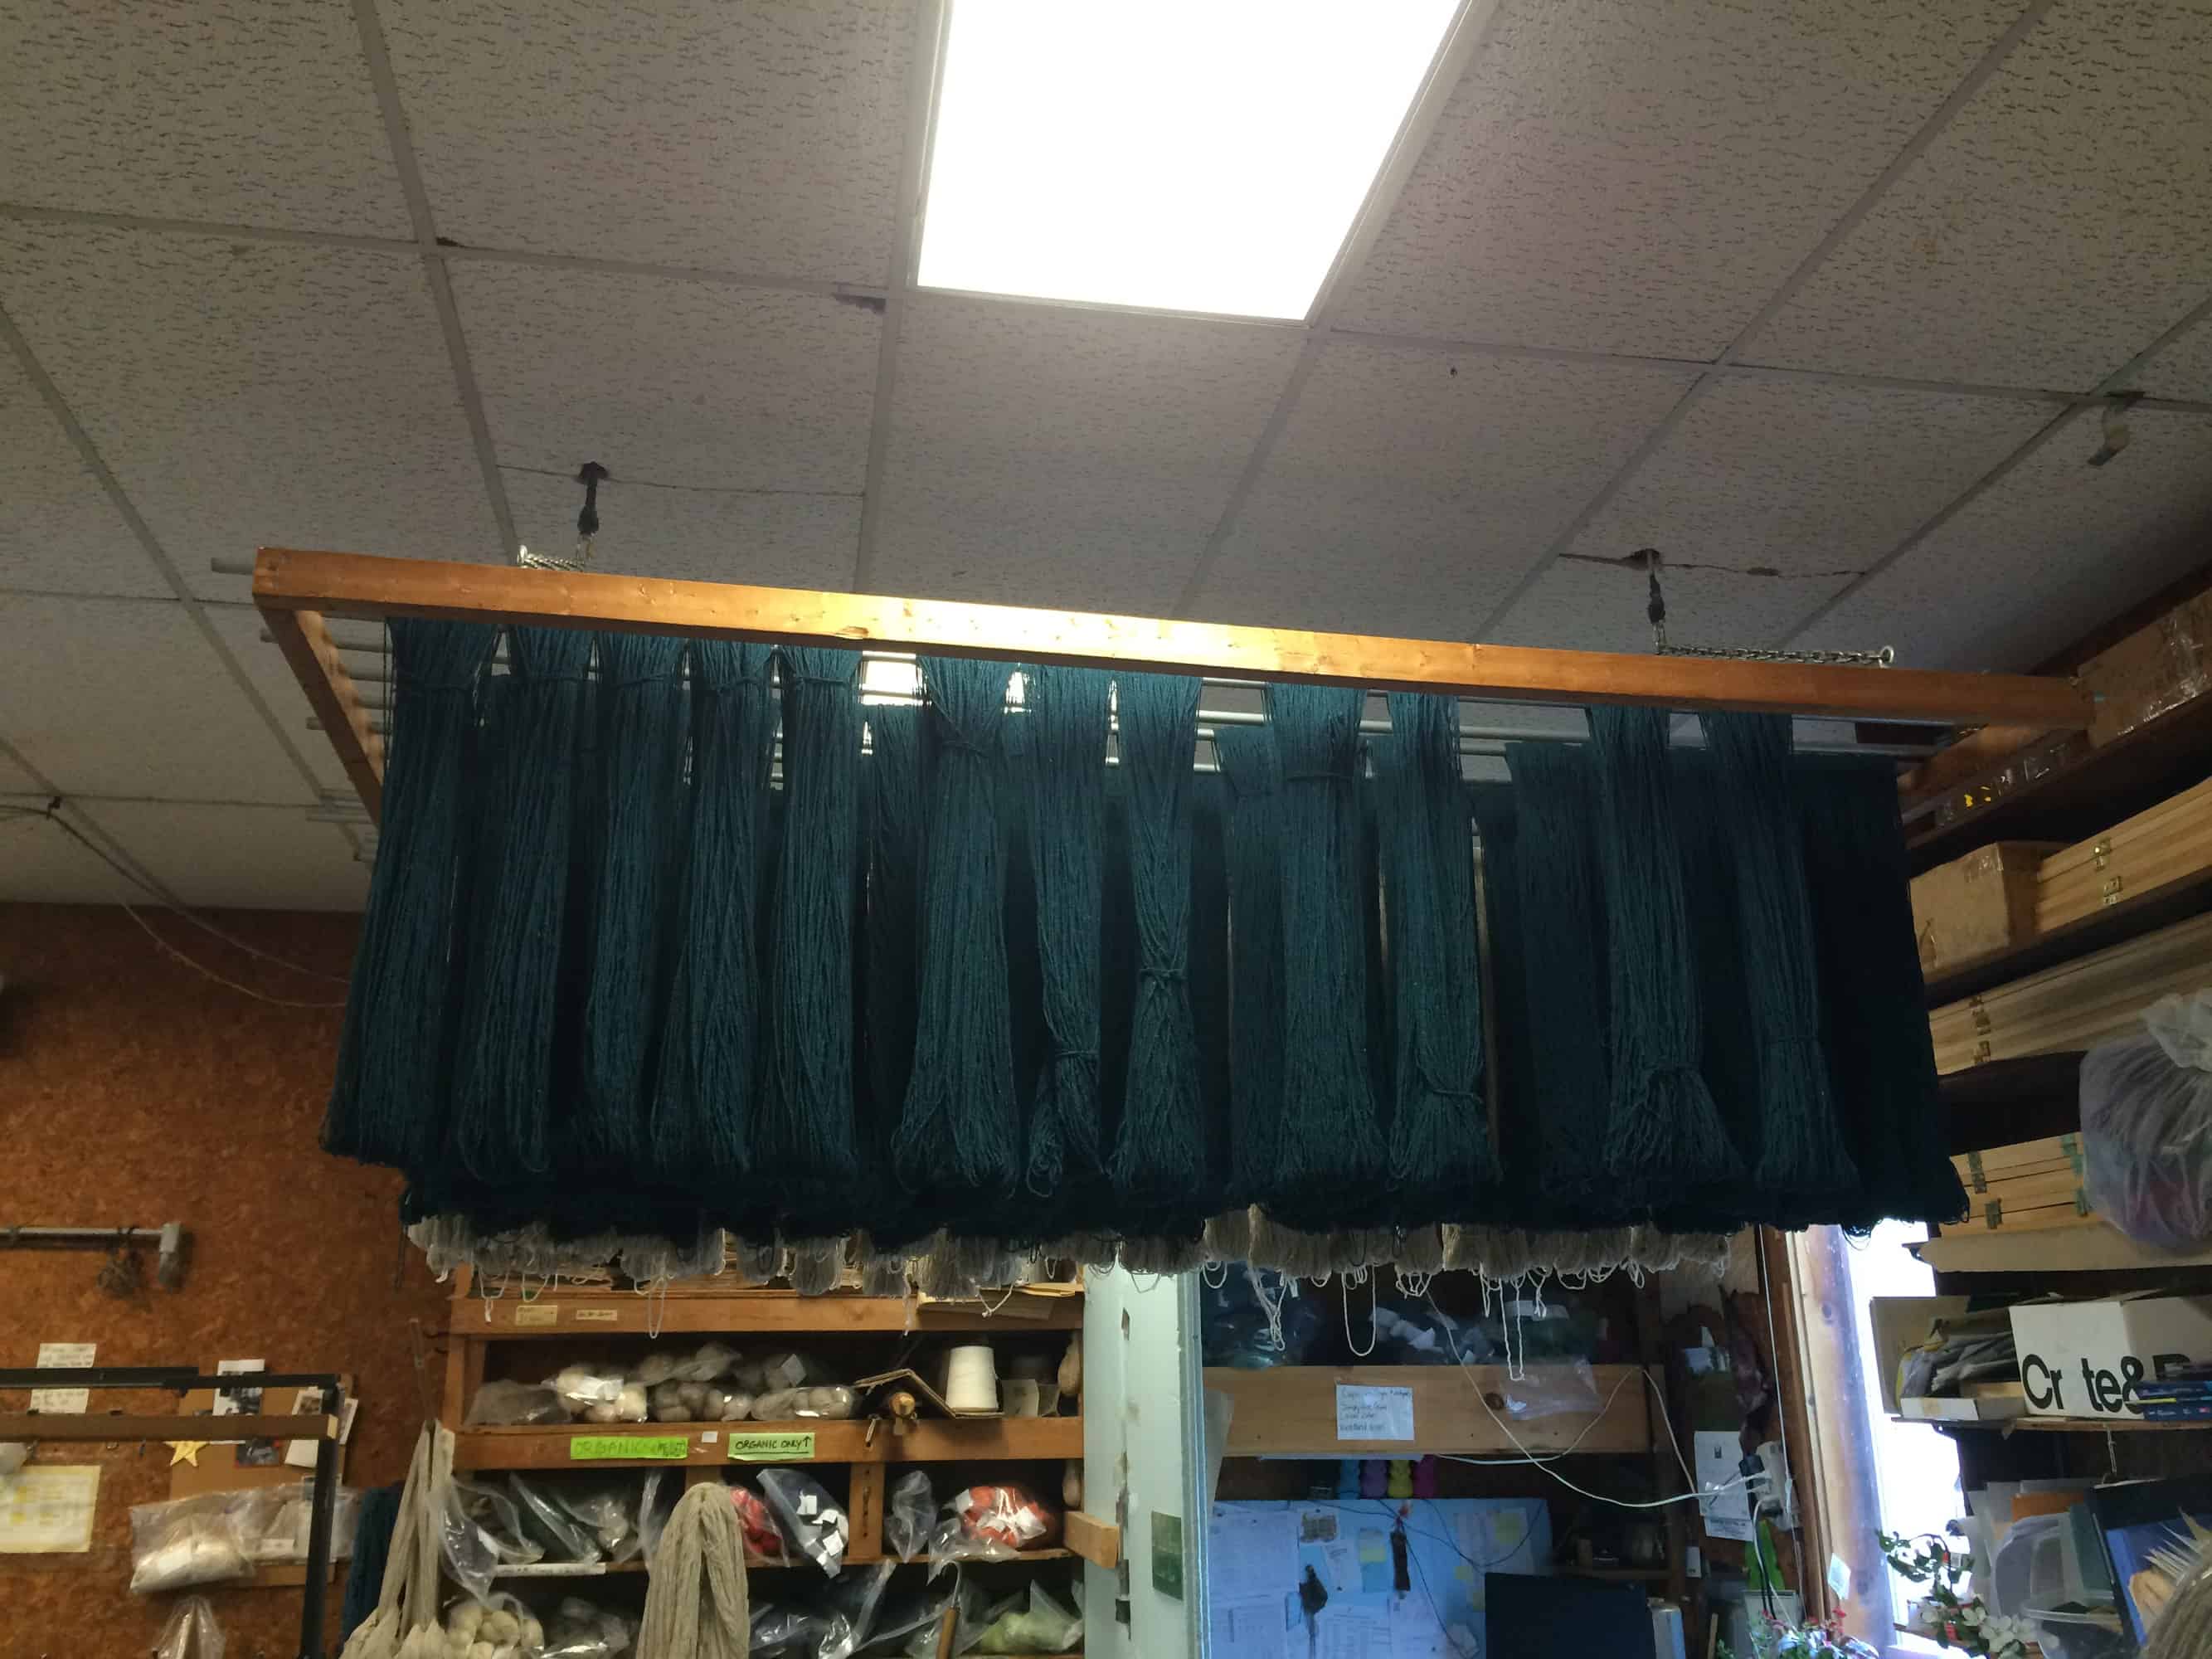
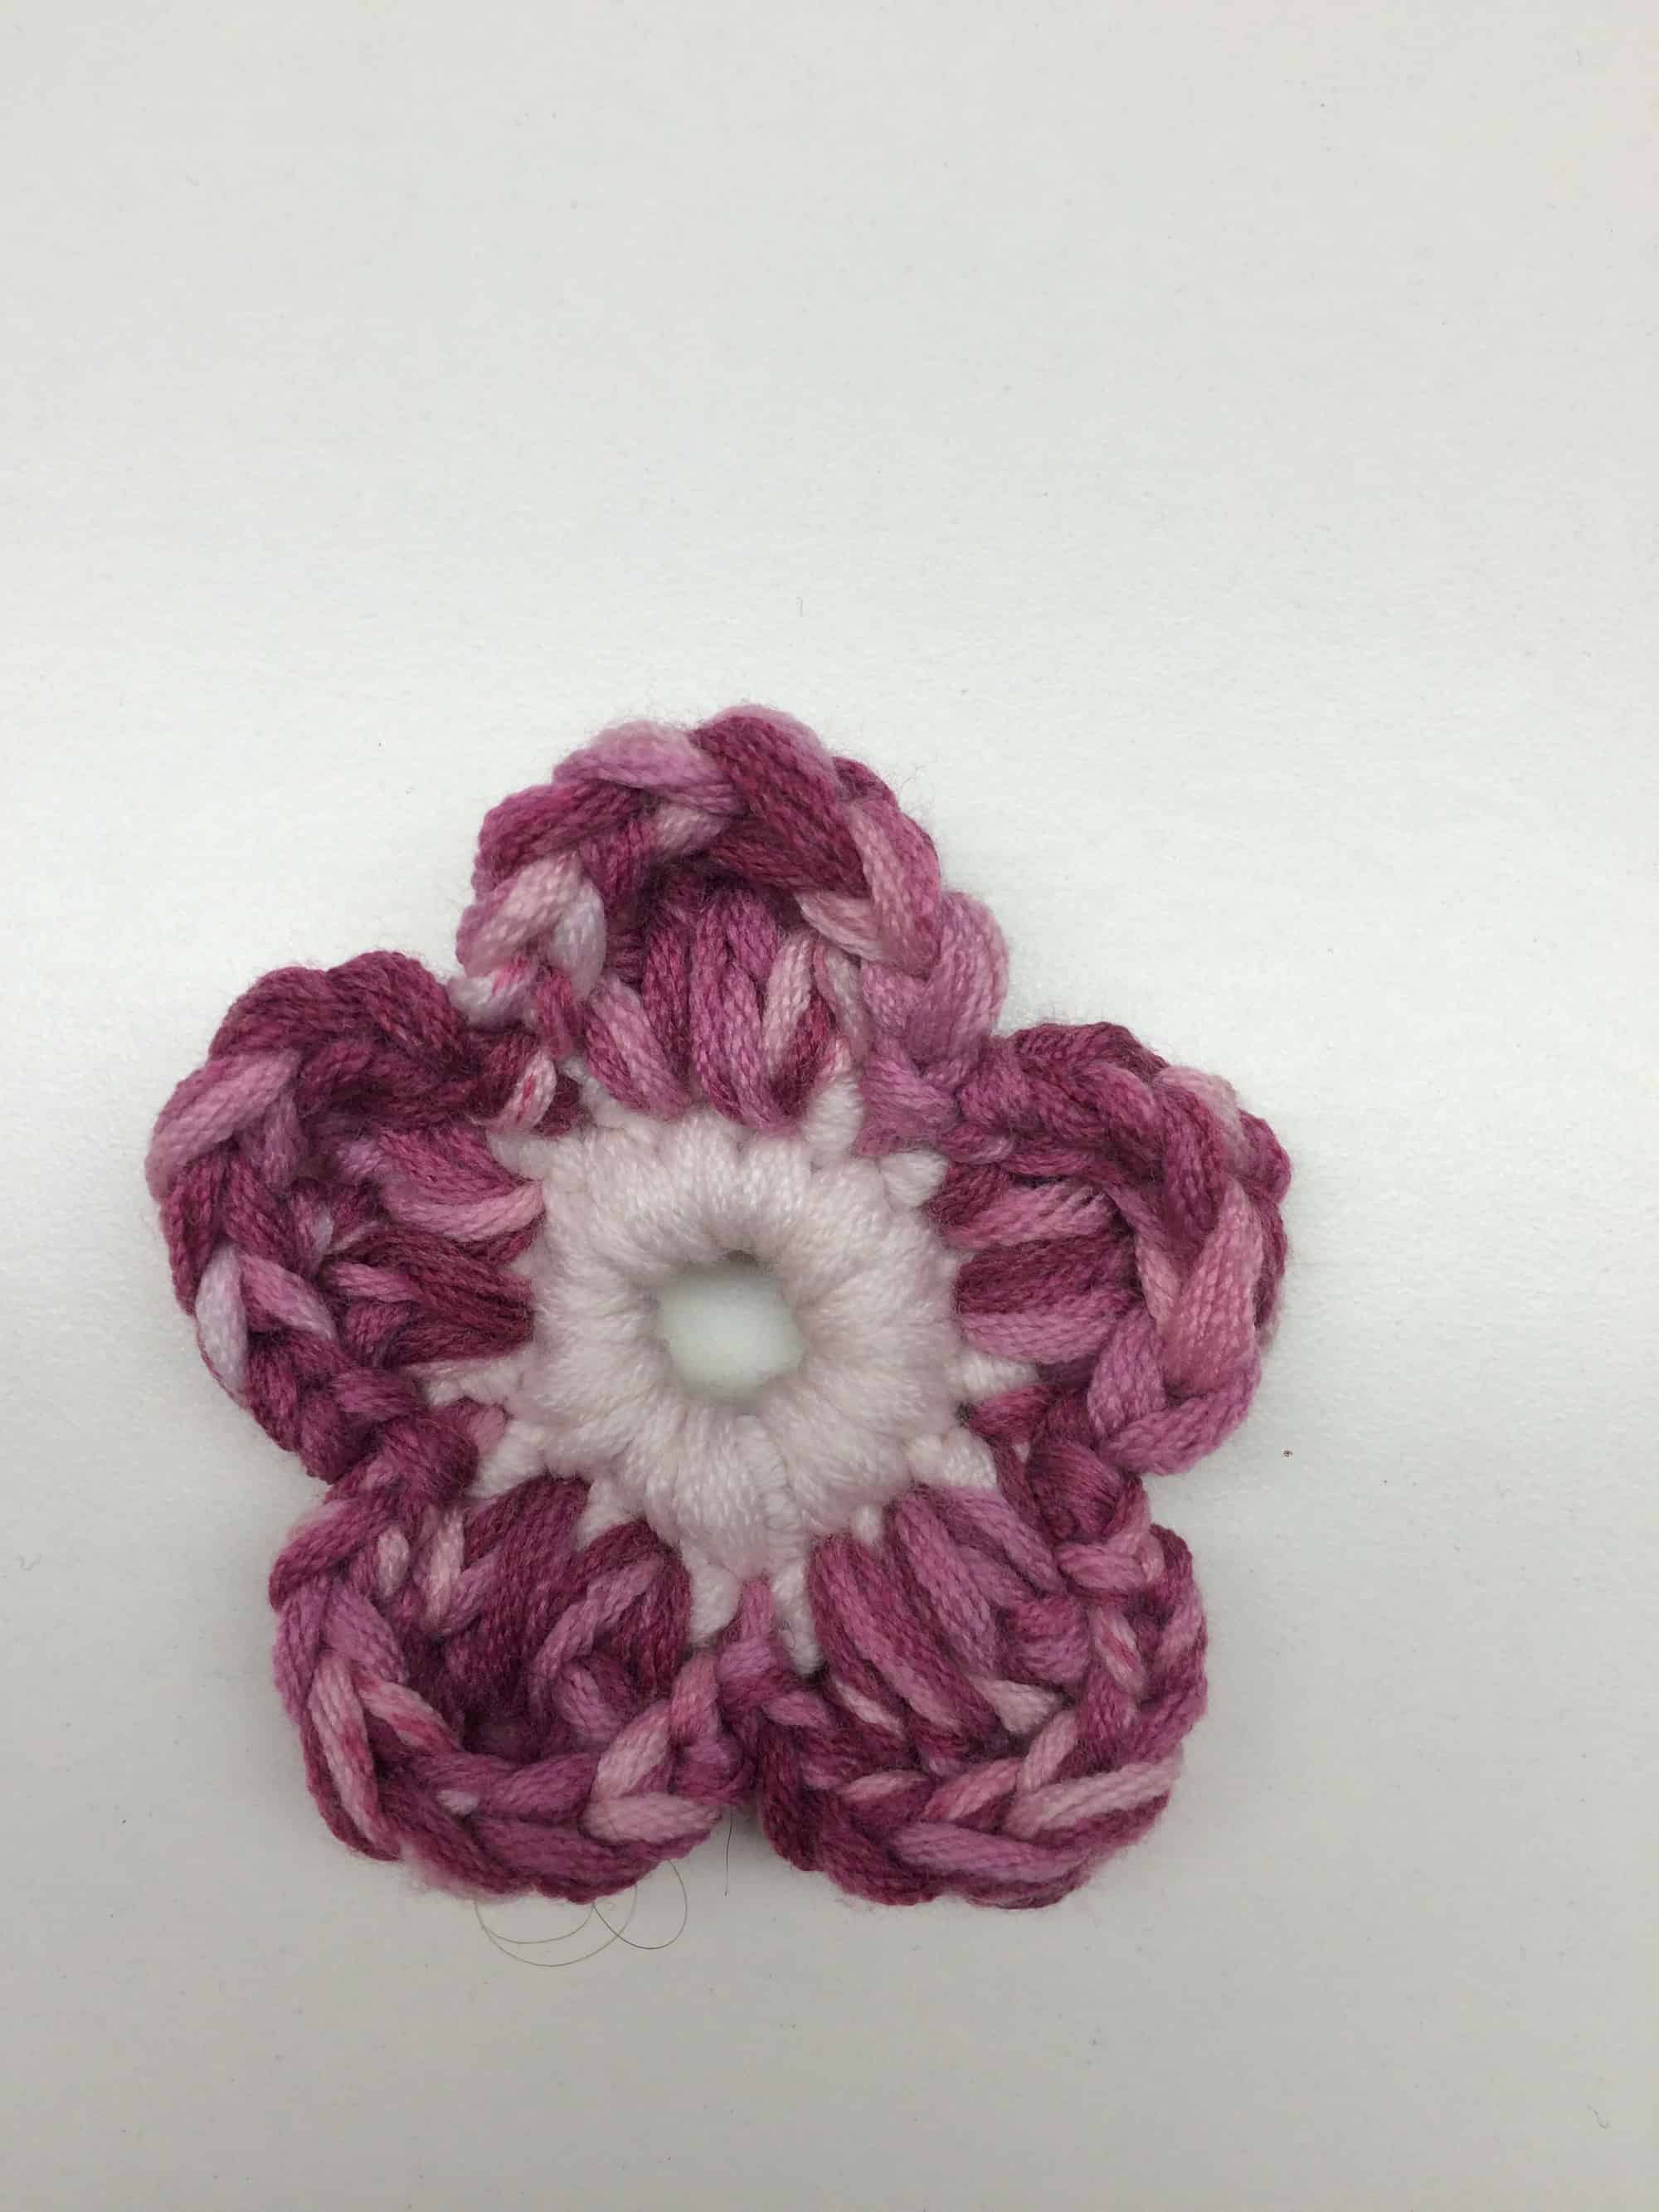
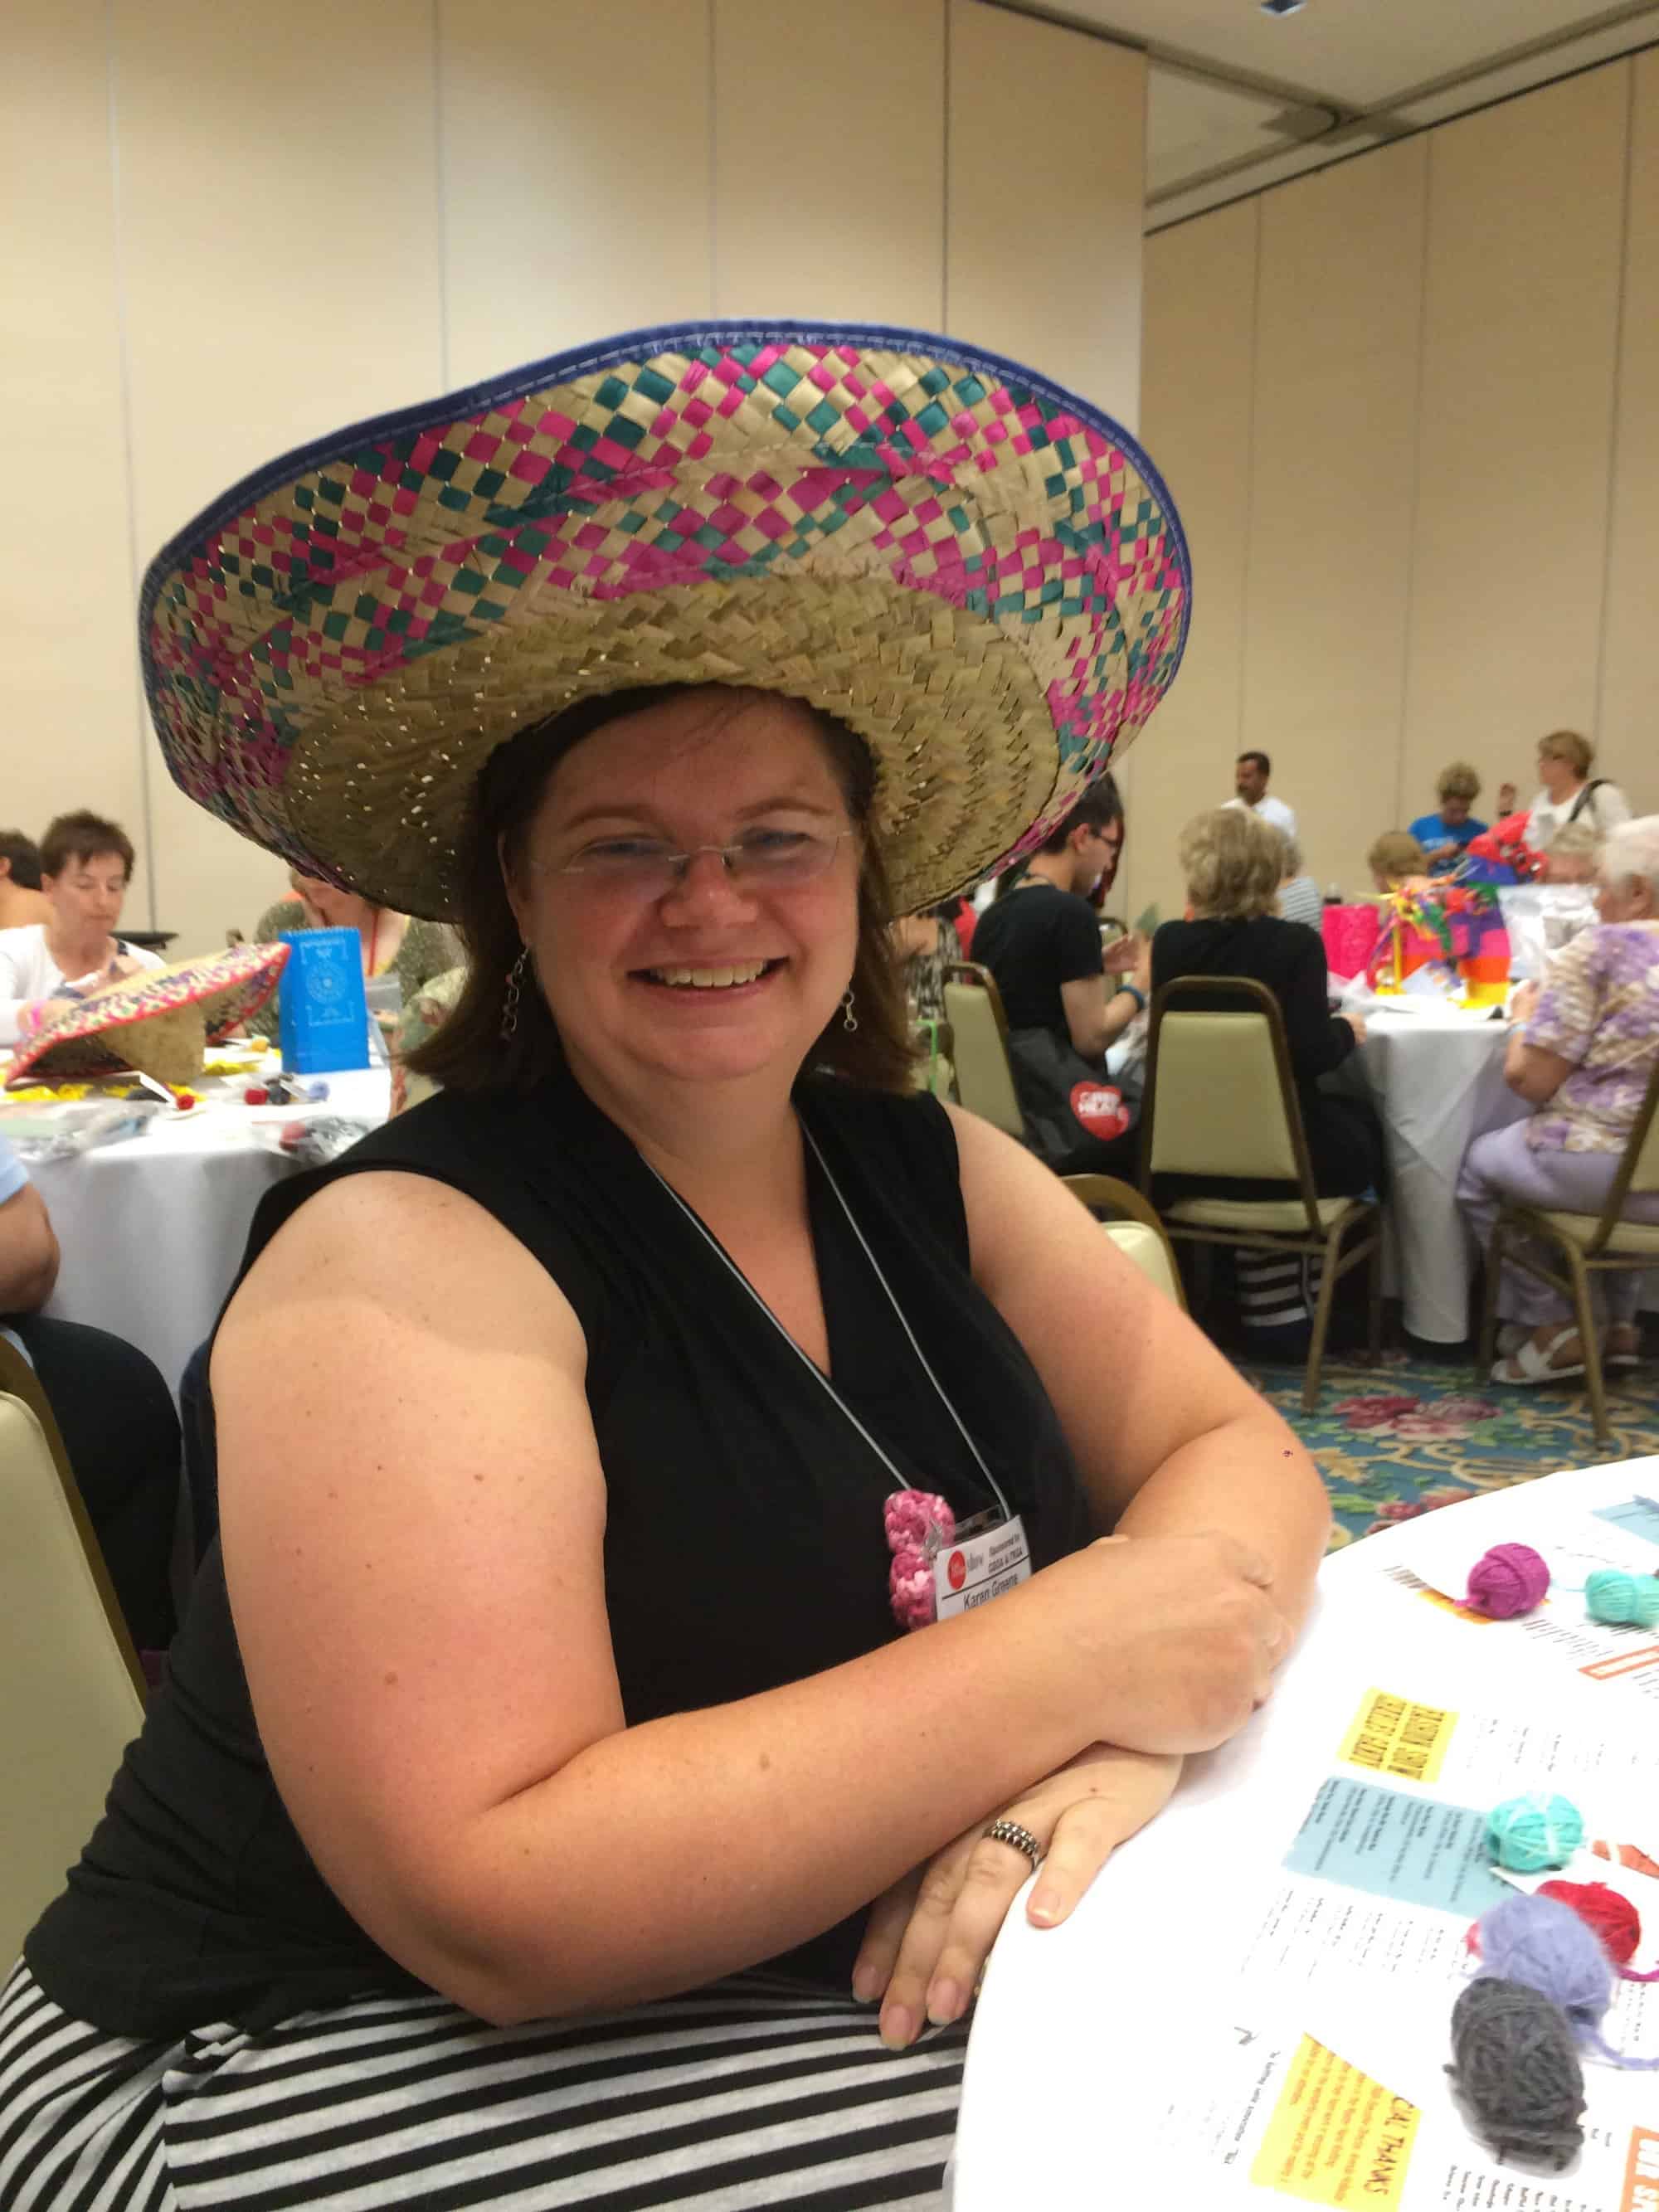
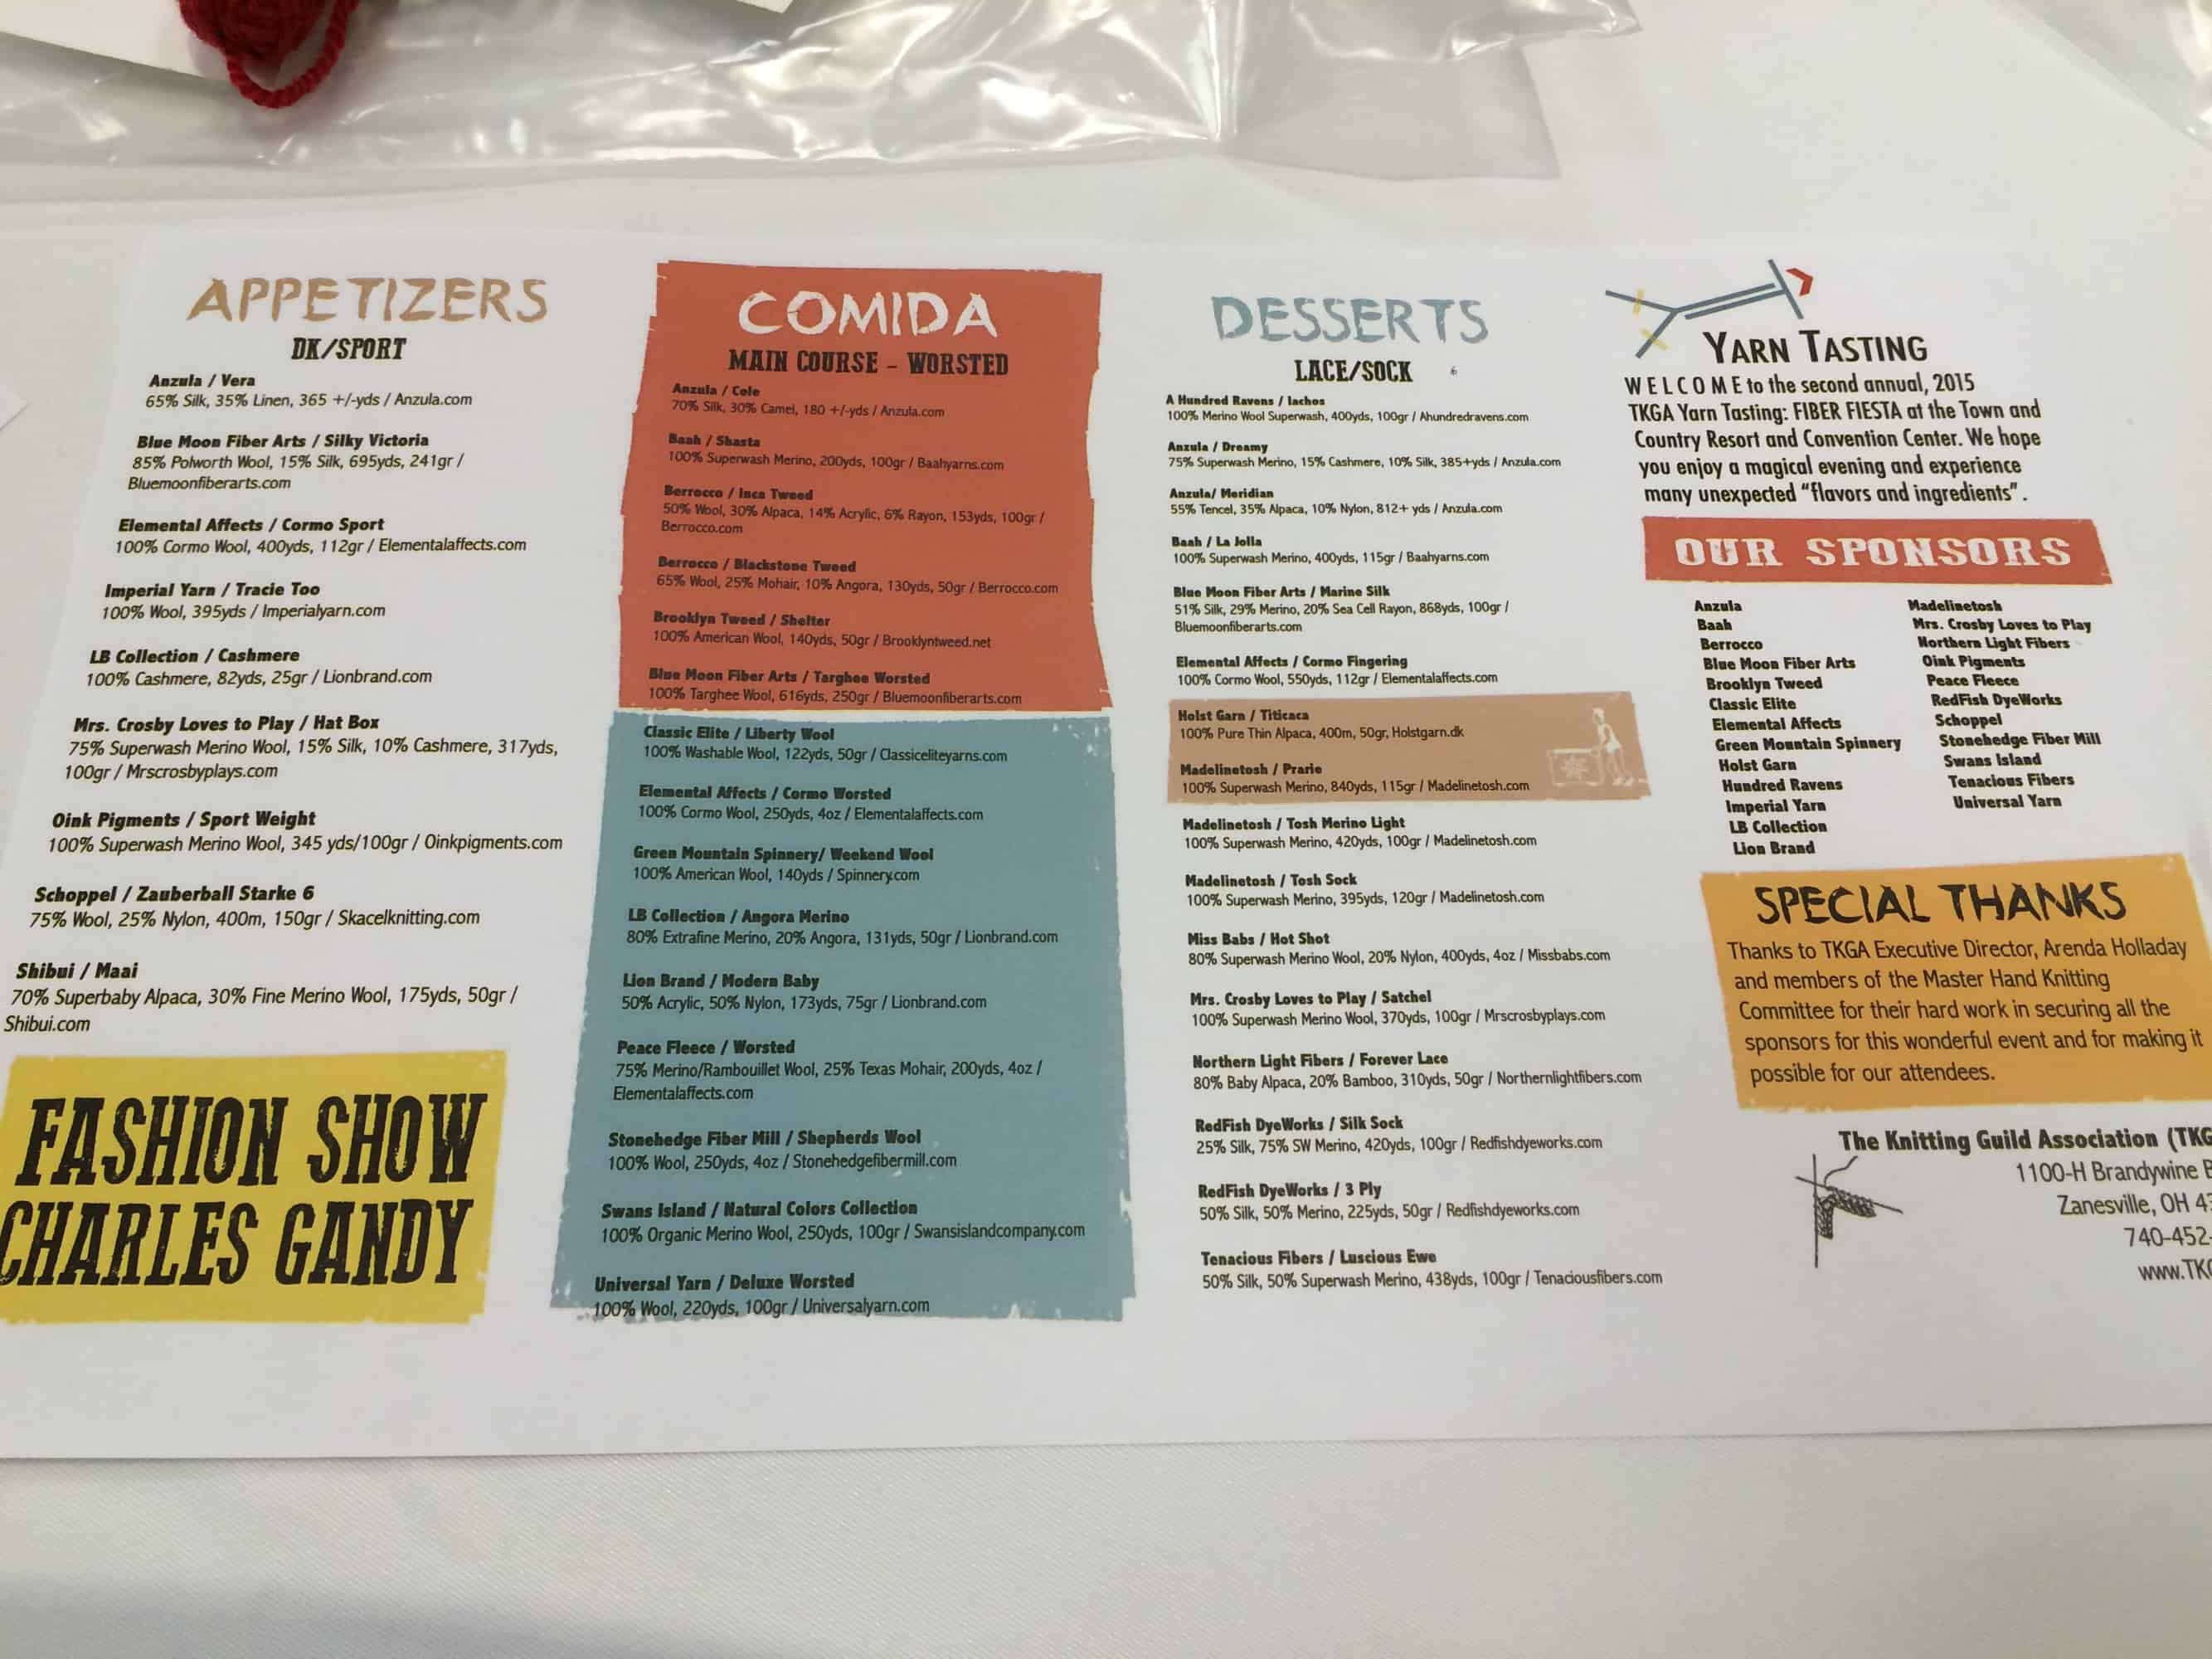
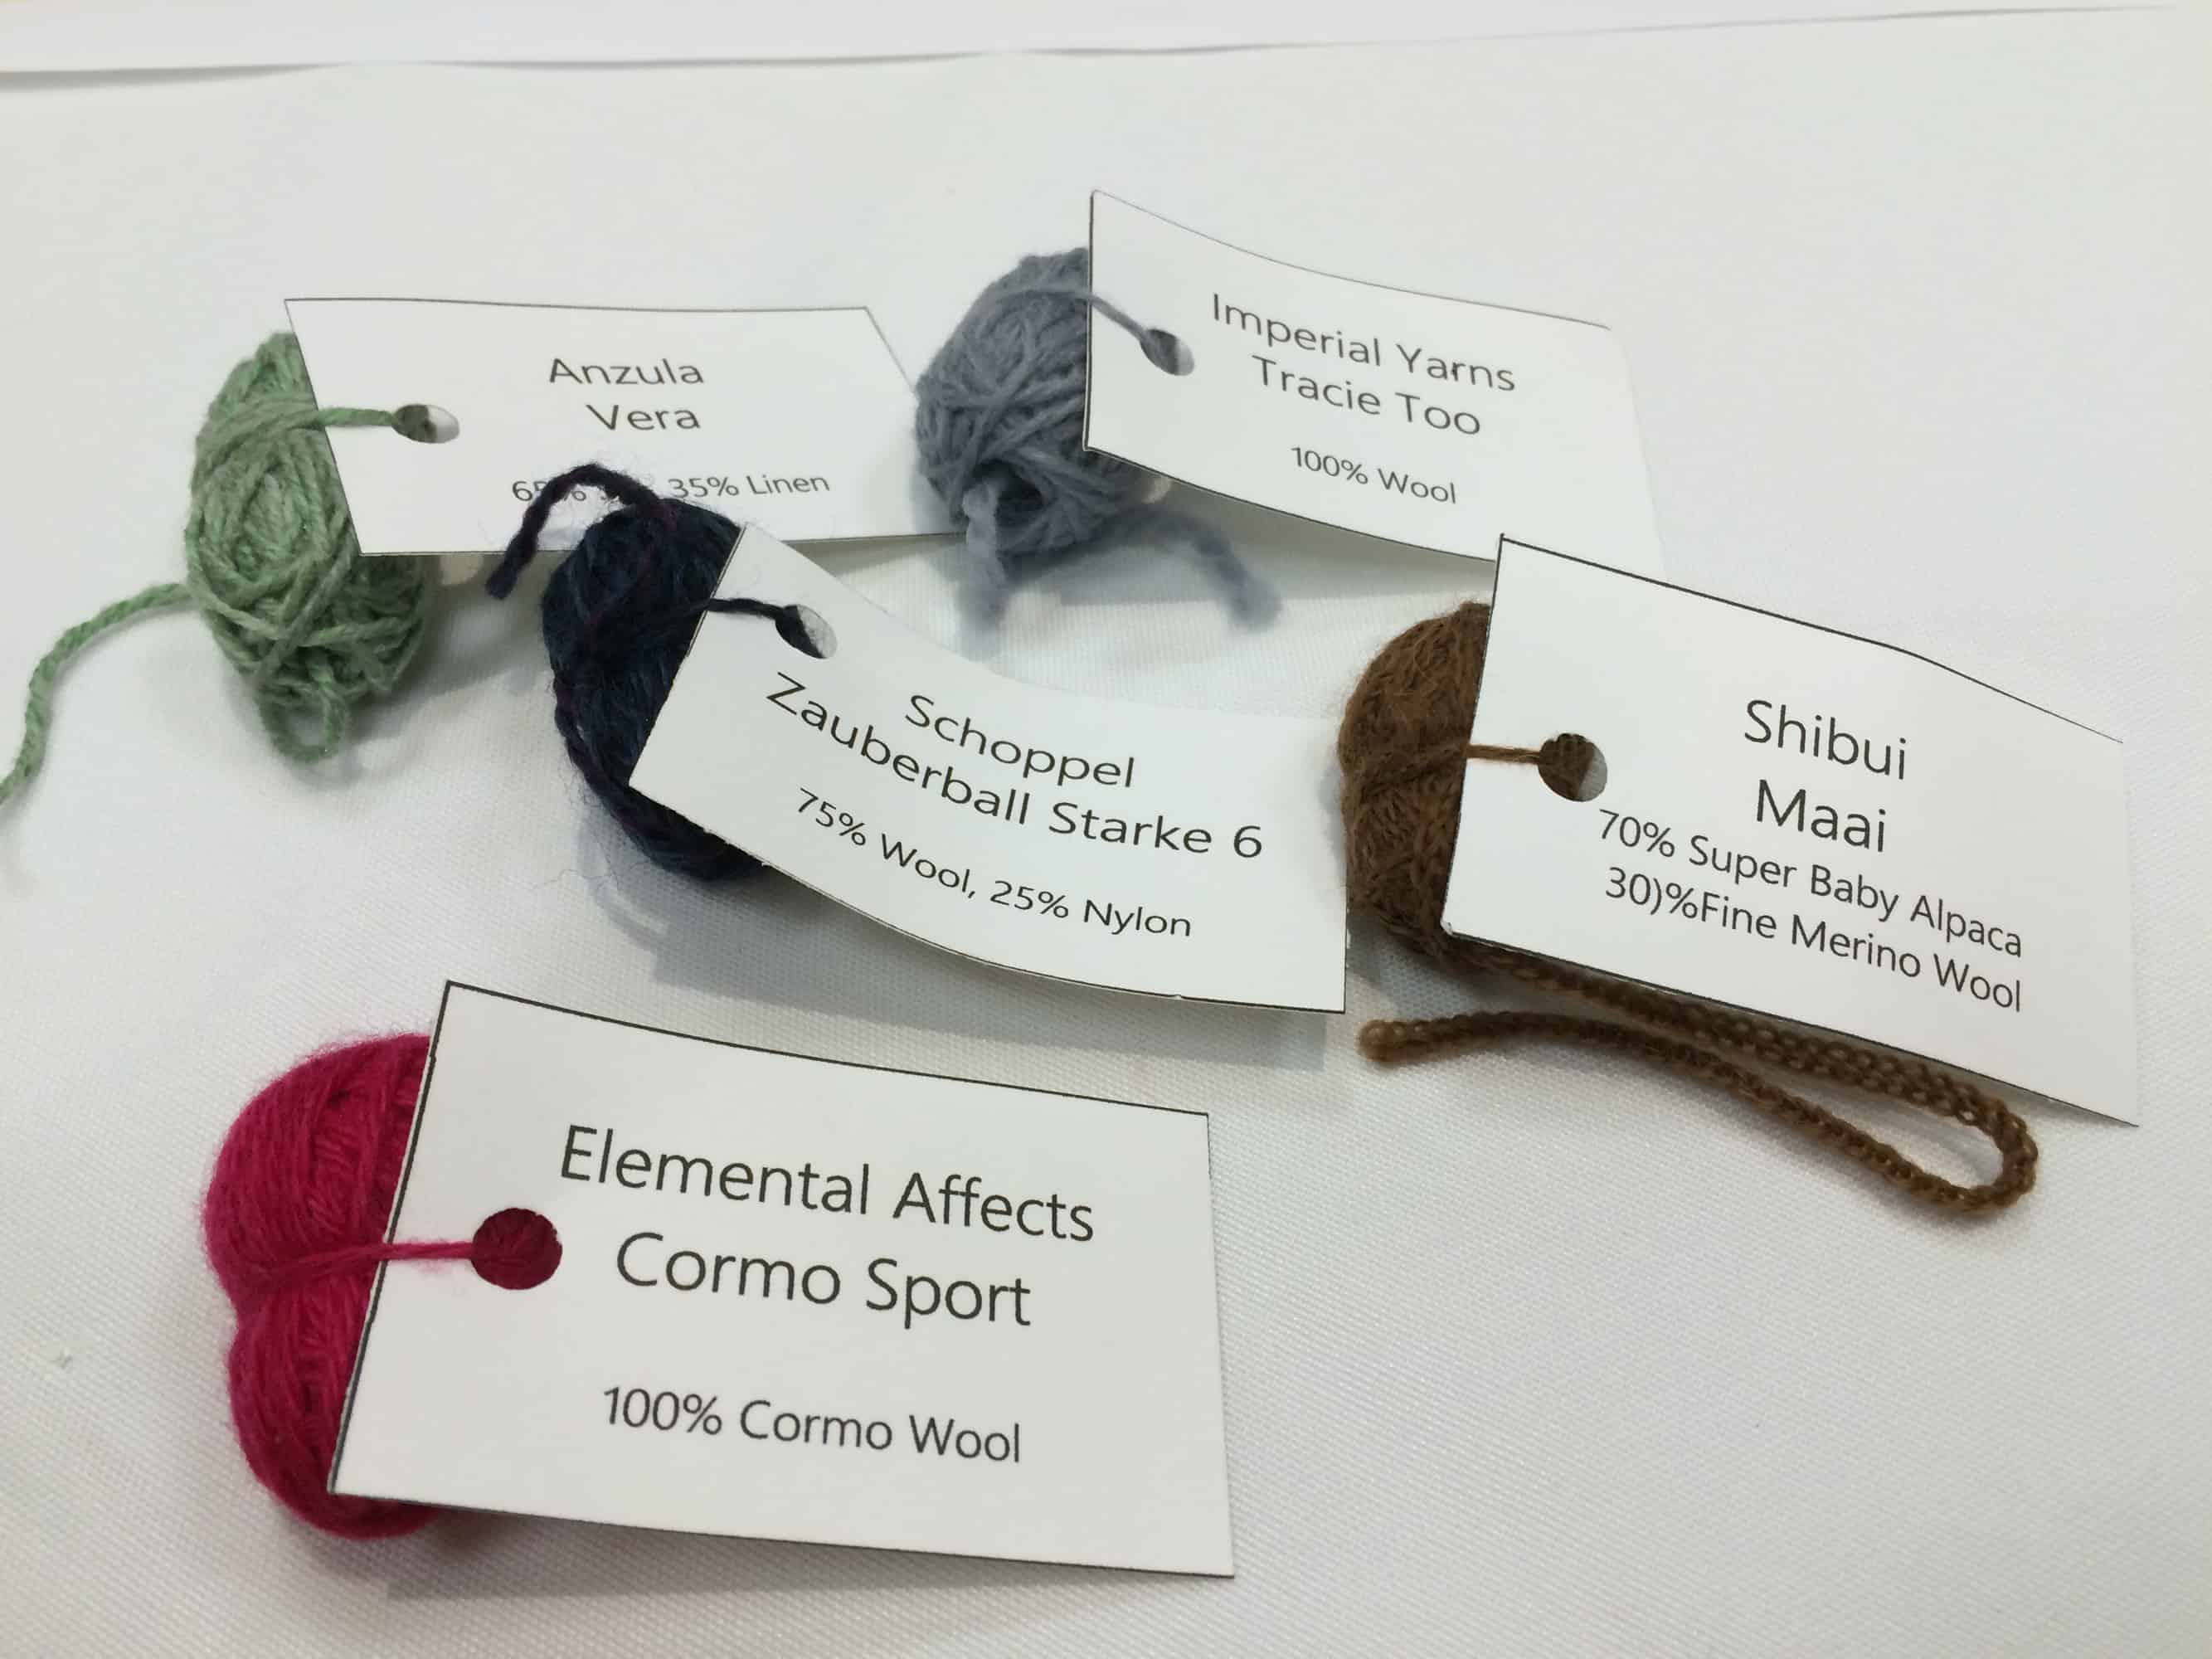
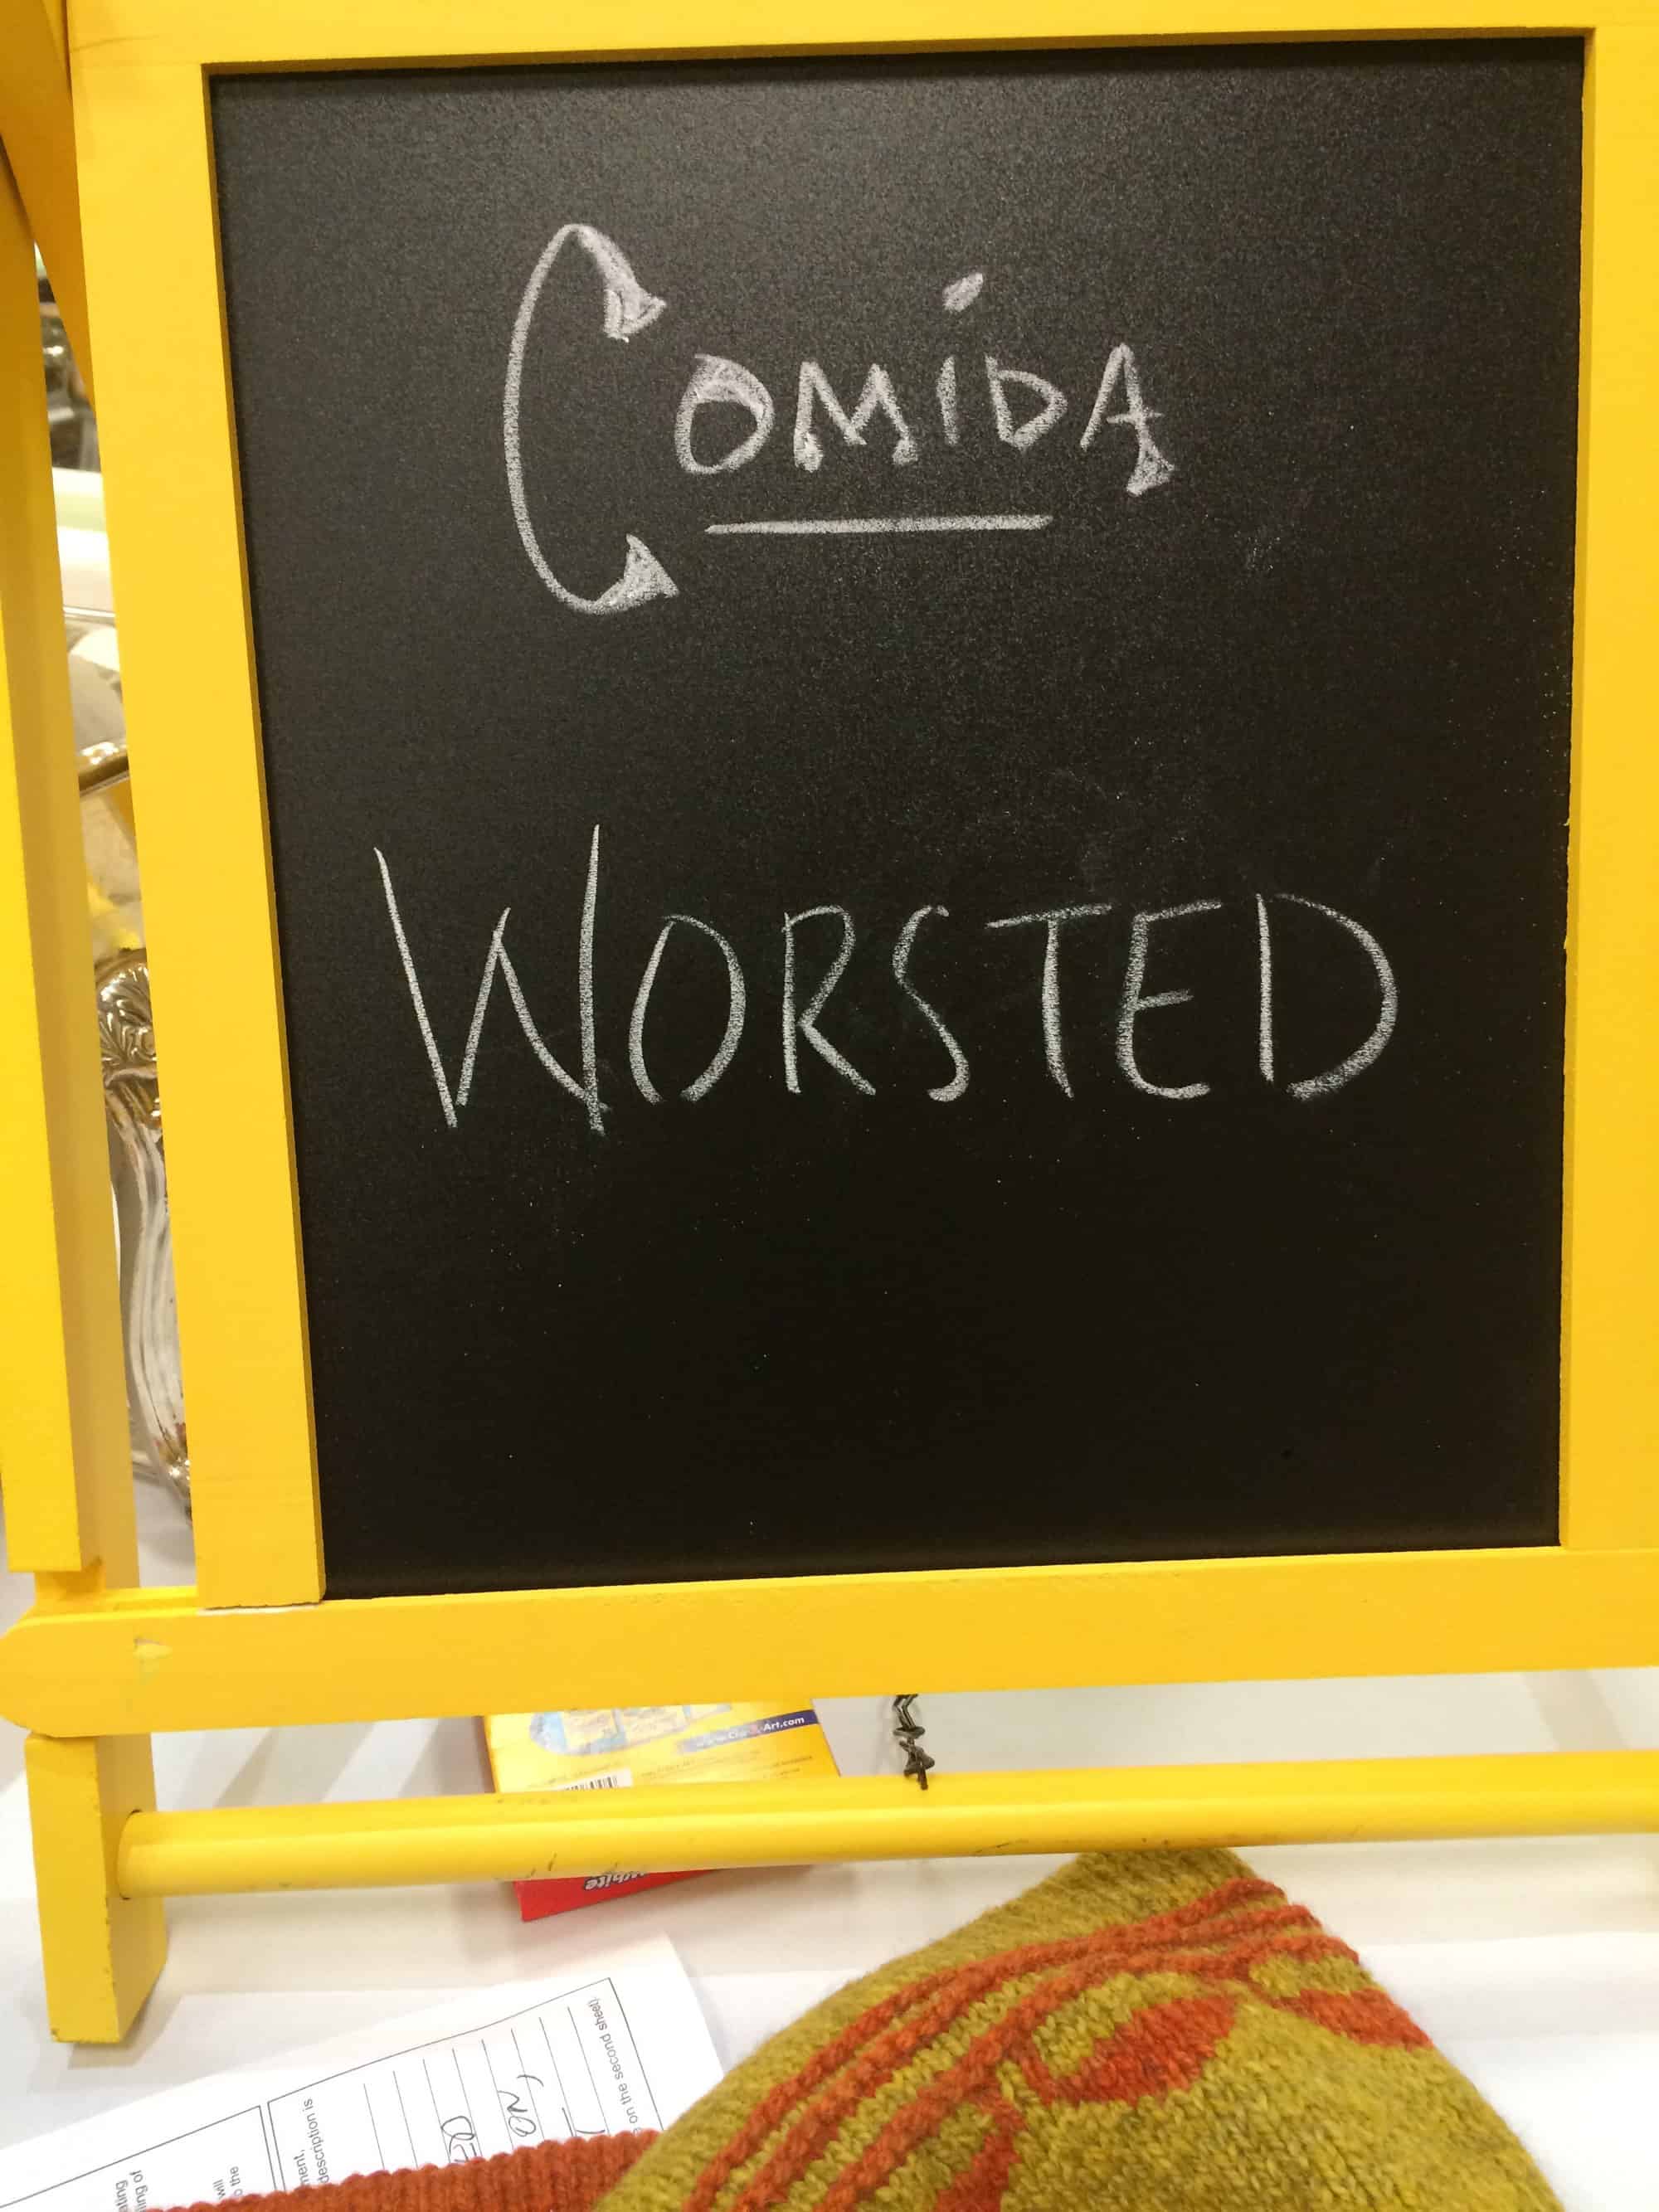
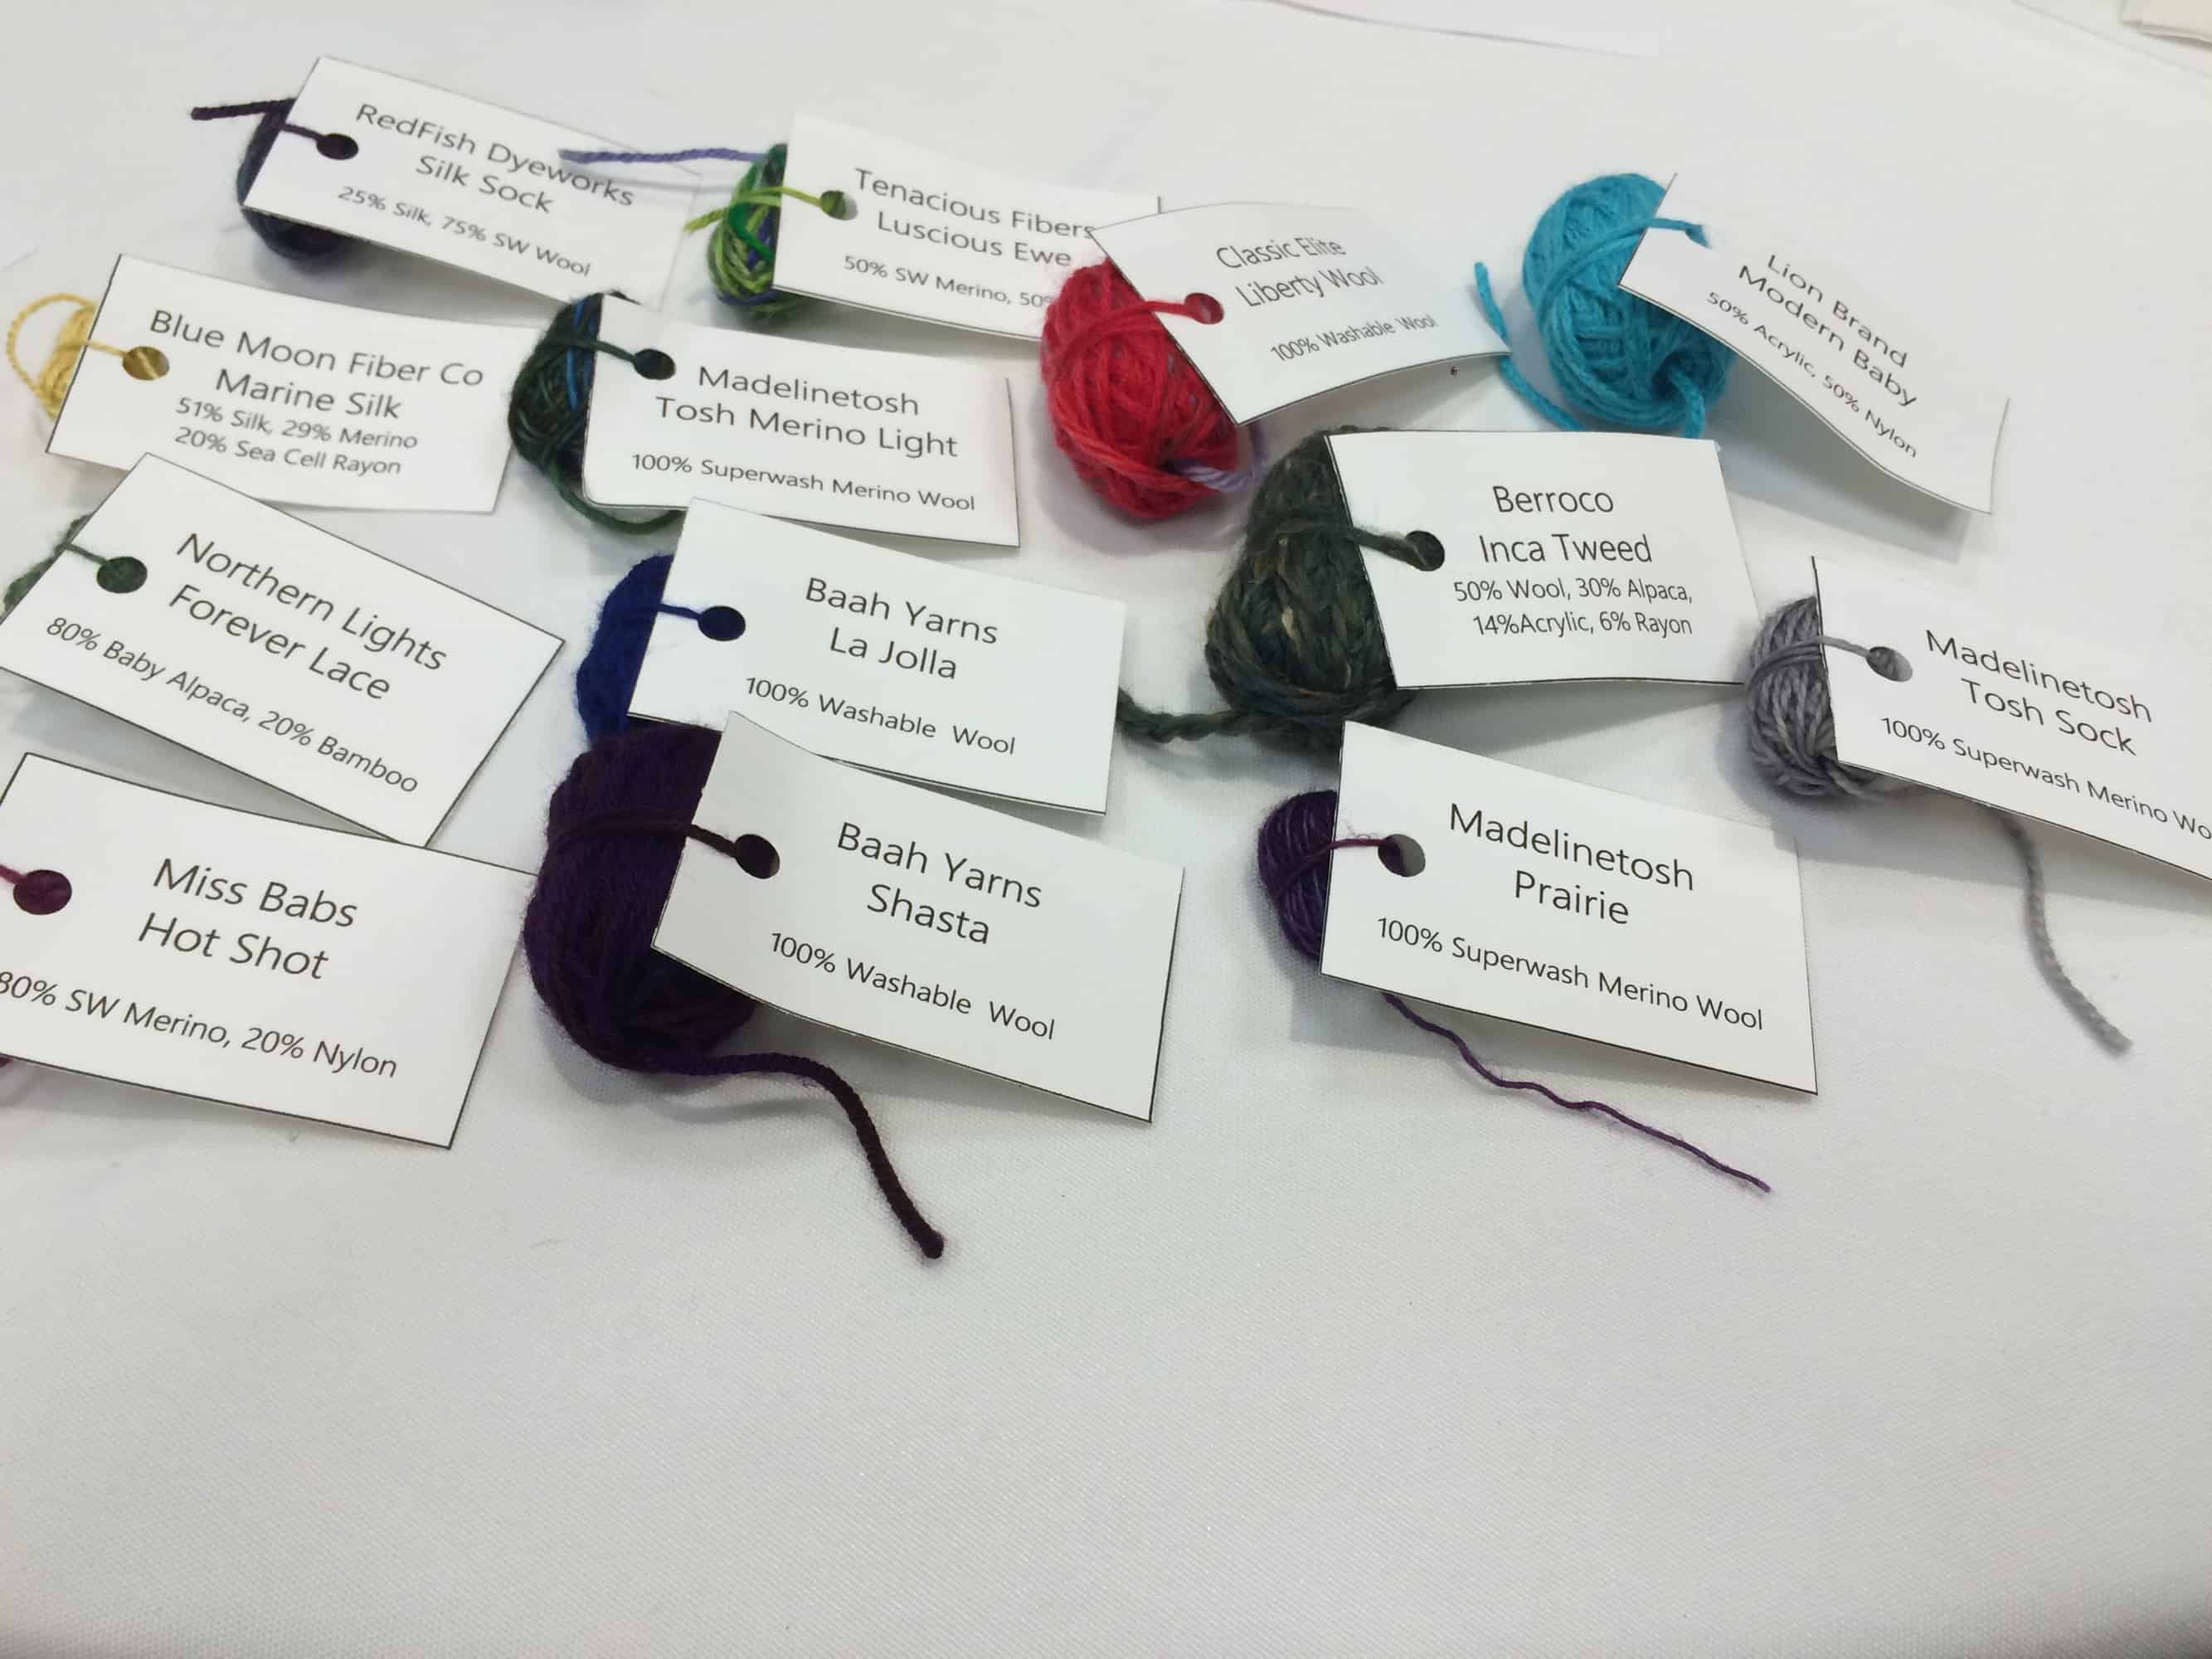
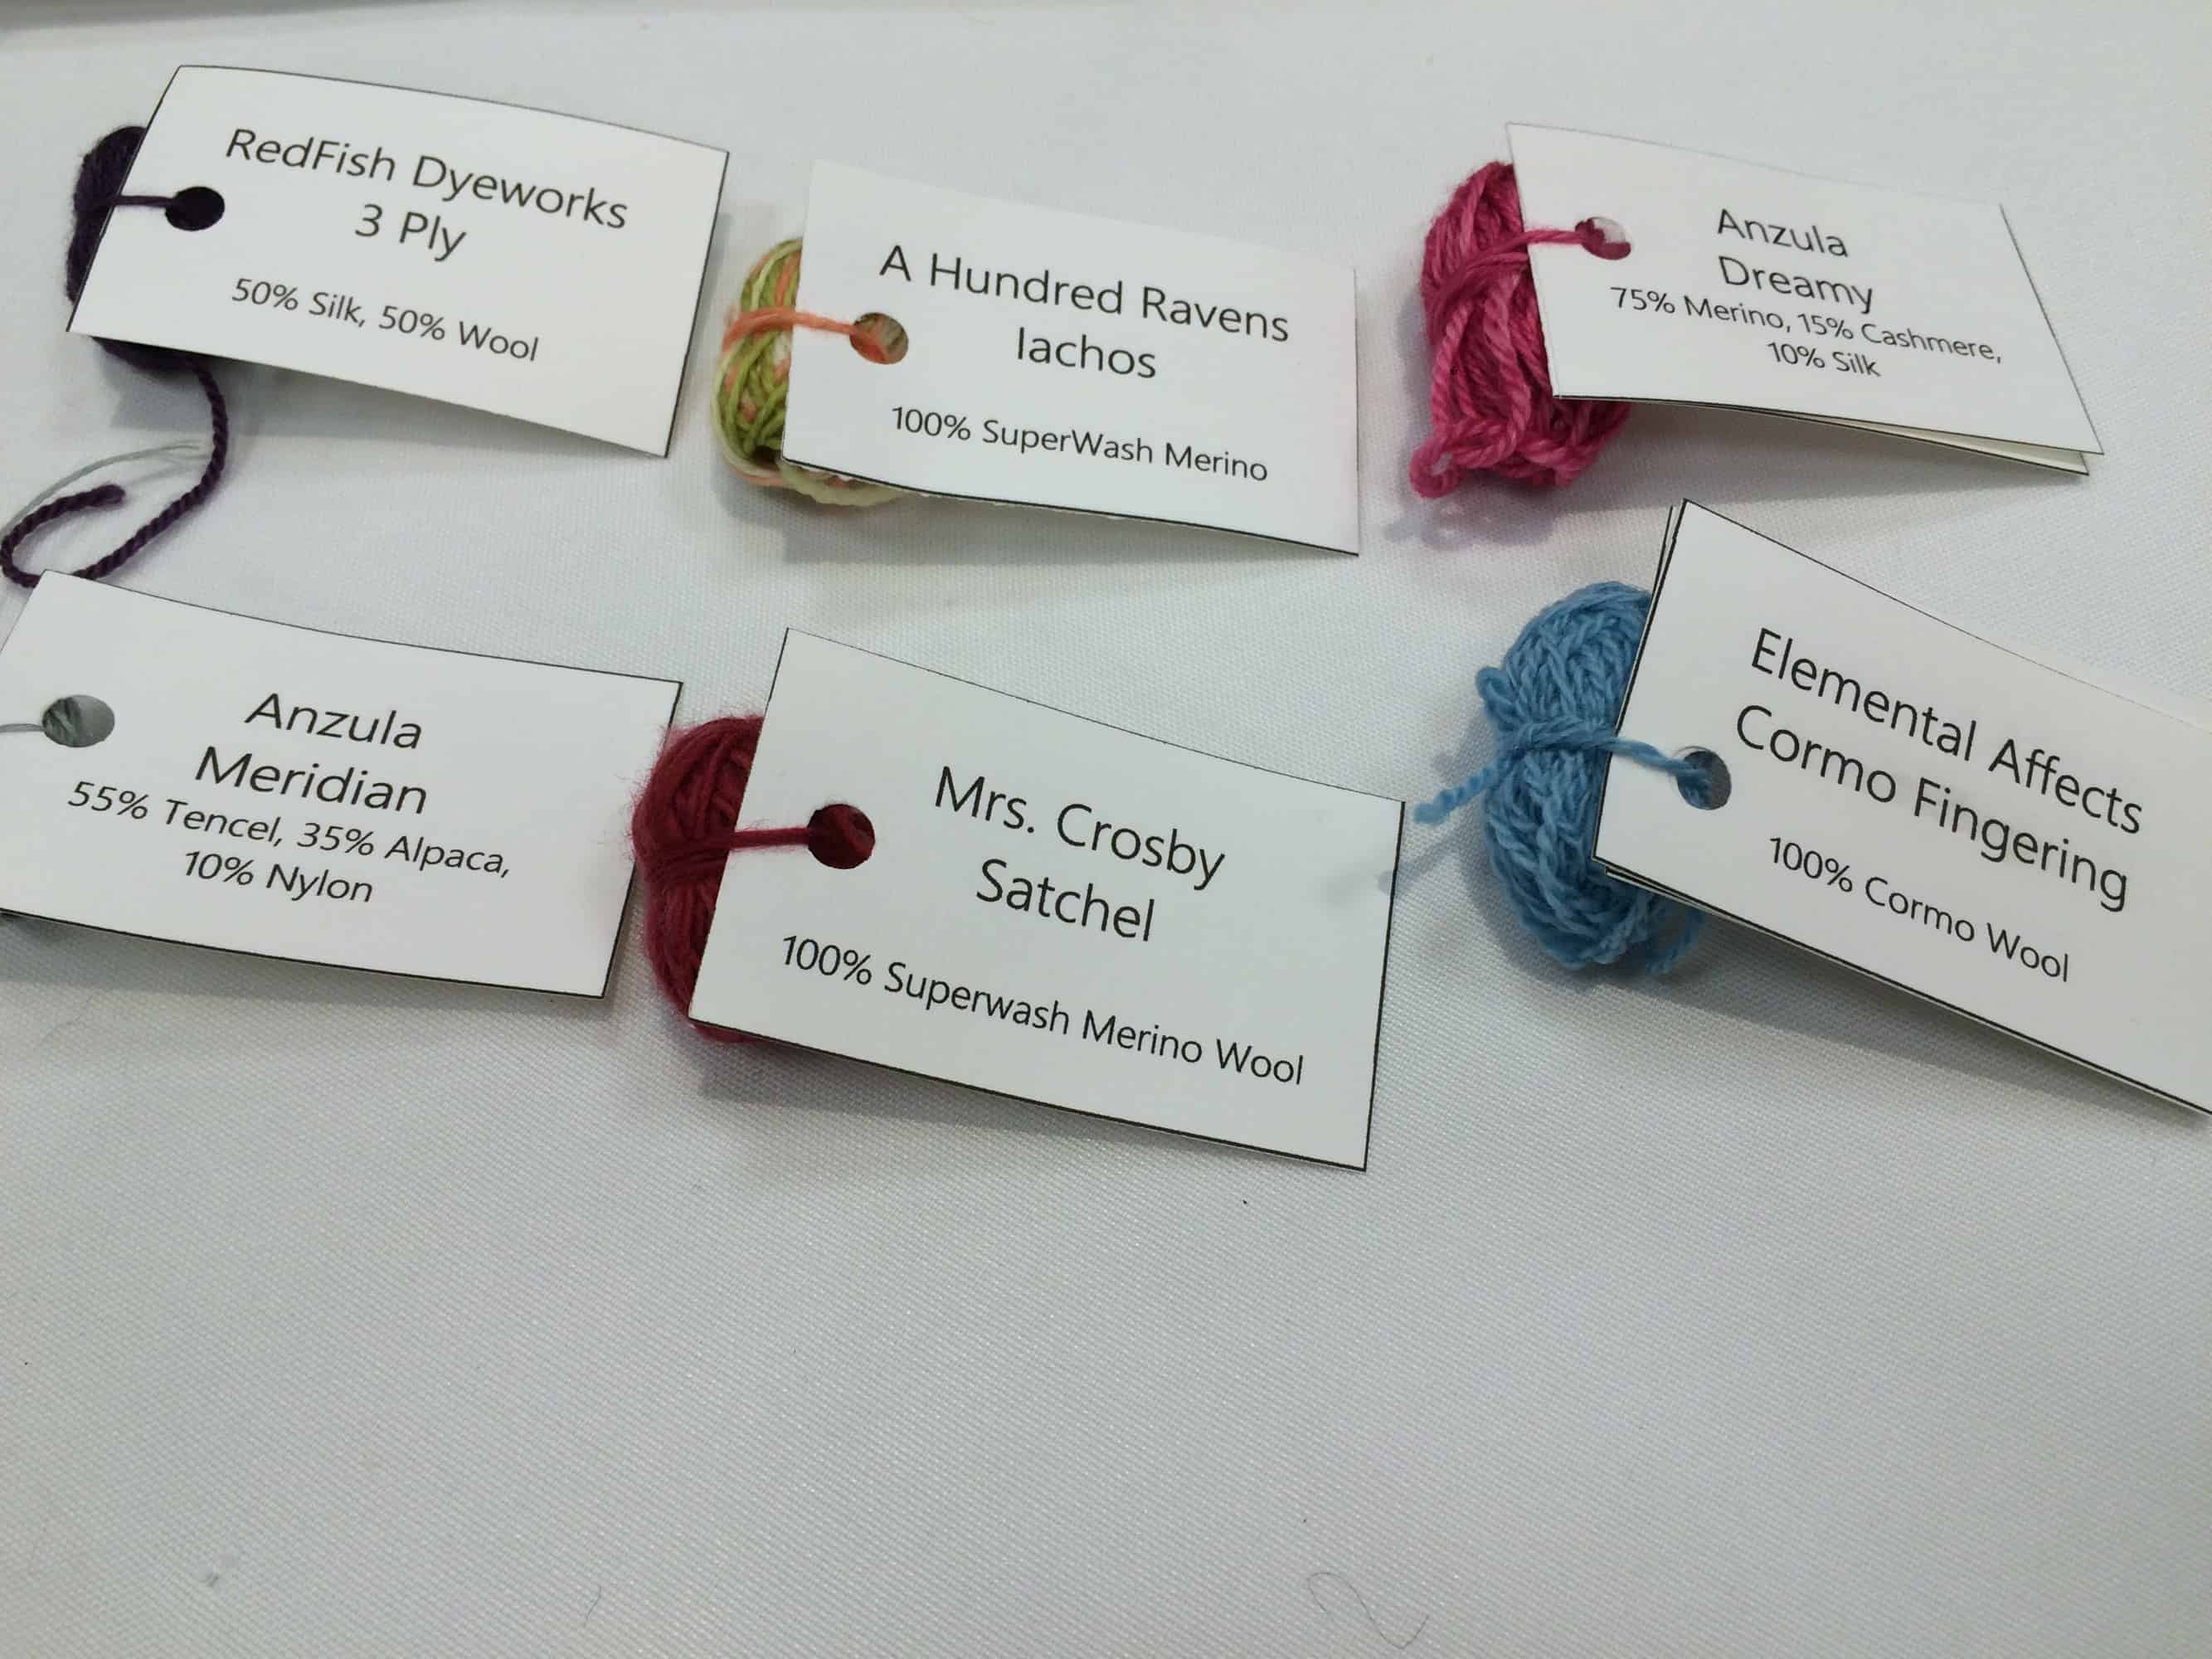
As you may have guessed from the “Fiber Fiesta” on the event sign, the Yarn Tasting had a Mexican theme, which was carried throughout the night.  Seven or eight varieties of yarn were scattered around the table.  There was one mini ball / person of each variety.

image
The yarns from the table.
Somebody had to do it.  Photo by Heather Weber.
Somebody had to do it. Photo by Heather Weber.
Heather and I at the Yarn Tasting.  Photo by Emma Anderson.
Heather and I at the Yarn Tasting. Photo by Emma Anderson.

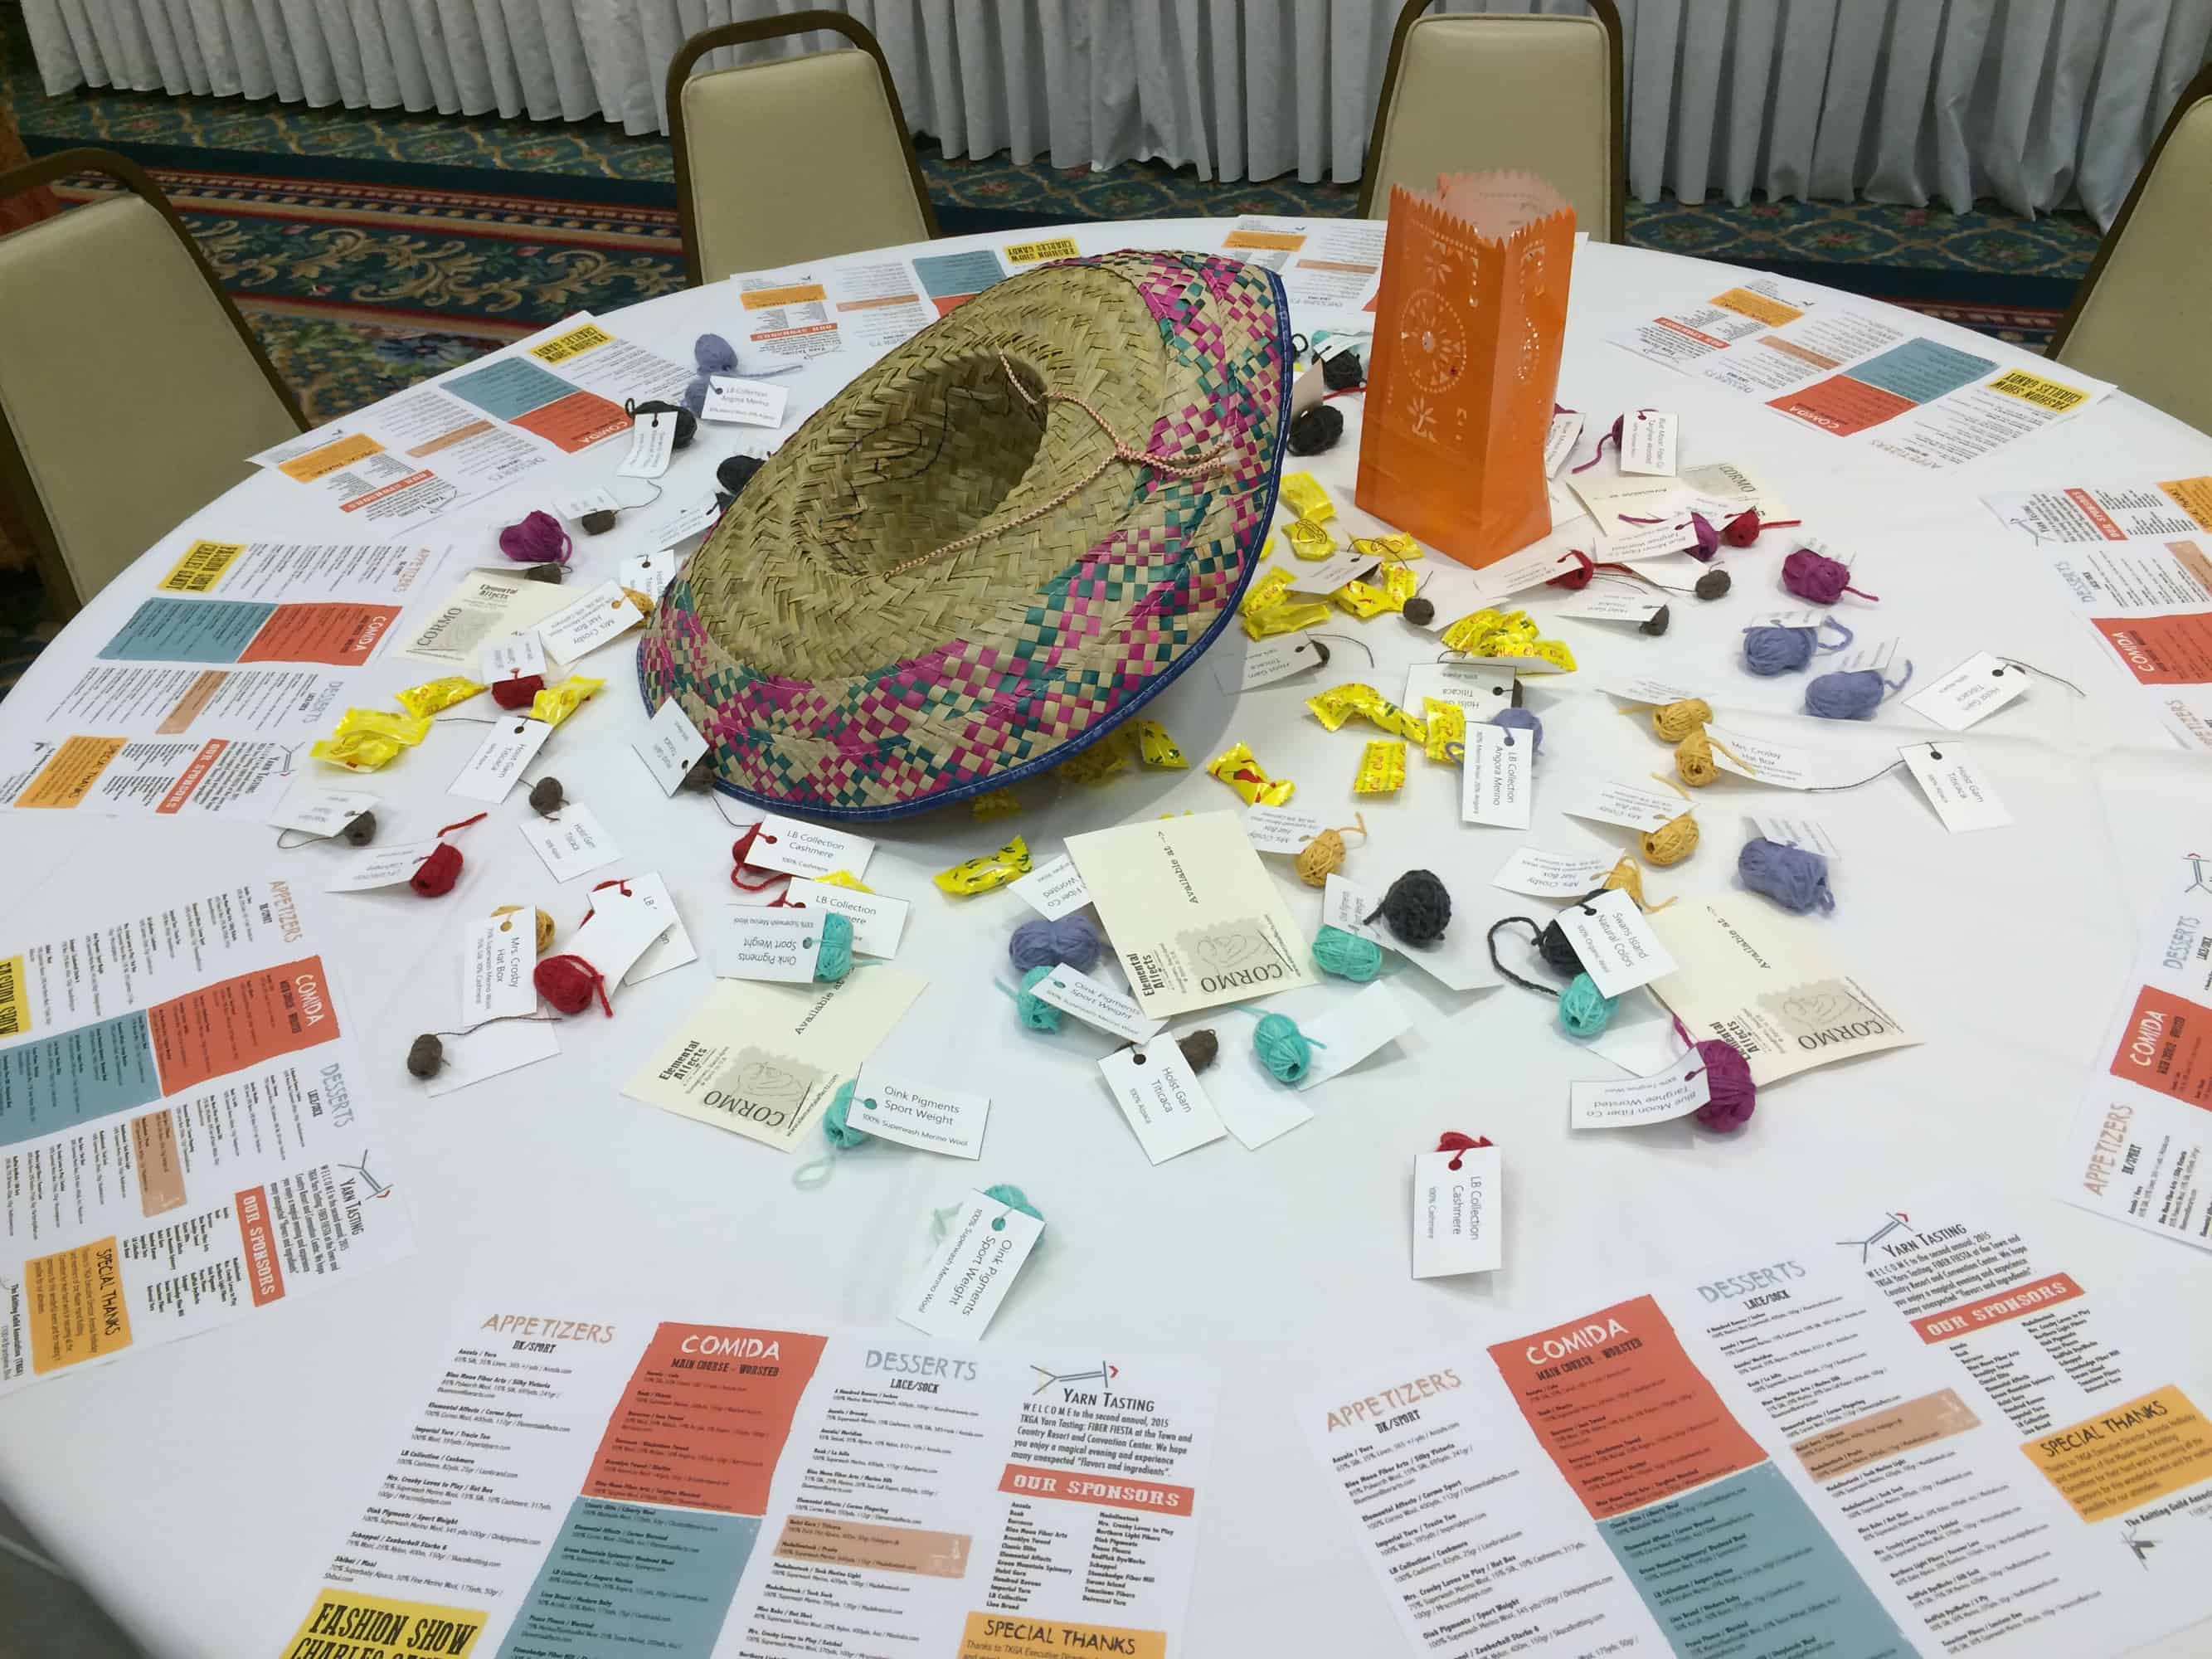
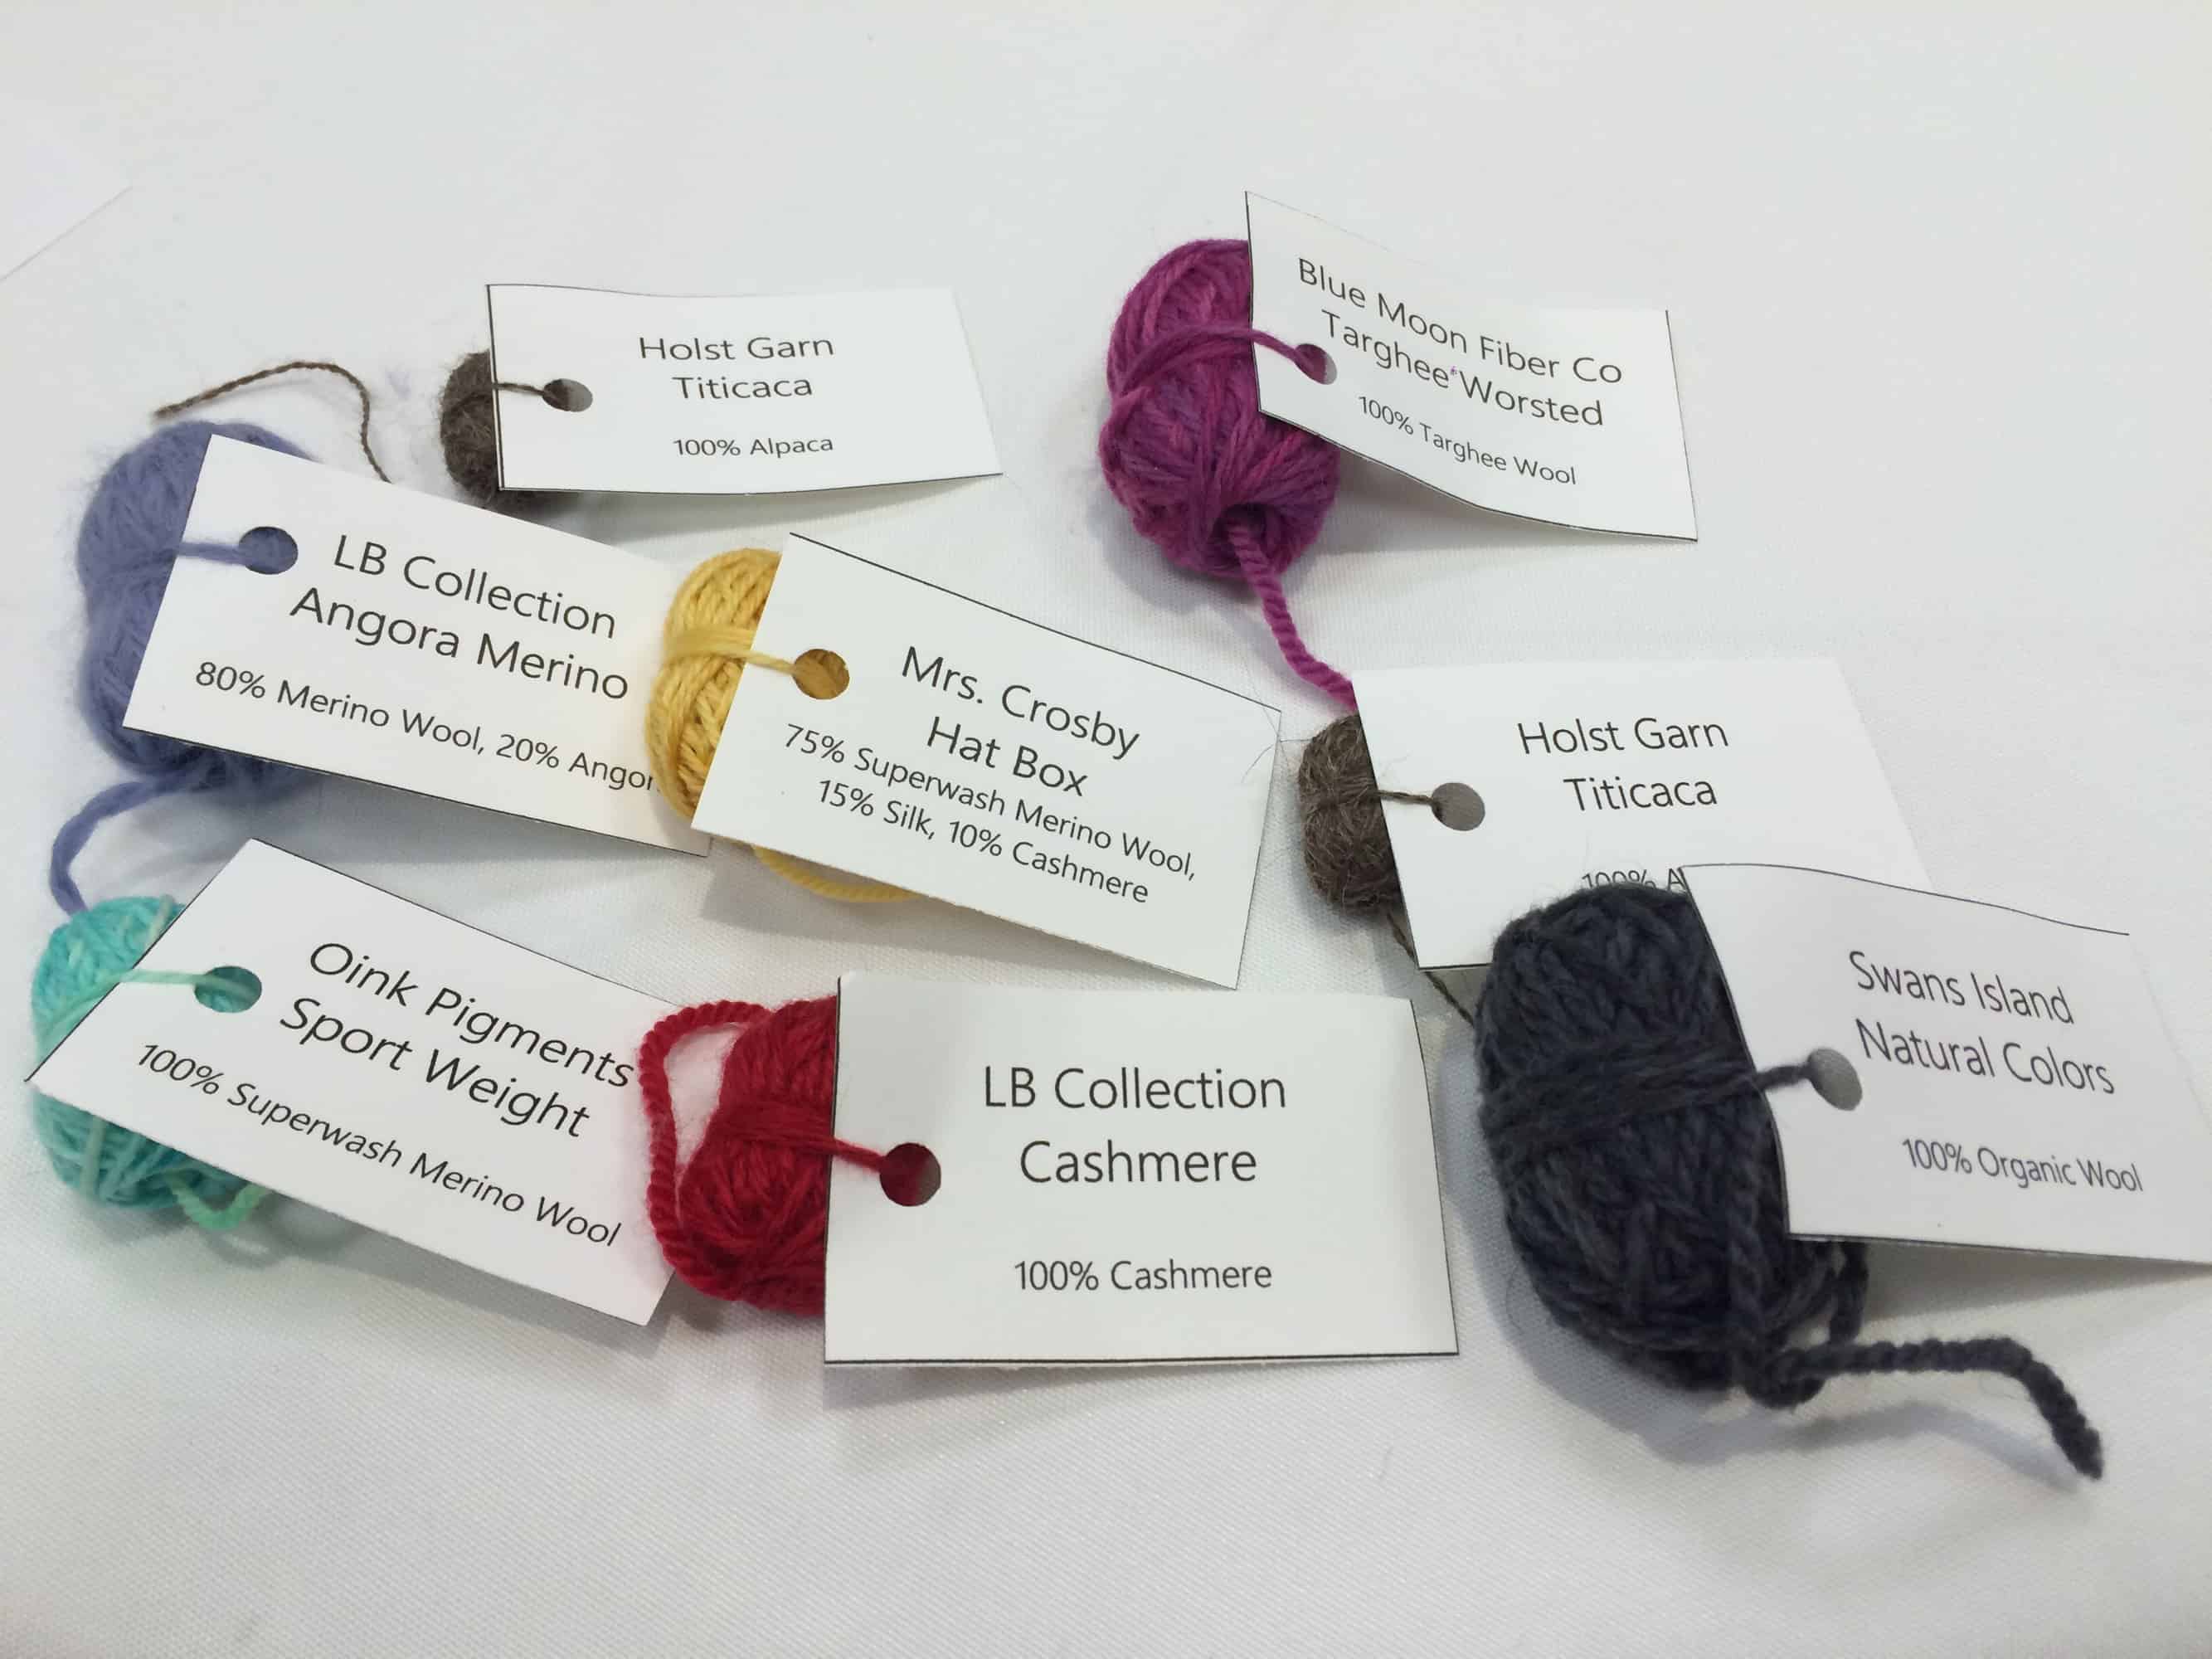
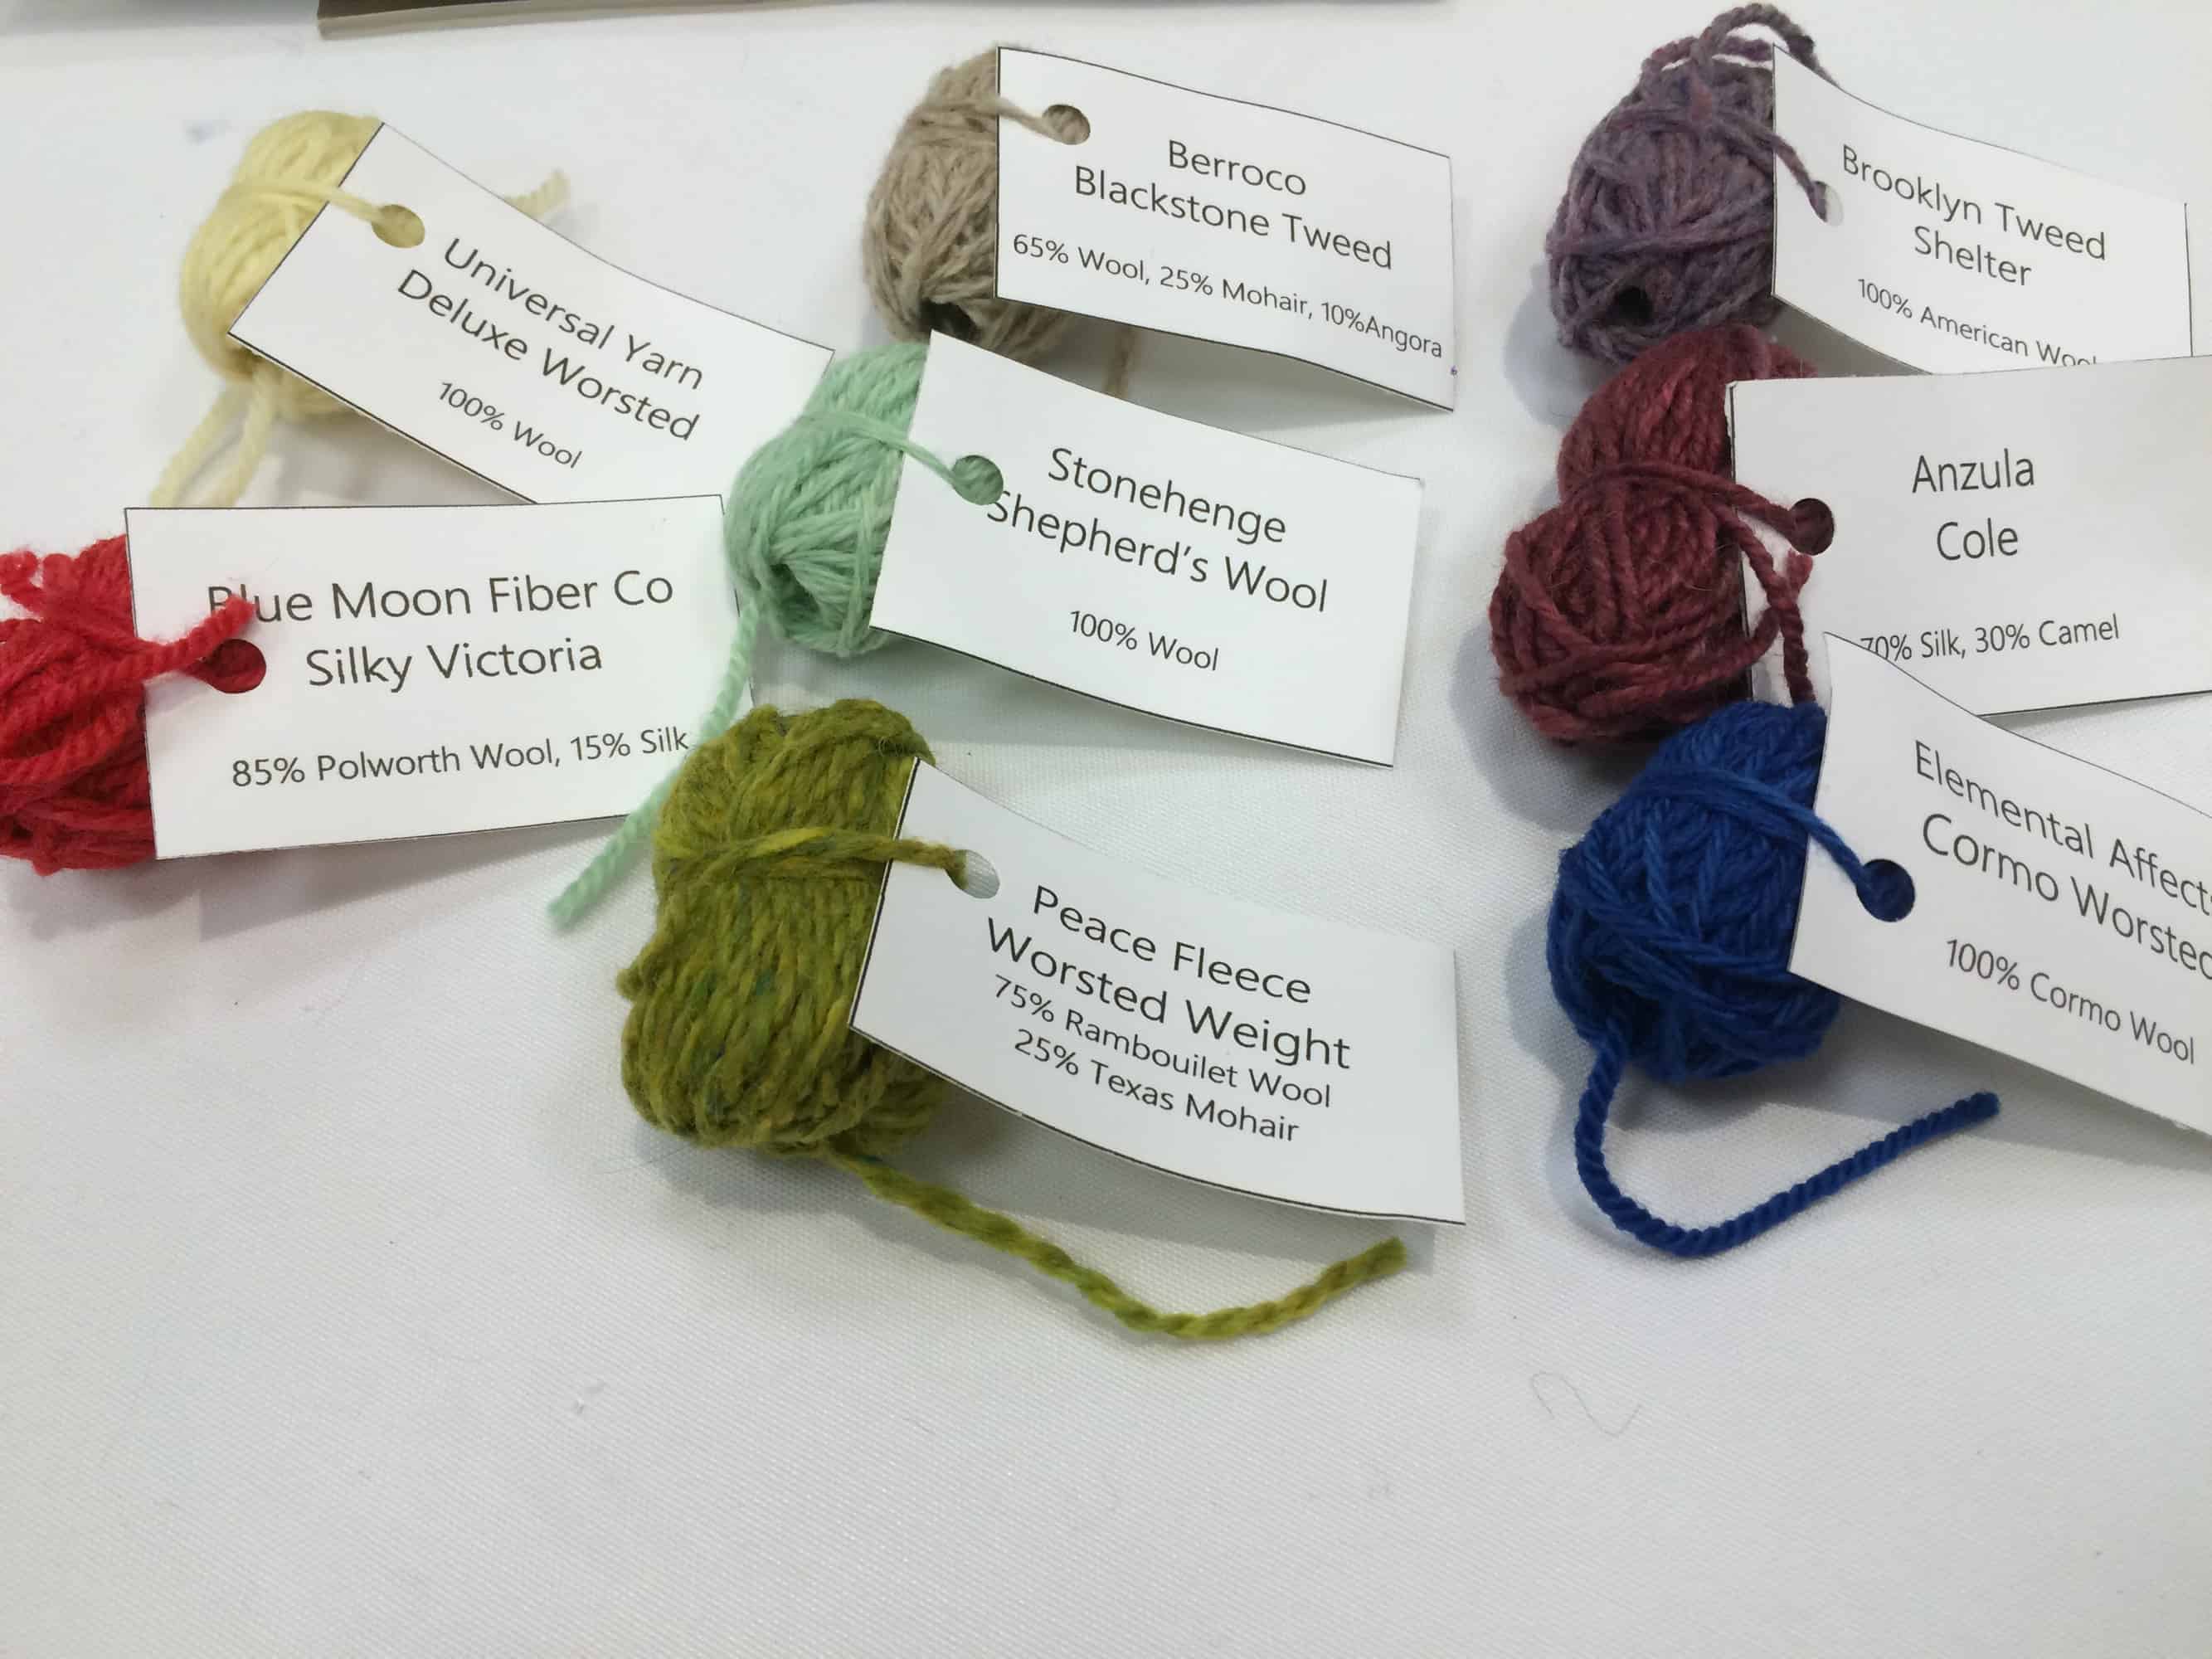
The placemats listed every yarn we got to sample.  Each person got one mini ball of each variety of yarn listed here!

image

We got 8 mini balls in our bag and 7 or 8 on the table.  The remaining samples were set up as a buffet.

image
Hey — I just realized this is as close as we get to a picture of Emma, Jo, Heather, and I together; we’re reflected in the mirror behind the buffet! Emma in the blue shirt, me to her right snapping the picture, Jo to my right, and Heather to her right.
image

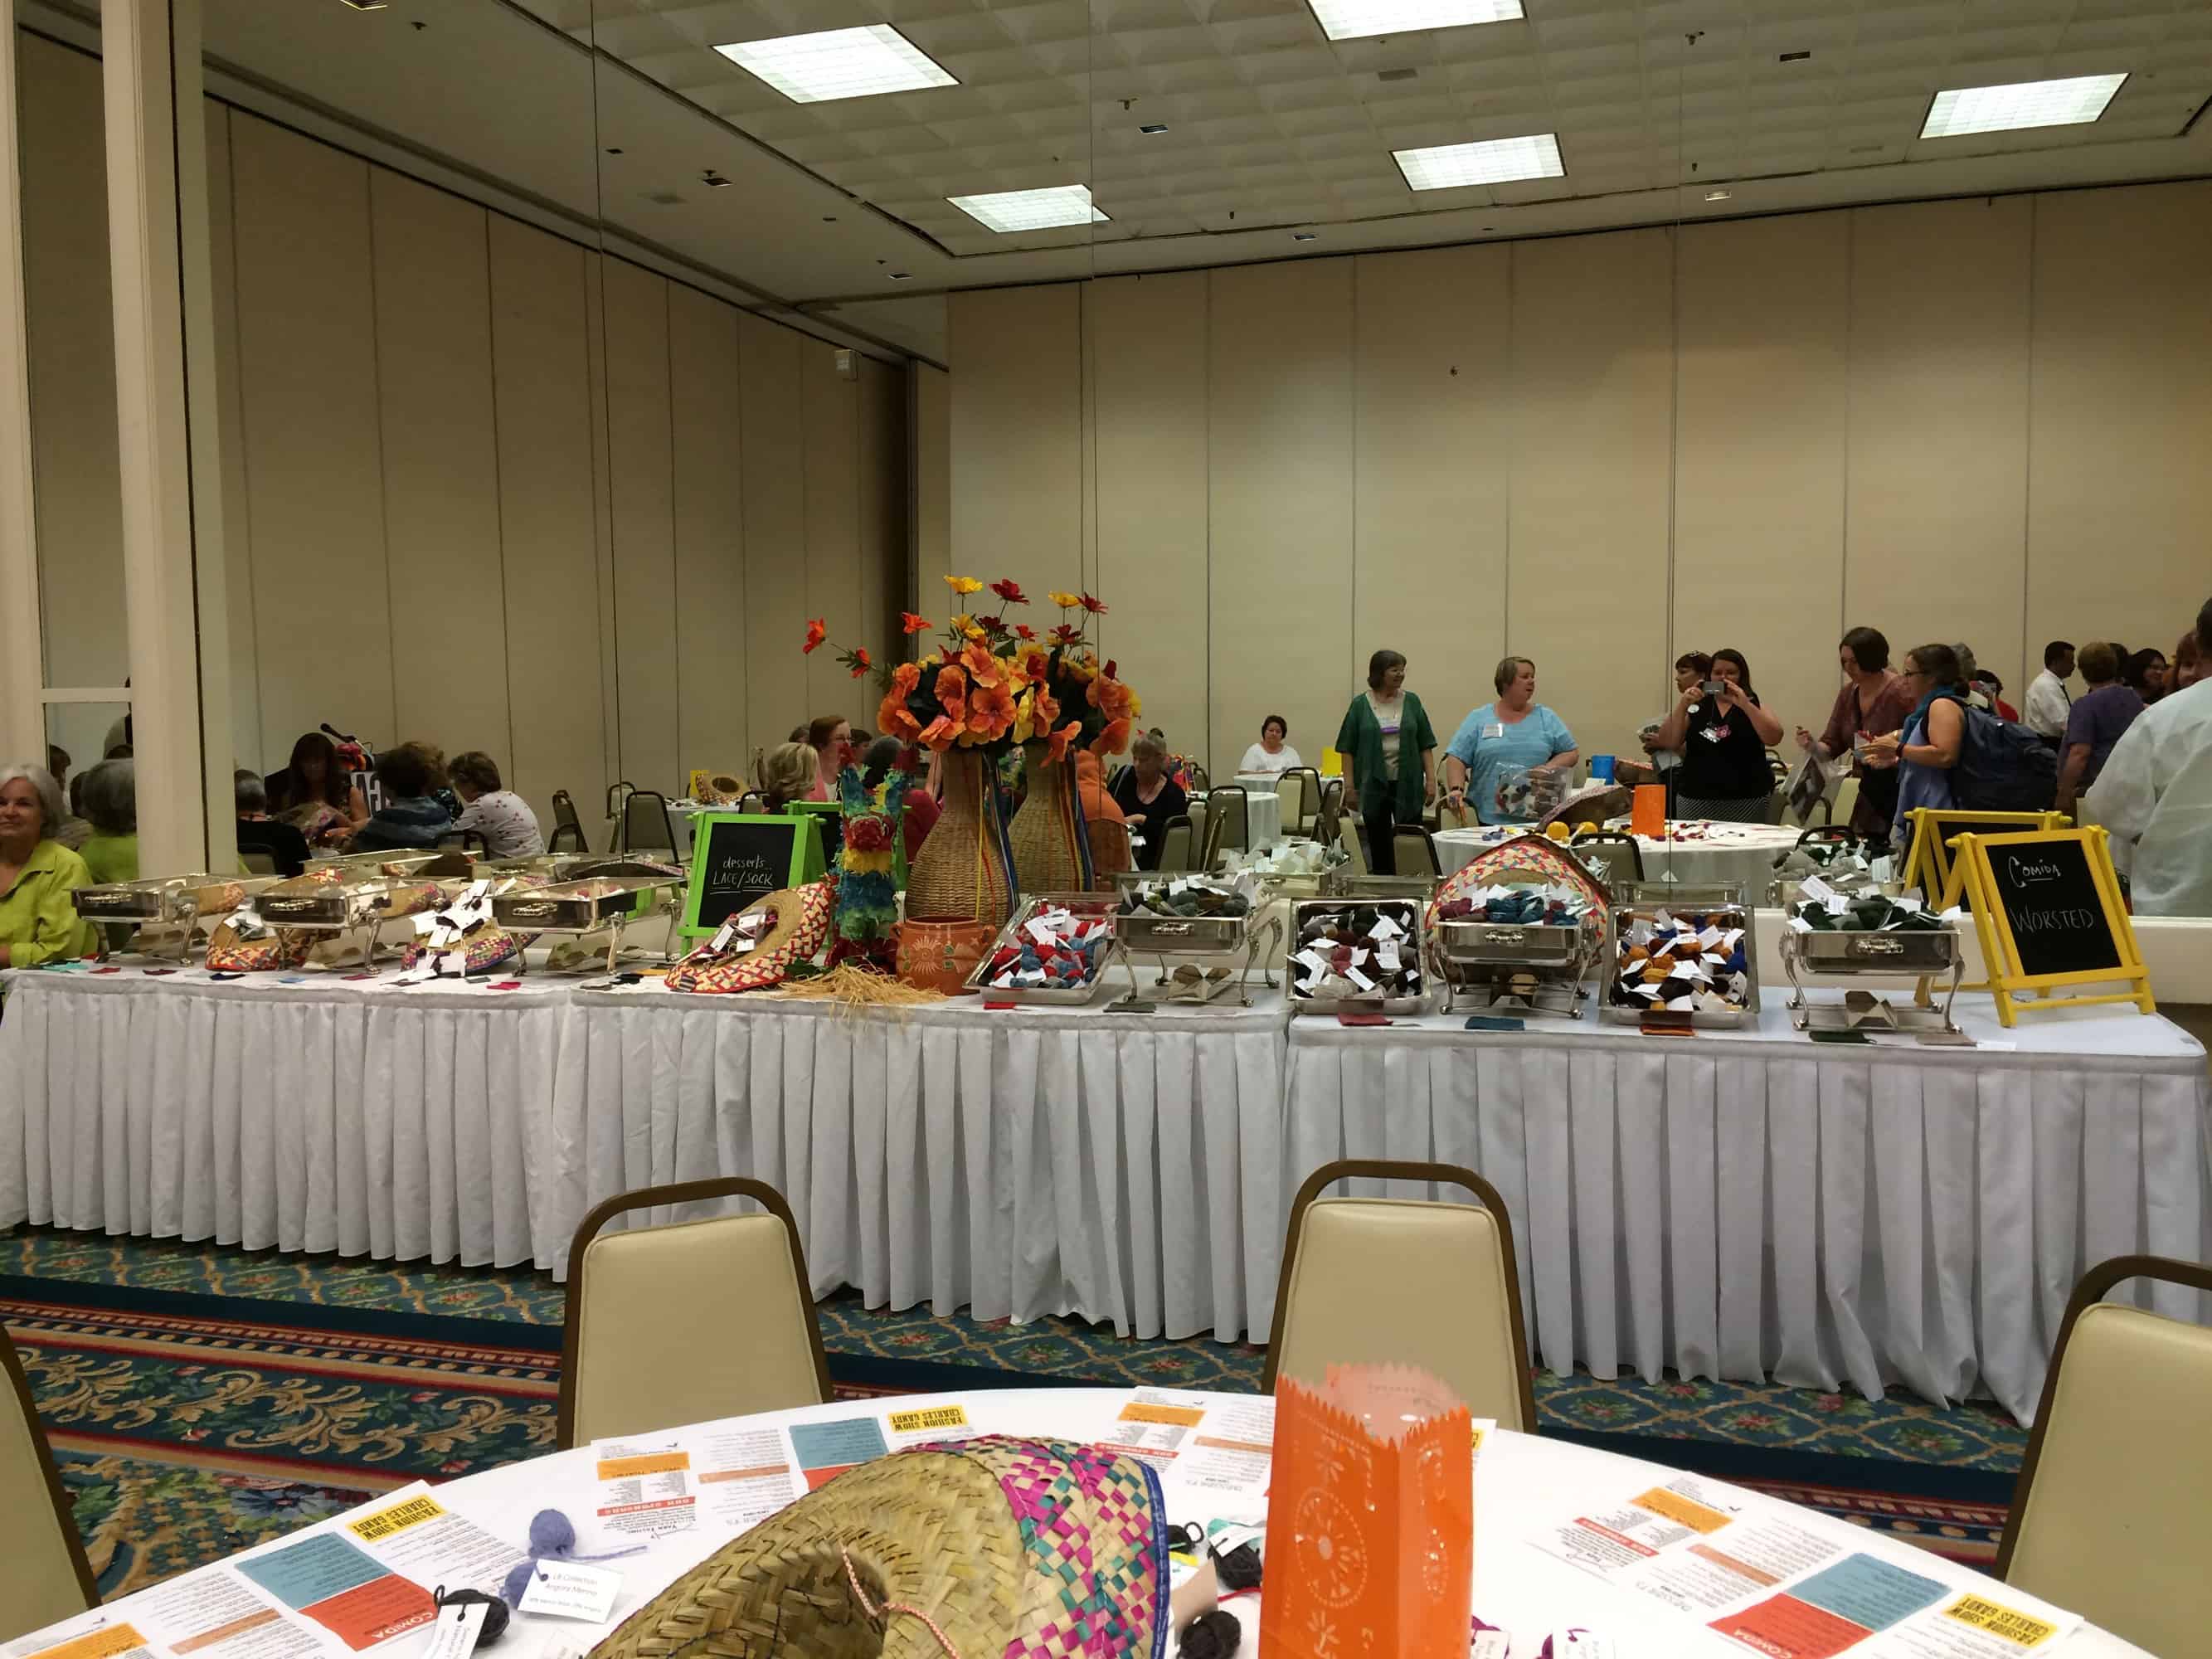
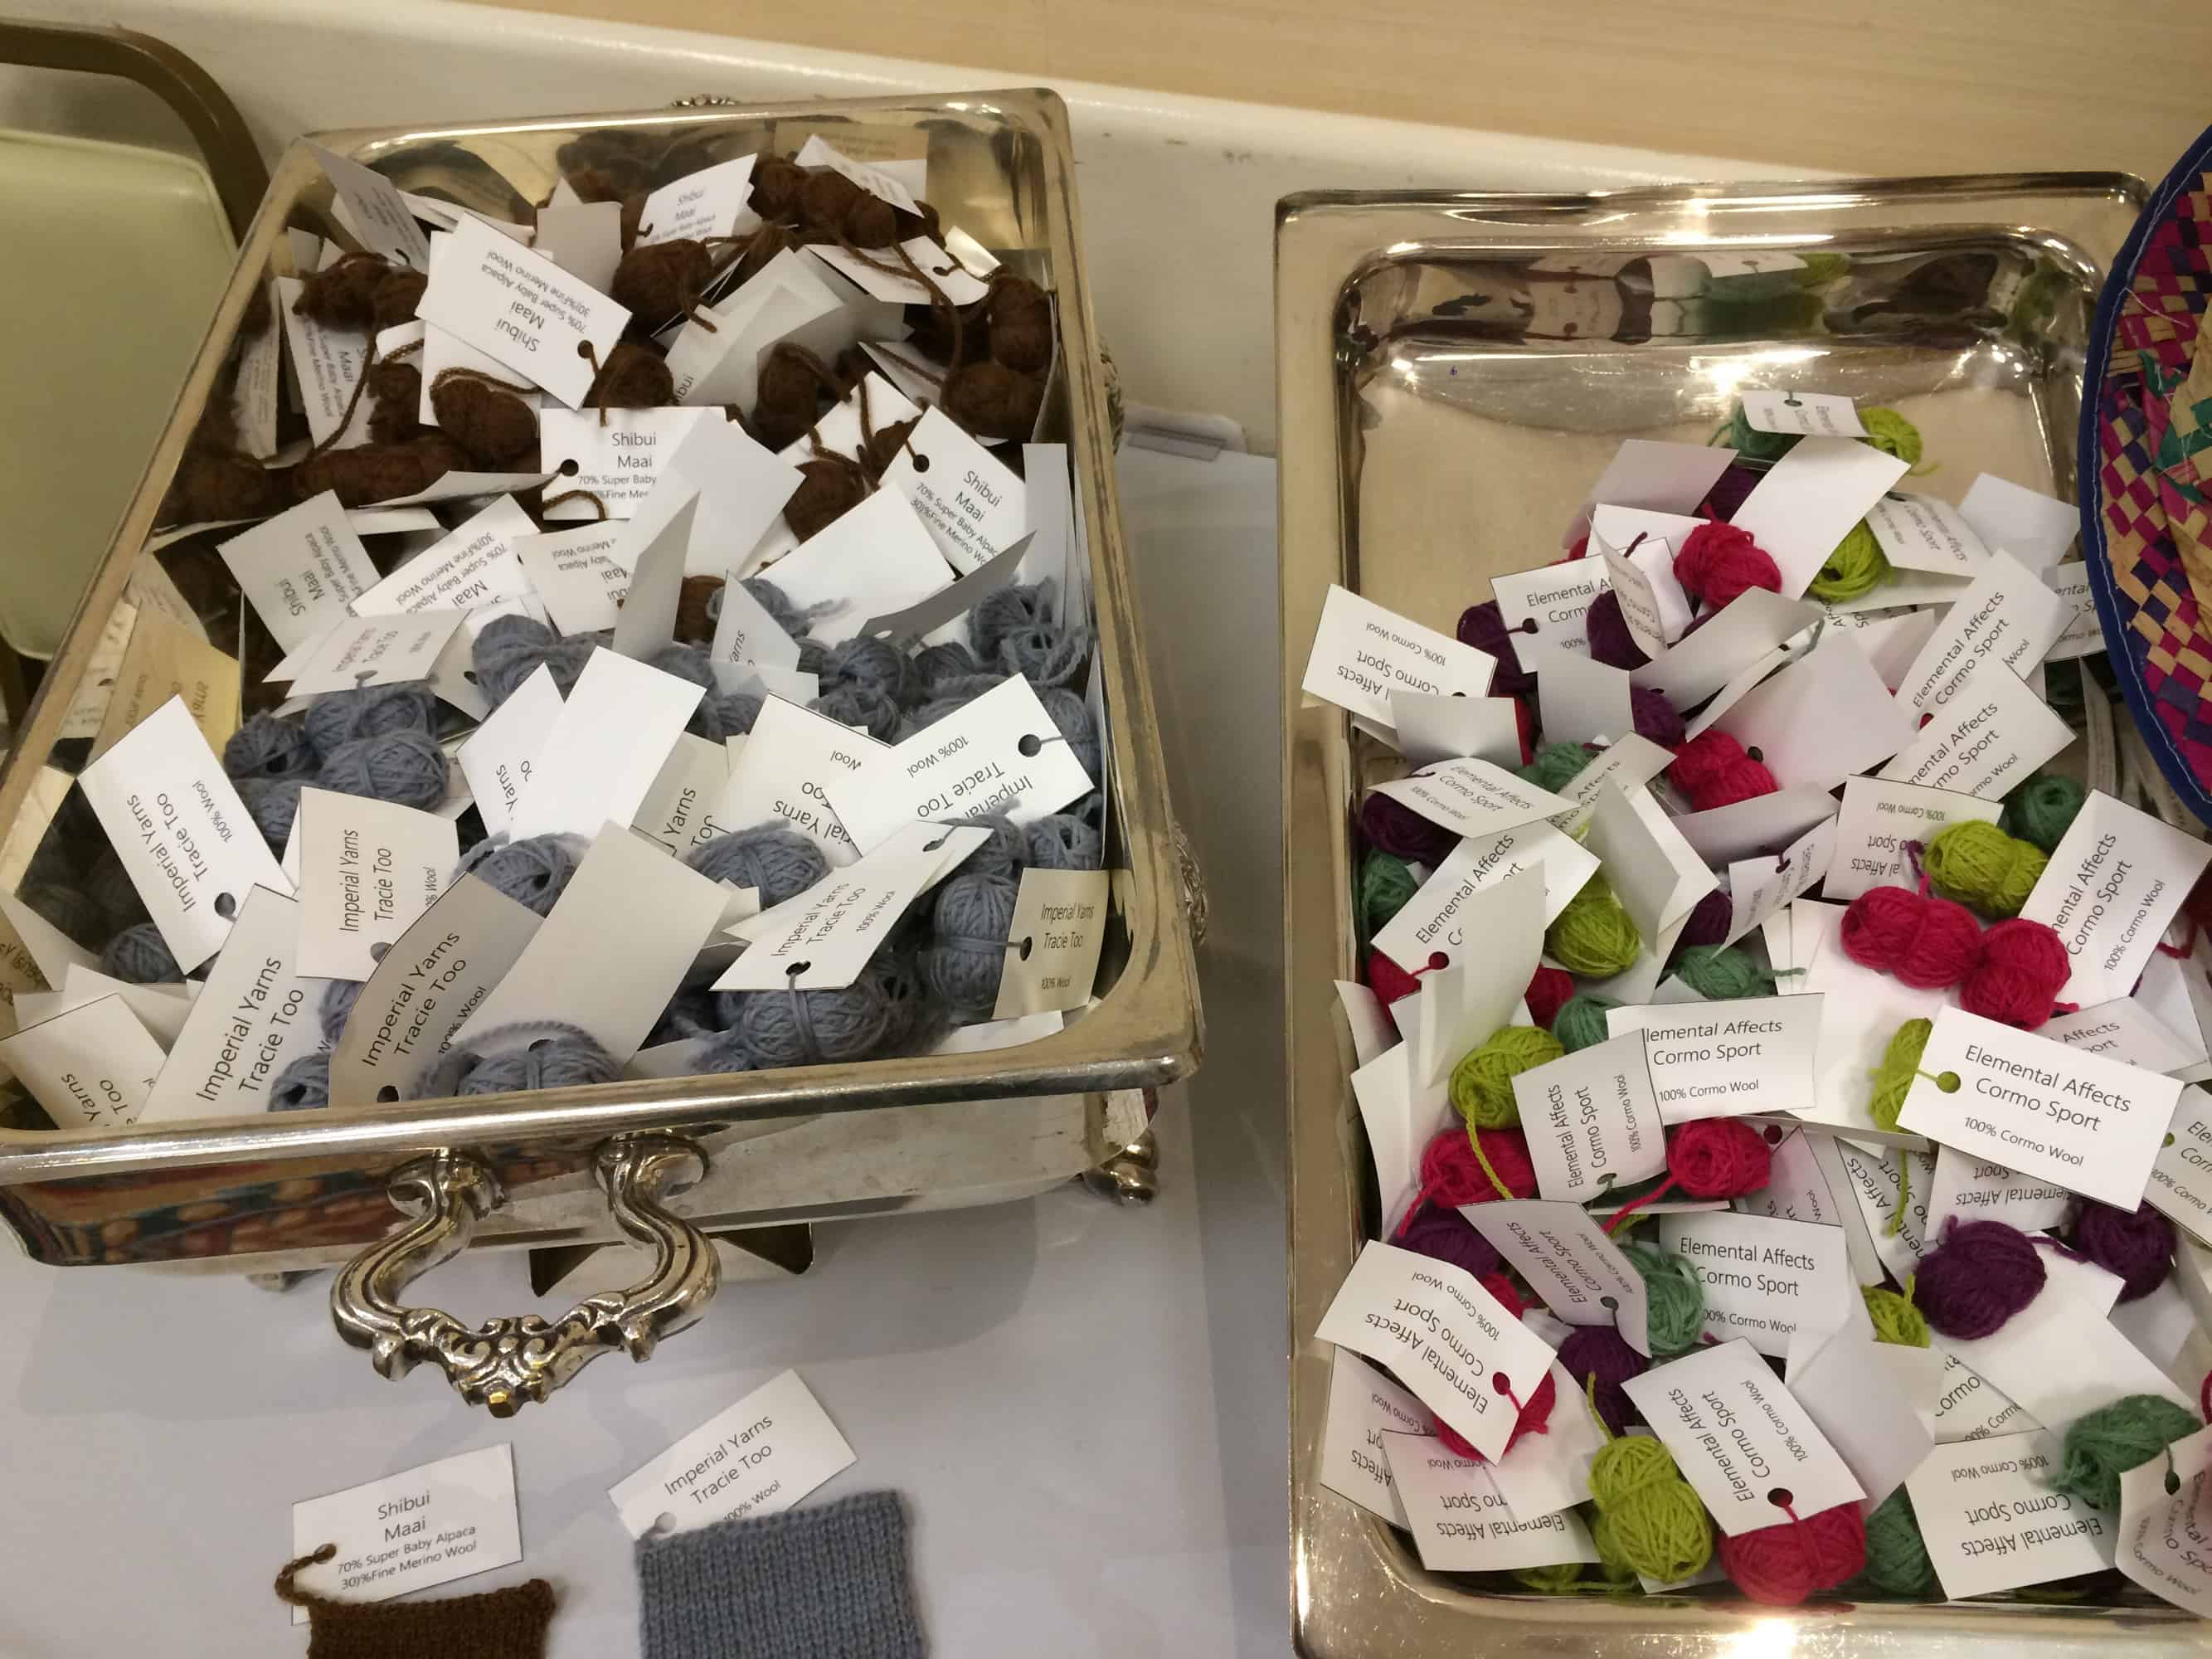
We walked through the buffet, collecting one of each variety displayed.

image

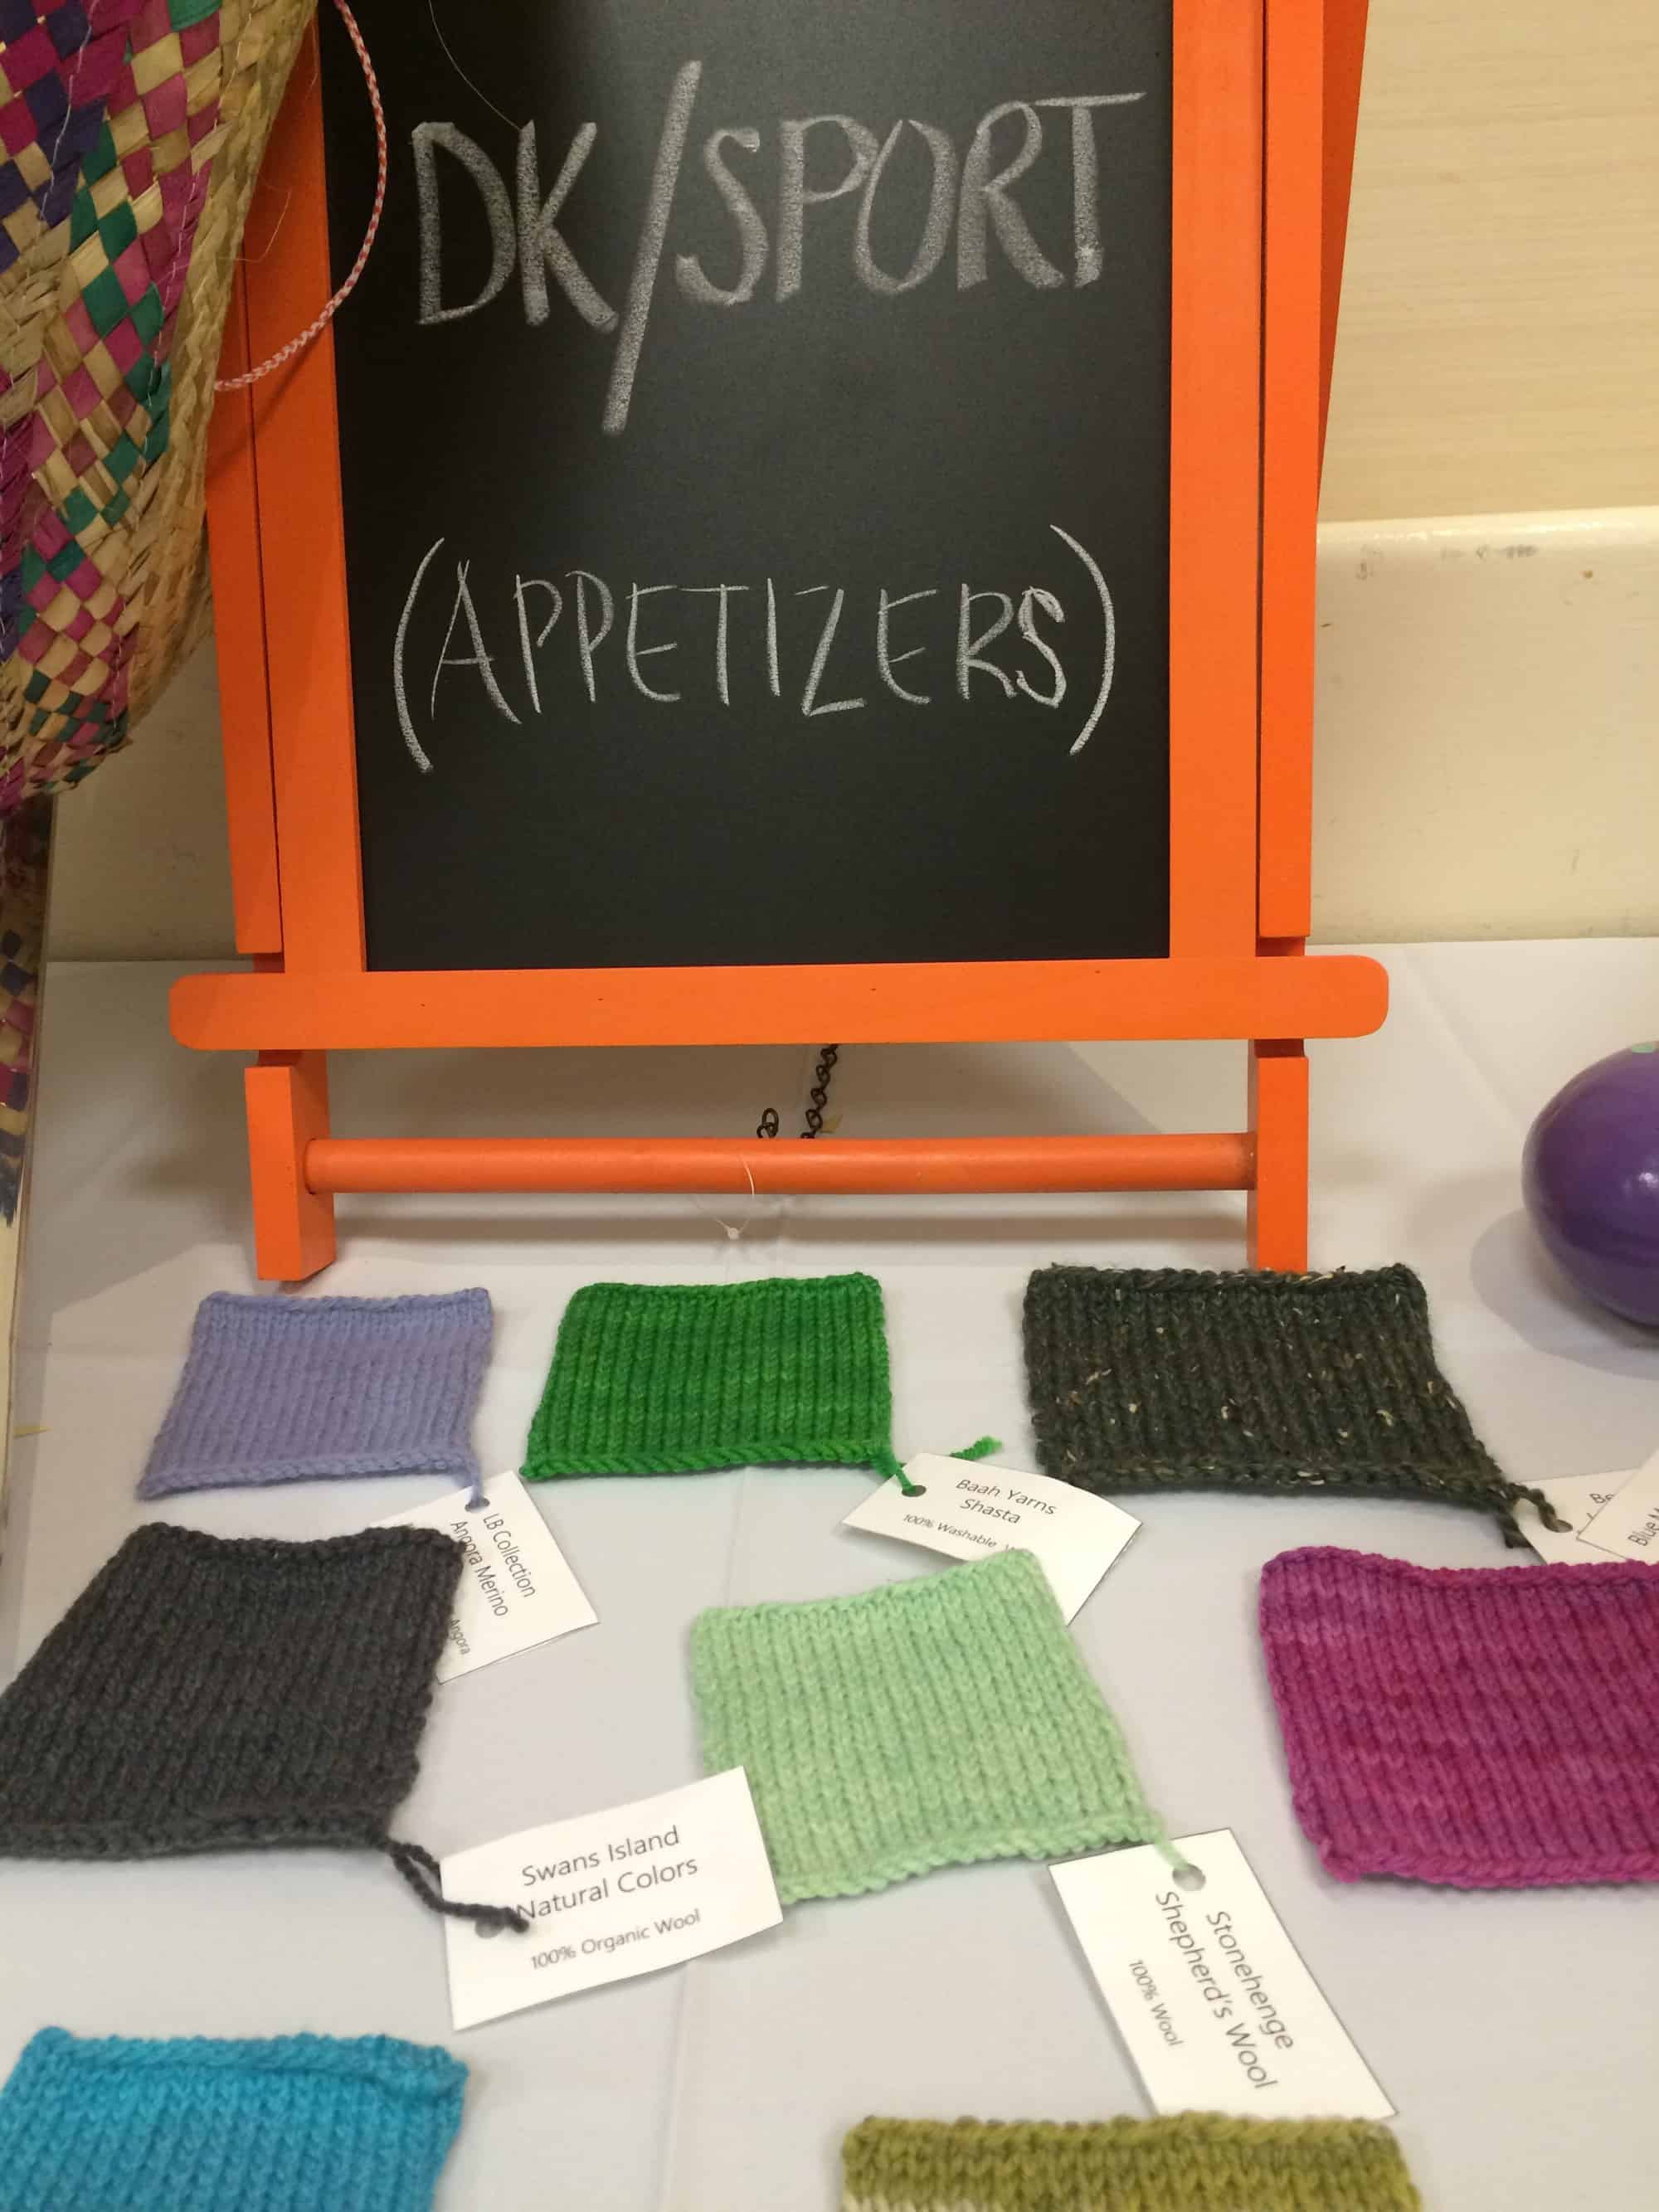
The buffet sections were labeled by courses, just like they would be if we were getting food.  A swatch of each yarn in that category decorated the tables.  I believe Arenda knit all the swatches.

image
The Appetizer Yarns from the Buffet.
image
A mix of Comida and Dessert Yarns from the buffet.
image
Dessert Yarns from the buffet.

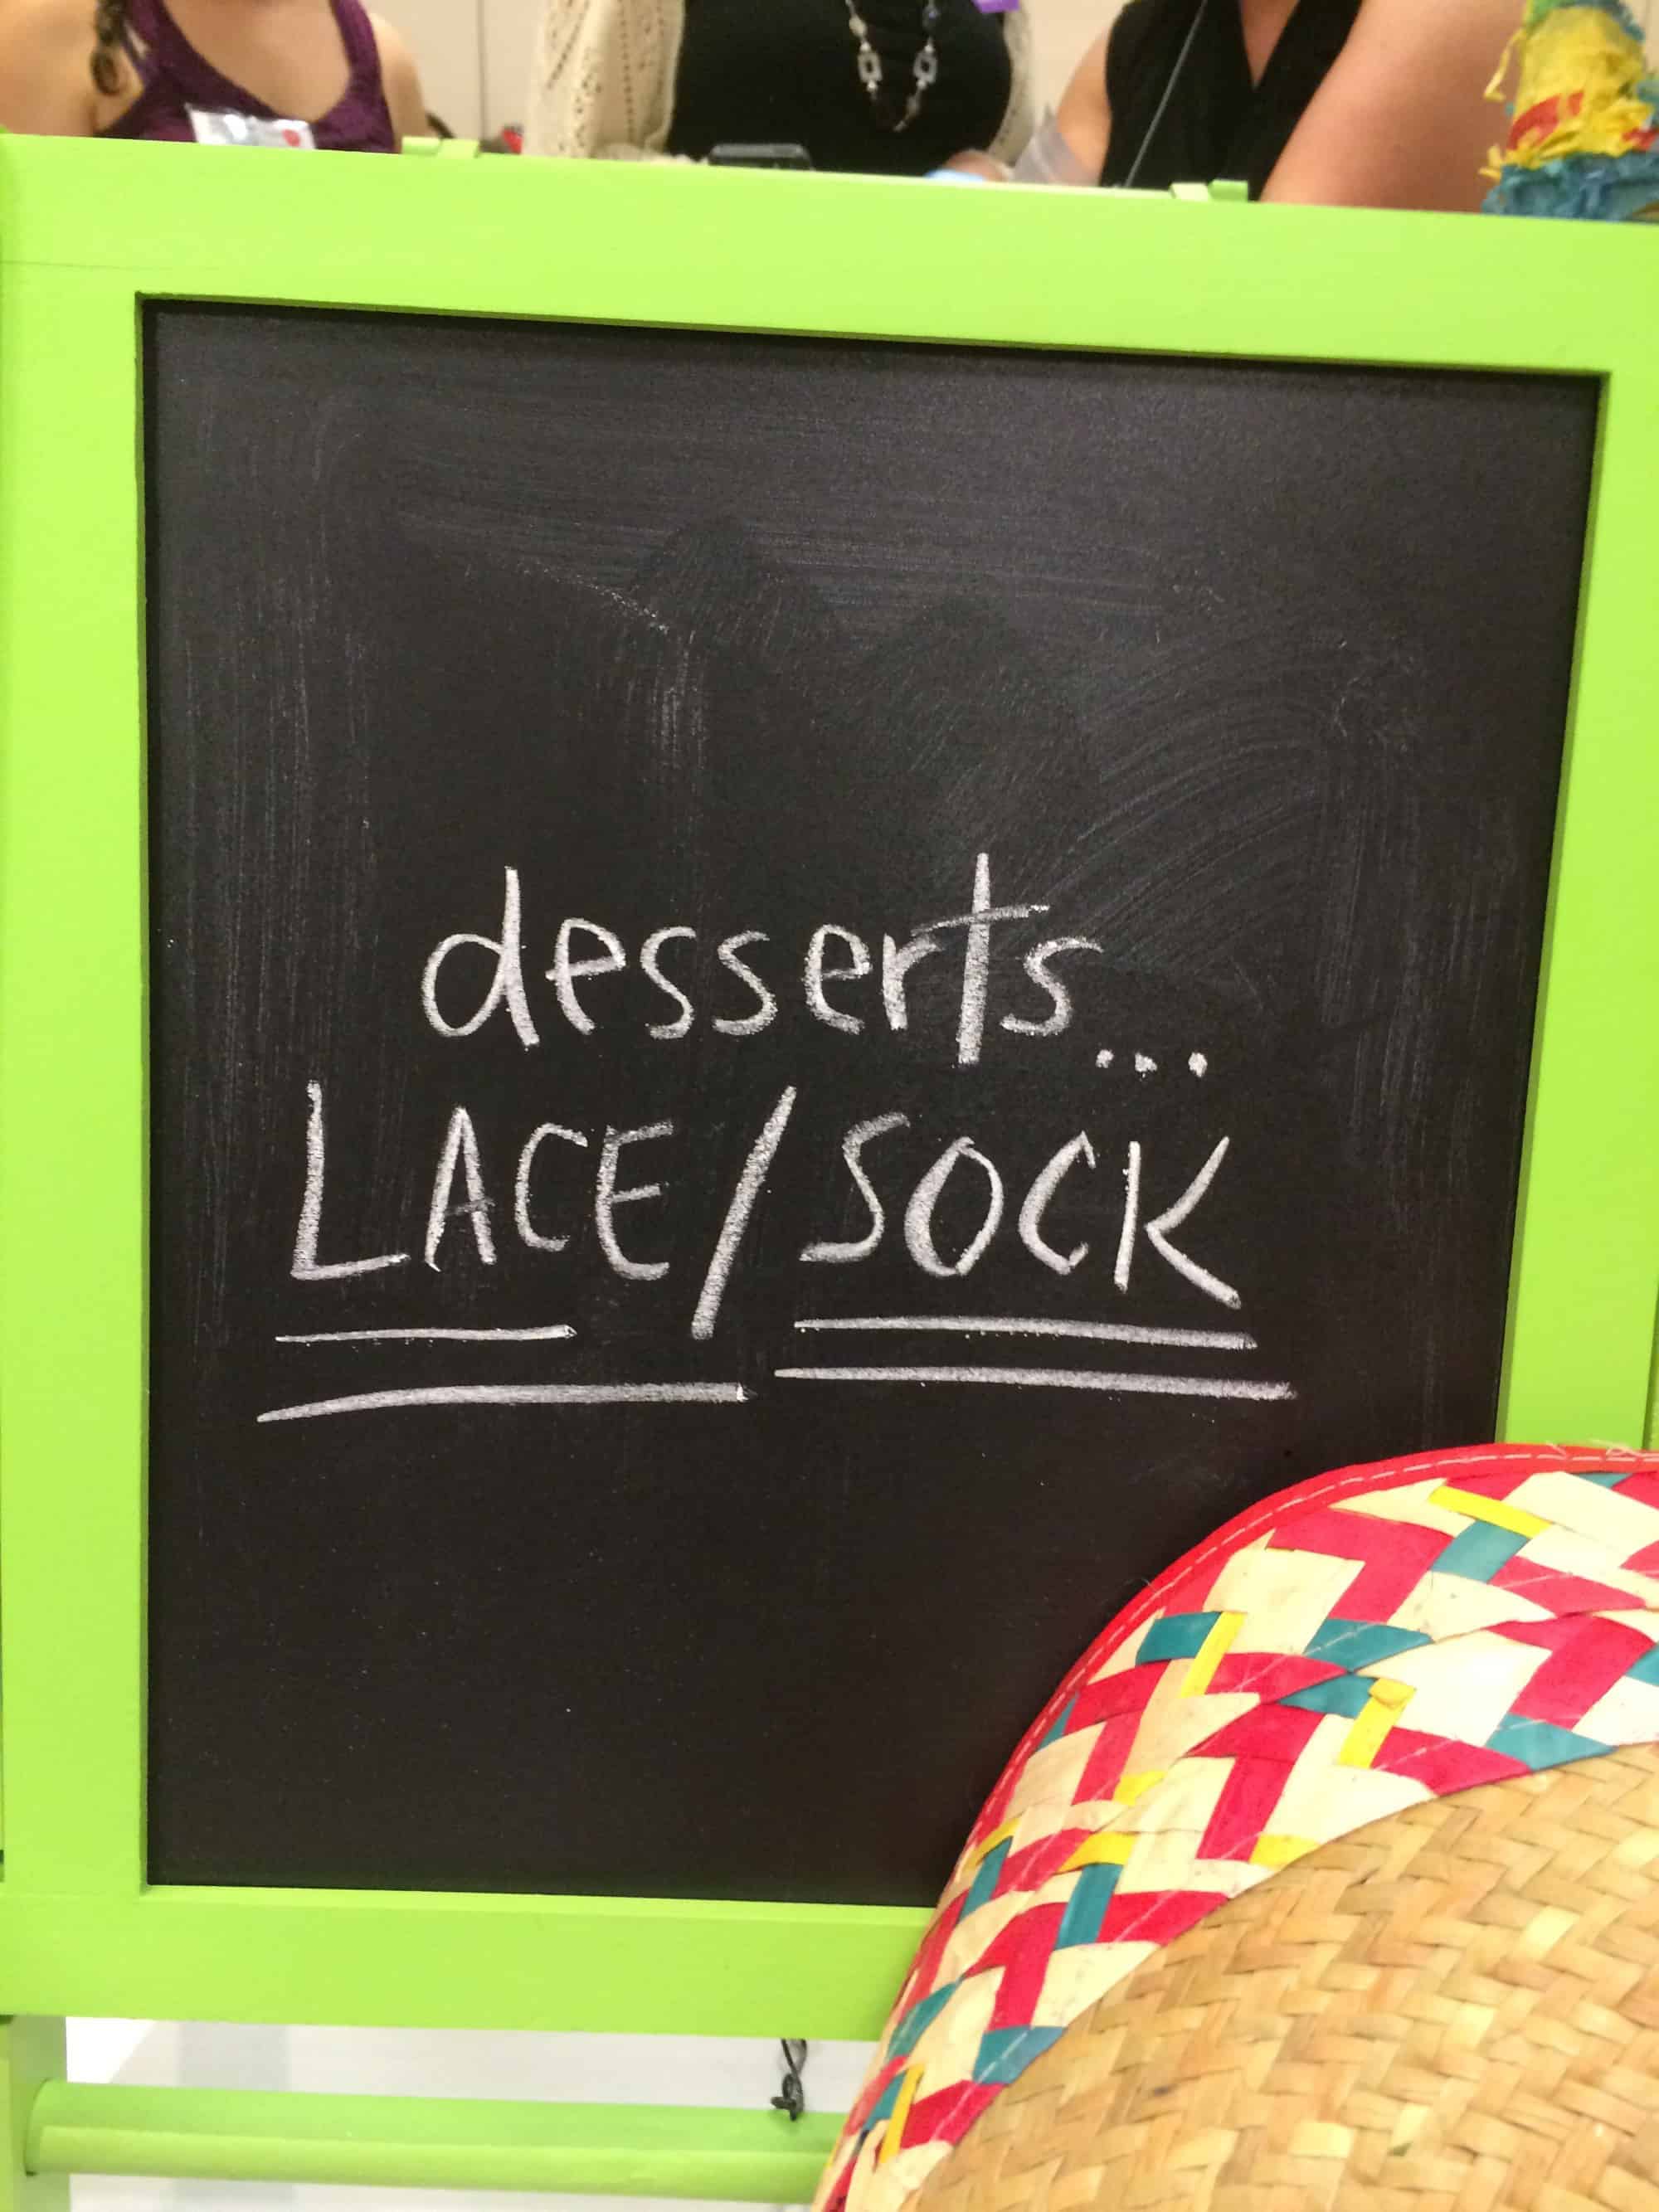
After we got our yarn from the buffet, Charles Gandy MCed a fashion show, featuring objects knit from sponsor yarns.

image

I did not get pattern names, model names, or knitter names for any of these projects — I was lucky just to get pictures!  I only have pictures of a small fraction of the beautiful knitwear in this fashion show.

image
image
image
image
image
The baby sweater and the model’s cardigan are both part of the fashion show.
image
image
image

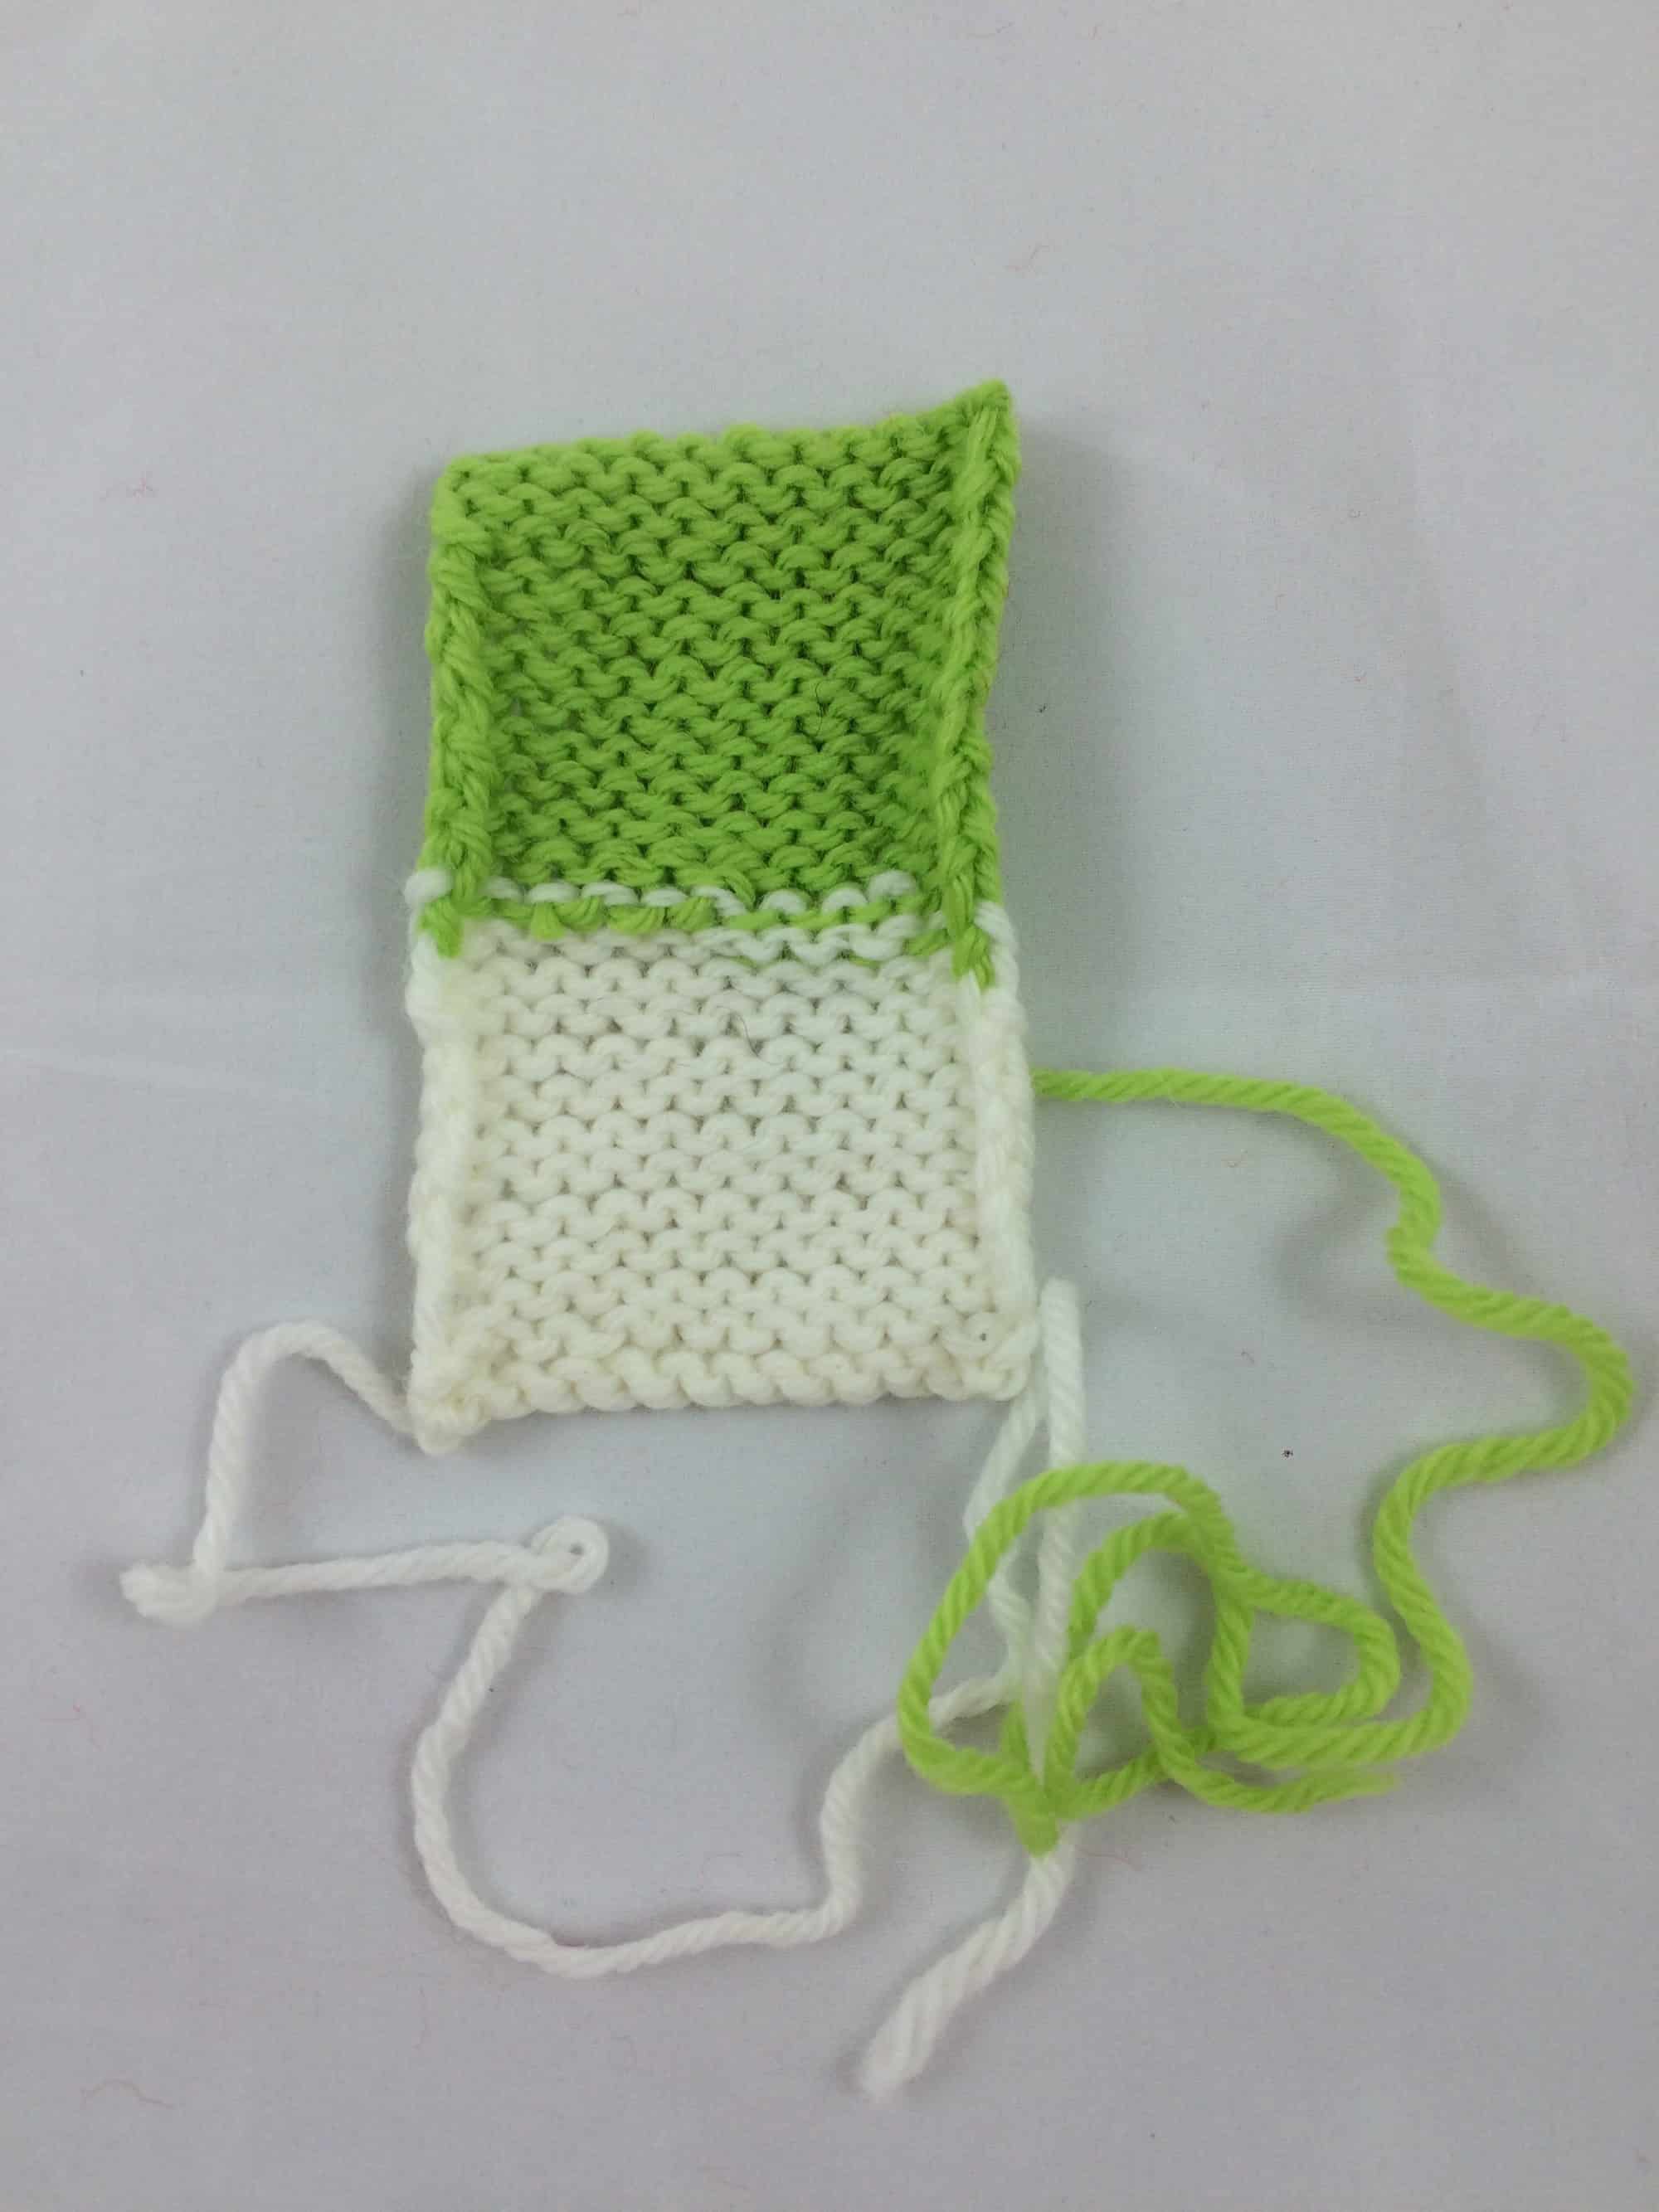
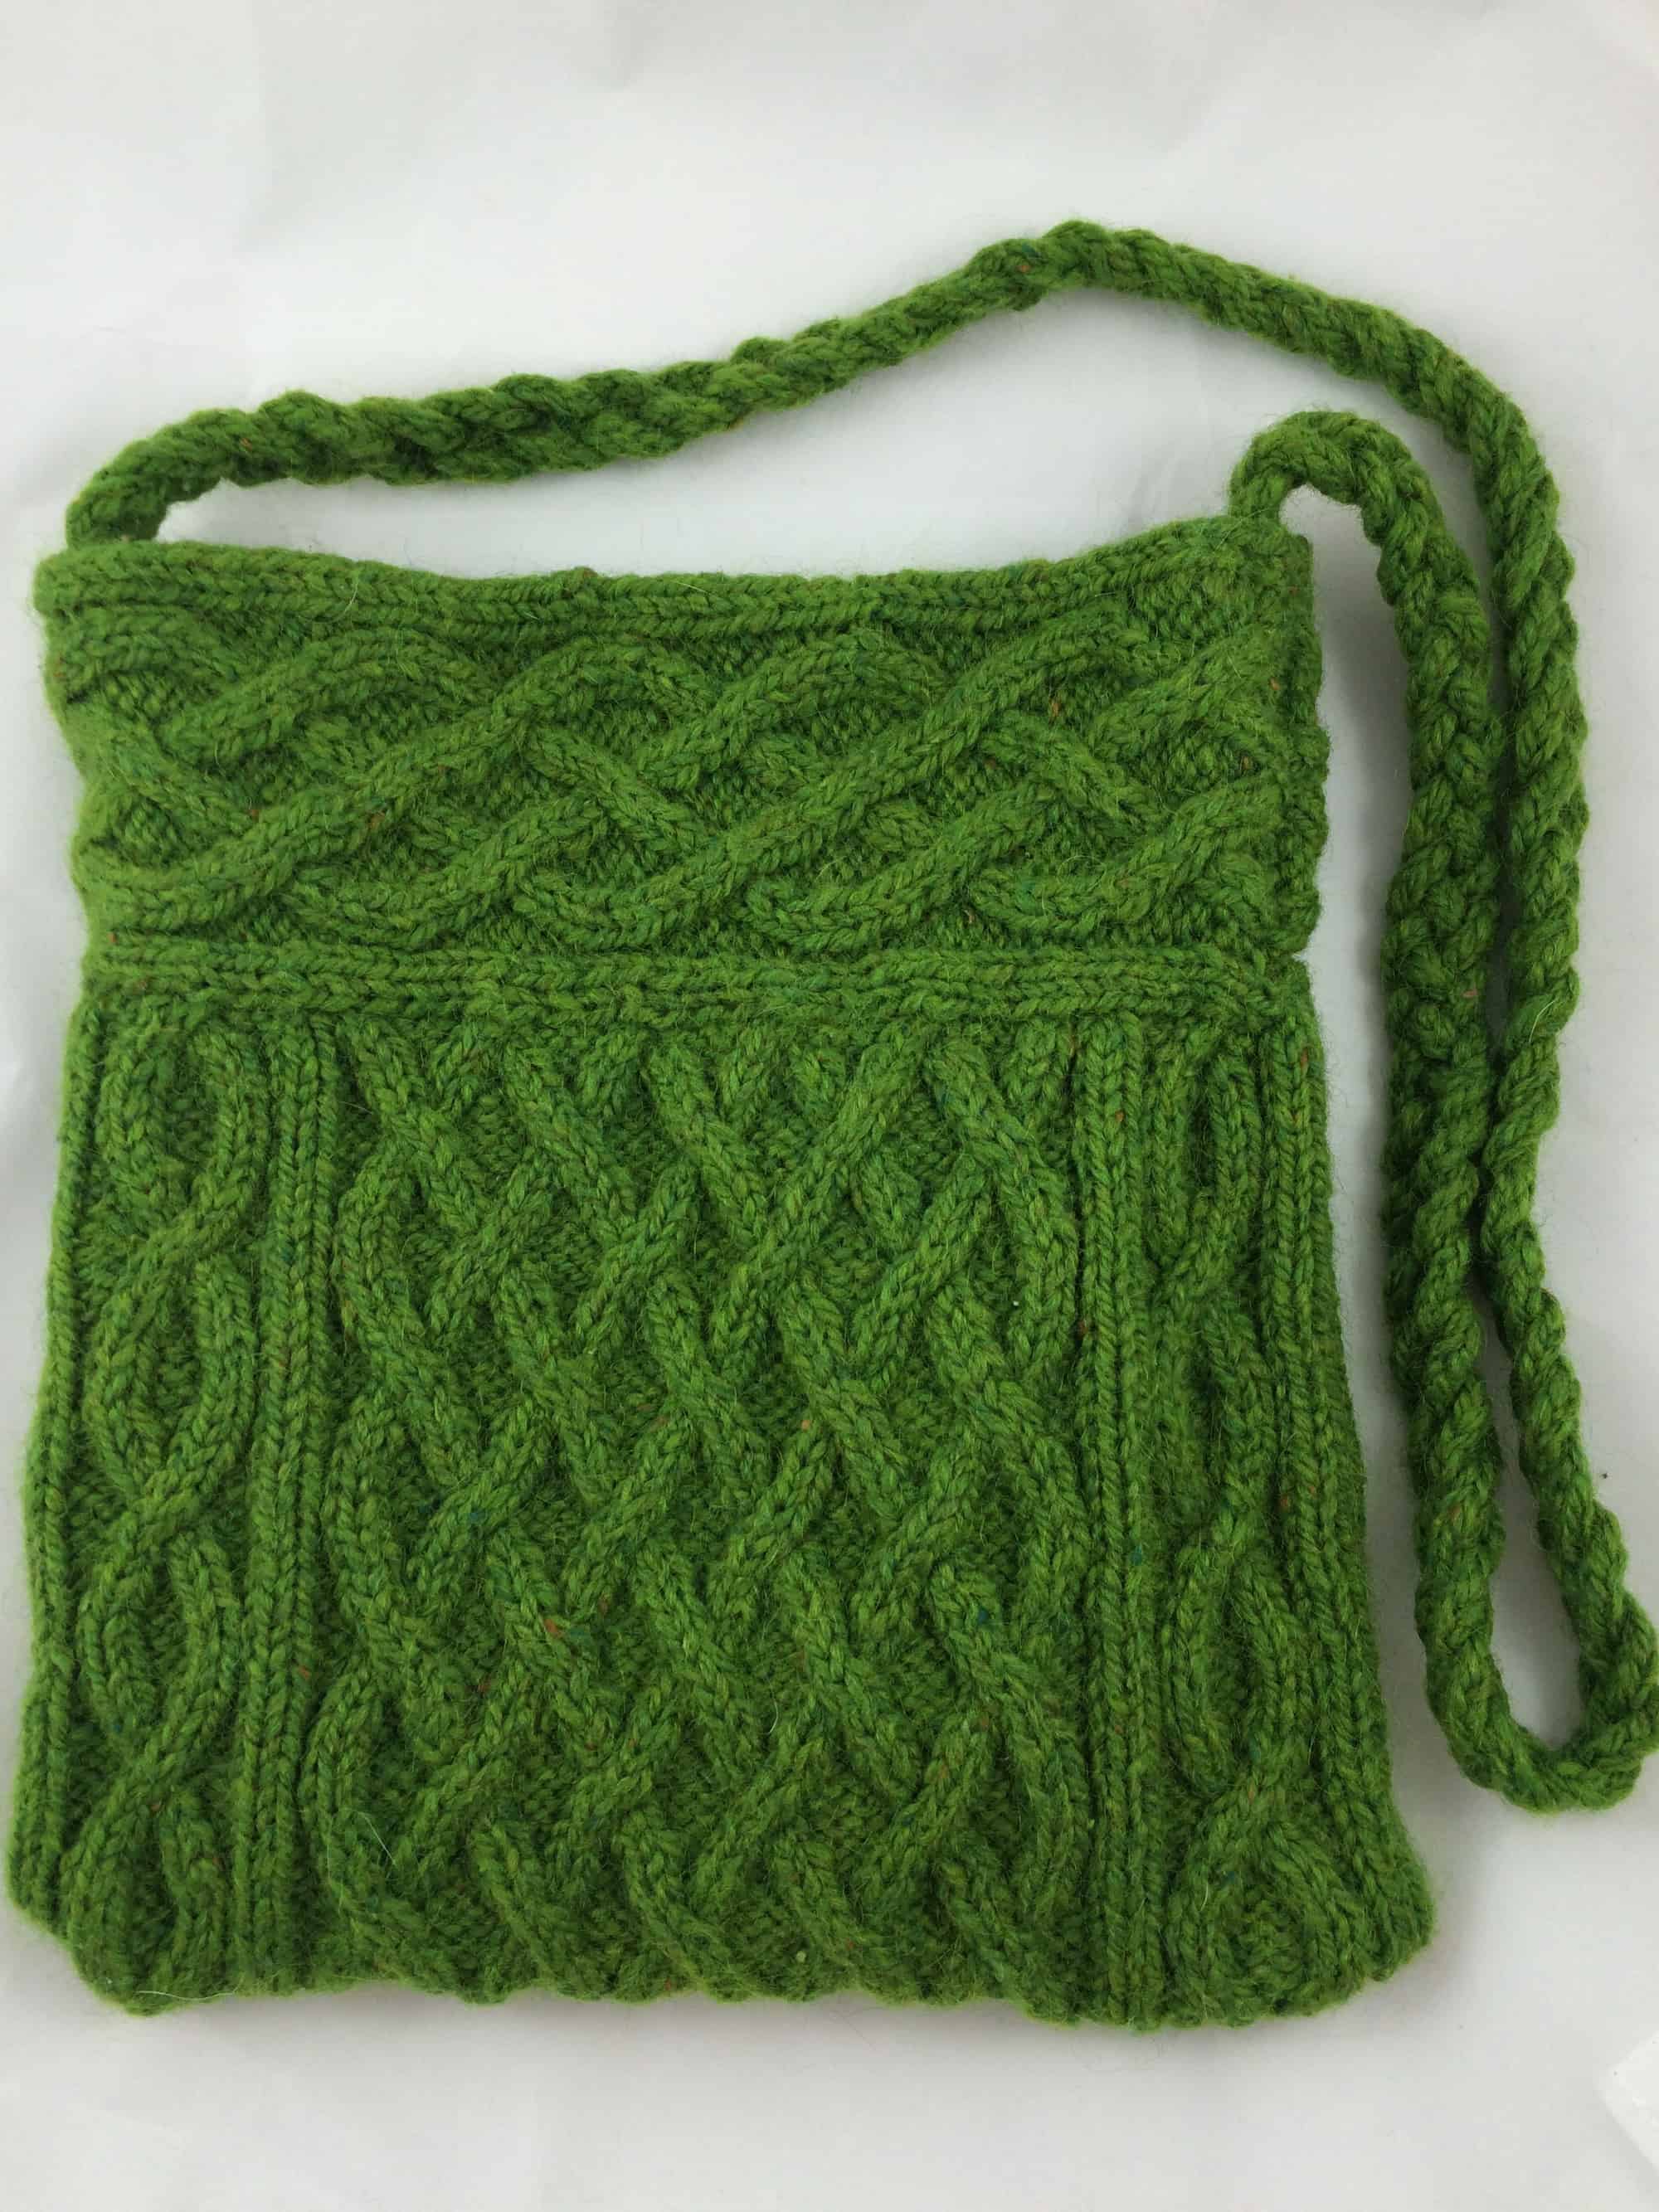
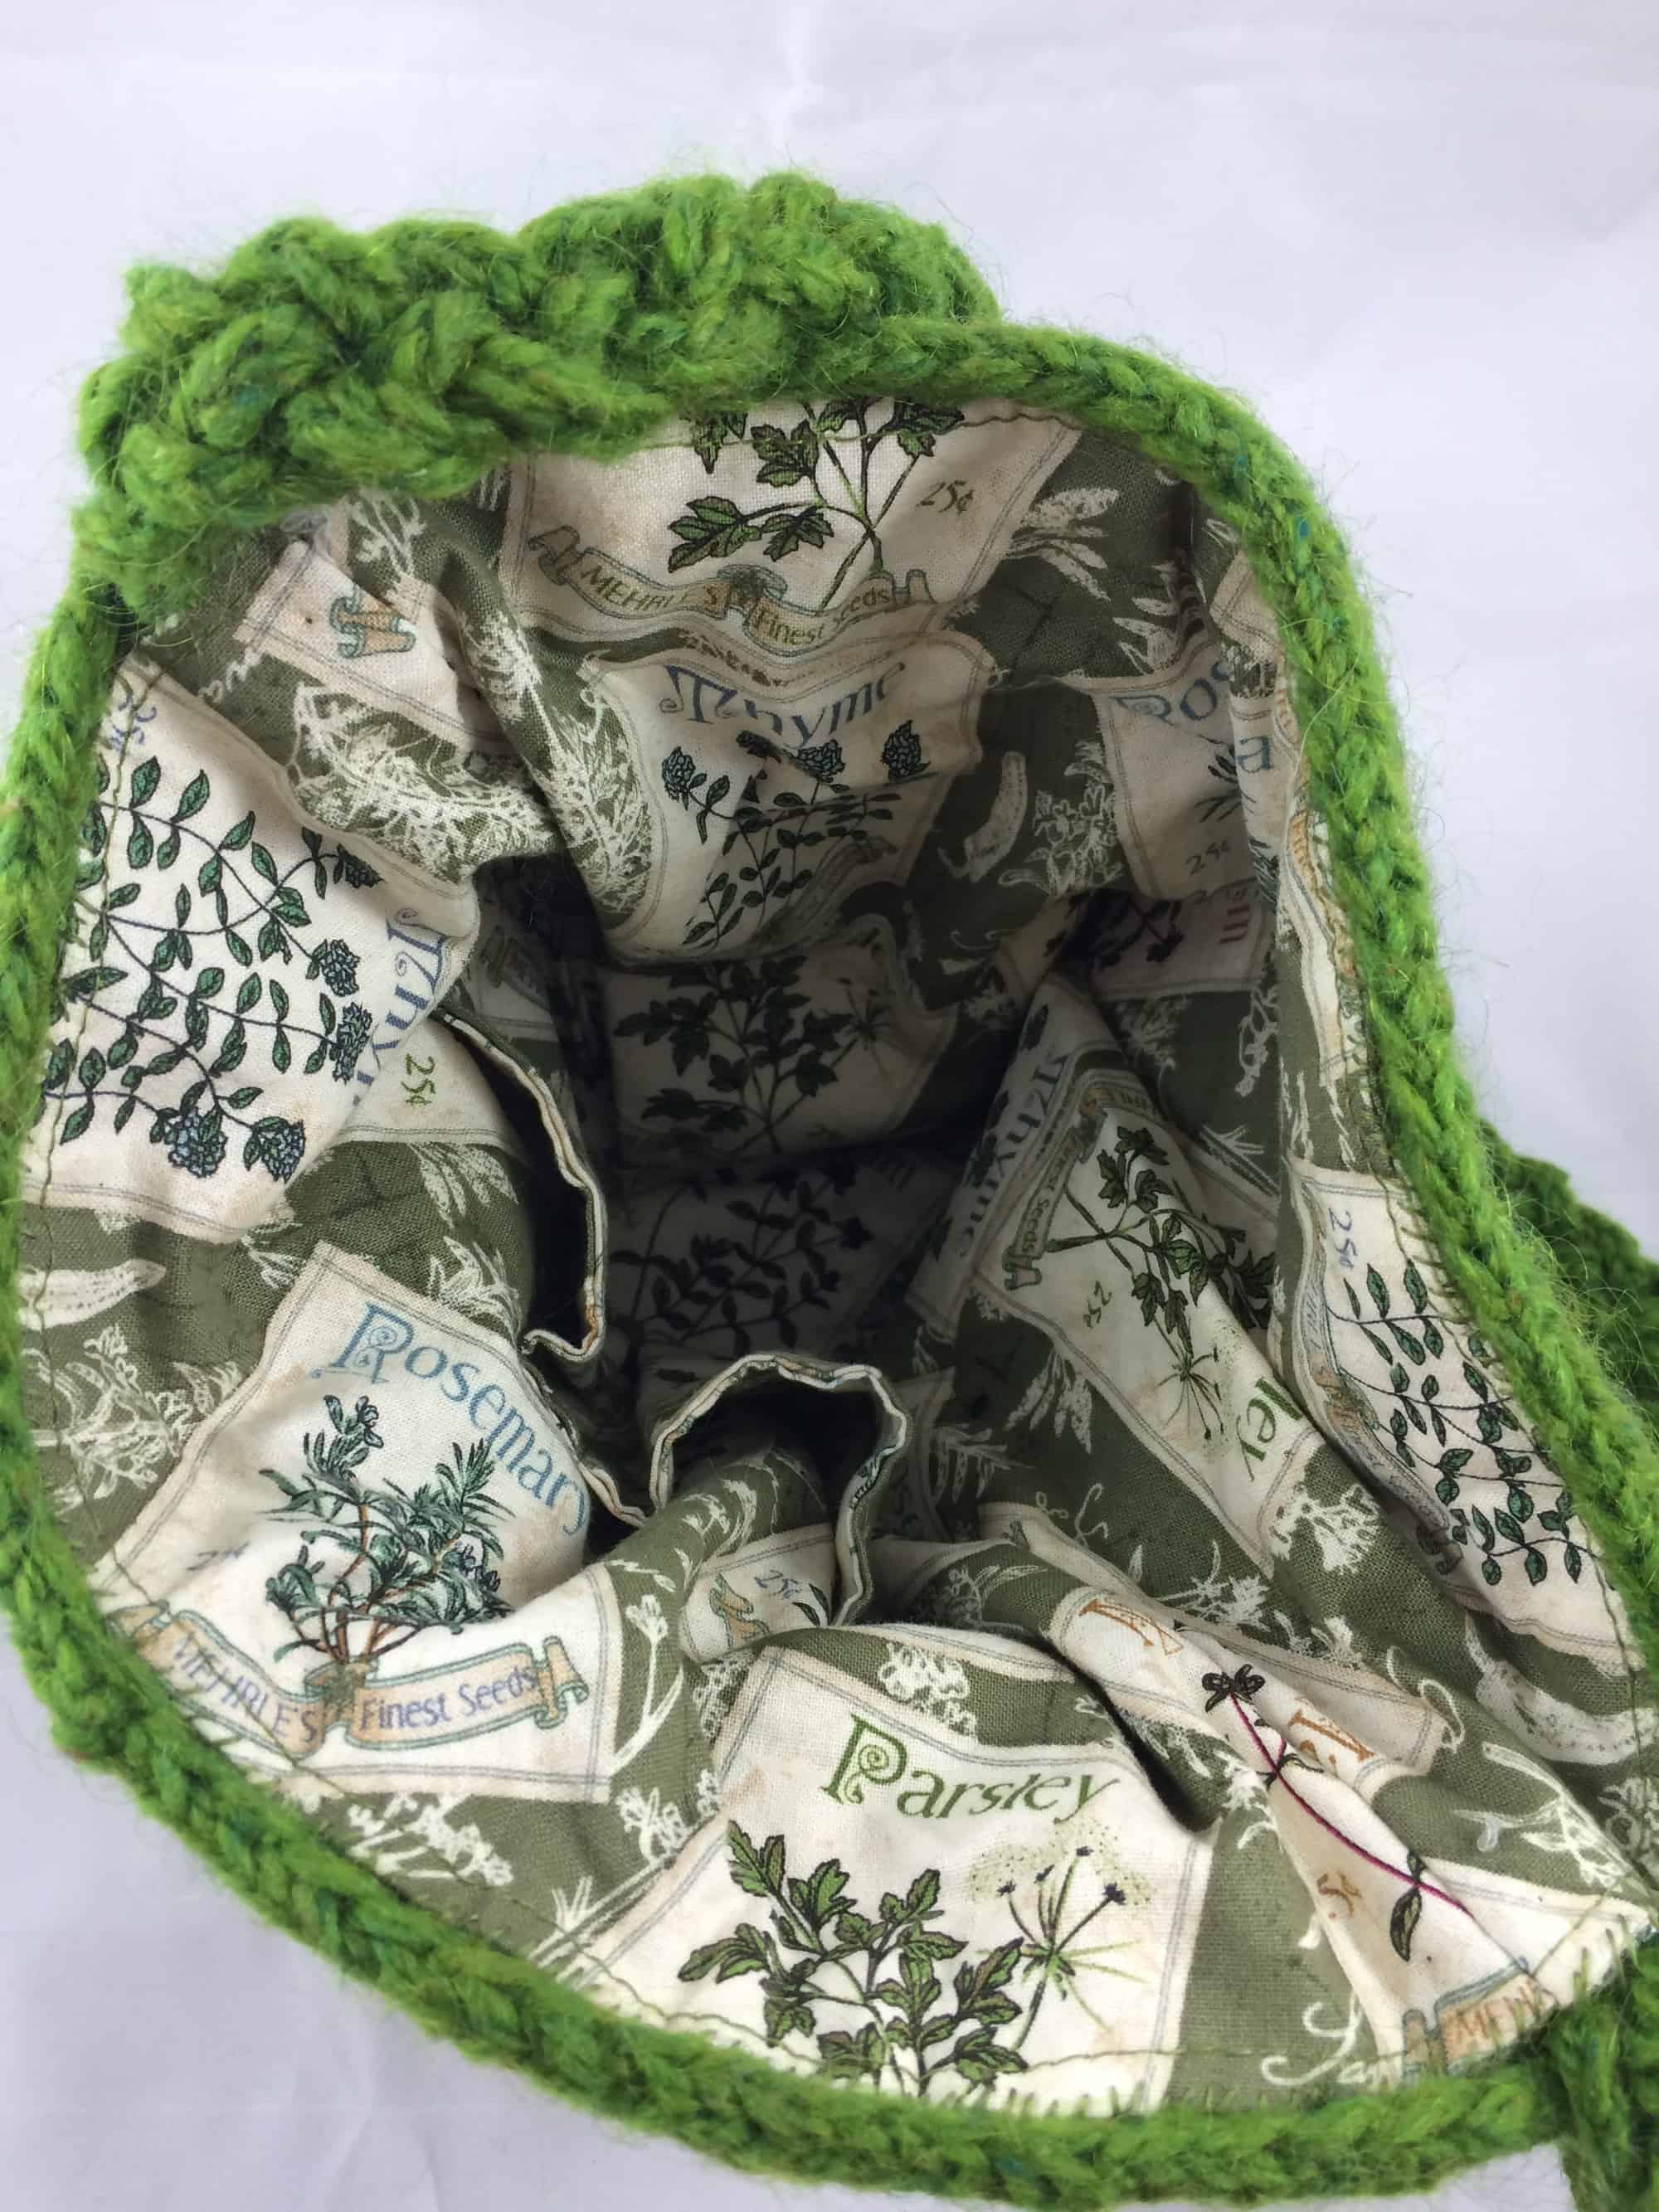
I submitted two items for the fashion show, but failed to take pictures of the models!  The first was the Sand Tracks Scarf, knit with Swans Island yarn.  The second was a Quinn Cabled Bag.  In 2013 I knit 9 of these bags, each in a different color of Peace Fleece.  I finished 8 of them and gave them as Christmas gifts.  The 9th was mine.  The knitting has been finished for more than 18 months, but it’s been sitting in my UFO pile, waiting for me to sew in the lining.  Since I said I would submit it for the fashion show, I had to get that lining sewn in.  I finally finished it during lunch on the day of the Fashion Show!

image
image

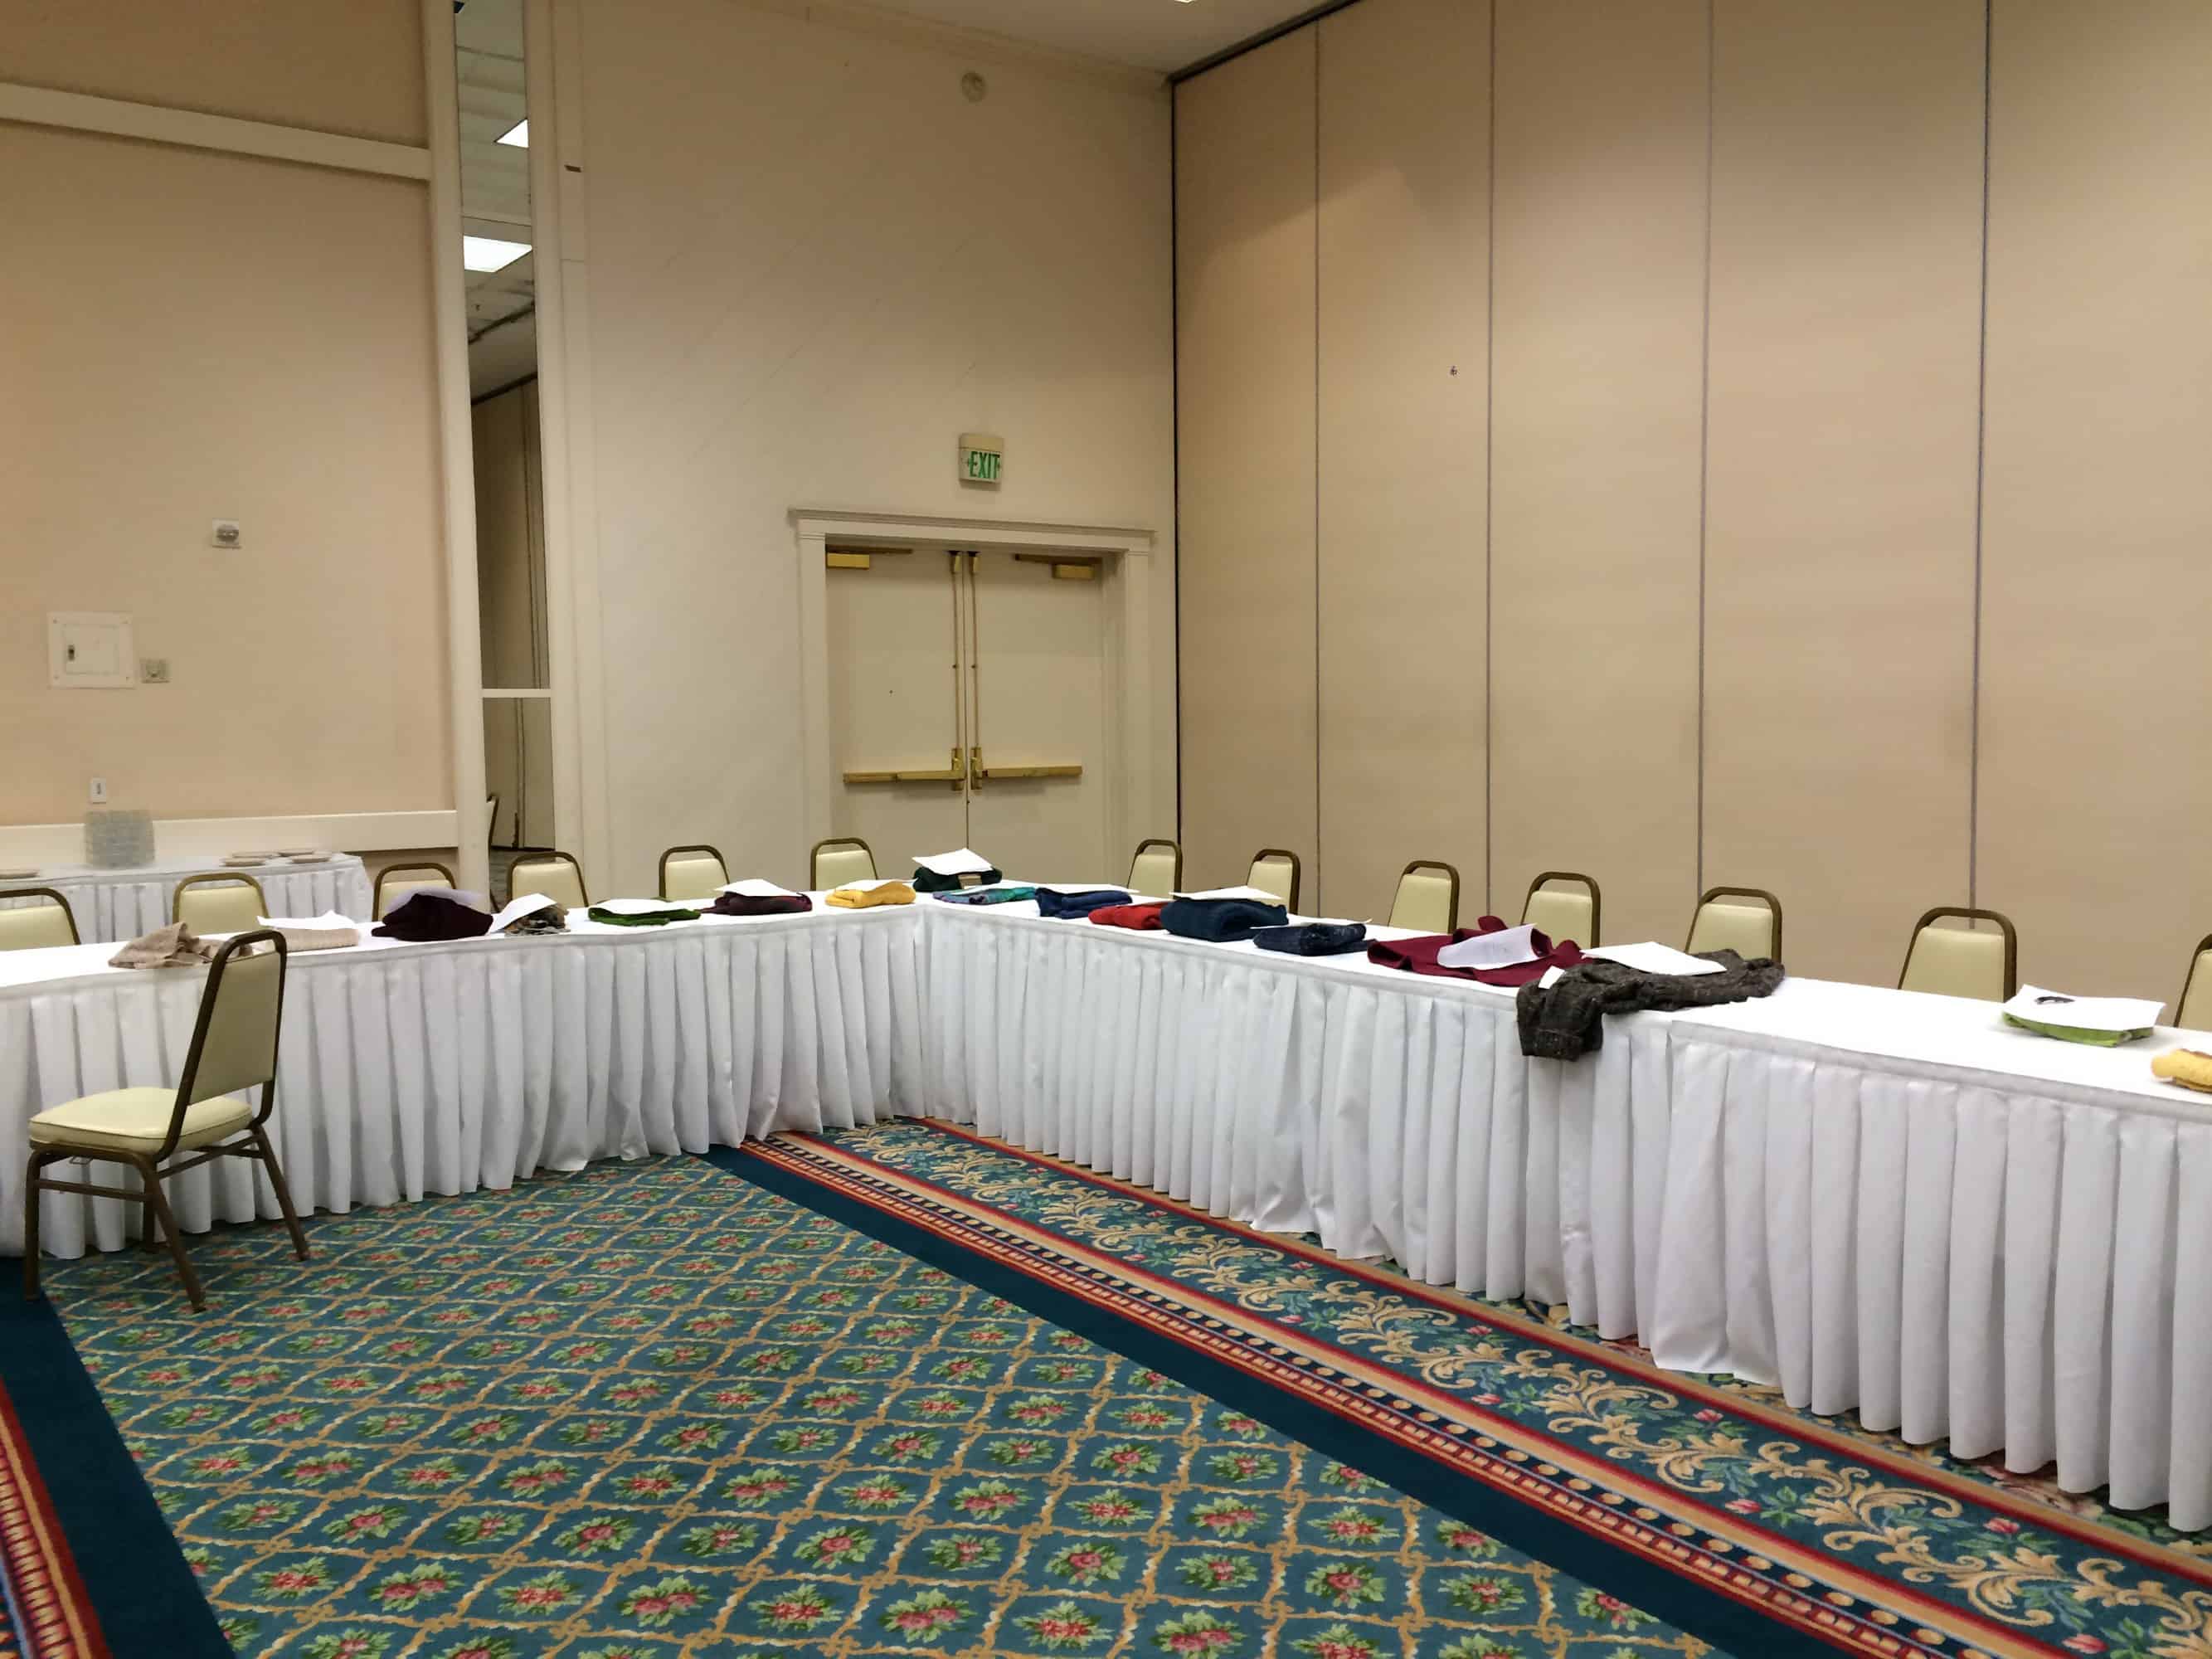
After the Fashion Show, anyone who submitted objects went to the ballroom next door to pick up their knitting.  Everything looked beautiful, folded up in a row on tables!

image

As if everything we’d gotten already wasn’t enough, we each got a bag with 5 or 6 skeins of yarn as we left the Yarn Tasting, all donated by sponsors.  Each person’s bag was a little different.  Arenda suggested we head out to the lobby for a “Halloween candy swap” if we wanted to find enough skeins for large projects!

image

Like I said — a spectacular event!

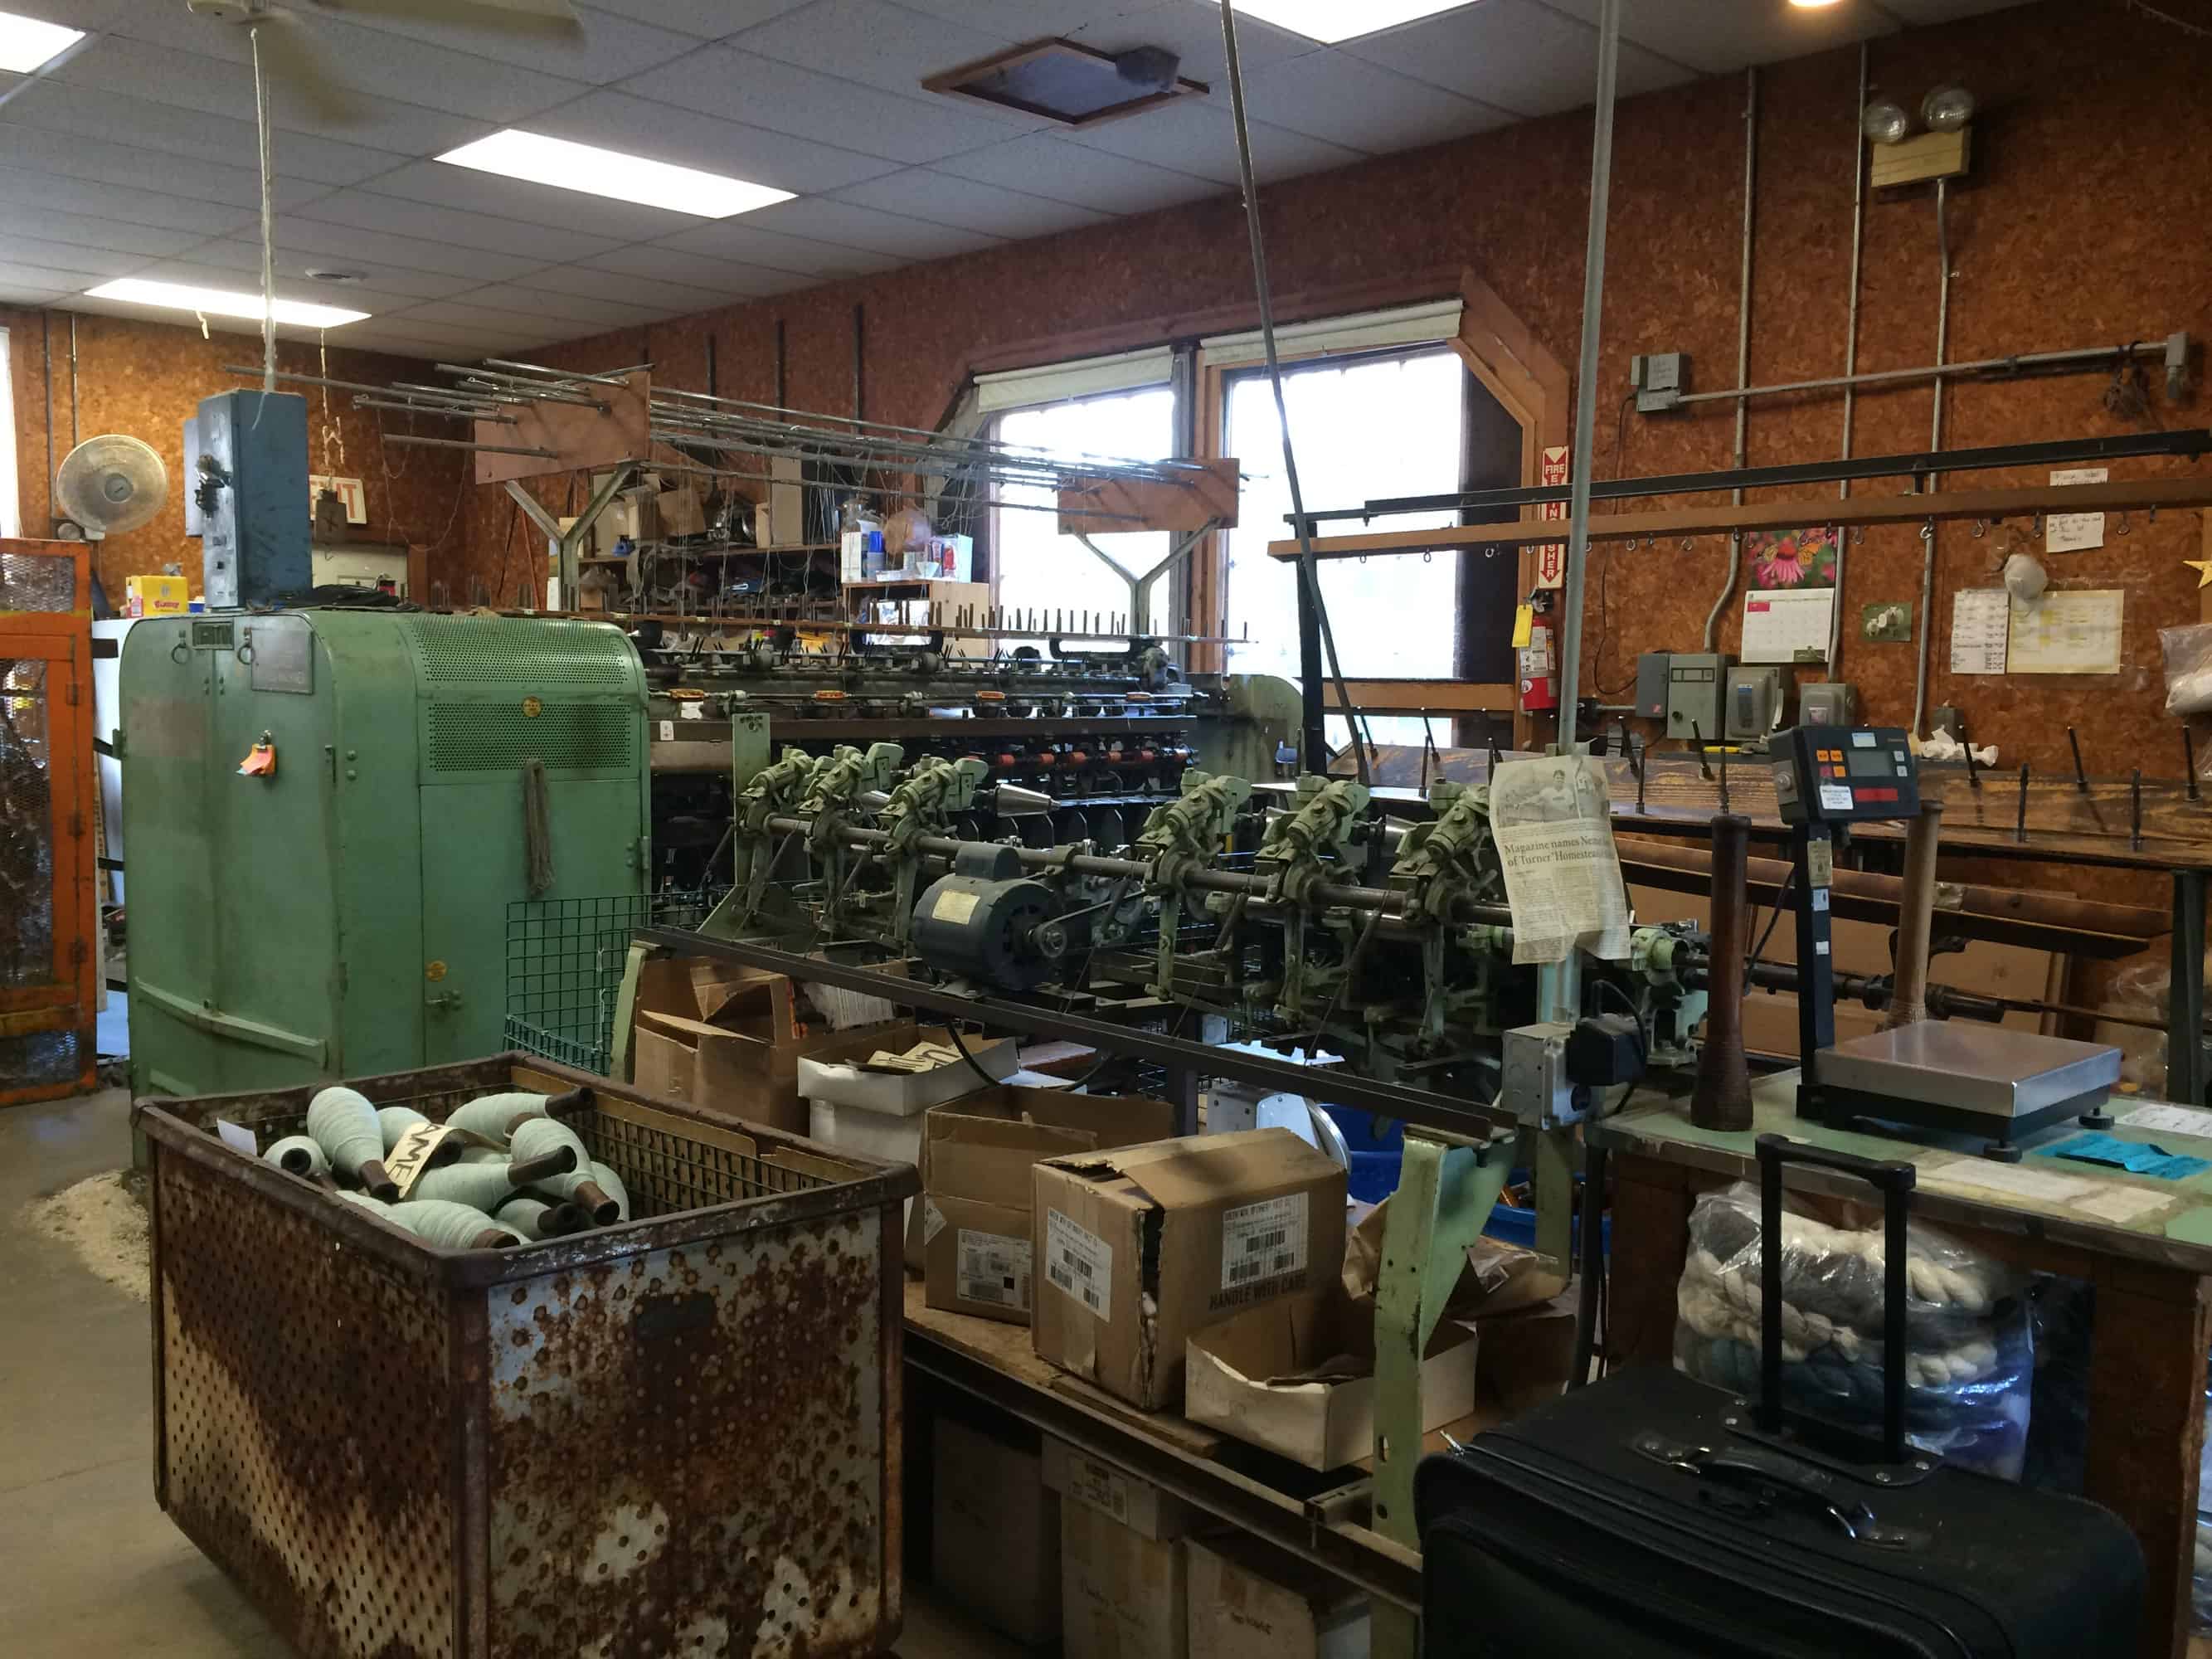
Bonus: A Visit to Green Mountain Spinnery

IMG_8549

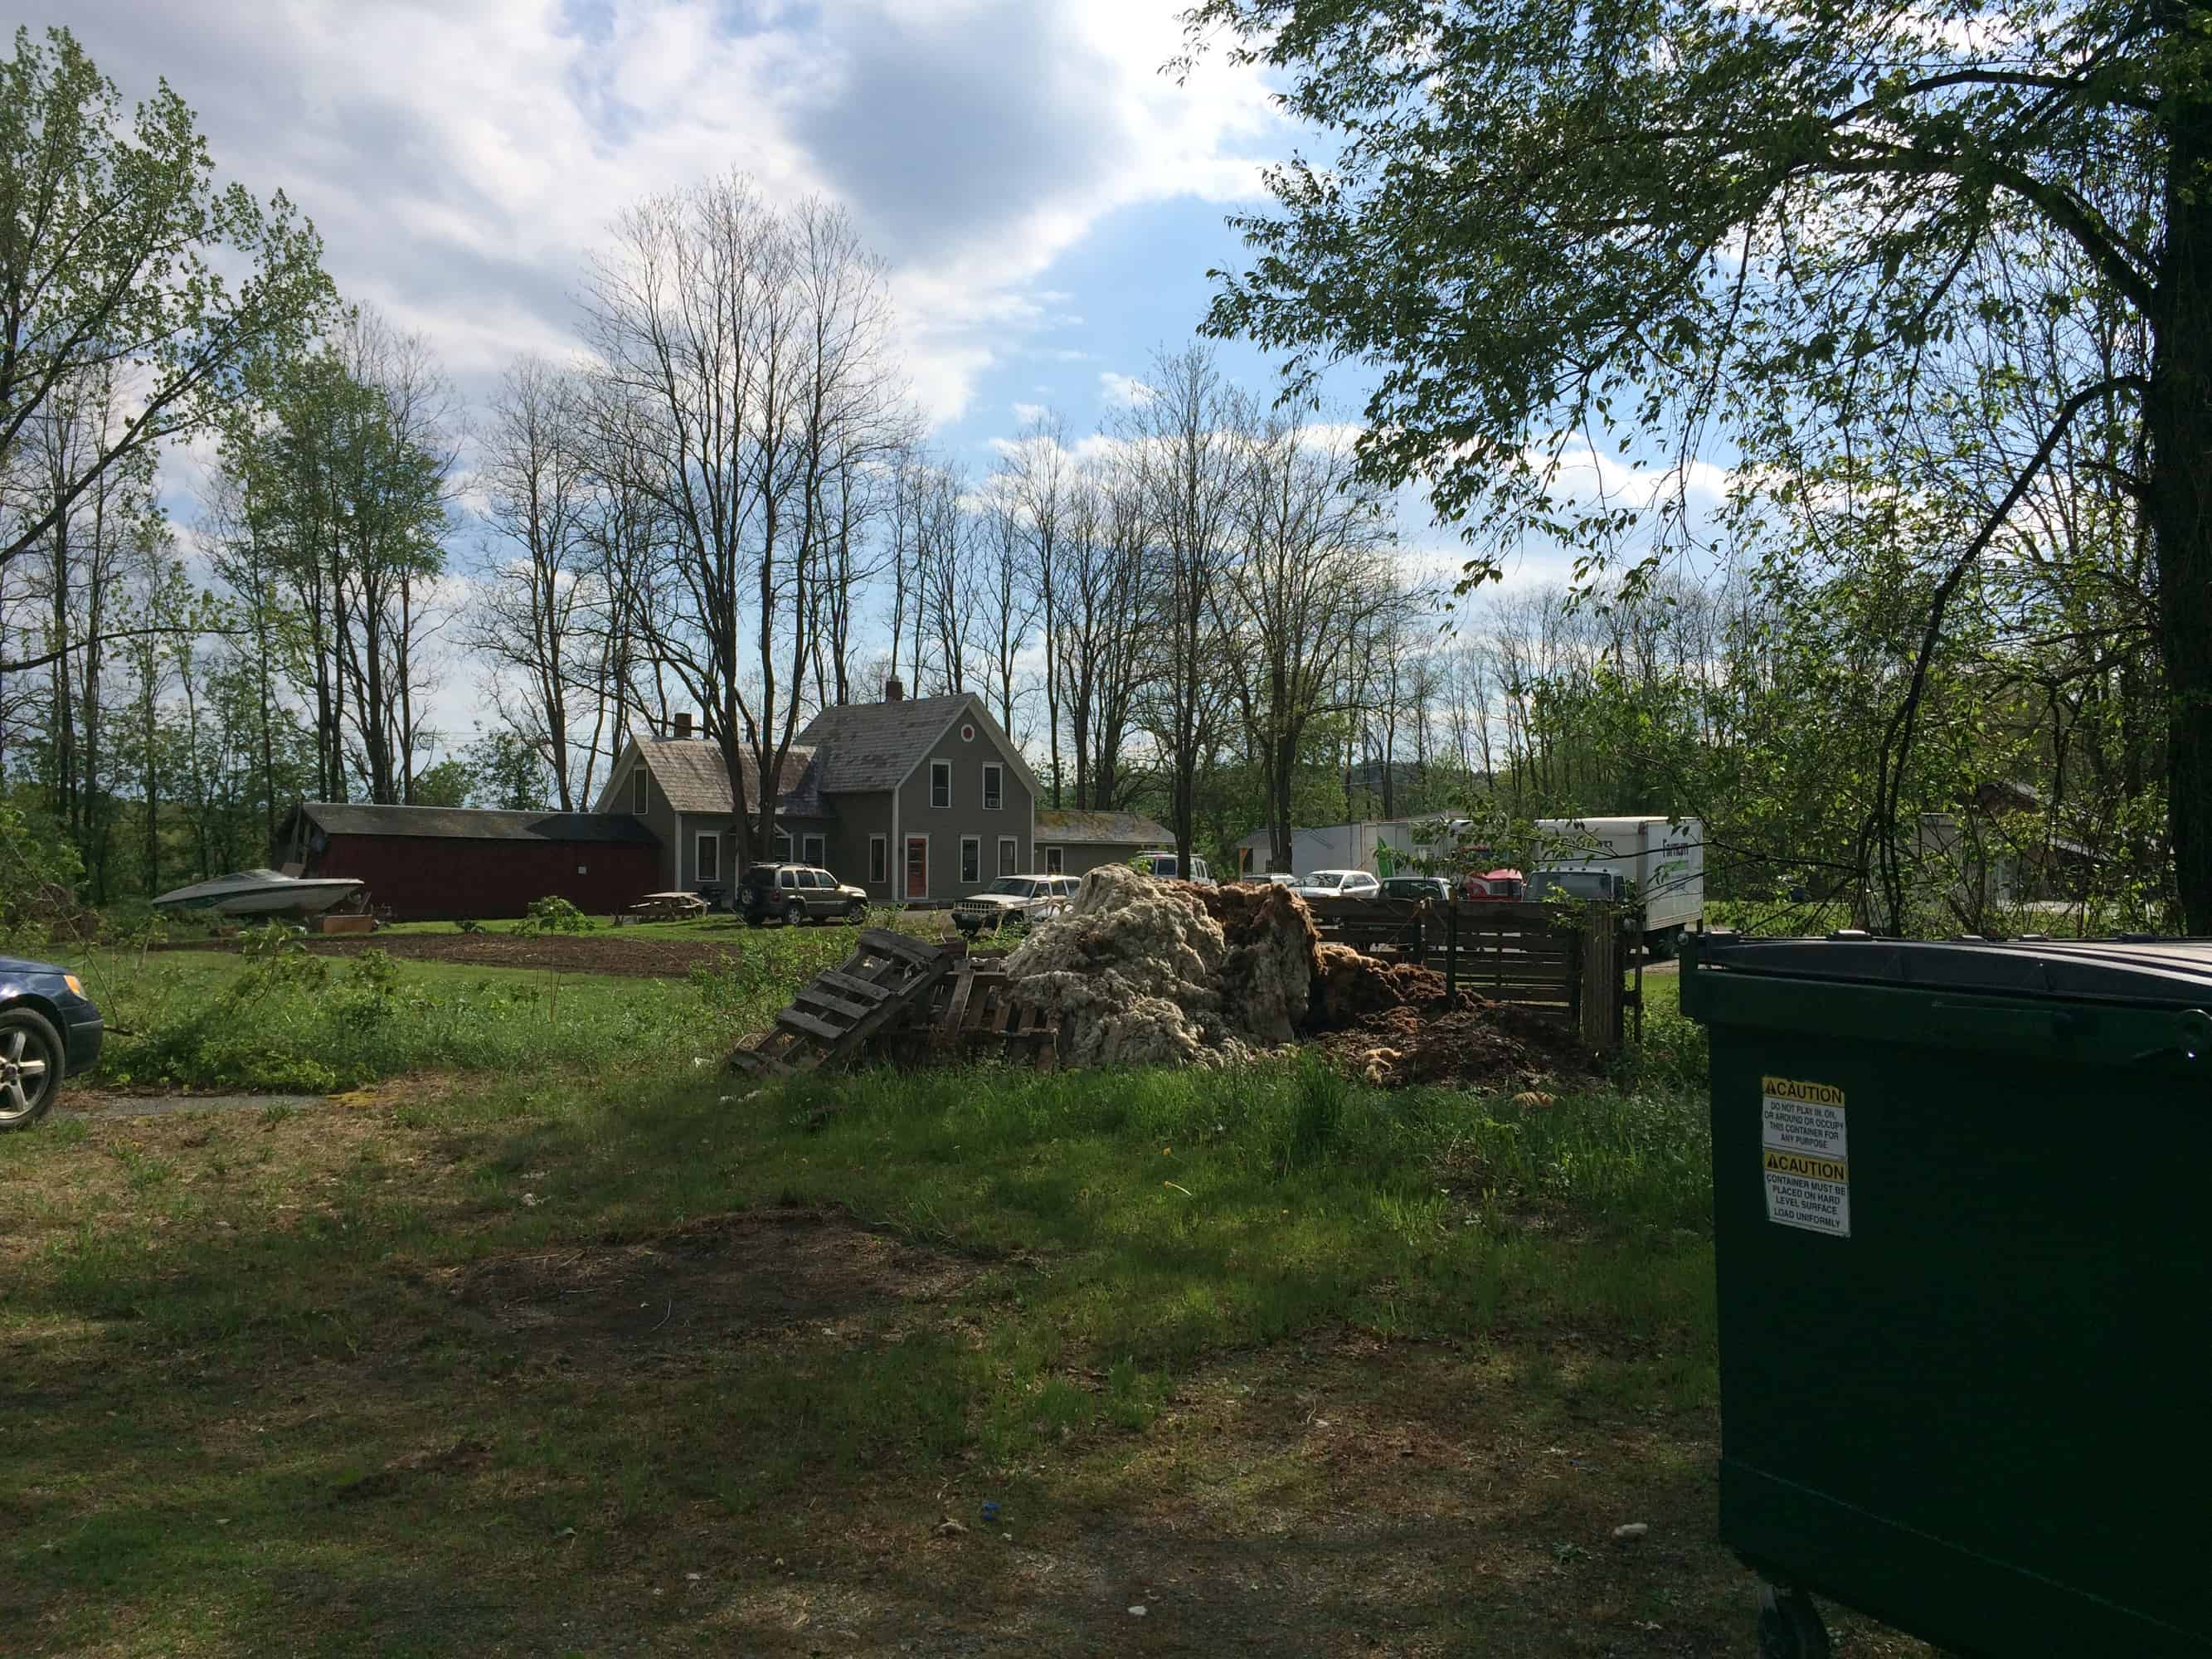
Back in May, I went to Burlington, Vermont to attend my cousin’s college graduation.  I drove from Burlington down to Northampton, MA to go to WEBS and meet up with some Ravelry friends, then on to Hartford, Connecticut to spend a couple of days visiting my sister.  During my trip, I visited a total of 12 yarn shops!  I keep threatening to write blog posts about the trip, but haven’t done it yet.  One of the places I visited was Green Mountain Spinnery.  Since they were one of the Yarn Tasting Sponsors, I thought I’d slip that visit into this post.

Green Mountain Spinnery is a co-op.  Most of the people who work there are part owners of the company, and it is run on democratic principles.  When I planned to visit the shop, I didn’t realize that it was a tiny retail space in the mill!  As soon as I parked, I knew this wasn’t an ordinary yarn shop.  This sorting table is right beside the parking area.  Yes, that’s a pile of discarded wool, full of tags or debris.

IMG_8552

There’s another big pile of discarded wool out back.

IMG_8550
Over there by the pallets. It kinda looks like hay from this distance, but that’s all wool.

The entrance to the retail space:

IMG_8543

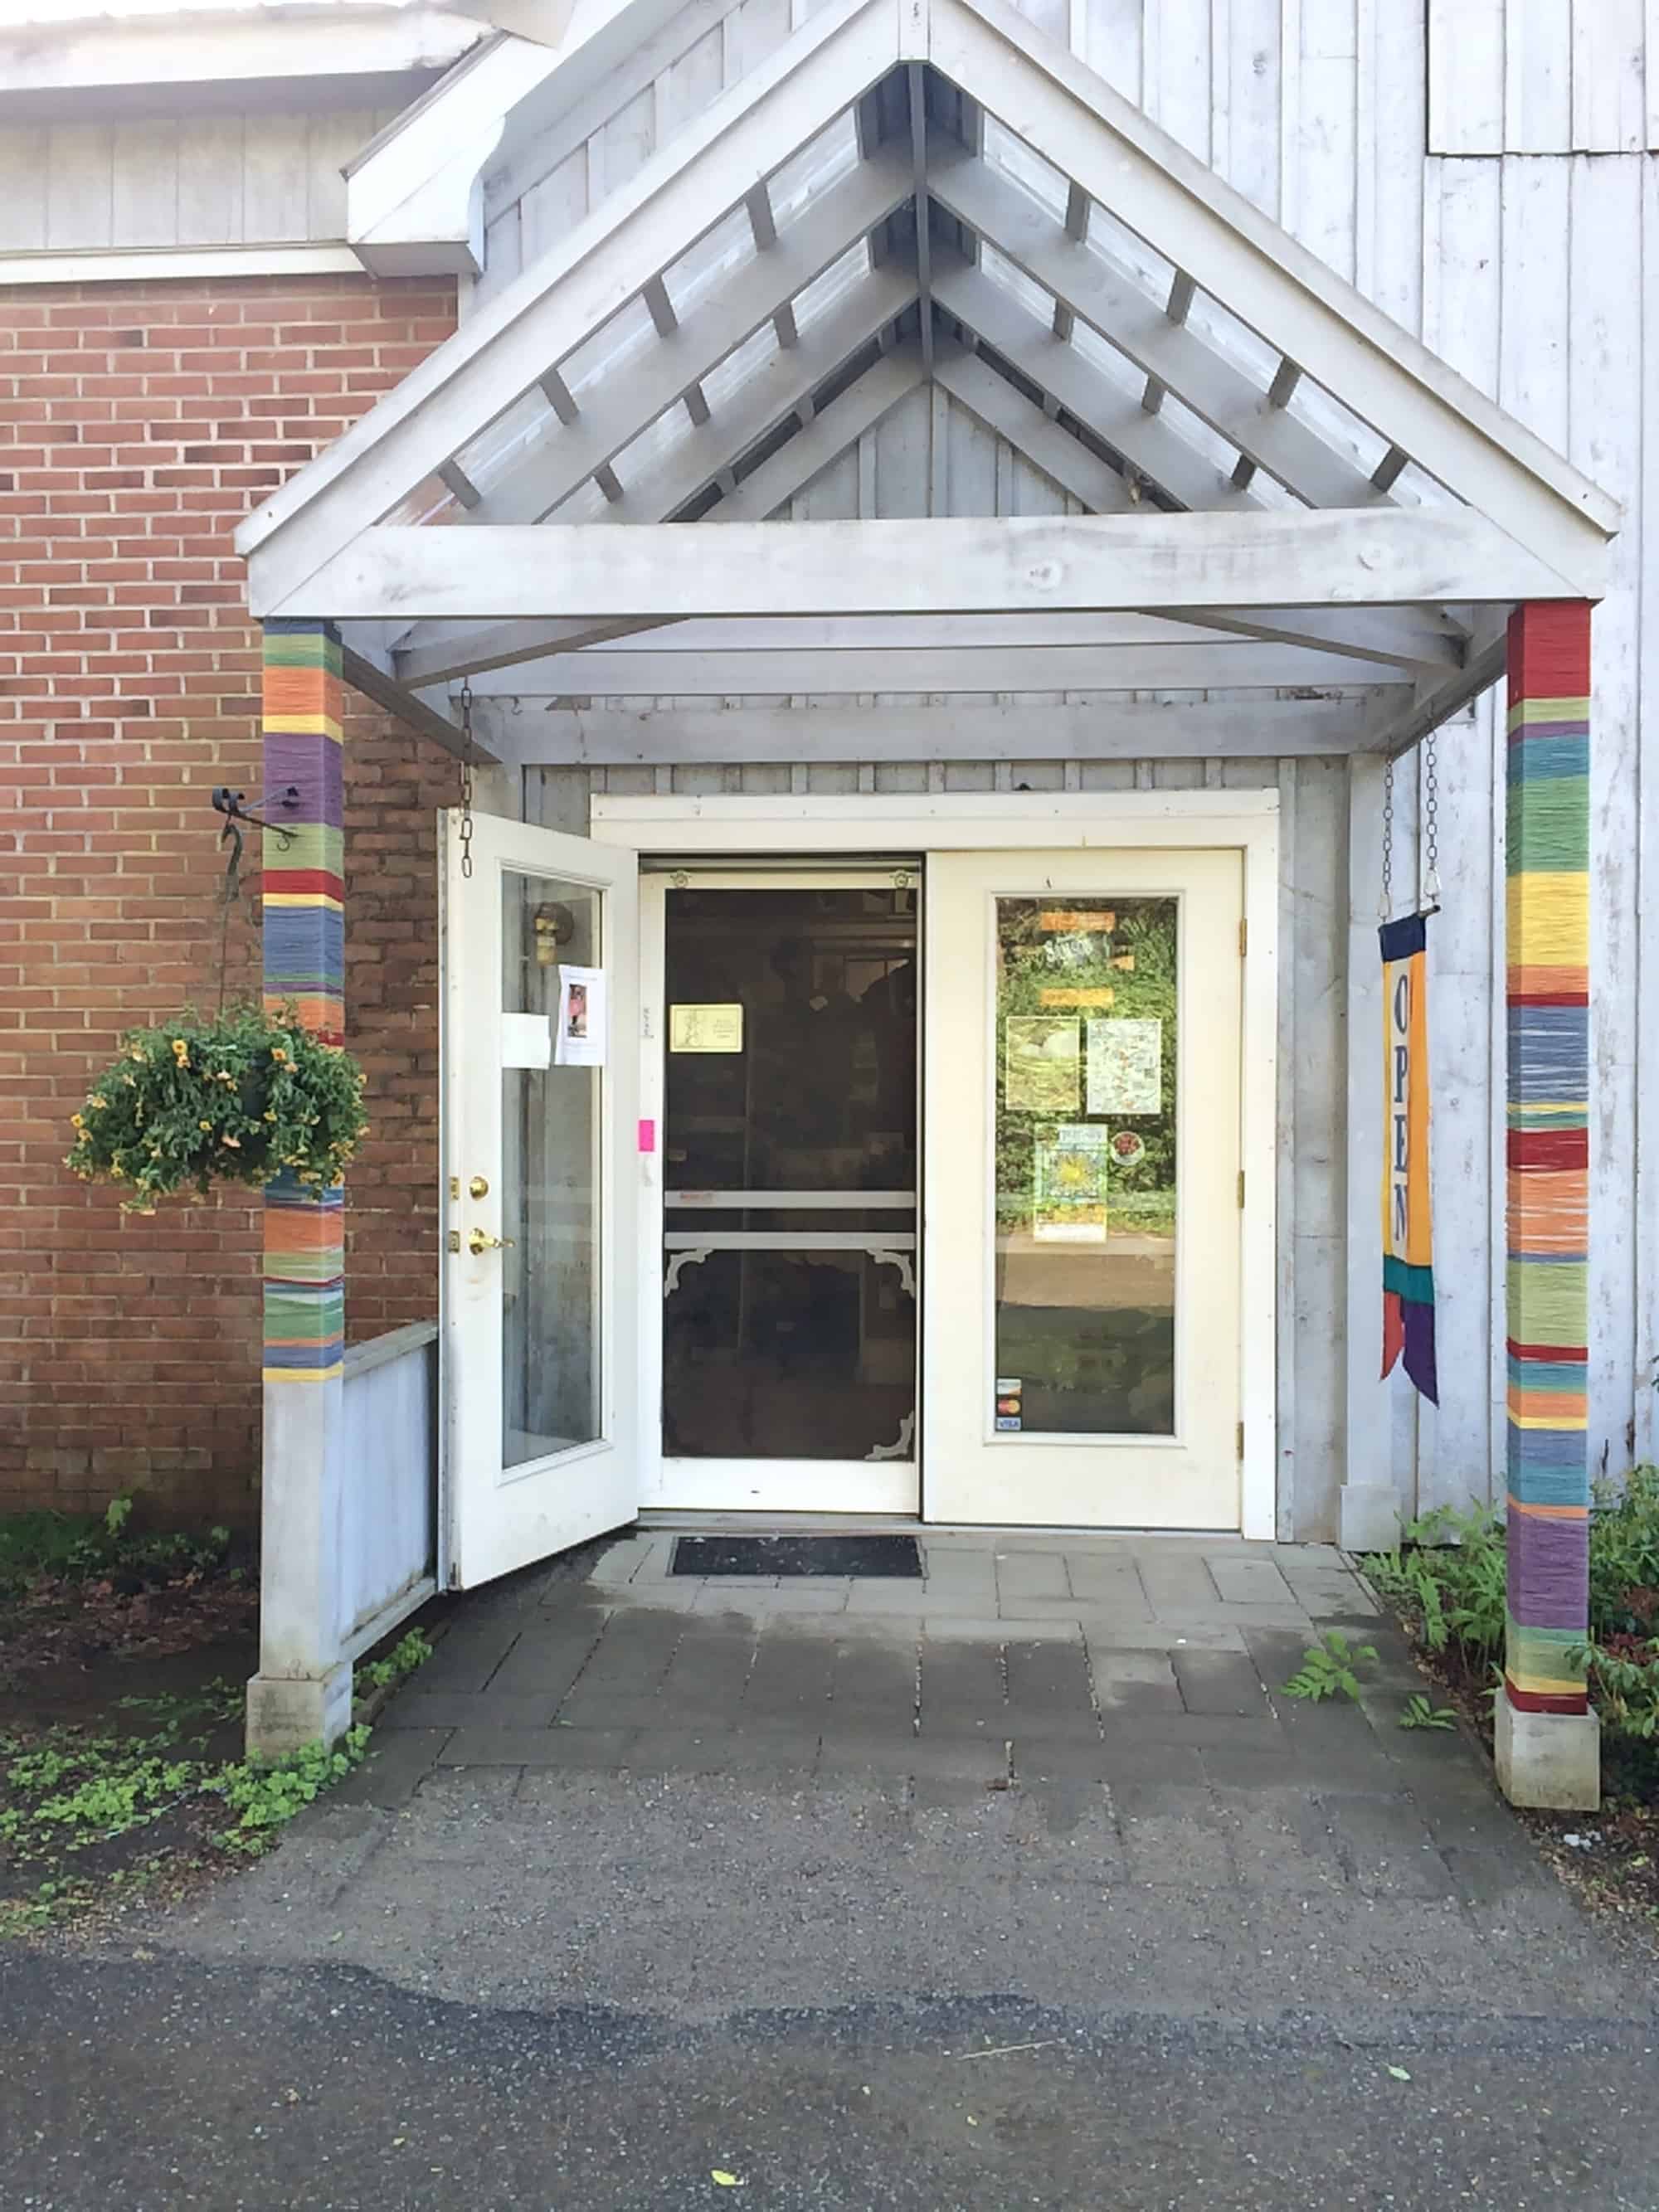
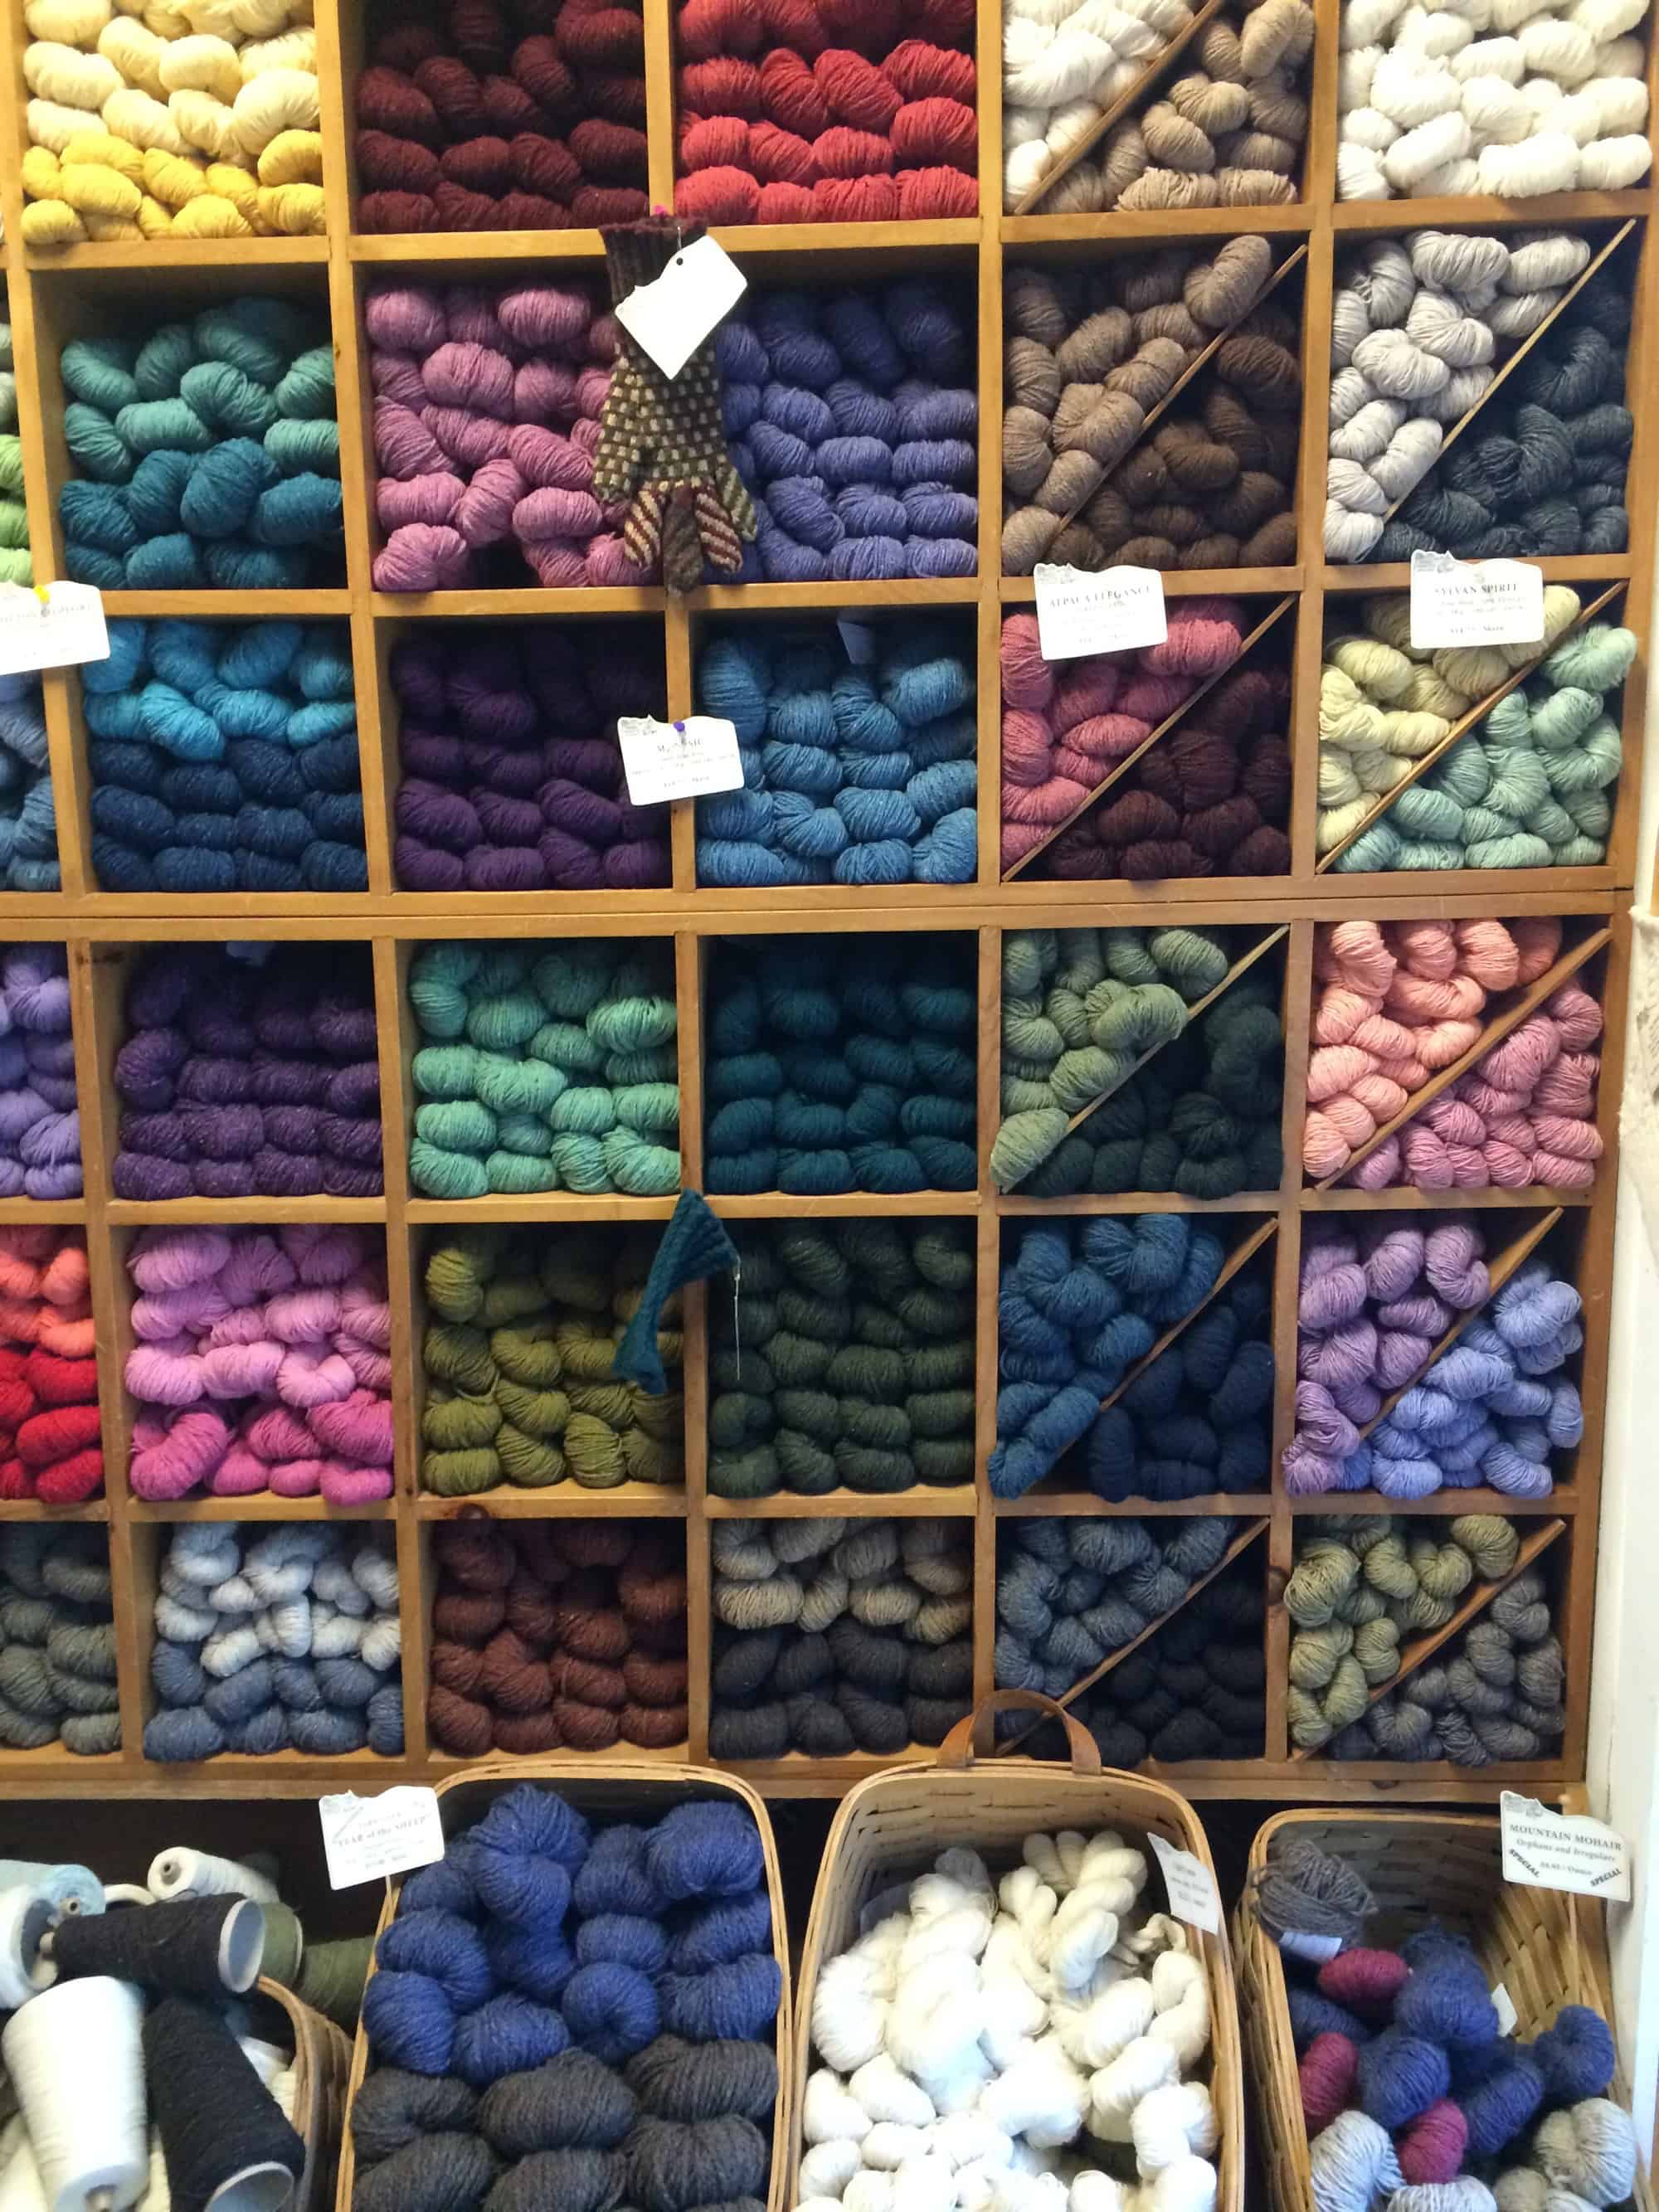
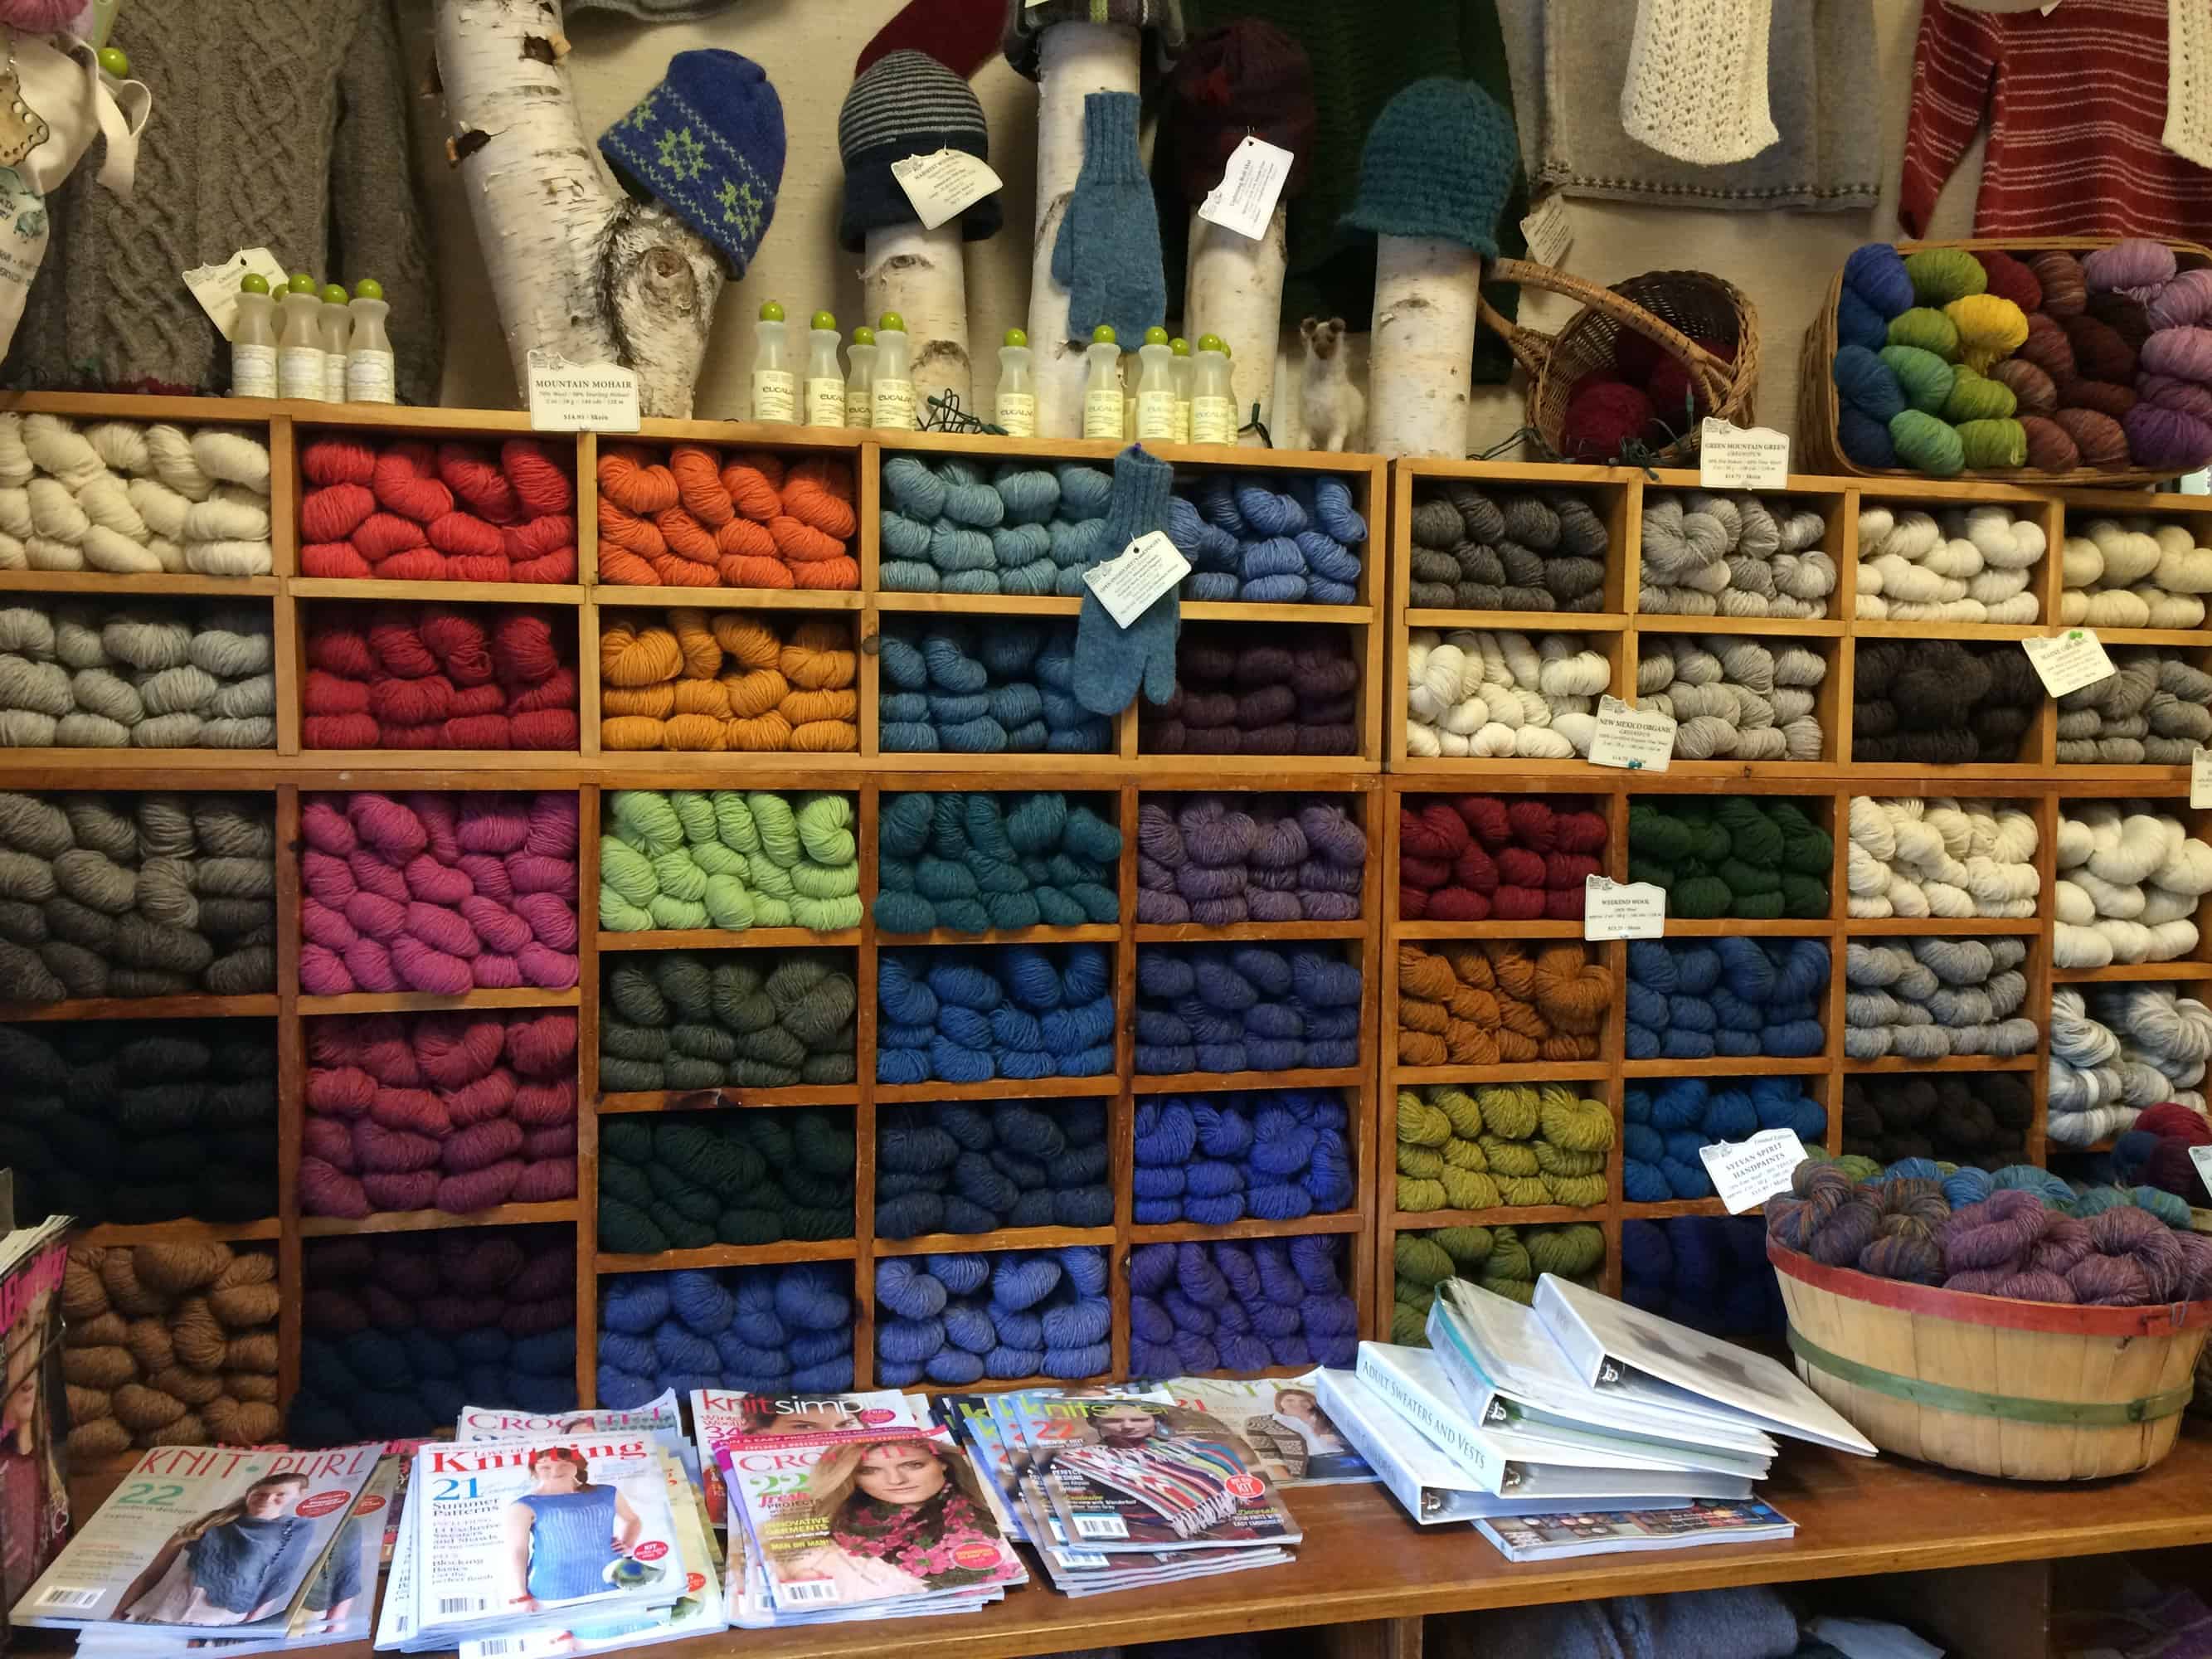
Inside the retail space:

IMG_8547
IMG_8548
IMG_8546

It was late in the day when I got there, and the mill was not operating.  I did get a quick peek inside.

IMG_8544
IMG_8545

TKGA 2015: Finishing with Arenda Holladay

Thursday was the first official day of the TKGA Conference.  I should have already mentioned that CGOA (the Crochet Guild of America) Annual Conference and the TKGA Annual Conference are held at the same time and place.  Attendees can choose to attend only knitting events, only crocheting events, or a combination.  I only attended knitting events because my primary goal was to learn anything and everything that might help me complete the Master Hand Knitter levels.  This year’s attendance was a record.  I didn’t hear an official number, but the rumor swirling around the event was that 600 knitters and crocheters came to San Diego!

For those of you that asked yesterday, I never did find out who bought me dinner.  I’m happy to leave it that way!  On Thursday, I met Heather from South Carolina, Jo from Sydney, Australia, and Emma from Illinois.  All four of us were newbies and had come to the Conference knowing no one there.  We spent the rest of the event hanging out.  Eventually we discovered that Heather, Jo, and I are practically triplets; our birthdays fall within an 8 month range!  Unfortunately, we never got our picture taken together.  I have a picture of Heather and I taken at the Yarn Tasting, so I’m saving that picture for tomorrow.  Here’s a picture of Emma (left) and Jo (center) with Master Hand Knitting Committee Member Christina Hanger (right) on Masters Day.  I believe Sadie Pachan took this picture.

image

I attended a 2-day Finishing class taught by Arenda Holladay, the Executive Director of Cast On magazine.  Rather than writing a post about everything I did on Thursday (first day of Finishing and the Market Preview), today I’m just going to writing about the Finishing course.  Tomorrow I’ll write about the Market and the two wonderful events I attended on Friday, the Breakfast of Brilliance and the Yarn Tasting.

image

The finishing class covered all the skills you need to assemble a finished garment.  This included seaming vertical, horizontal, and combination (attaching a horizontal to a vertical) seams; picking up stitches along vertical, horizontal, and combination (e.g., collars because they are vertical on the sides and horizontal across the back of the neck) edges; buttonholes; weaving in ends; three-needle bind off; Kitchener stitch; and probably other skills that I’m forgetting.

I took this class for three reasons. (1) In 20+ years of knitting, I’ve never knit a sweater.  Knitting myself a sweater is on my list of goals for this year.  If I’m going to knit a sweater, I need to finish it properly.  If I don’t, it won’t be wearable!  (2) Master Hand Knitting Level 2 is all about finishing.  (3) I have 12 of S’s sweaters to finish.  I learned so much in this class, and I’m now excited that I have all those sweaters since I have a way to practice my new skills!

We had to knit (or buy from Arenda) a lot of homework for this class.  I already posted a picture of my finished homework in last week’s Year of Projects post, but in case you missed it, here it is again (the one piece in the bottom right was not for the finishing class):

image

Finishing requires so much homework because you need two pieces to practice seaming techniques and because we practiced vertical seams and weaving in tails in various stitch patterns — stockinette, garter, seed stitch, 1×1 ribbing, and 2×2 ribbing.  We even had two different swatches for 2×2 ribbing so we could see two different ways to create seams in ribbing.  Despite having two full days and a talented, organized teacher, we did not have enough time in class to actually execute all the seaming.  There’s just so much to cover!

Arenda is a fantastic teacher.  (She also brought us bourbon caramels from a distillery near her Kentucky home and a constant supply of chocolates.  And she’s hilarious).  For each technique and variation, she first explained what we were trying to accomplish, the correct technique, and the common mistakes.  She used still photographs to illustrate these points; the photos were marked with arrows or diamonds or numbers to clearly identify stitches or running thread or whatever it was we needed to see.  She then demonstrated each technique live, projecting the video onto the screen so everyone could easily see what she was doing.  Then we each used our own swatches to work the technique and she walked around the room answering questions and correcting our inevitable mistakes.

Arenda suggested that we leave the last inch or so of our seams loose so that when we look back at them, we can see the path of the yarn.  Prior to this class, I’d done minimal seaming and I hadn’t done any of it correctly.  I totally did not understand how mattress stitch worked!

The swatches in the left column are my vertical seams in stockinette, garter, and seed stitch.  From top to bottom on the right: seaming horizontal edge to vertical edge, three-needle bind off, seaming horizontal edges together, and seaming stair step edges.
The swatches in the left column are my vertical seams in stockinette, garter, and seed stitch. From top to bottom on the right: seaming horizontal edge to vertical edge, three-needle bind off, seaming horizontal edges together, and seaming stair step edges.

Prior to this class, I had picked up stitches on horizontal and vertical edges, but never on curved edges.  I had never done a double pick up for bands.

image
The unmarked swatch is the double-pick up. I started binding it off too soon because I was running low on the pink yarn we were using for picking up stitches. I probably needed to knit at least one more row for it to look right.

Prior to this class, I had never knit a buttonhole.  We knit these swatches in class and they aren’t blocked, which makes it more difficult to see the buttonholes!

image

On the second day of class, we ran out of time for weaving in ends.  Arenda presented the information and gave us a demo, but the only swatch we worked in class was the mid-row color change.  I haven’t woven in the ends on any of the other swatches yet!

image

And here’s all the finished swatches together!

image

I highly recommend attending Arenda’s Finishing class if you have the opportunity.  However, those of you unable to attend the Finishing Course either because you weren’t in San Diego or because the class was sold out aren’t entirely out of luck.  Arenda has an excellent YouTube channel and blog covering many of the techniques we learned in class.  Here’s links to the relevant videos and blog posts.

Seams

Vertical

Horizontal

Other

Picking Up Stitches

Buttonholes

Weaving in Ends

In Peripherally Related News

Just a quick note on my swatch photos.  I use my iPhone to take the photos that appear on this blog.  I usually take the pictures on my dining room table in the mid-afternoon when filtered sunlight shines through the window right beside the table.  If it’s raining or I’m busy, I sometimes have to wait to take pictures until I can take them in good light.  In order to be more flexible with photos, I’ve wanted to get a light box.  During Amazon’s Prime Day sale, I bought the StudioPRO 24″ Portable Table Top Product Photography Lighting Tent Kit (affiliate link).  It was delivered to my house while Chris and I were in NJ for his Uncle Angelo’s funeral.  These finished swatch pictures are the first pictures I’ve taken with the light box.  It was 10:30 pm when I took them, so obviously I wasn’t getting any sunlight!  I love how the pictures came out and I look forward to using the light box on my future pictures!

image

TKGA 2015: Masters Day

Wednesday started bright and early simply because I was still on East Coast time.  I woke up at 3:30 am and couldn’t get back to sleep.  By 6:30 am, I was showered, dressed, packed, and at the front desk to get my room changed.  I couldn’t get into a new room until the regular check in time of 3:00 pm, so I left my suitcases with the bell hop and went to breakfast in the Terrace Cafe on the hotel property.  I forgot to mention this yesterday, but all the food I ate at the hotel was excellent.  Since it was also expensive, I ate most of my meals at the mall which was behind the hotel property.

image
Lemon Ricotta Pancakes with orange maple syrup and a couple scrambled eggs. YUM!

After breakfast, I headed over to the Conference Center.

image
image

Since I received my registration packet in the mail a couple of weeks before the event, I already had my tickets, but I needed a sleeve to hold my name badge, so I stopped at the registration desk.

image
image

I got two surprises at registration.  Neither should have been a surprise; I knew about both things, but had totally forgotten.  Since this was my first time attending TKGA, I registered as a newbie.  This meant that I was assigned to a buddy group, consisting of three newbies (including me) and a previous attendee.  My buddy was the program organizer, Kate Steinke.  The surprise I got at registration was this envelope:

image

Inside, I found this pin:

image

Kate crocheted a pink pin for each newbie and a blue pin for each buddy!  I attached mine to my name tag.

My second surprise was a goodie bag from Lion Yarns.  The first 500 people to register for the conference got this goodie bag.

image
The small booklet on top of Laugh with Lola! is graph paper. I’ve never seen a graph paper booklet that small! The key chain is a tape measure.

Here’s a better look at the yarn.  I hadn’t heard of this yarn before, and at first glance I thought it was wool (because of the texture) blended with silk or bamboo (because of the sheen).  It’s actually acrylic!

image

I also bought two TKGA pins

image

I added them to the collection on my backpack:

image

After registration, I headed to Masters Day!

image

The Masters Day program included four tracks: one for each level of the Master Hand Knitting program and one for Level 3 graduates.  I am working on Level 1, so I attended all the Level 1 sessions.  Since those are the only sessions I attended, I can’t tell you about any of the other tracks!  Here’s the schedule for the day (downloaded from the TKGA website):

image

I was so busy learning that I failed to take pictures during the day.  Sadie Pachan, the Managing Editor of Cast On, took this picture of my table.  At least I have proof I was actually there 🙂

image

The three mornings sessions were vitally important to completion of Level 1, as these are the three skills underlying every single swatch.  While each swatch does test other basic knitting stitches, if yarn selection, gauge, and tension are off, every single swatch will be off.  I learned this lesson the hard way during the afternoon’s swatch review!

The information presented during the morning sessions is already available to everyone taking Level 1.  The general instructions, the On Your Way to the Masters articles in Cast On, the TKGA Ravelry group, and YouTube videos by several MHK Committee members cover the same topics in detail.  I don’t know about you, but no matter how much research and writing I do (and I’ve done all of it for the first 15 swatches and the blocking report), I’m never 100% certain of my application of the technique.  I’ve knit for a long time, but I’m self-taught, and I know the hazards that this can involve.  No matter how much I think I understand, I don’t always do it right!

The morning sessions were valuable because we got to see examples and ask questions.  During yarn choice, we could hold up our yarn and say, “Is this light-colored?”  Answer: While other colors might be acceptable, you can’t go wrong with white, cream, or pastels.  The green yarn that I thought I might use for the mittens (the same yarn that I used for the swatches below) is too neon.  It takes about 8 hours (all volunteer, by-the-way) to review a level 1 binder, and 20+ hours to review a level 2 binder.  MHK requires light-colored yarn to make it easier for the reviewer to see the stitches during his / her detailed review of our work.

image

During the gauge session, we walked through the steps of measuring gauge, using swatches provided to us.  While I was working on my Level 1 swatches at home, I watched Arenda Holladay’s excellent videos on marking the swatches for gaugemeasuring for gauge, and calculating gauge.  During Masters Day, we used this same process with one important addition — we saw the process of placing the markers (in Arenda’s video, the markers are already in place).

I found this demonstration to be particularly valuable on the cable swatch.  Throughout Masters Day (and the 2-day Finishing Class I took on Thursday and Friday), I was repeatedly reminded of the importance of differentiating between a knit stitch (looks like a V) and the space between stitches (looks like an upside down V).  While I’m generally skilled at reading my knitting, the first two times I placed the marker in the cable swatch, I put it in the wrong place.  When you have a knit stitch next to a purl stitch, it is difficult to see the demarcation between stitches.

Here’s the swatch I marked at home:

image

I threaded the markers through the column of purl stitches beside the cable on the right and the border on the left.  When you turn the swatch over, you see that each marker runs through the middle of a column of knit stitches.

Here’s the swatch I marked during Master’s Day:

image

This swatch is correctly marked between stitches.  On the back side, I did not split any stitches.  On both the front and the back, the green yarn is barely visible!

My biggest aha moment of Masters Day came during the tension session.  I learned that I have tension issues.  During the afternoon swatch review session, I realized that some of the problems I had with the swatches which I thought were execution problems were actually tension problems.  Since these two sessions run together in my mind, I’m going to conflate them into one discussion on tension!

During the tension presentation, we saw several examples of swatches with poor tension and with good tension.  We saw gutters across the entire swatch and gutters only along the edge stitches.  We also learned two techniques for diagnosing whether our purl stitches are larger than our knit stitches or vice versa.  (For most people, the purl stitches are larger, but that isn’t true for everyone!)  The first technique is to cut the yarn after a purl row and after a knit row, pull the rows out and measure the yarn.  Suzanne Bryan, current Committee chair, wrote a step-by-step blog post on this method.  The other technique is to knit a swatch with four rows of one color and four rows of a different color.  This method, detailed on knittsings blog, makes it easier for you to distinguish between purl rows and knit rows.

I’ve knit for a long time.  I did all the research for the swatches and learned the definition of guttering.  I’ve read many posts on the TKGA boards re: struggles with tension and guttering.  I looked at the back of my swatches, but since my guttering is not as pronounced as the examples I had seen, I didn’t recognize it.  Here’s pictures of the back of two Level 1, Swatch #2 that I knit.  The top row, on size 7 needles, is the one I brought to Masters Day.  The bottom row, on size 8 needles, I rejected because I didn’t like the gauge.  The guttering is more pronounced on it, so I’m including it here.  The pictures on the right side are close-ups of the right edge of each swatch, where the guttering is more pronounced.

image

For those lucky readers unfamiliar with the concept, guttering happens when your knit and purl stitches are not the same size.  In reverse stockinette, two rows of purl bumps snuggle up to each other and on either side there’s a bit of space between the cozy rows and the next pair of purl bumps.  As a result, the knitting looks striped.  (The front also looks striped, but I think it’s easier to see on the purl side, so only included those pictures here).

At least three Committee members looked at my knitting and offered suggestions on tension and guttering.  My knit stitches are larger than my purl stitches.  In addition, the guttering gets worse as I work across the row.  Suggestions included trying a different yarn, going down another needle size, and taking a video of my knitting so I can see what I’m doing differently on my knit rows and purl rows.  The Committee members tried to encourage me — it’s not the worst guttering problem they’ve seen and I don’t have to reknit all 15 swatches.  I appreciated the kind words, but I’m actually not discouraged by the notion that I might have to reknit all the swatches!  In fact, I was happy to learn that other things I thought were problems were a result of tension issues.

For example, here’s the picture of all the swatches pinned out for blocking.

image

Notice how the increase and decrease swatches aren’t symmetrical.  I thought I wasn’t executing the paired increases and decreases correctly.  The increases and decreases on the left side of the swatch look more pronounced to me (the pencil points to the spot where I think this is easiest to see).  While my increases and decreases aren’t perfect, my tension problems exacerbate the problem.  If I fix my tension, I will likely fix the symmetry of my increase and decrease swatches.

Remember last month when I mentioned that the Raindrops on Roses shawl is slightly asymmetrical?  It’s probably just me.  I had the shawl with me in San Diego, so when I got back to my room at the end of Masters Day, I looked at the back.  I have the same guttering problem on that shawl, and it is more pronounced on one side.  I also had with me an Icarus shawl that I knit 3 years ago.  That shawl does not have the same guttering problem.

image

These were important revelations for me, because it means the problem is not the yarn or needle size on my TKGA swatches.  The problem is how I knit, and it’s a problem that developed in the last couple of years.  I’ve been knitting more and knitting faster than I did before.  I already knew my tension had changed substantially, thanks to the Liquid Silver Shawl, but I didn’t know that the increased speed and change in tension meant I developed gutters.

I immediately signed up for TKGA’s Taming Tension Course and Patty Lyons Improve Your Knitting: Alternative Methods (affiliate link) Craftsy Course.  I signed up for the latter course because it covers several different ways to hold your needles while knitting.  I’ll be working through both courses during August, trying to figure out my tension.  I knit through my entire flight on the way home from San Diego, and I looked carefully at how I’m holding my needles.  I’m pretty sure I know why my knit stitches are larger than my purl stitches.  Later this week, I plan to record myself knitting so I can confirm my suspicions.  I’ll share the results on my blog.  Once I find a solution to my tension issue, I plan to reknit all the swatches.

After swatch review, we had a blocking demonstration.  My swatches pictured above are poorly blocked; you should ignore them.  I was stretching out the swatches too much, attempting to correct the tension issues through blocking.  That’s never going to work!

Several attendees brought swatches with them and Suzanne showed us the proper technique.  She put the swatches in a bowl of water and gently pressed them down, holding them in the water until air bubbles stopped rising to the surface.  She then blocked several participant swatches, including swatch #15 (horseshoe cable) and #13 (yarnovers).  In short, the proper method is to pin the bind off and cast on edges straight, without stretching the knitting.  Then you gently unroll the edges and pin them down, again without stretching the edges.  Of all my swatches above, the only one that I think is properly blocked is #15 (the swatch with two cables).

During the Q & A Session, Joyce demonstrated a method for working the cuff on the Level 1 mitten.  I haven’t looked at the mitten yet, so recorded the demonstration for my reference.  She kindly granted me permission to post the video publicly.  On one row of the cuff, you knit three, then k2tog.  On the next row, you work a m1o increase, followed by k2tog.  The k2tog on the preceding row tends to tighten the stitches, making it difficult to see the running thread that you need to pick up for the m1o.  She showed us an easy way to get to the running thread.  Most of the video demonstrates Continental knitting.  If you knit English style, like I do, skip to 2:50 for a method that works for you.

I did not take any classes on Wednesday evening.  After Masters Day, I picked up the key to my new room, dropped off my things and headed to the mall for dinner at True Food Kitchen.  When I finished dinner, something happened that transformed my day and, I believe, the rest of my Conference experience.

Everyone falls prey to negative self-talk at some point.  I’m particularly vulnerable when I’m tired, and by early evening on Wednesday, I was quite tired as I had been up since 3:30 am.  From my room to the restaurant was a 10 to 15 minute walk.  The entire time, one of those negative lies (that I’m unable to connect with people — otherwise, I wouldn’t be going to dinner alone) burrowed its way into my head.  The food was truly delicious and I enjoyed it, but the negative voice still echoed in my head.  The waitress brought me the bill and I gave her my card.  Just about the time I was beginning to wander where she got to with my credit card, she came back.  “You don’t owe me anything,” she said.  “Someone else paid for your dinner.”

I’m not the kind of person this happens to; I don’t think it’s ever happened before.  “Are you serious?!”

“He doesn’t want me to tell you who he is,” she replied before I even asked.

Incredulous, I practically ran back to my hotel room and wept with gratitude (I’m tearing up again as I type this).  I have no idea who this stranger was, but here’s a public thank you.  Your random act of kindness blew all the negative crap out of my head.  Because of you, I didn’t isolate myself during the rest of the conference, like I probably would have otherwise.  Since I didn’t isolate myself, I met some new friends from across the country and the world.  Thank you.

TKGA 2015: Arriving in San Diego

I was in San Diego for The TKGA Conference from Tuesday, July 21 through Sunday, July 26.  I intended to blog while I was there, but I was so busy enjoying myself that I didn’t have time.  I had a truly spectacular time, and was sorry to see it end.  This week, I’ll write a series of blog posts about the event.  I hope you decide to come next year; the Conference will be held in Charleston, SC, a mere 5 hour drive from my house.  I’ve already put it in my calendar!

The main part of the Conference ran Thursday to Saturday.  Wednesday was a one-day pre-conference Master’s Day, with different tracks for each TKGA Master Hand Knitter Levels and a track for Level 3 graduates.   Tuesday and Sunday were travel days.  On Tuesday, my flight left Orlando at 10:40 am and arrived in San Diego at 12:10 pm local time.  The flight was uneventful.  I read the whole way — The Age of Homespun, which is fascinating and which I will review on this blog once I finish it.

I took Super Shuttle to the airport and checked into the hotel.  There was a long line to check in, and most of the people in the line appeared to be fiber crafters:

image

The Town and Country Resort is a large property with multiple buildings, two high-rises and several two-story buildings.  My first room was on the second floor of one of the two-story buildings, on the far opposite corner of the property from the conference center.

image

It smelled musty.  I wasn’t going to complain; I knew this resort and all the nearby hotels were sold out.  But when I was getting for bed and walked barefoot into the bathroom, I discovered that the carpet in the entryway was wet.  I didn’t see anything leaking anywhere in the room, but obviously there was a problem somewhere and, judging by the musty smell, there’d been a problem for a while.  I was exhausted and it was late, so I stayed in the room on Tuesday night.  On Wednesday morning, I went to the front desk and asked to be moved to a new room.  My new room was downstairs in the same building and obviously had a facelift.  I had no problems with the new room — I was hardly ever in my room, except to sleep!

image

The English-garden-meets-California landscaping was beautiful!

image
image
image
image
image
image
image
image

I spent Tuesday afternoon and evening in my room, even ordering room service for dinner.  I took a nap for a while, finished knitting the last 3 Level 1 swatches that I wanted to finish before Master’s Day, and then blocked all 15 of the finished swatches.  (The swatch on the bottom right isn’t one of the Level 1 swatches; it was homework for one of the Masters Day sessions.)  I brought my blocking mats with me, just for this purpose!

image

Tomorrow I will write a post about Master’s Day.  I learned a lot about my knitting and about the Master’s program.  I’m particularly glad that I went to San Diego early so I could attend Master’s Day.