Thursday was the first official day of the TKGA Conference. I should have already mentioned that CGOA (the Crochet Guild of America) Annual Conference and the TKGA Annual Conference are held at the same time and place. Attendees can choose to attend only knitting events, only crocheting events, or a combination. I only attended knitting events because my primary goal was to learn anything and everything that might help me complete the Master Hand Knitter levels. This year’s attendance was a record. I didn’t hear an official number, but the rumor swirling around the event was that 600 knitters and crocheters came to San Diego!
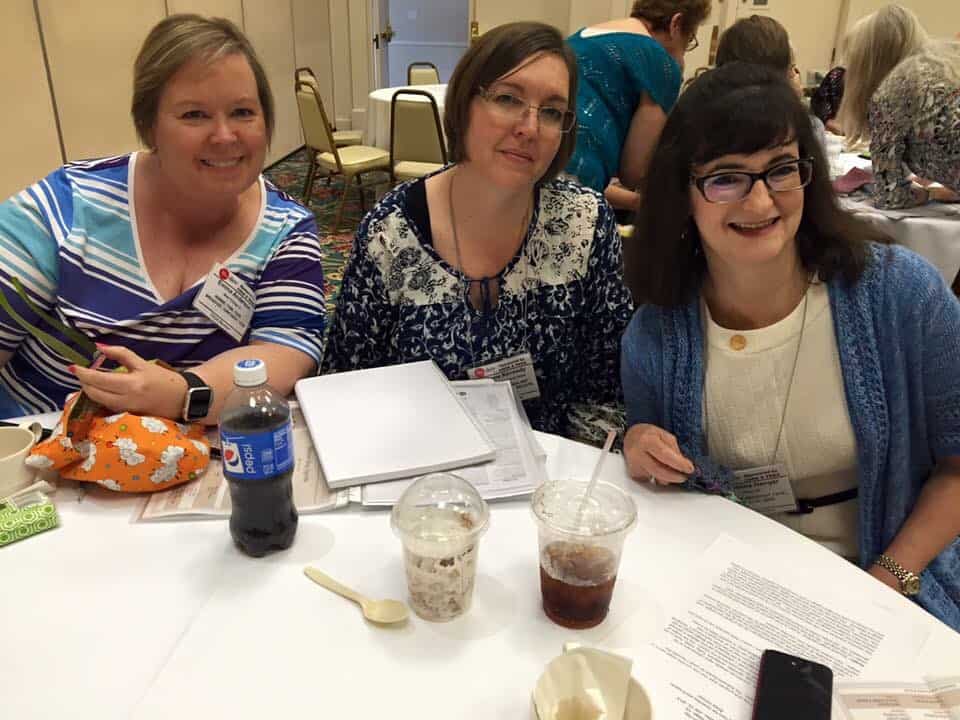
For those of you that asked yesterday, I never did find out who bought me dinner. I’m happy to leave it that way! On Thursday, I met Heather from South Carolina, Jo from Sydney, Australia, and Emma from Illinois. All four of us were newbies and had come to the Conference knowing no one there. We spent the rest of the event hanging out. Eventually we discovered that Heather, Jo, and I are practically triplets; our birthdays fall within an 8 month range! Unfortunately, we never got our picture taken together. I have a picture of Heather and I taken at the Yarn Tasting, so I’m saving that picture for tomorrow. Here’s a picture of Emma (left) and Jo (center) with Master Hand Knitting Committee Member Christina Hanger (right) on Masters Day. I believe Sadie Pachan took this picture.
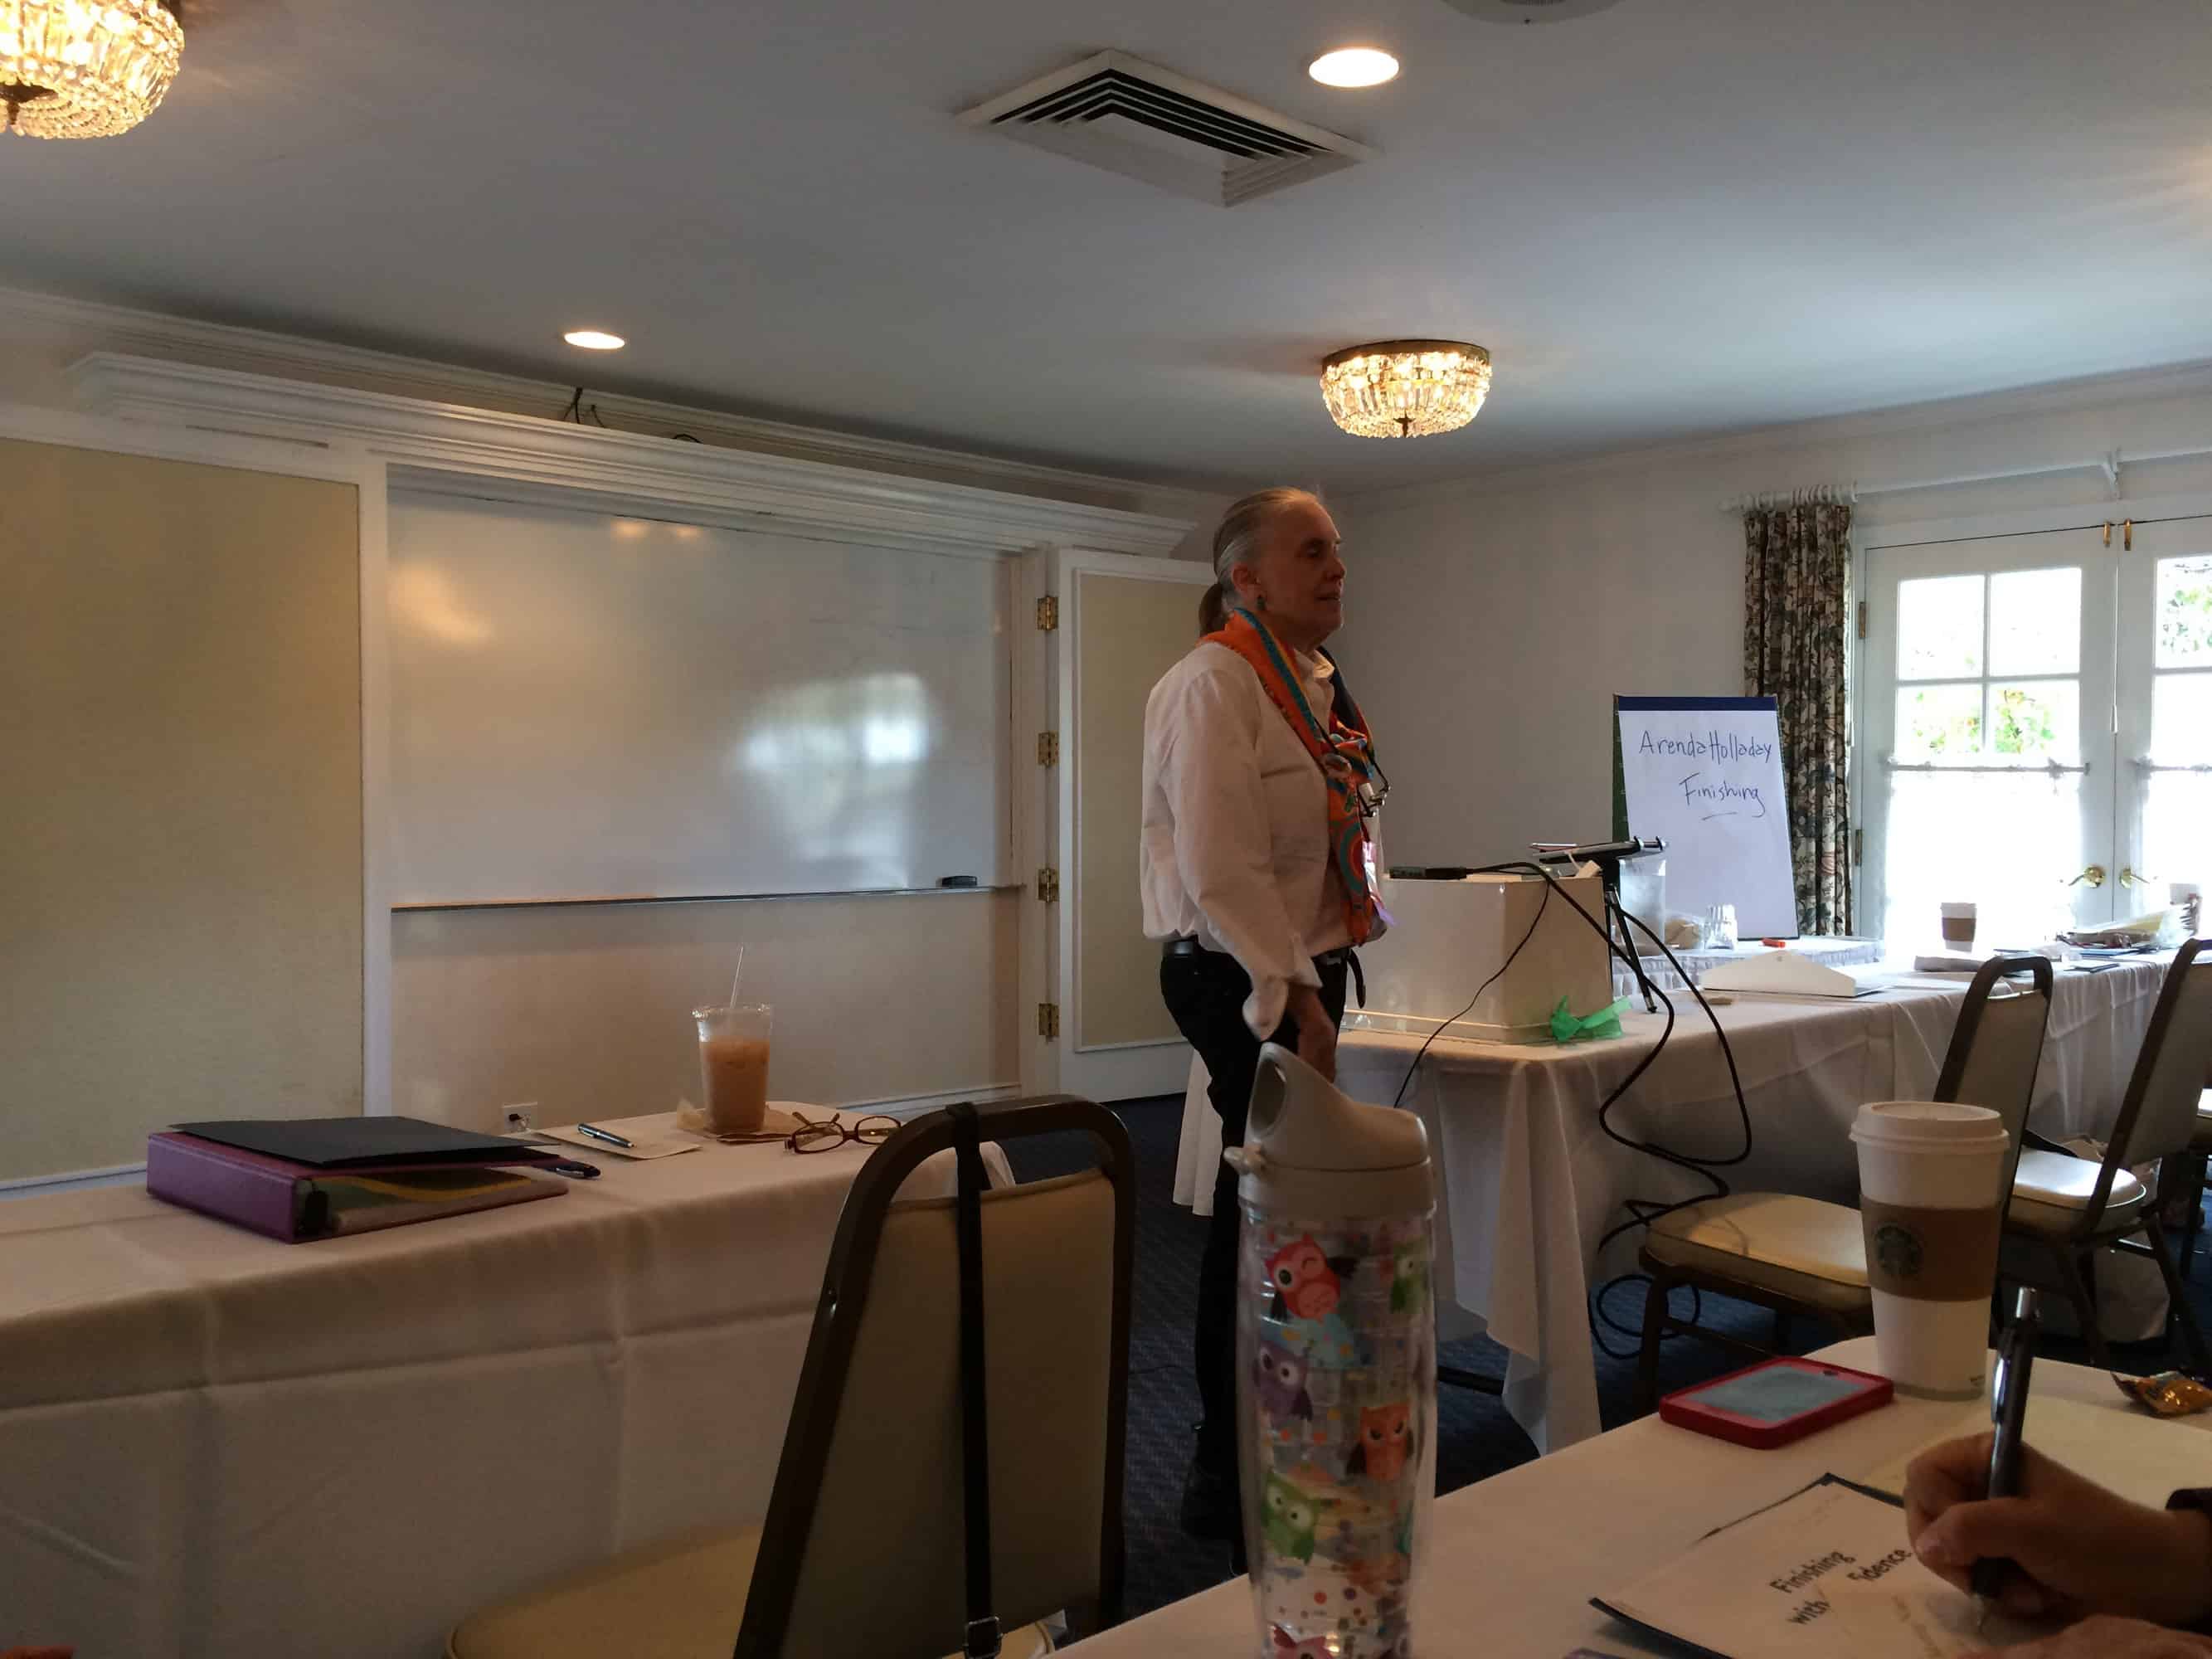
I attended a 2-day Finishing class taught by Arenda Holladay, the Executive Director of Cast On magazine. Rather than writing a post about everything I did on Thursday (first day of Finishing and the Market Preview), today I’m just going to writing about the Finishing course. Tomorrow I’ll write about the Market and the two wonderful events I attended on Friday, the Breakfast of Brilliance and the Yarn Tasting.
The finishing class covered all the skills you need to assemble a finished garment. This included seaming vertical, horizontal, and combination (attaching a horizontal to a vertical) seams; picking up stitches along vertical, horizontal, and combination (e.g., collars because they are vertical on the sides and horizontal across the back of the neck) edges; buttonholes; weaving in ends; three-needle bind off; Kitchener stitch; and probably other skills that I’m forgetting.
I took this class for three reasons. (1) In 20+ years of knitting, I’ve never knit a sweater. Knitting myself a sweater is on my list of goals for this year. If I’m going to knit a sweater, I need to finish it properly. If I don’t, it won’t be wearable! (2) Master Hand Knitting Level 2 is all about finishing. (3) I have 12 of S’s sweaters to finish. I learned so much in this class, and I’m now excited that I have all those sweaters since I have a way to practice my new skills!
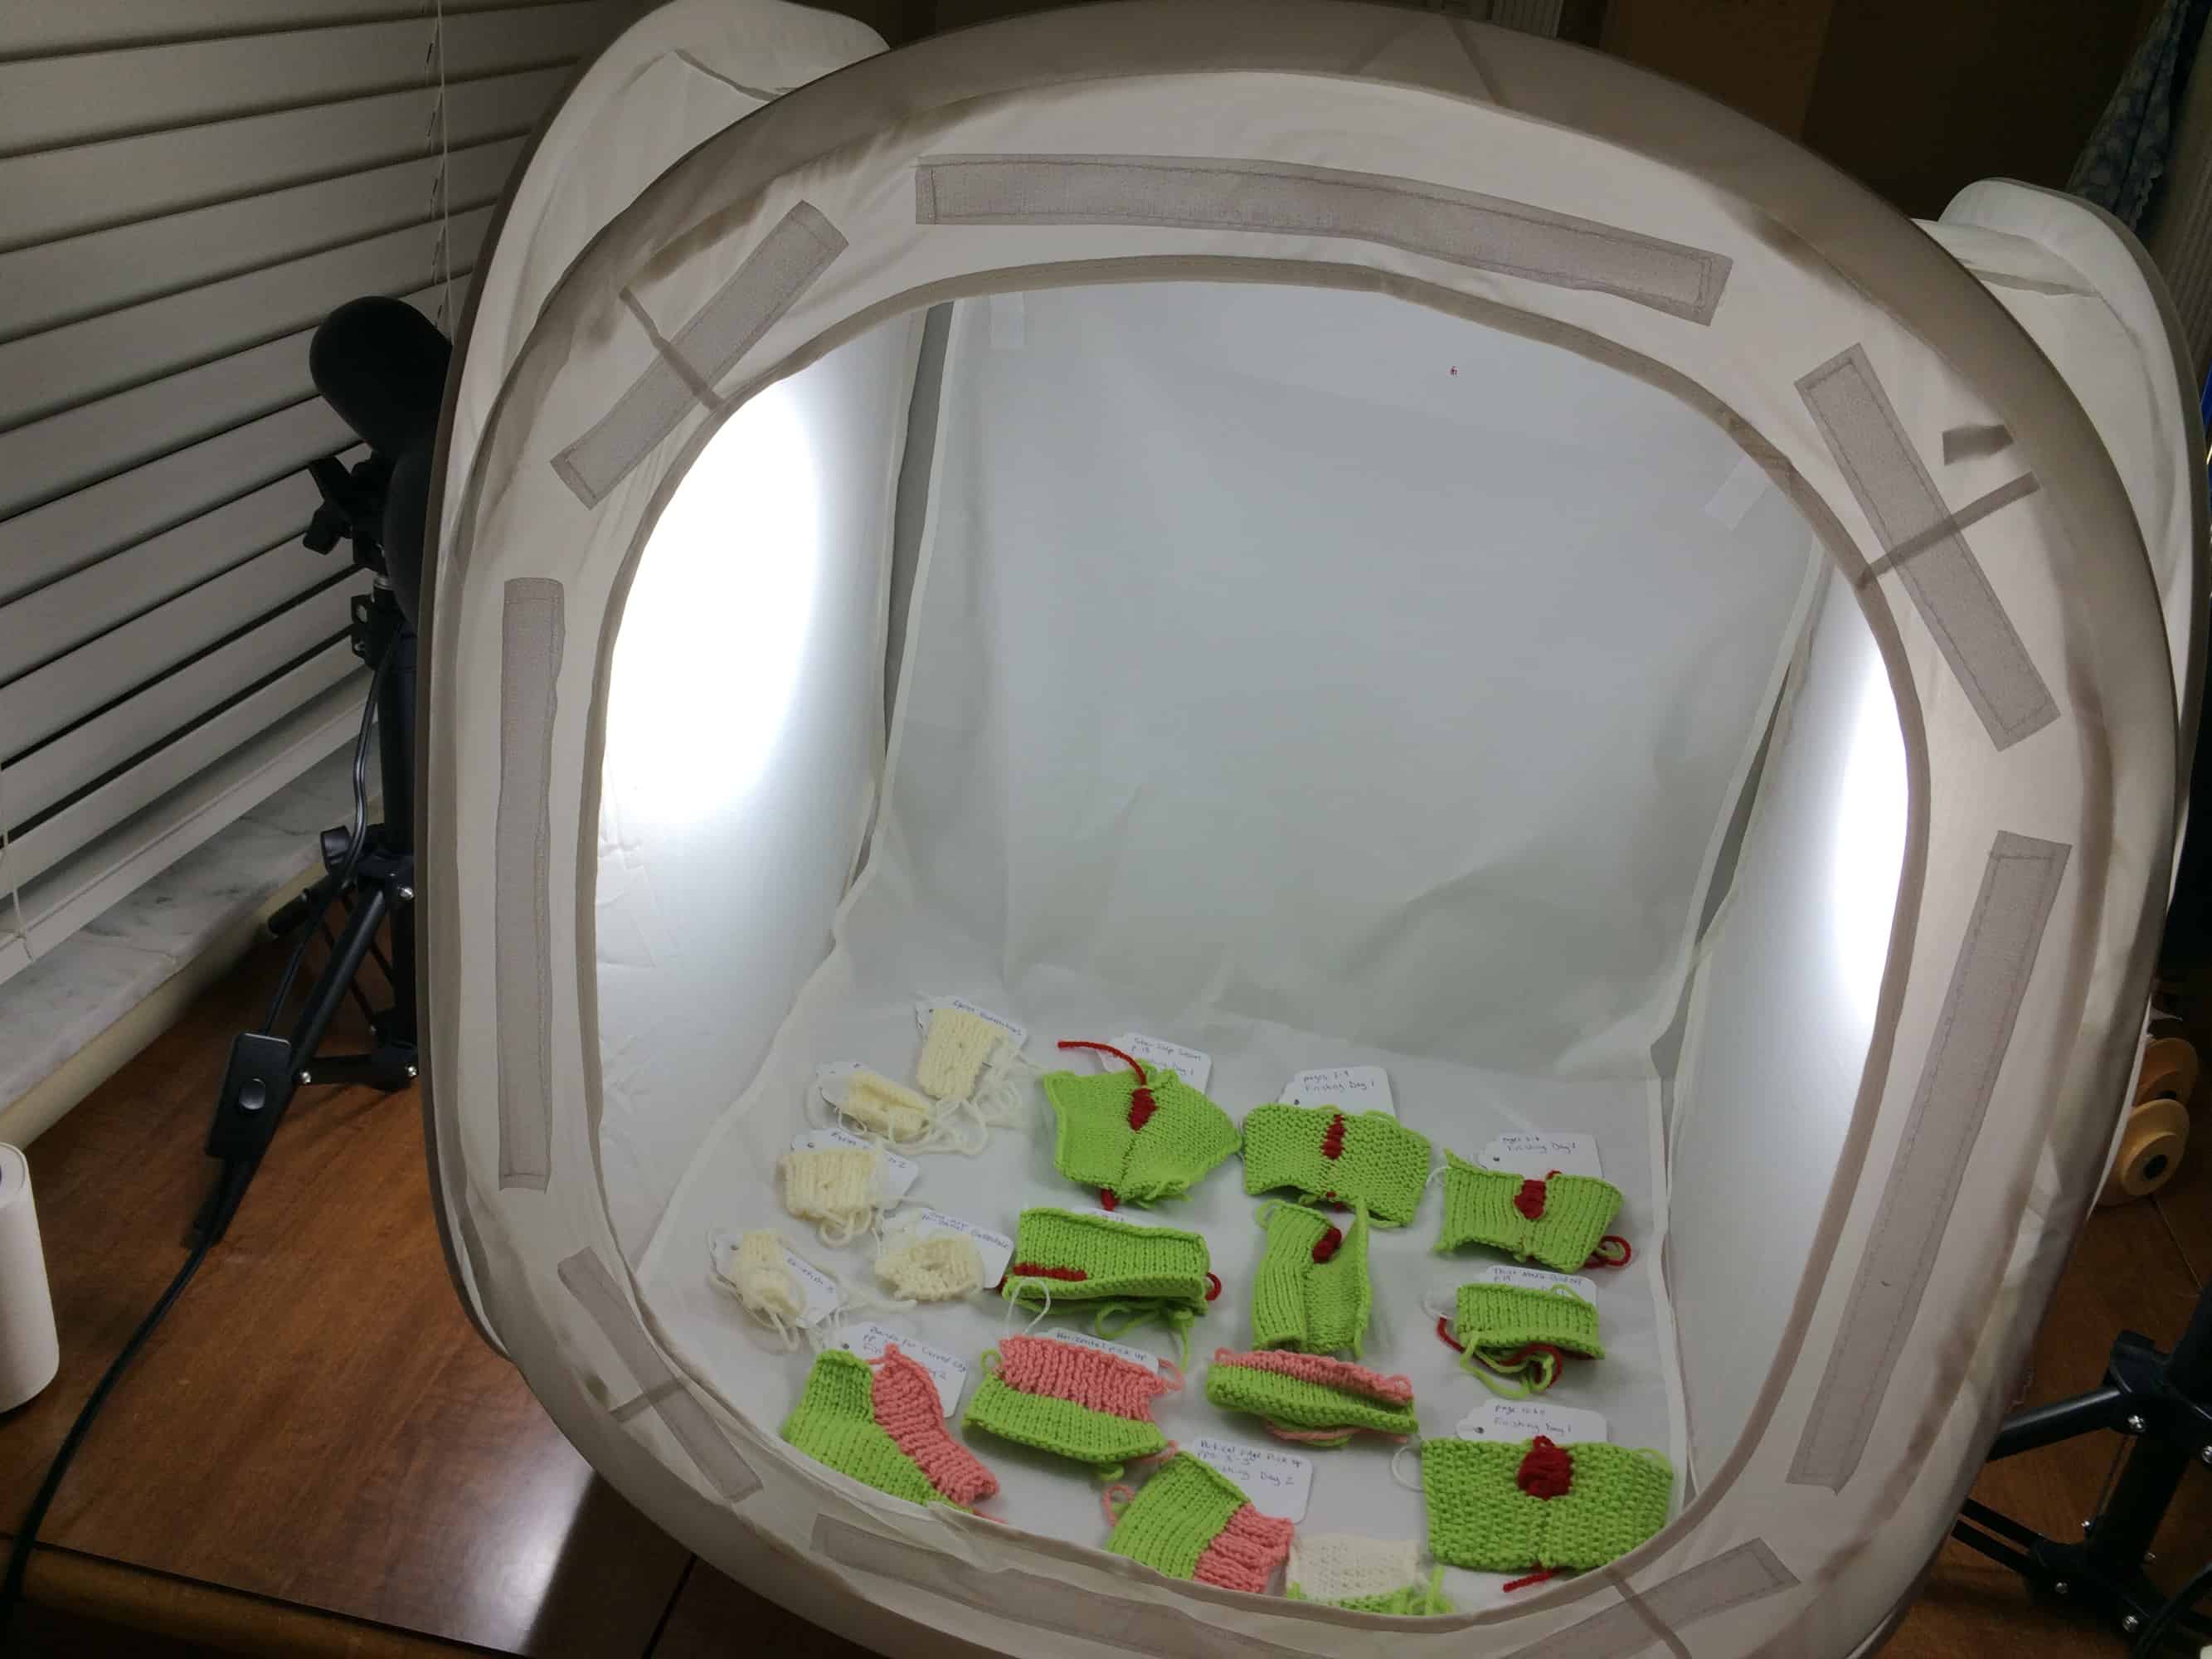
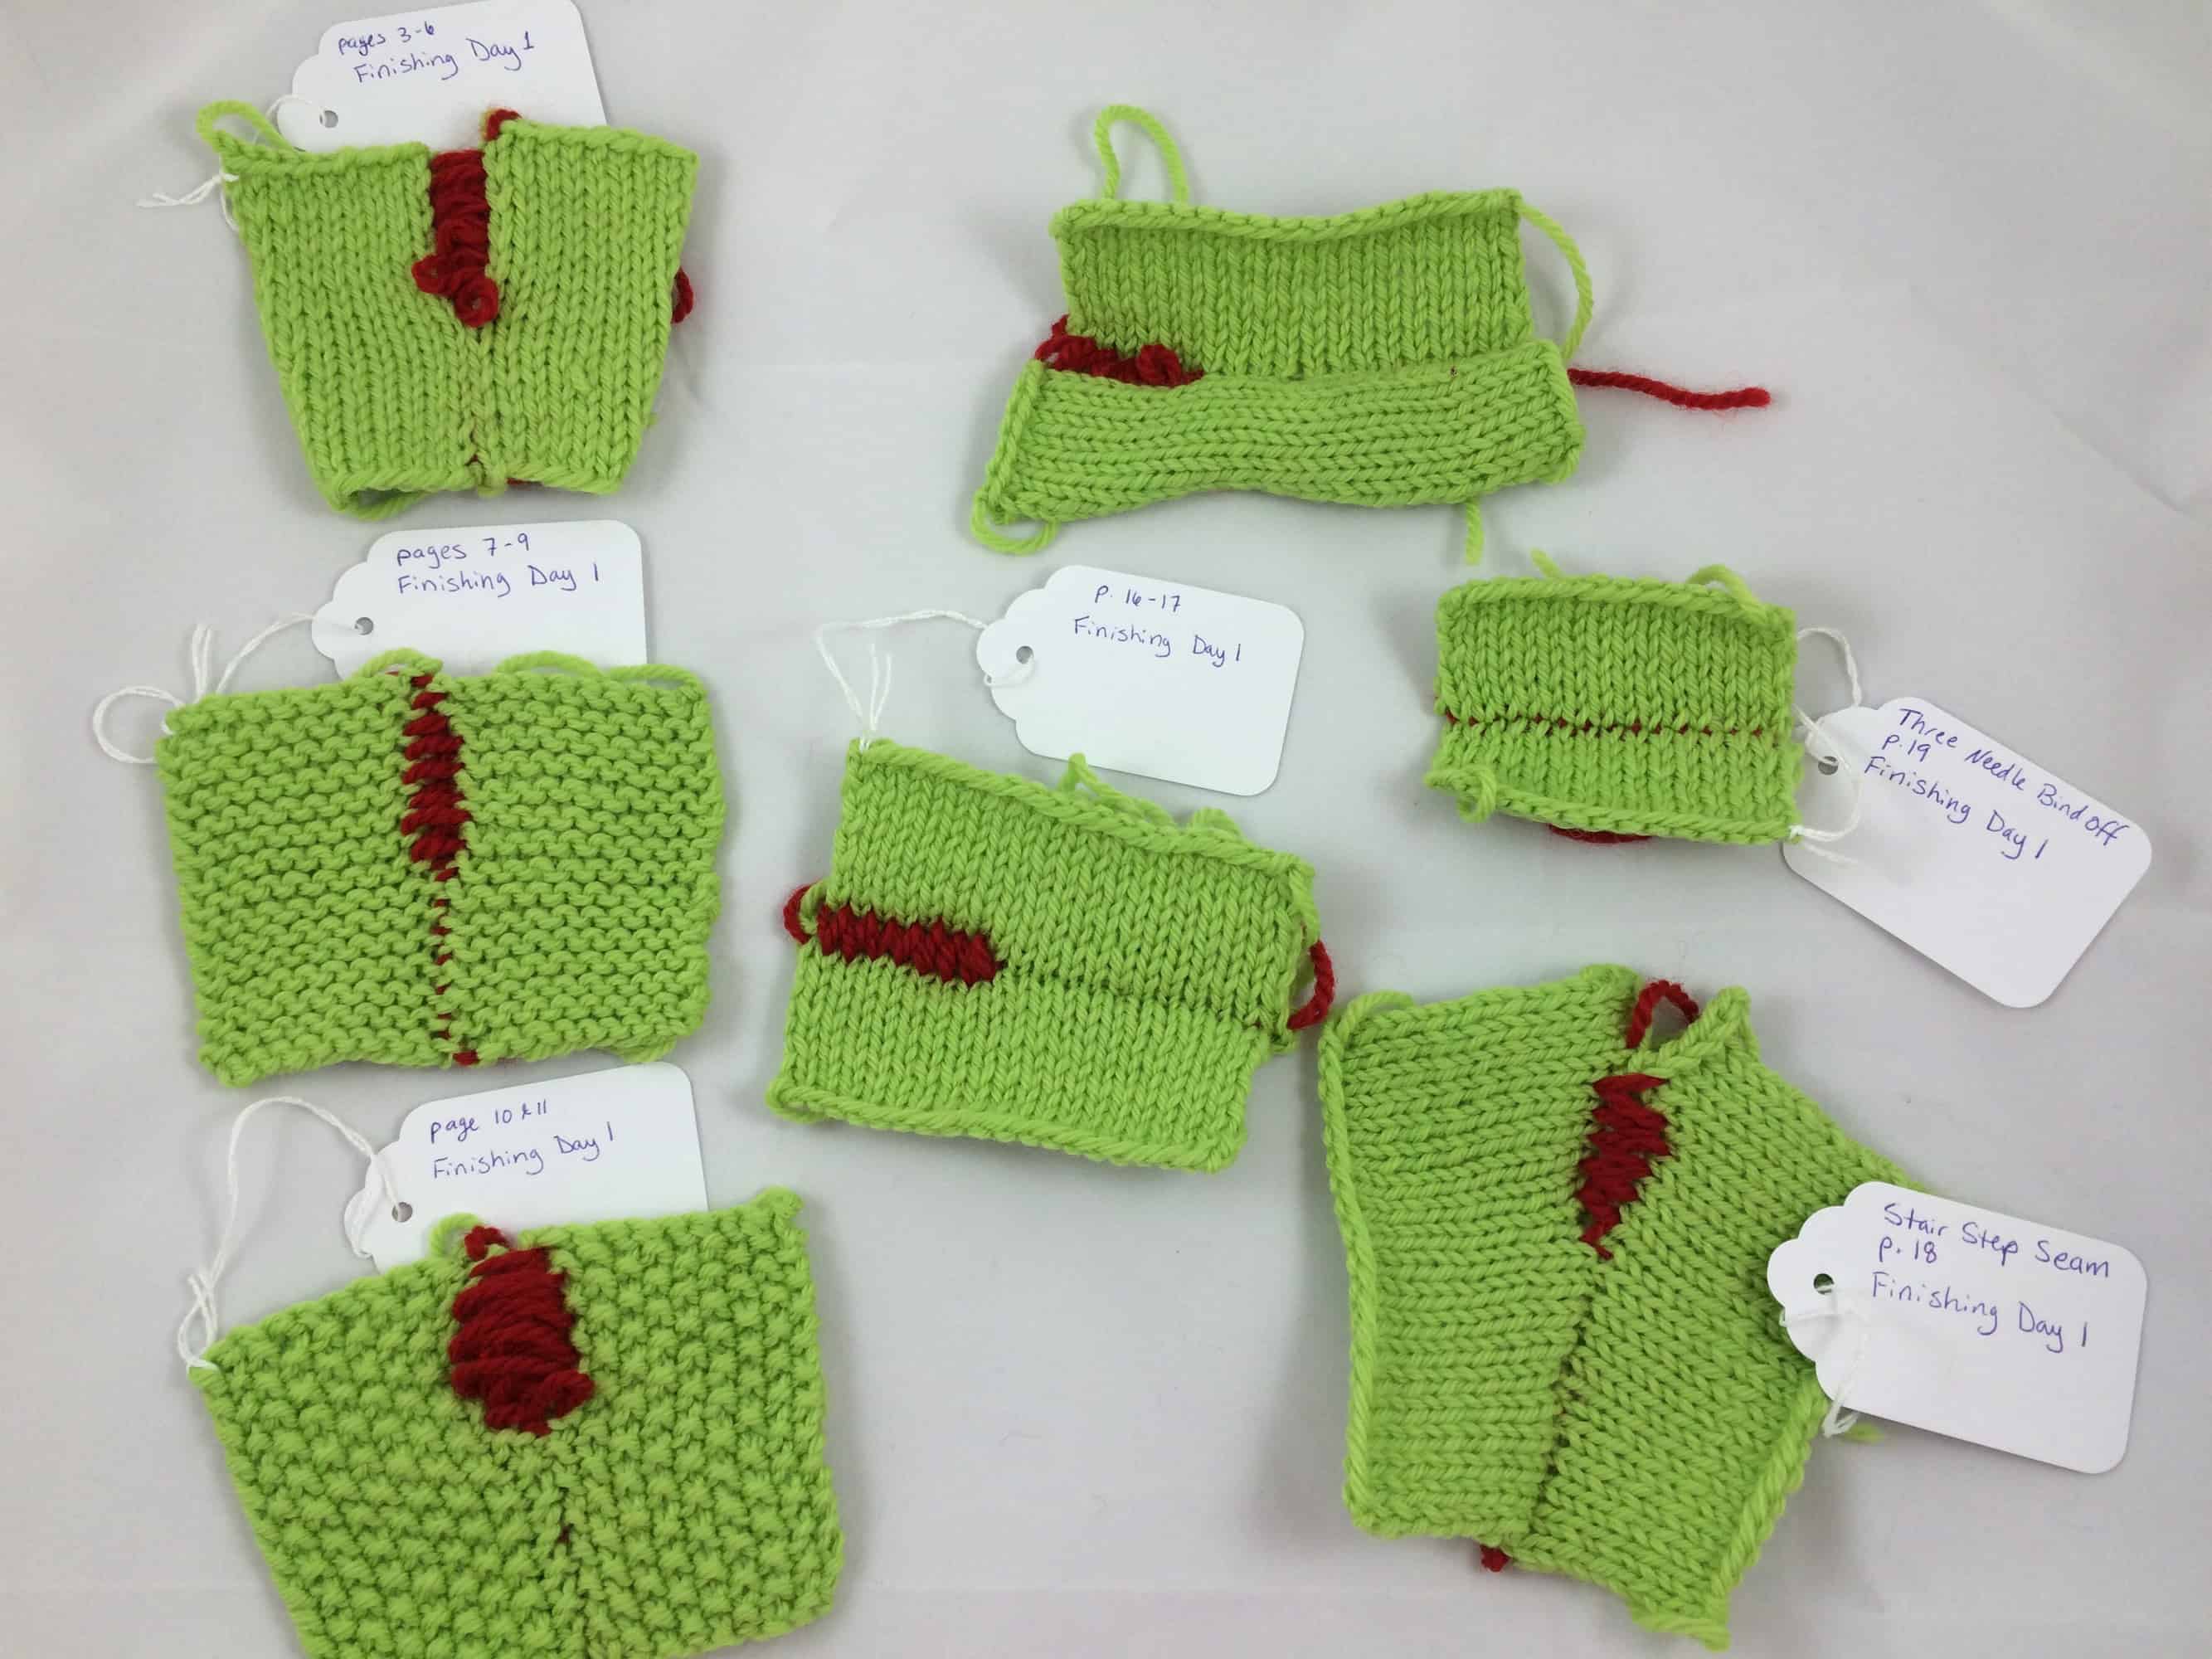
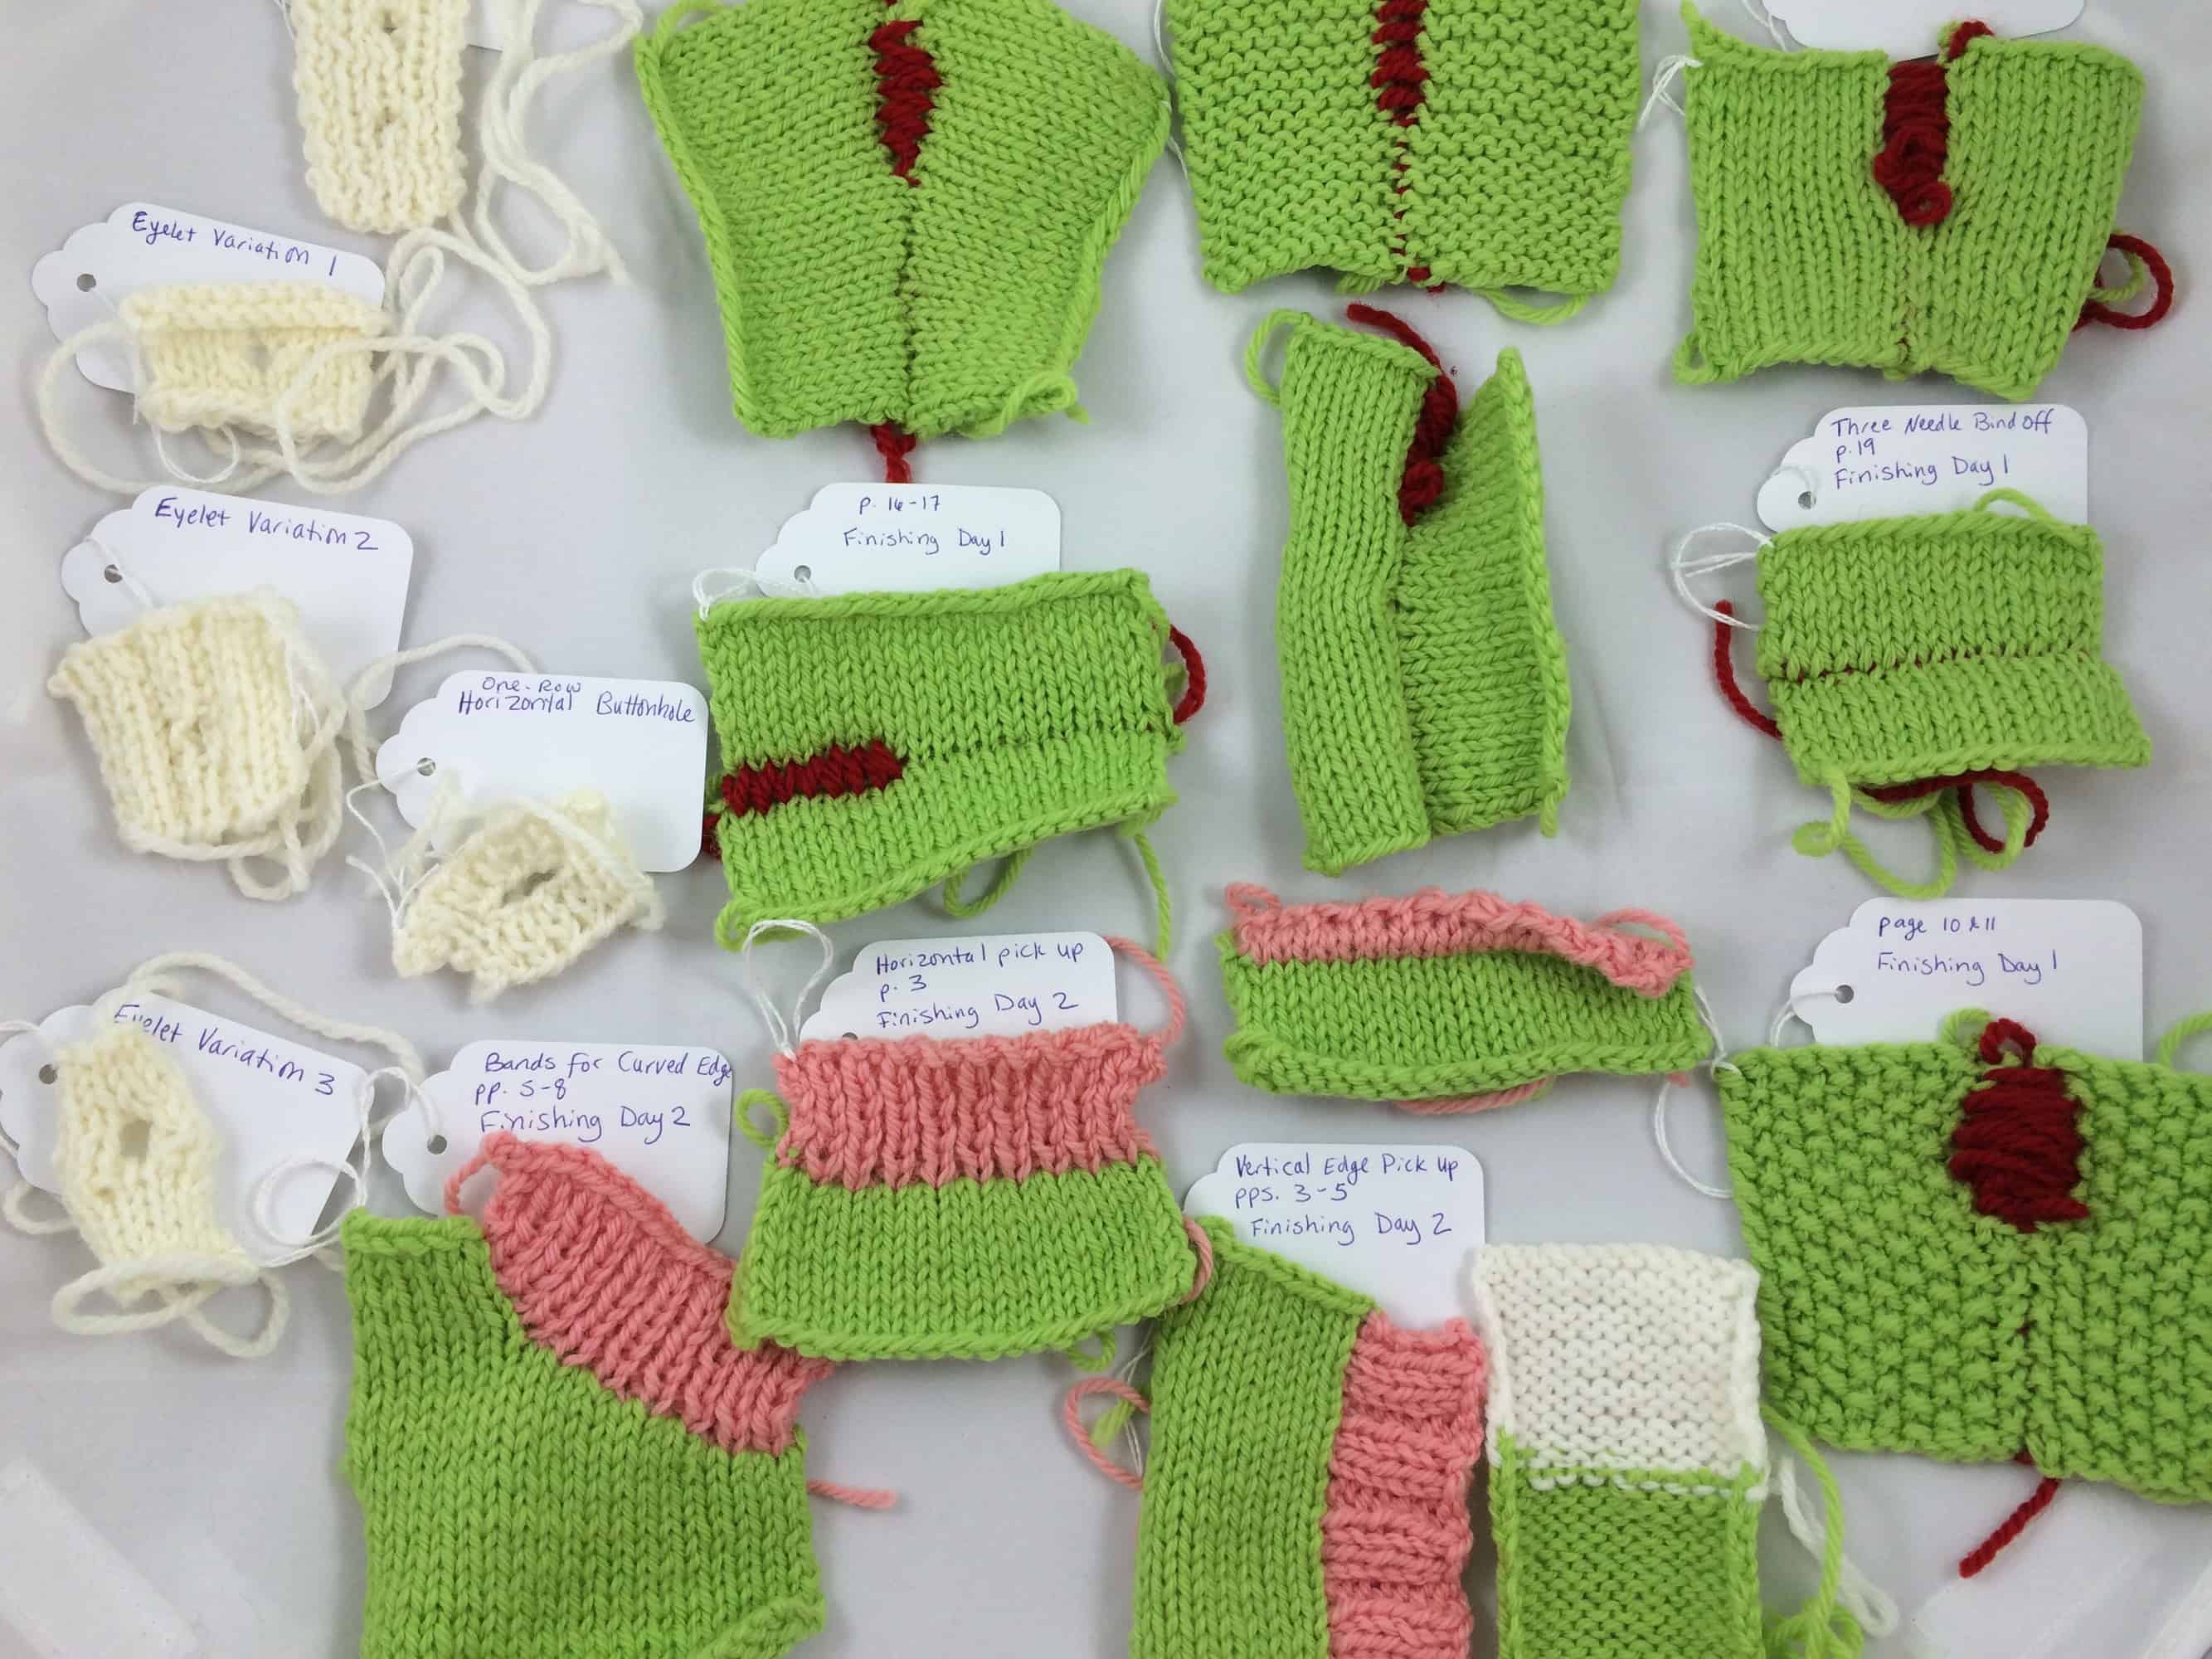
We had to knit (or buy from Arenda) a lot of homework for this class. I already posted a picture of my finished homework in last week’s Year of Projects post, but in case you missed it, here it is again (the one piece in the bottom right was not for the finishing class):
Finishing requires so much homework because you need two pieces to practice seaming techniques and because we practiced vertical seams and weaving in tails in various stitch patterns — stockinette, garter, seed stitch, 1×1 ribbing, and 2×2 ribbing. We even had two different swatches for 2×2 ribbing so we could see two different ways to create seams in ribbing. Despite having two full days and a talented, organized teacher, we did not have enough time in class to actually execute all the seaming. There’s just so much to cover!
Arenda is a fantastic teacher. (She also brought us bourbon caramels from a distillery near her Kentucky home and a constant supply of chocolates. And she’s hilarious). For each technique and variation, she first explained what we were trying to accomplish, the correct technique, and the common mistakes. She used still photographs to illustrate these points; the photos were marked with arrows or diamonds or numbers to clearly identify stitches or running thread or whatever it was we needed to see. She then demonstrated each technique live, projecting the video onto the screen so everyone could easily see what she was doing. Then we each used our own swatches to work the technique and she walked around the room answering questions and correcting our inevitable mistakes.
Arenda suggested that we leave the last inch or so of our seams loose so that when we look back at them, we can see the path of the yarn. Prior to this class, I’d done minimal seaming and I hadn’t done any of it correctly. I totally did not understand how mattress stitch worked!
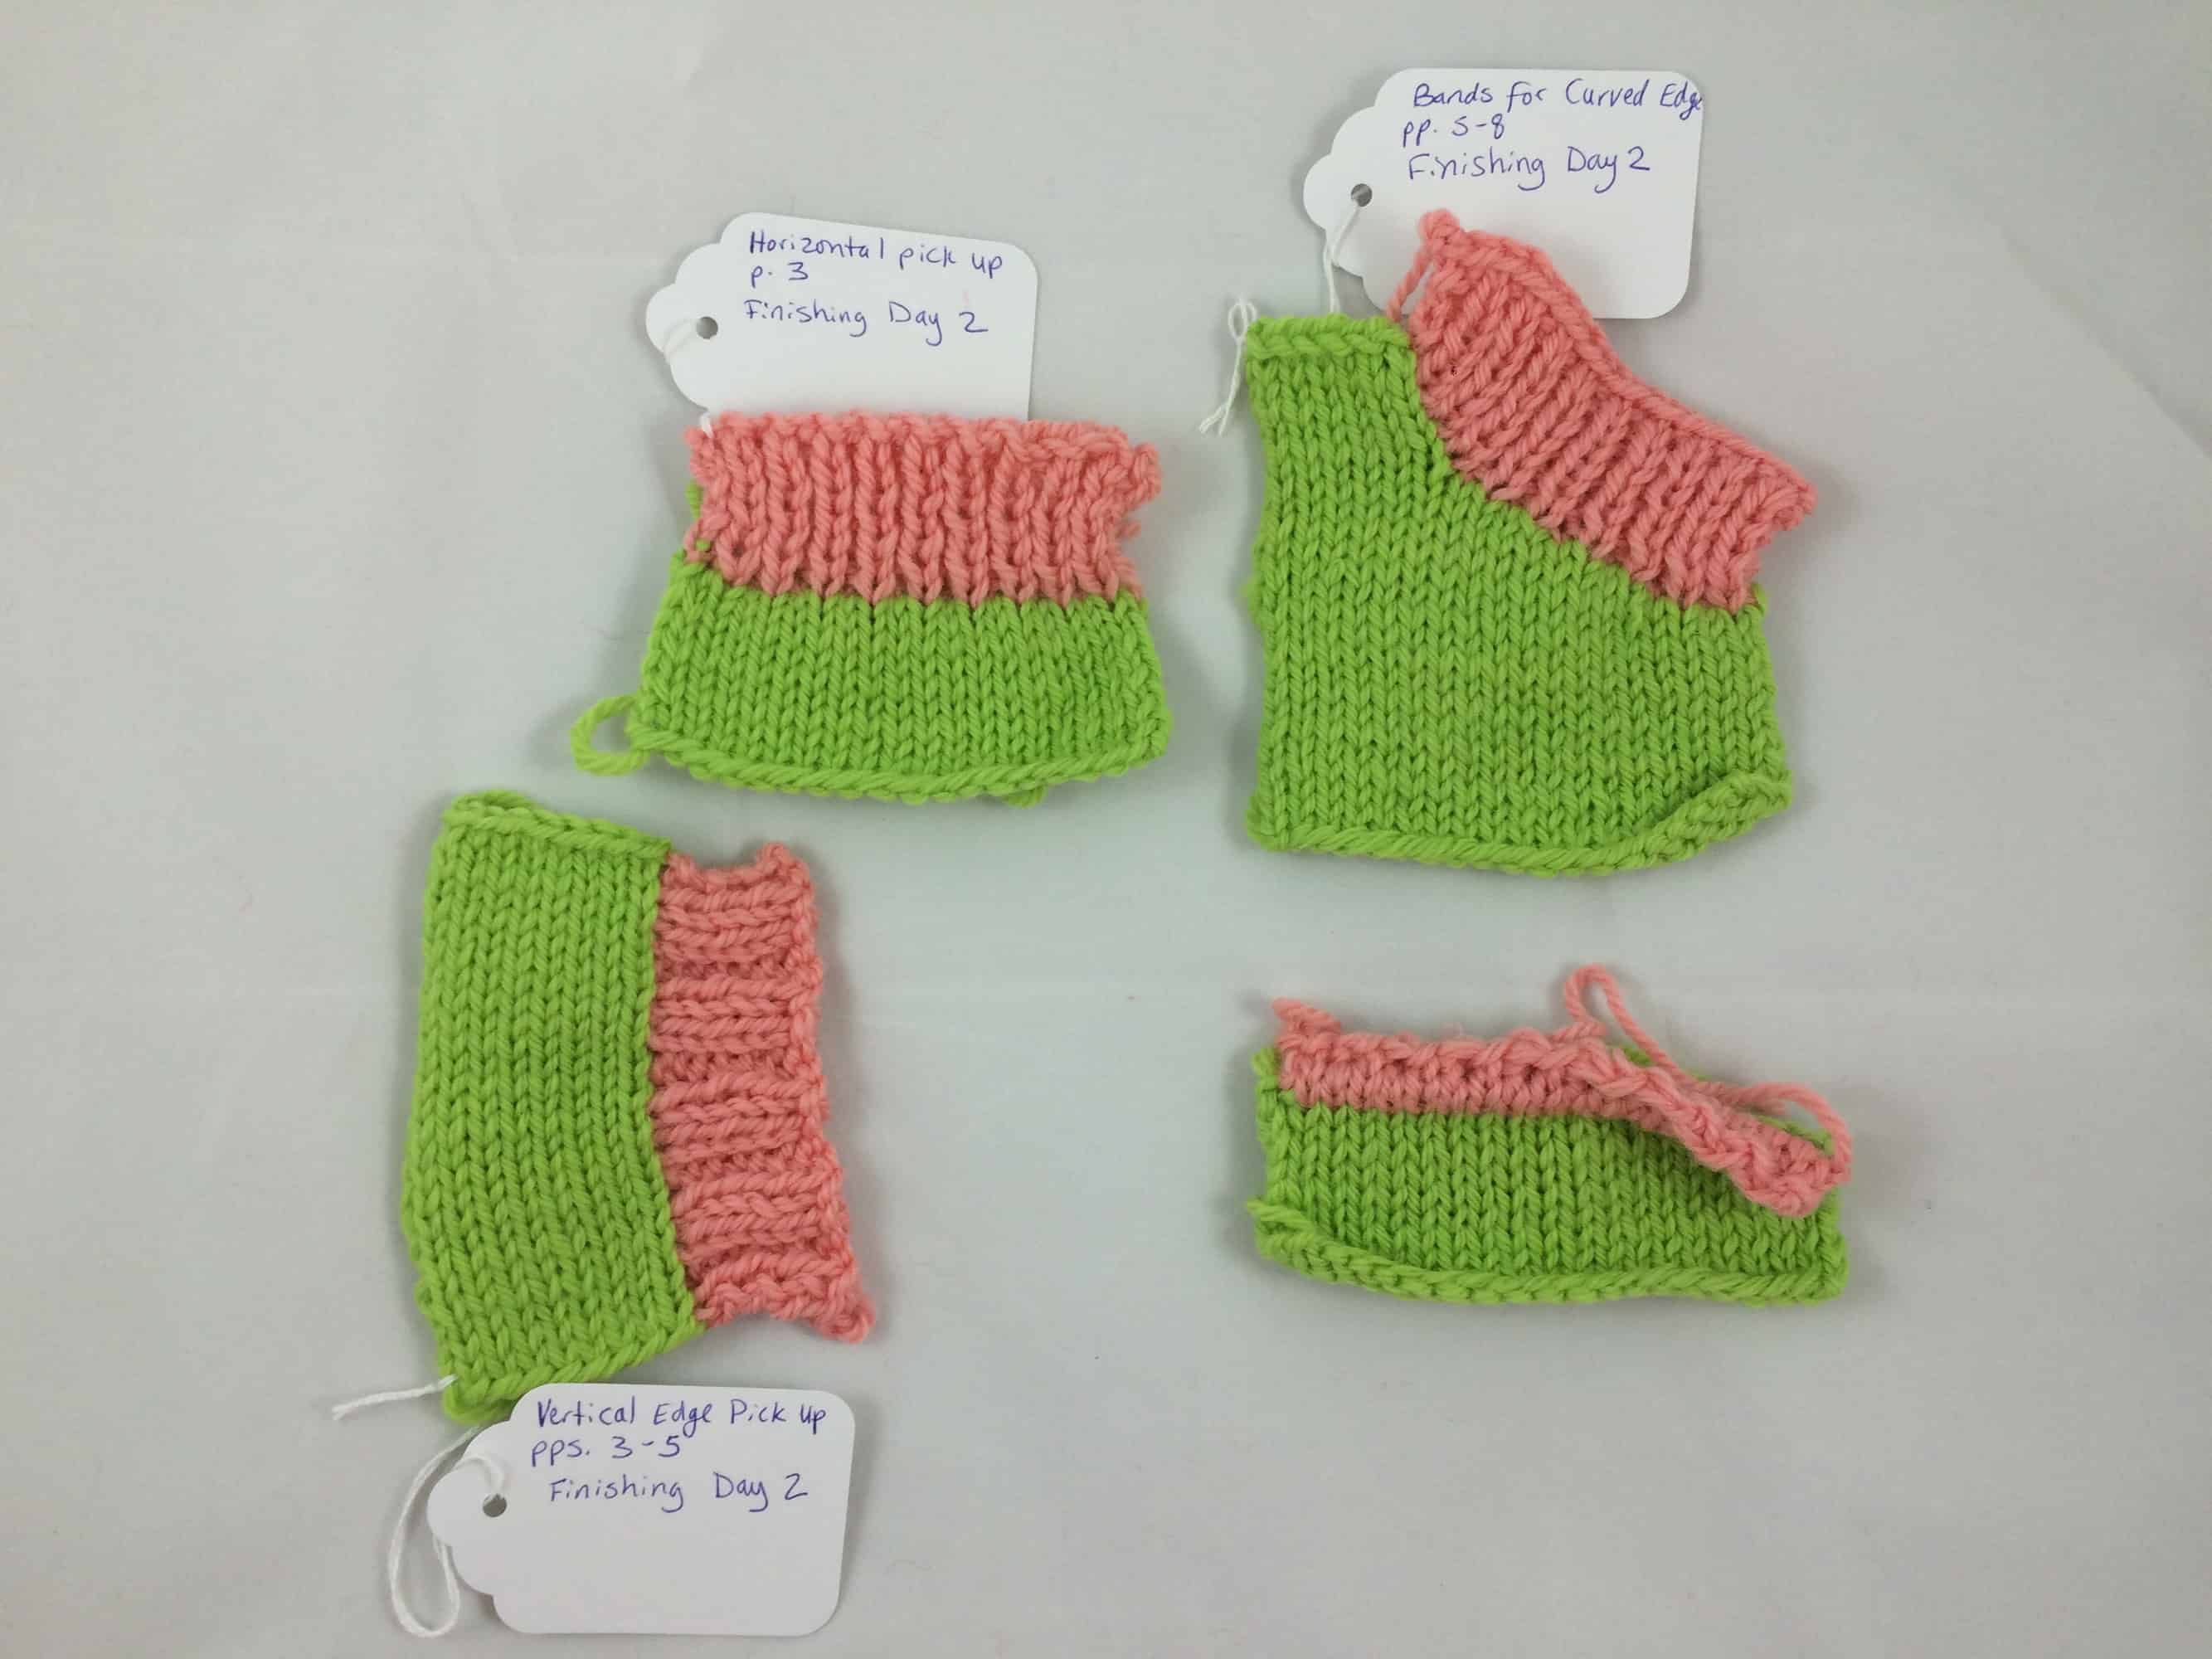
Prior to this class, I had picked up stitches on horizontal and vertical edges, but never on curved edges. I had never done a double pick up for bands.
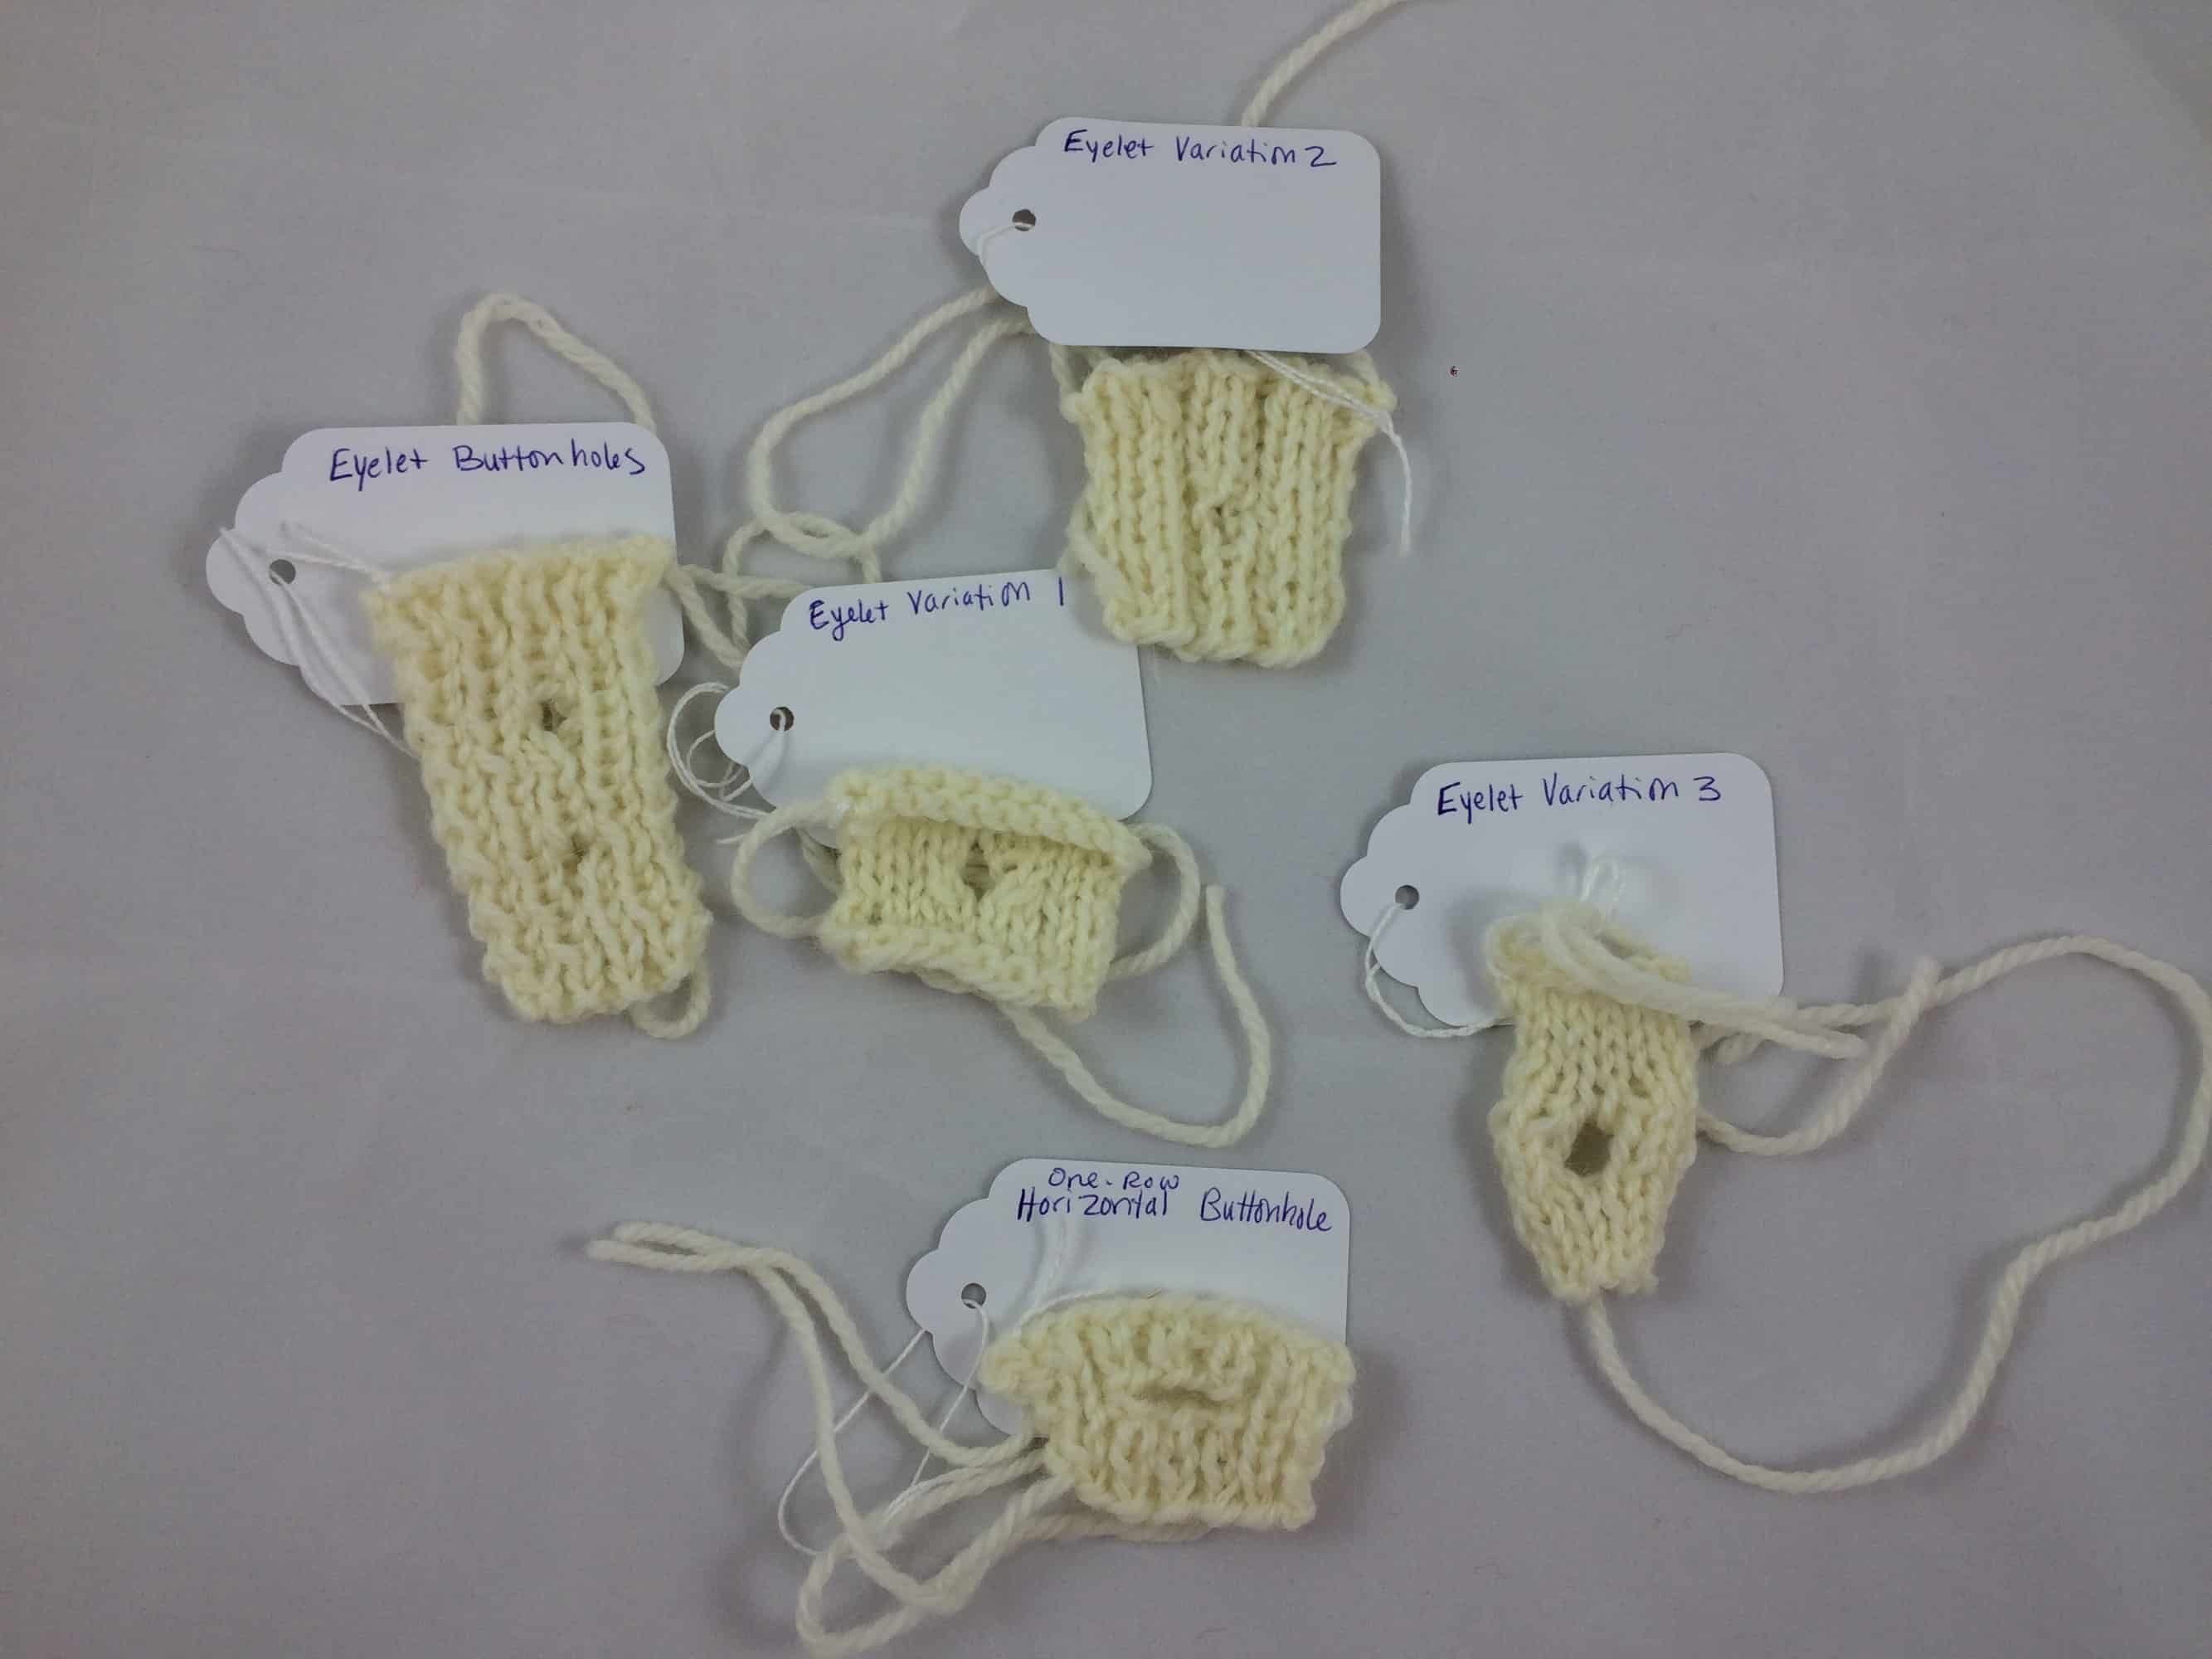
Prior to this class, I had never knit a buttonhole. We knit these swatches in class and they aren’t blocked, which makes it more difficult to see the buttonholes!
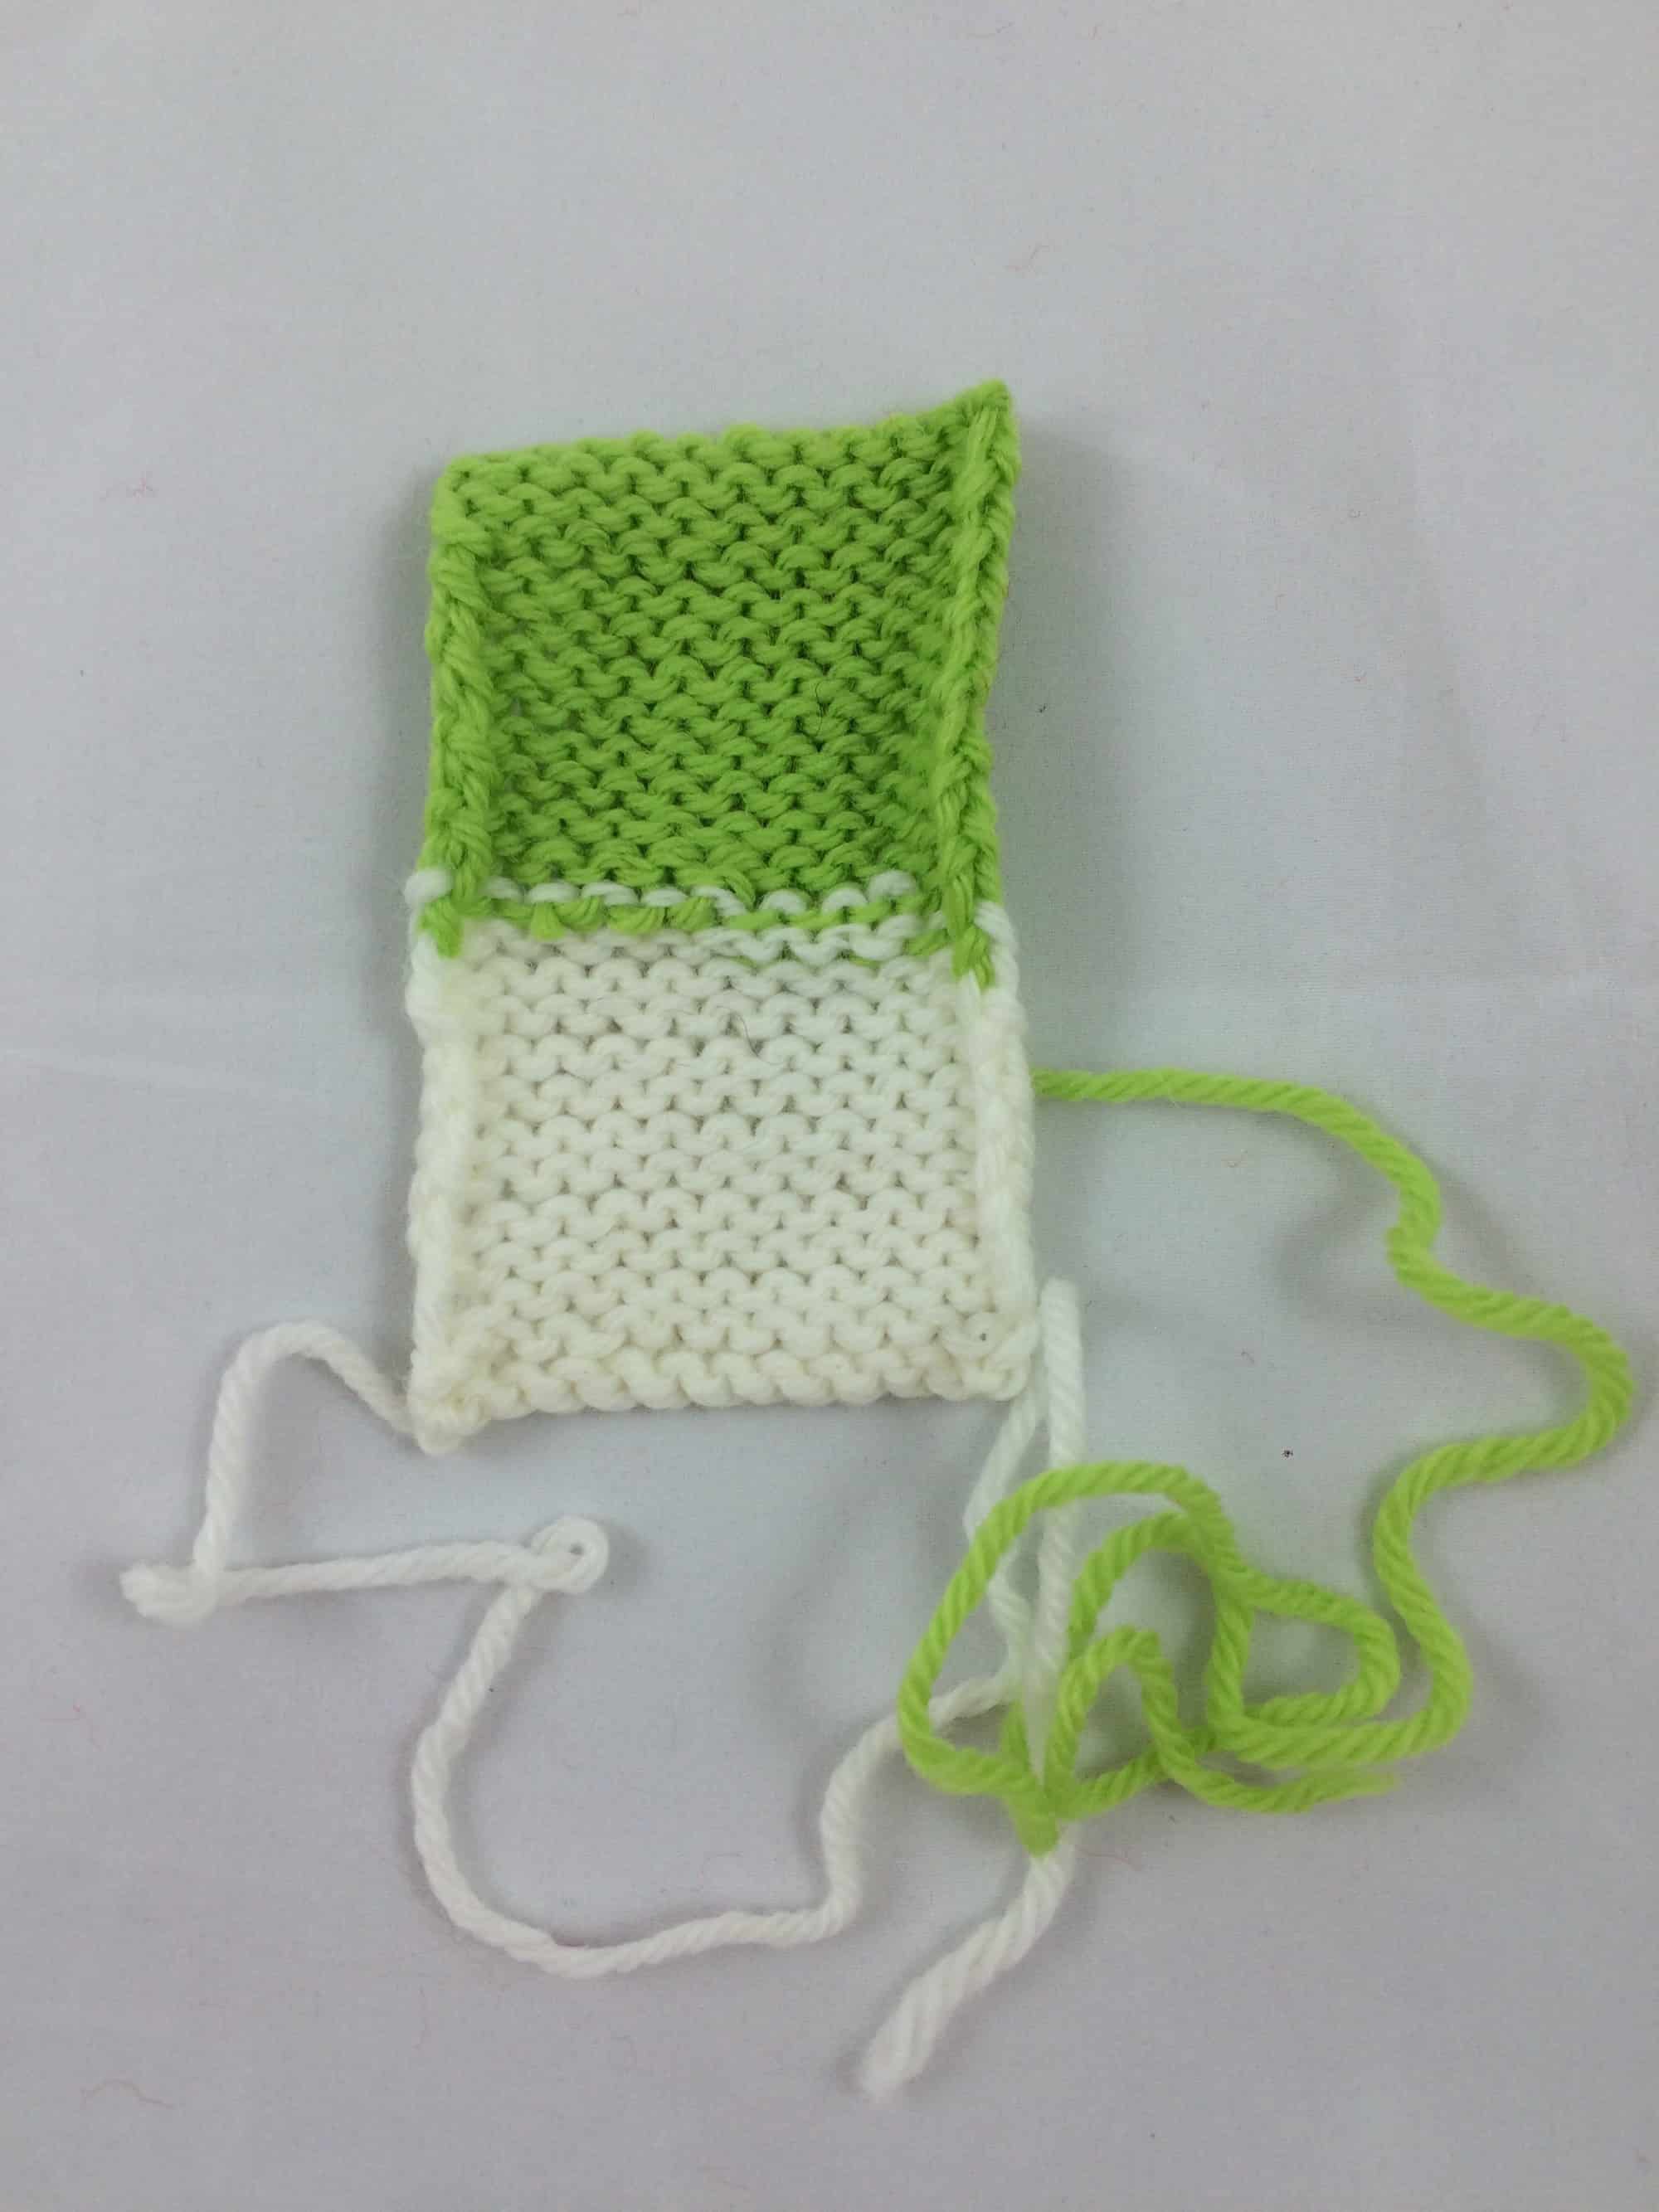
On the second day of class, we ran out of time for weaving in ends. Arenda presented the information and gave us a demo, but the only swatch we worked in class was the mid-row color change. I haven’t woven in the ends on any of the other swatches yet!
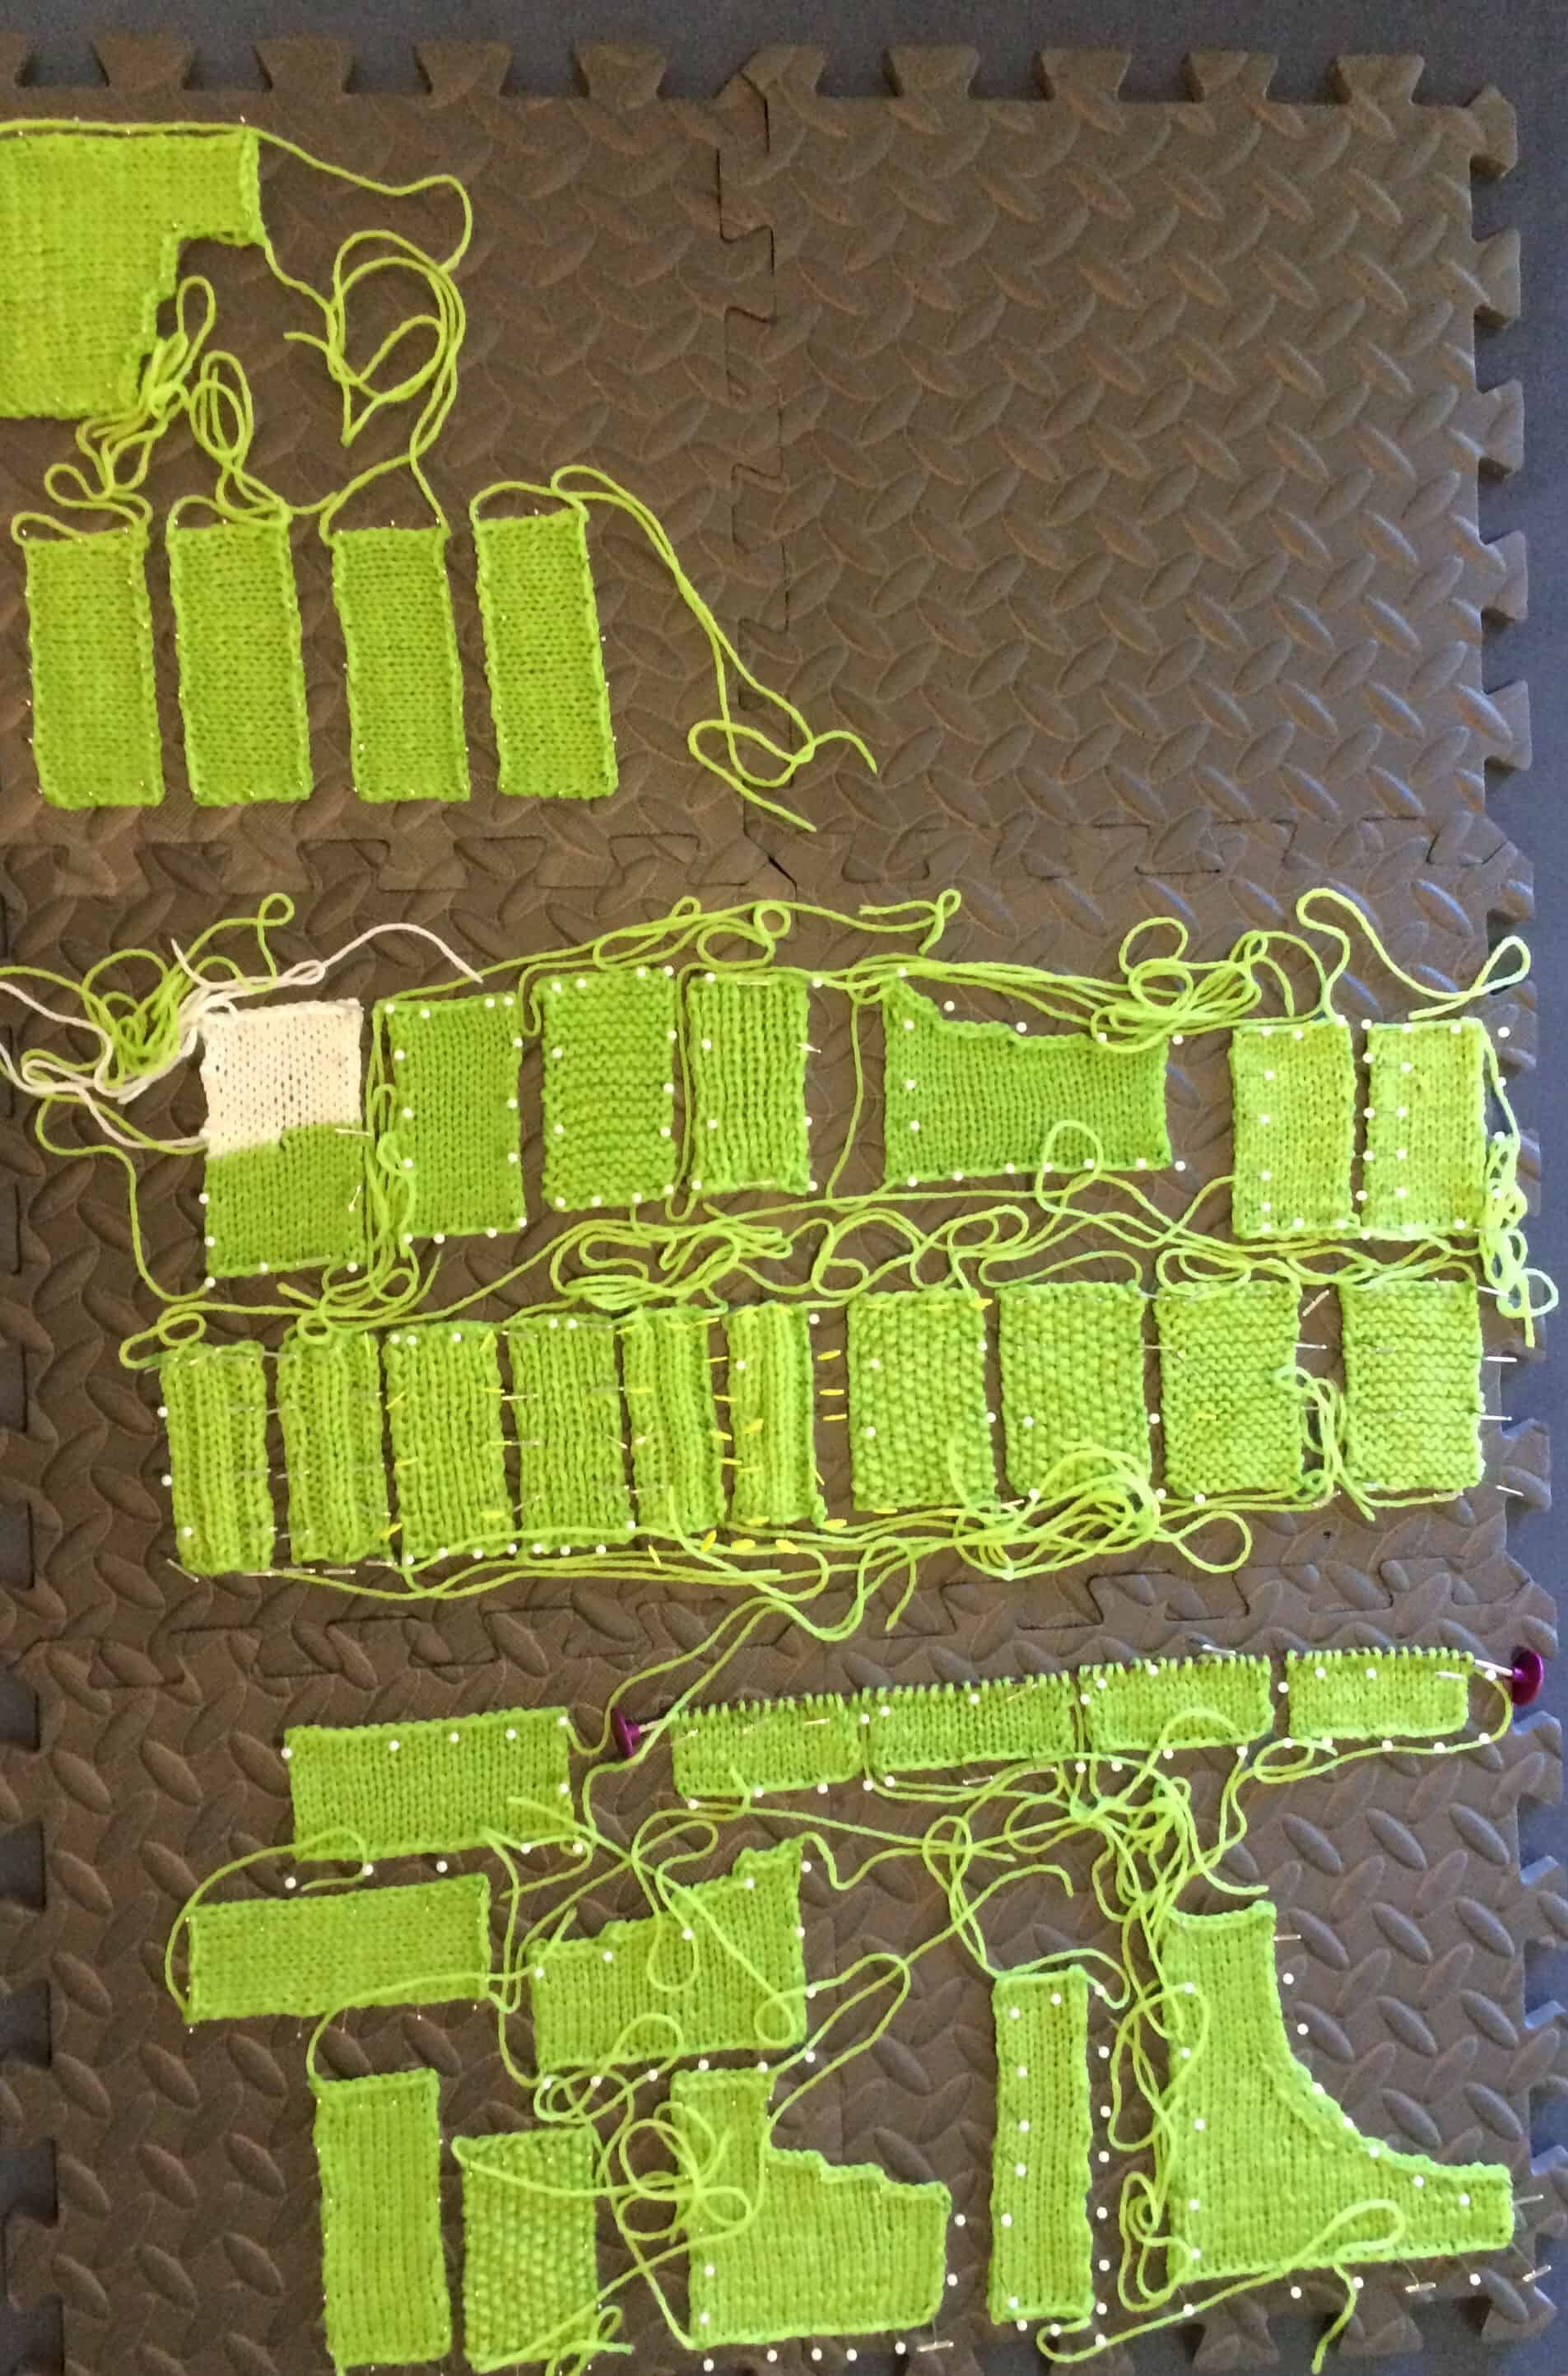
And here’s all the finished swatches together!
I highly recommend attending Arenda’s Finishing class if you have the opportunity. However, those of you unable to attend the Finishing Course either because you weren’t in San Diego or because the class was sold out aren’t entirely out of luck. Arenda has an excellent YouTube channel and blog covering many of the techniques we learned in class. Here’s links to the relevant videos and blog posts.
Seams
Vertical
- Figure 8 technique (beginning a vertical seam) blog post and YouTube
- Stockinette Stitch blog post and YouTube
- Reverse Stockinette Stitch blog post and YouTube
- Garter Stitch blog post and YouTube
- Seed Stitch blog post and YouTube
- 1×1 Ribbing blog post and YouTube
- 2×2 Ribbing blog post and YouTube
Horizontal
Other
- Seaming Stair Step Bind Offs blog post and YouTube
- Seaming a Vertical Edge to a Horizontal Edge blog post and YouTube
- Kitchener Stitch blog post and YouTube
Picking Up Stitches
- Horizontal Edges blog post and YouTube
- Vertical Edges blog post and YouTube
- Curved Edges blog post and YouTube
- Double Pick-up for Bands (no blog posts) and YouTube (1, 2, 3)
Buttonholes
- Eyelet Buttonhole in k1p1 ribbing blog post and YouTube
- Eyelet Buttonhole variation 1 blog post and YouTube
- Eyelet Buttonhole variation 2 blog post and YouTube
- Eyelet Buttonhole variation 3 blog post and YouTube
- Vertical Buttonhole blog post and YouTube
- One-Row Horizontal Buttonhole blog post and YouTube
Weaving in Ends
- Stockinette Stitch blog post and YouTube (and mid-row color change YouTube video)
- Reverse Stockinette Stitch blog post and YouTube
- Garter Stitch blog post and YouTube
- Seed Stitch blog post and YouTube
- Ribbing blog post and YouTube
In Peripherally Related News
Just a quick note on my swatch photos. I use my iPhone to take the photos that appear on this blog. I usually take the pictures on my dining room table in the mid-afternoon when filtered sunlight shines through the window right beside the table. If it’s raining or I’m busy, I sometimes have to wait to take pictures until I can take them in good light. In order to be more flexible with photos, I’ve wanted to get a light box. During Amazon’s Prime Day sale, I bought the StudioPRO 24″ Portable Table Top Product Photography Lighting Tent Kit (affiliate link). It was delivered to my house while Chris and I were in NJ for his Uncle Angelo’s funeral. These finished swatch pictures are the first pictures I’ve taken with the light box. It was 10:30 pm when I took them, so obviously I wasn’t getting any sunlight! I love how the pictures came out and I look forward to using the light box on my future pictures!