For several years, I have been accumulating a stash of breed-specific spinning fibers. In looking back at my blog, I believe the first time I mentioned breed-specific spinning was in January 2015. I wanted to do some breed-specific spinning to build my working knowledge of wool. I started spinning to understand yarn. In order to understand spinning, I need to understand fiber.
When I started buying breed-specific fibers, I was buying prepared fibers. However, I realized that some fibers are not available prepared, which led me to purchase multiple raw fleeces and scour them myself, as I’ve written about in January 2018 and February 2018.
While I have continued to accumulate breed-specific fibers, I have not spun them. I have, however, taken several classes at PlyAway and SAFF to help me in this process. This includes classes in long draw, how to process fleece after it is scoured, and one of Beth Smith’s breed study classes.
This year, I’m going to be start spinning some of my breed-specific stash. My friend Stacy will be joining me in this endeavor. We haven’t worked out all the details of this yet, but we will both be blogging about our experiences with the same breed. Sometimes we will be working from the same fleece or sample and sometimes we will be working from what we happen to have in our stashes. If I process the fleece from raw, notes on the processing will be included in the blog post, along with notes on the spinning and finished yarn.
This blog post will serve as an index to all the other posts in this series. I will go back and look through my prior posts to see if any are still relevant and if they are, I will link them here. When we write posts about a new spin that is part of this study, I will also link to it here. I will link back to this post from all the future posts on this topics so you can get back here easily, but you might also want to bookmark this post for your reference if you want to follow along.
The SassyBee Fiber I’m spinning is 100% Polworth, so Polworth may be the first fiber on our docket. Stacy is checking her stash to see if she has any. Since we haven’t worked out parameters, I can’t give you a specific timeline for when we will be publishing our first breed-specific post, but I know it will be this year 🙂 Stay tuned!
Goals
Here are any posts about goals or timelines or parameters of this project.
My birthday was several days ago. We got home from New Jersey only a few days before that. I was tired and needed to get back into a rhythm at home. I decided the best gift I could give myself for my birthday was progress on personal projects. I made progress on three projects: (1) Finishing a loom and spinning wheel; (2) Scouring fleece; and (3) Spinning a batt.
Finishing
In early January, I wrote about the problems I have with the finish on my rigid heddle loom and my spinning group’s wheel. My mother-in-law passed away the day after I wrote that post. When we left for New Jersey, I left all the pieces out on the workbench. I was at a bit of a loss of how to proceed because after five passes with the mineral spirits, some of the pieces were still tacky. On my birthday, I took the loom and the treadles to our local Woodcraft store and explained what I had done so far. They said I probably put too much Danish Oil on, which is why it never dried. They said that continuing with the mineral spirits was the correct approach but that if that doesn’t work then I will have to remove the entire finish and start over. I was using paper towels to apply the mineral spirits. They suggested that I use a shop towel because the paper towel might be too smooth. Over the course of the last several days, I applied another 5 or 6 rounds of mineral spirits. Some of the pieces are no longer tacky, some have parts that are tacky and some that are not, and some are still tacky all over but are not as tacky as they were before. We continue to move in the right direction!
Scouring
In early January, I scoured some fleece and wrote a long post about it. That day, I only scoured a fraction of the fleece I needed to scour.
The day my mother-in-law died, I was at a friend’s house, about to scour more fleece. My spinning group was holding our third annual retreat (I posted about the first one). This year, we decided to spend the day at the home of one of our members. These retreats are usually low-key, bring a project and do your own thing affairs, but this year several of us had fleece to scour, others had never scoured and wanted to learn, and our hostess has excellent space for scouring, so we decided to do a scouring day. I brought all the fleece I needed to scour and all my equipment.
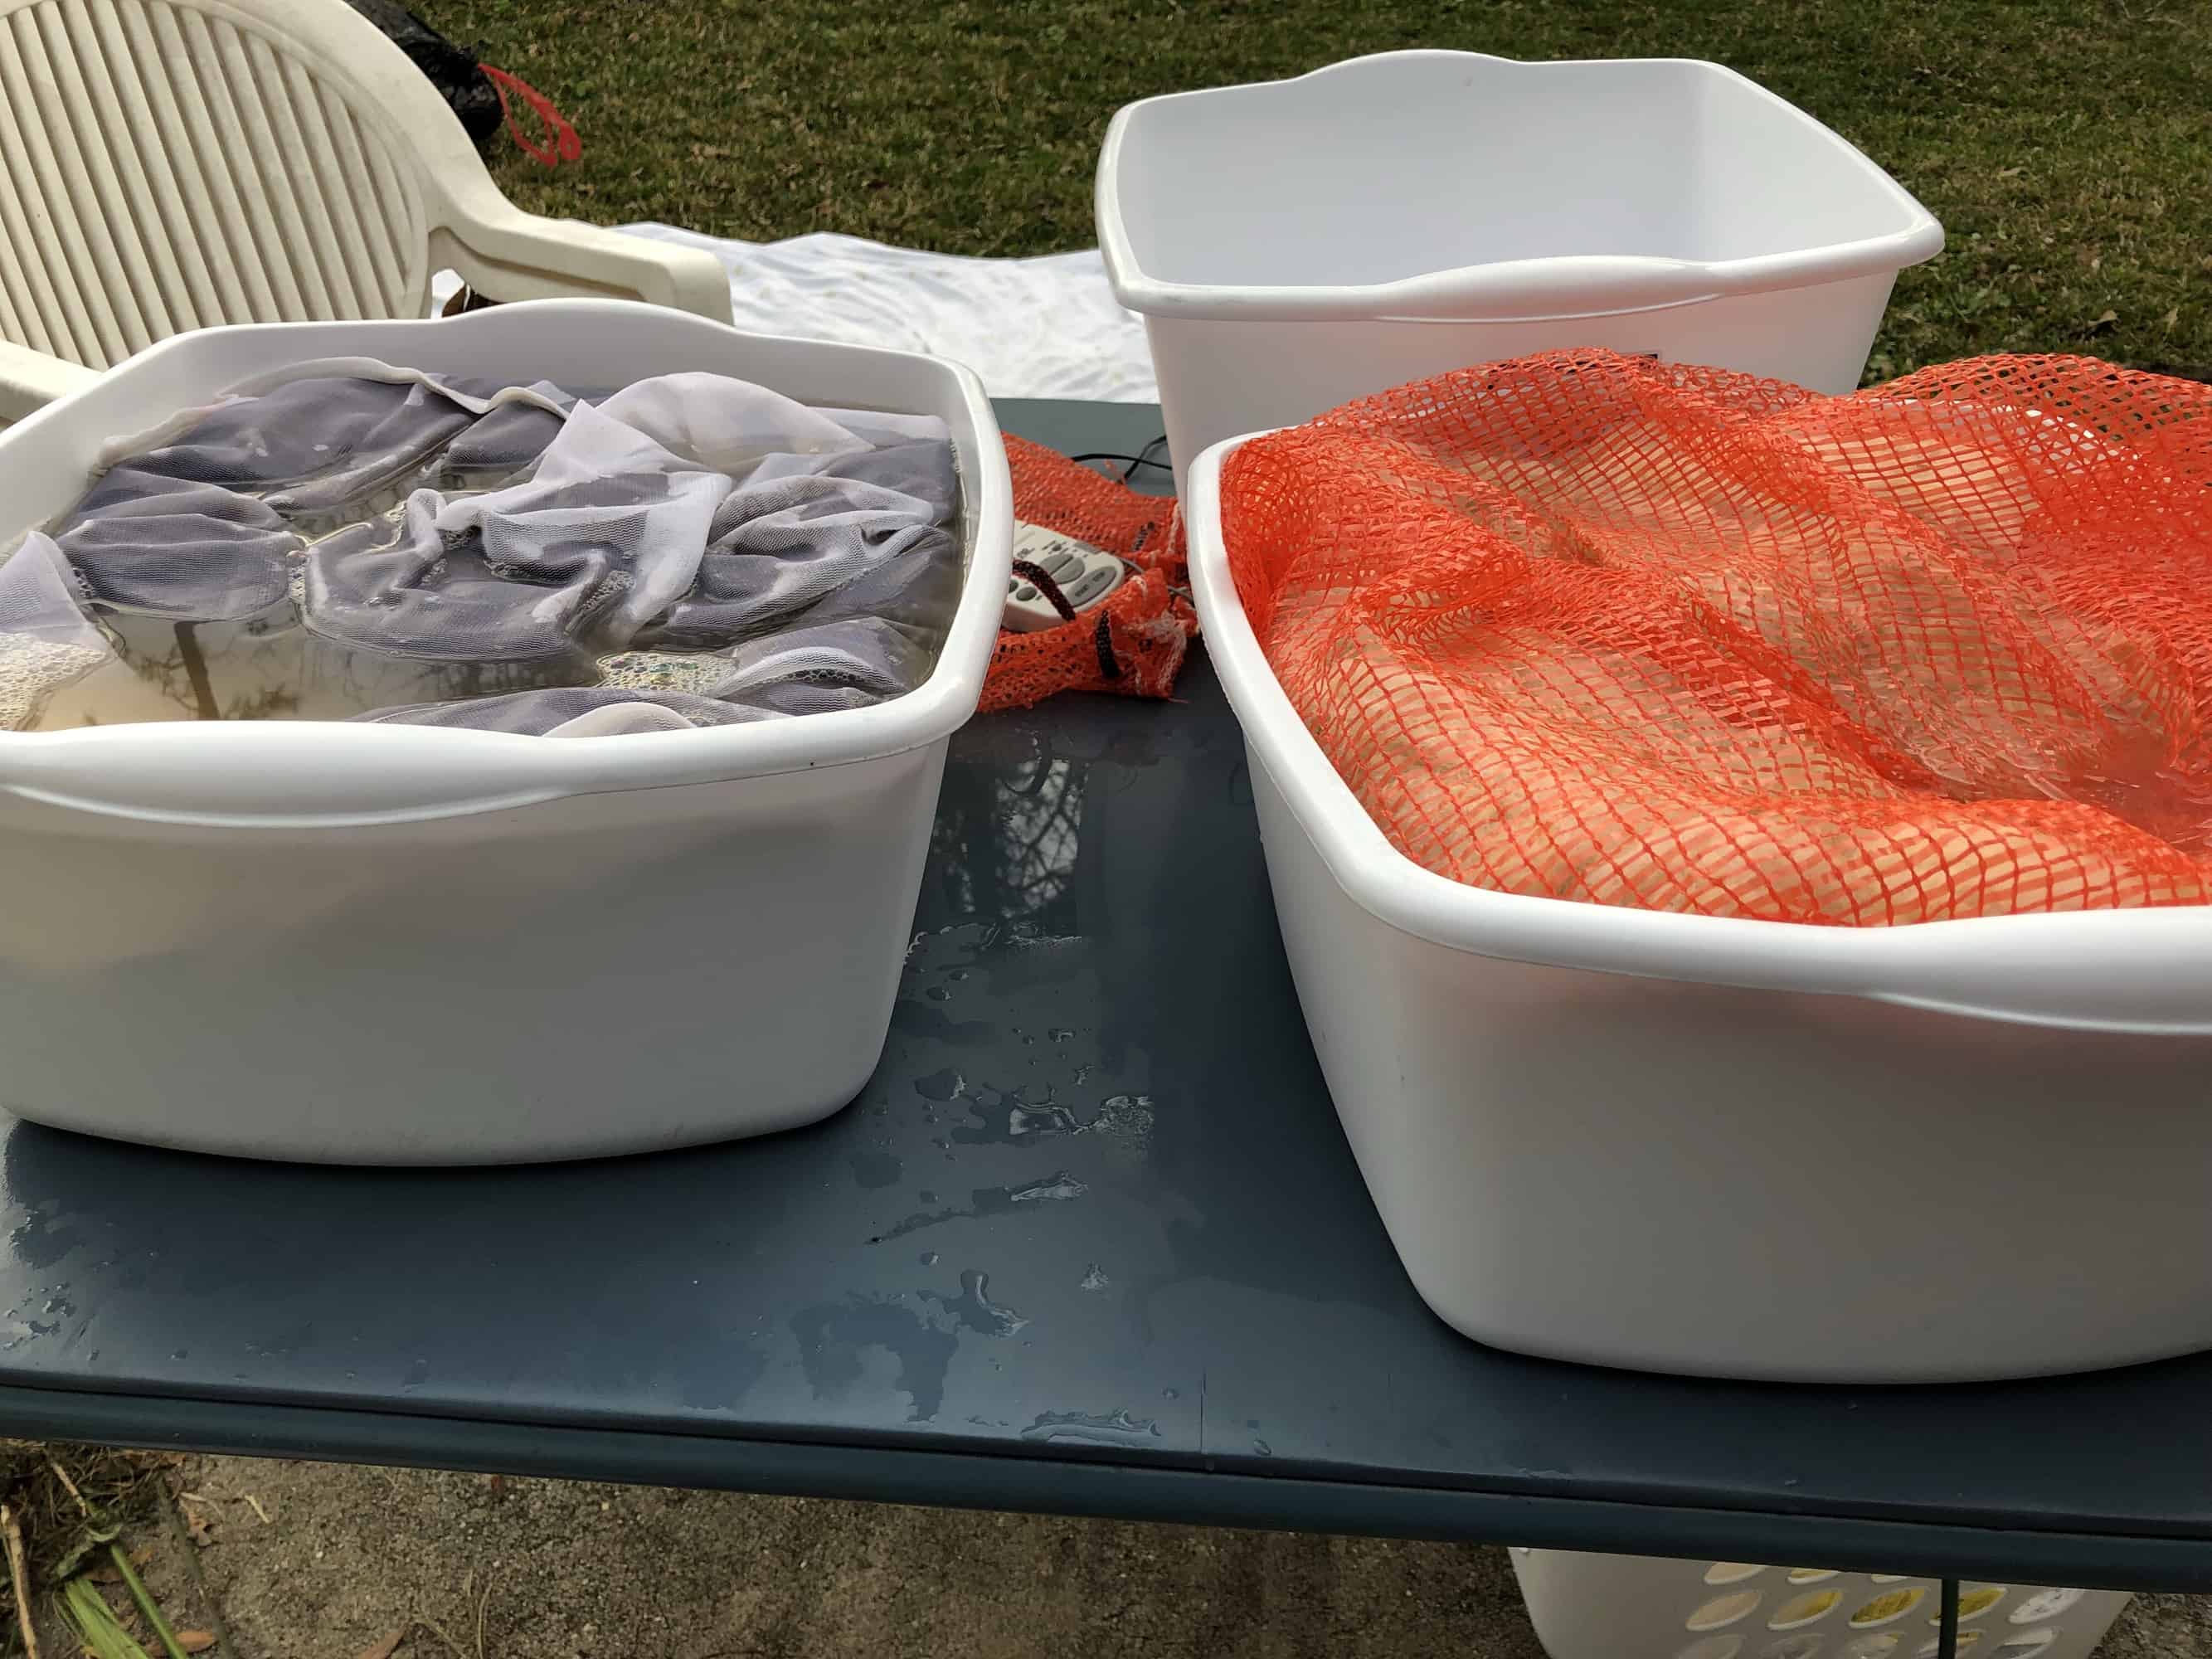
Since several of us were processing fleece and since I had several 4 – 16 ounce samples, I put all my fleece into mesh laundry bags. Inside each laundry bag, I wrote the name of the breed on a tyvek wrist band (Amazon affiliate link). I used these wristbands when dyeing and scouring because they will not dissolve in water and you can write on them with a Sharpie. I had just finished putting everything into bags and was about to start scouring when my husband called to tell me his mother had passed. I immediately packed up all my fleece and drove home, leaving my equipment behind since everyone else was using it. I picked up the equipment after we returned home.
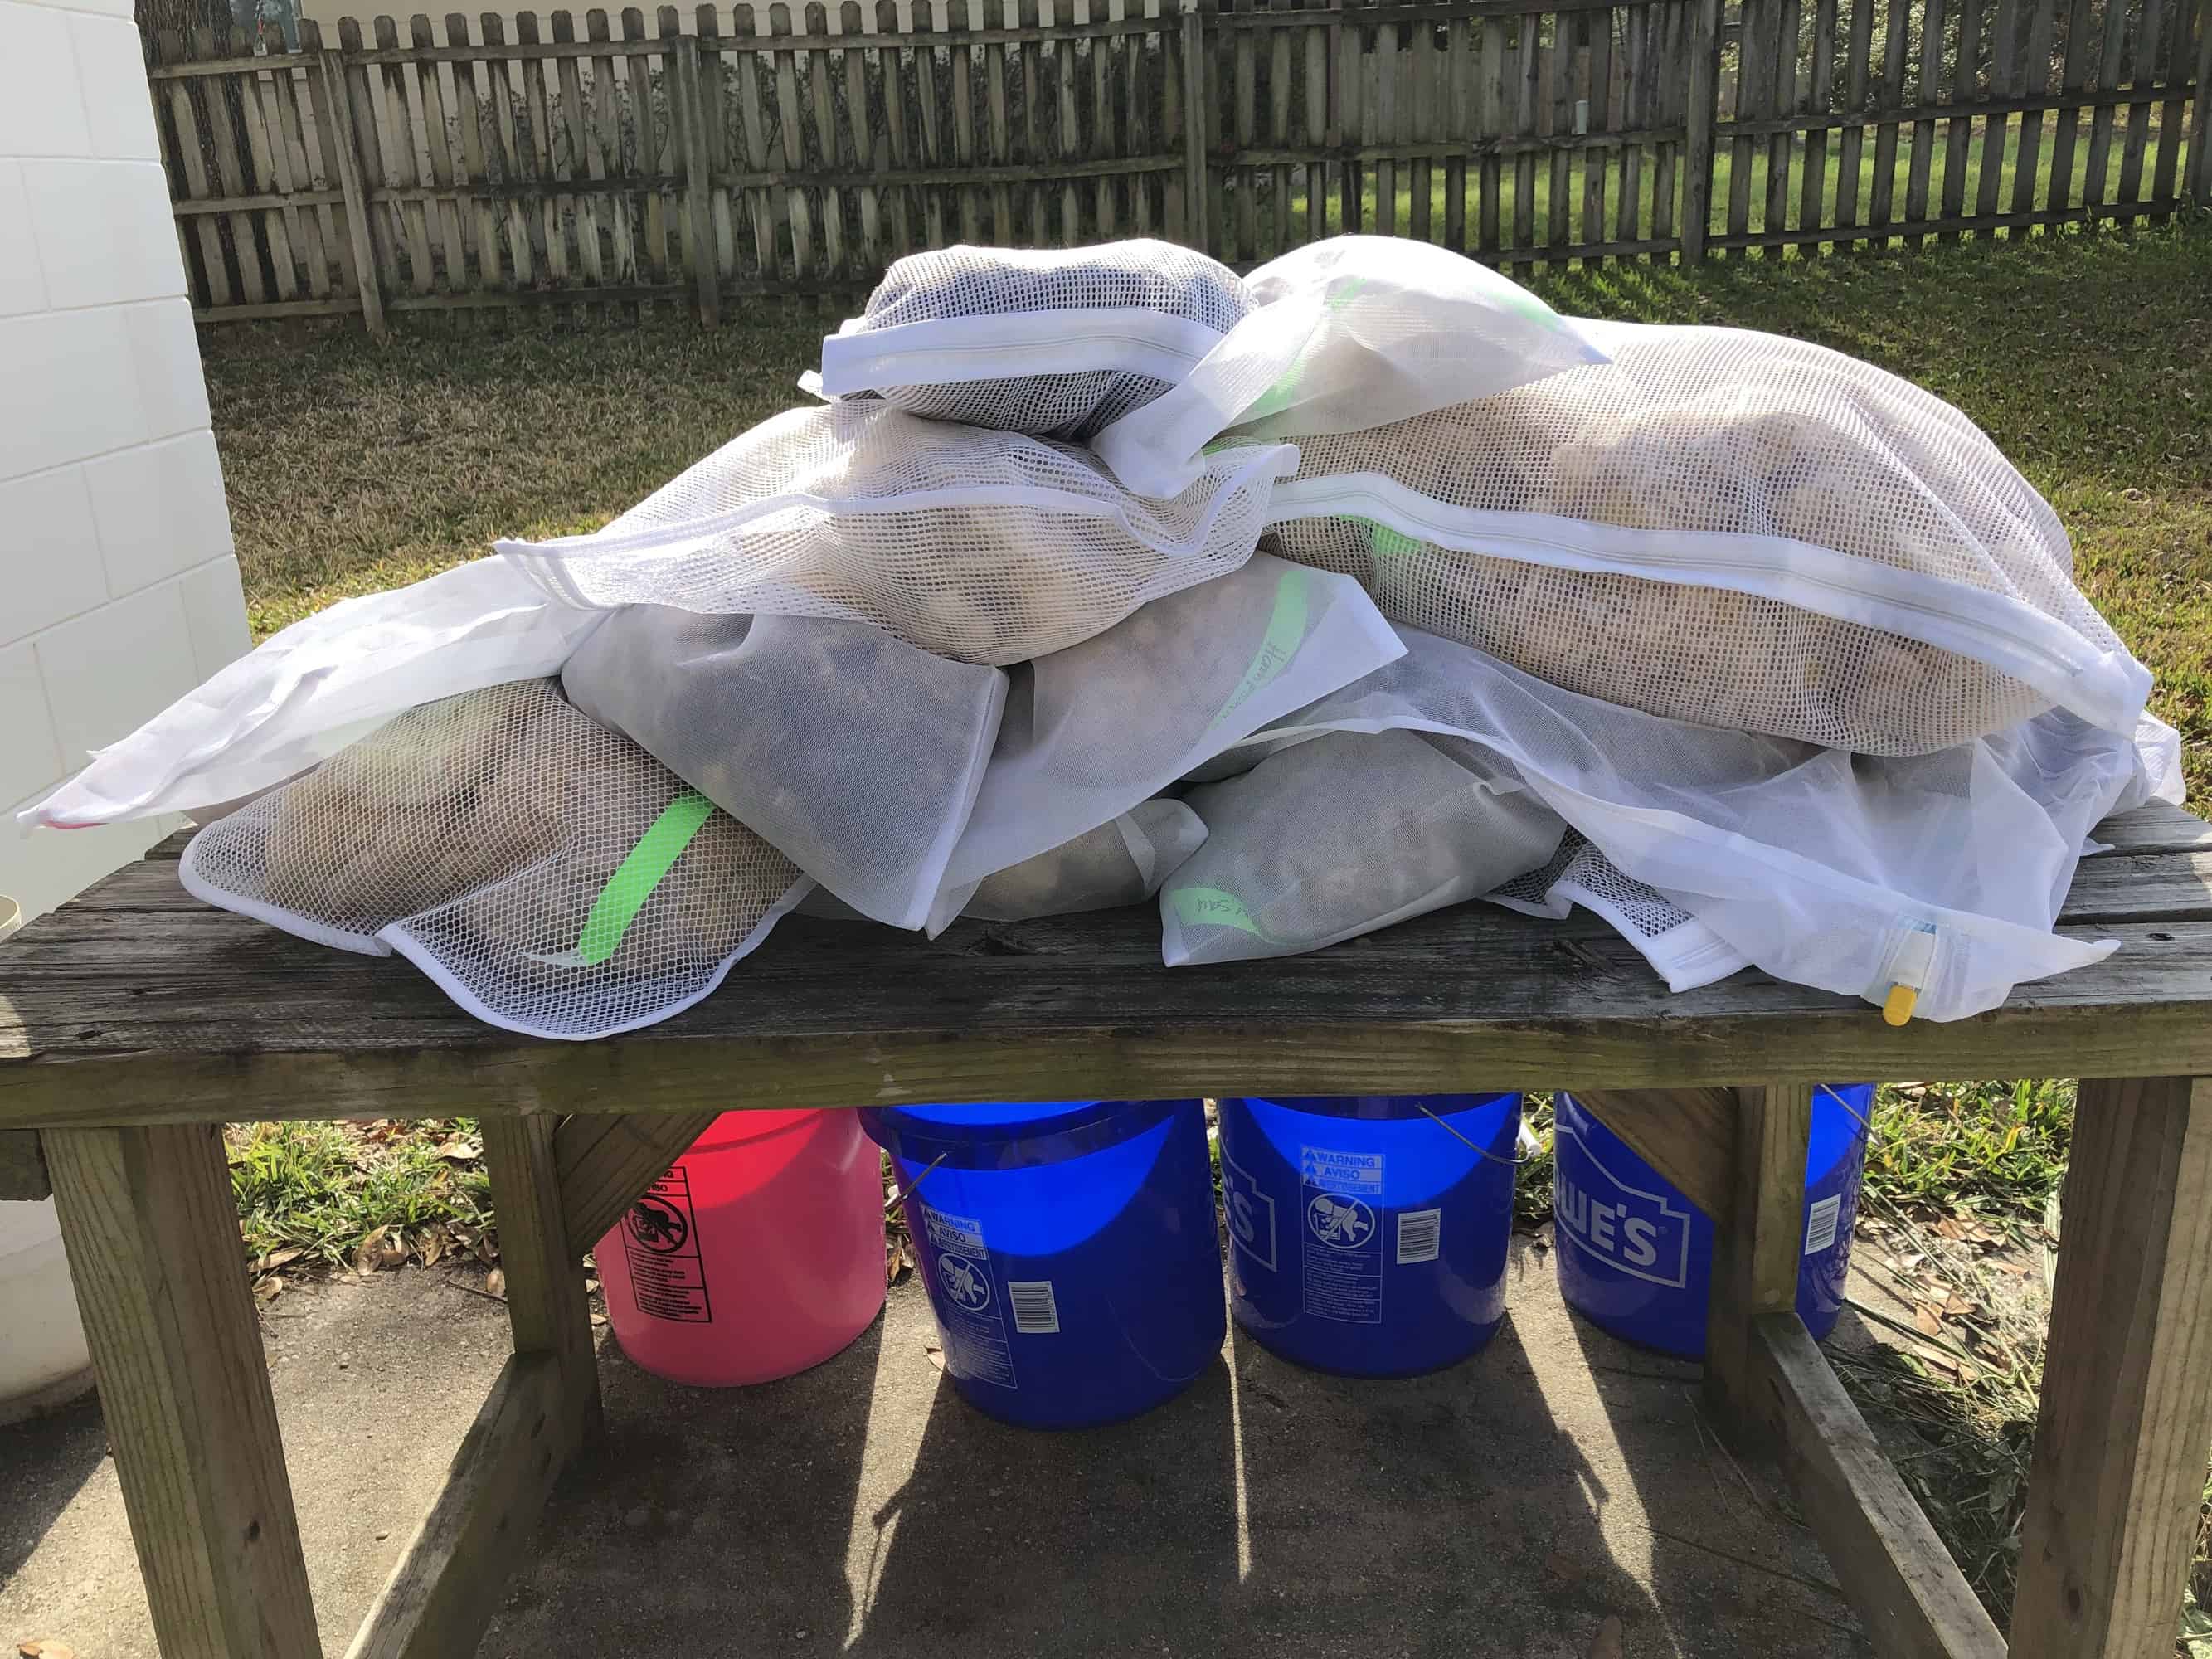
I still wanted to get all that fleece, plus additional fleece I had at my house, scoured. So I spent the afternoon of my birthday scouring fleece. Here’s all the fleece I put into laundry bags while with my spinning group.
My friend Nancy told us that she and her sister now do cold soaks of fleece before scouring. I decided that I would try that method. We have a plethora of 5 gallon pails. We use them for putting water into our hydroponics system, for toting around tools, and for storing things in the garage. Last September, we bought several more to use for water storage as part of our Hurricane Irma preparations.
TANGENT/
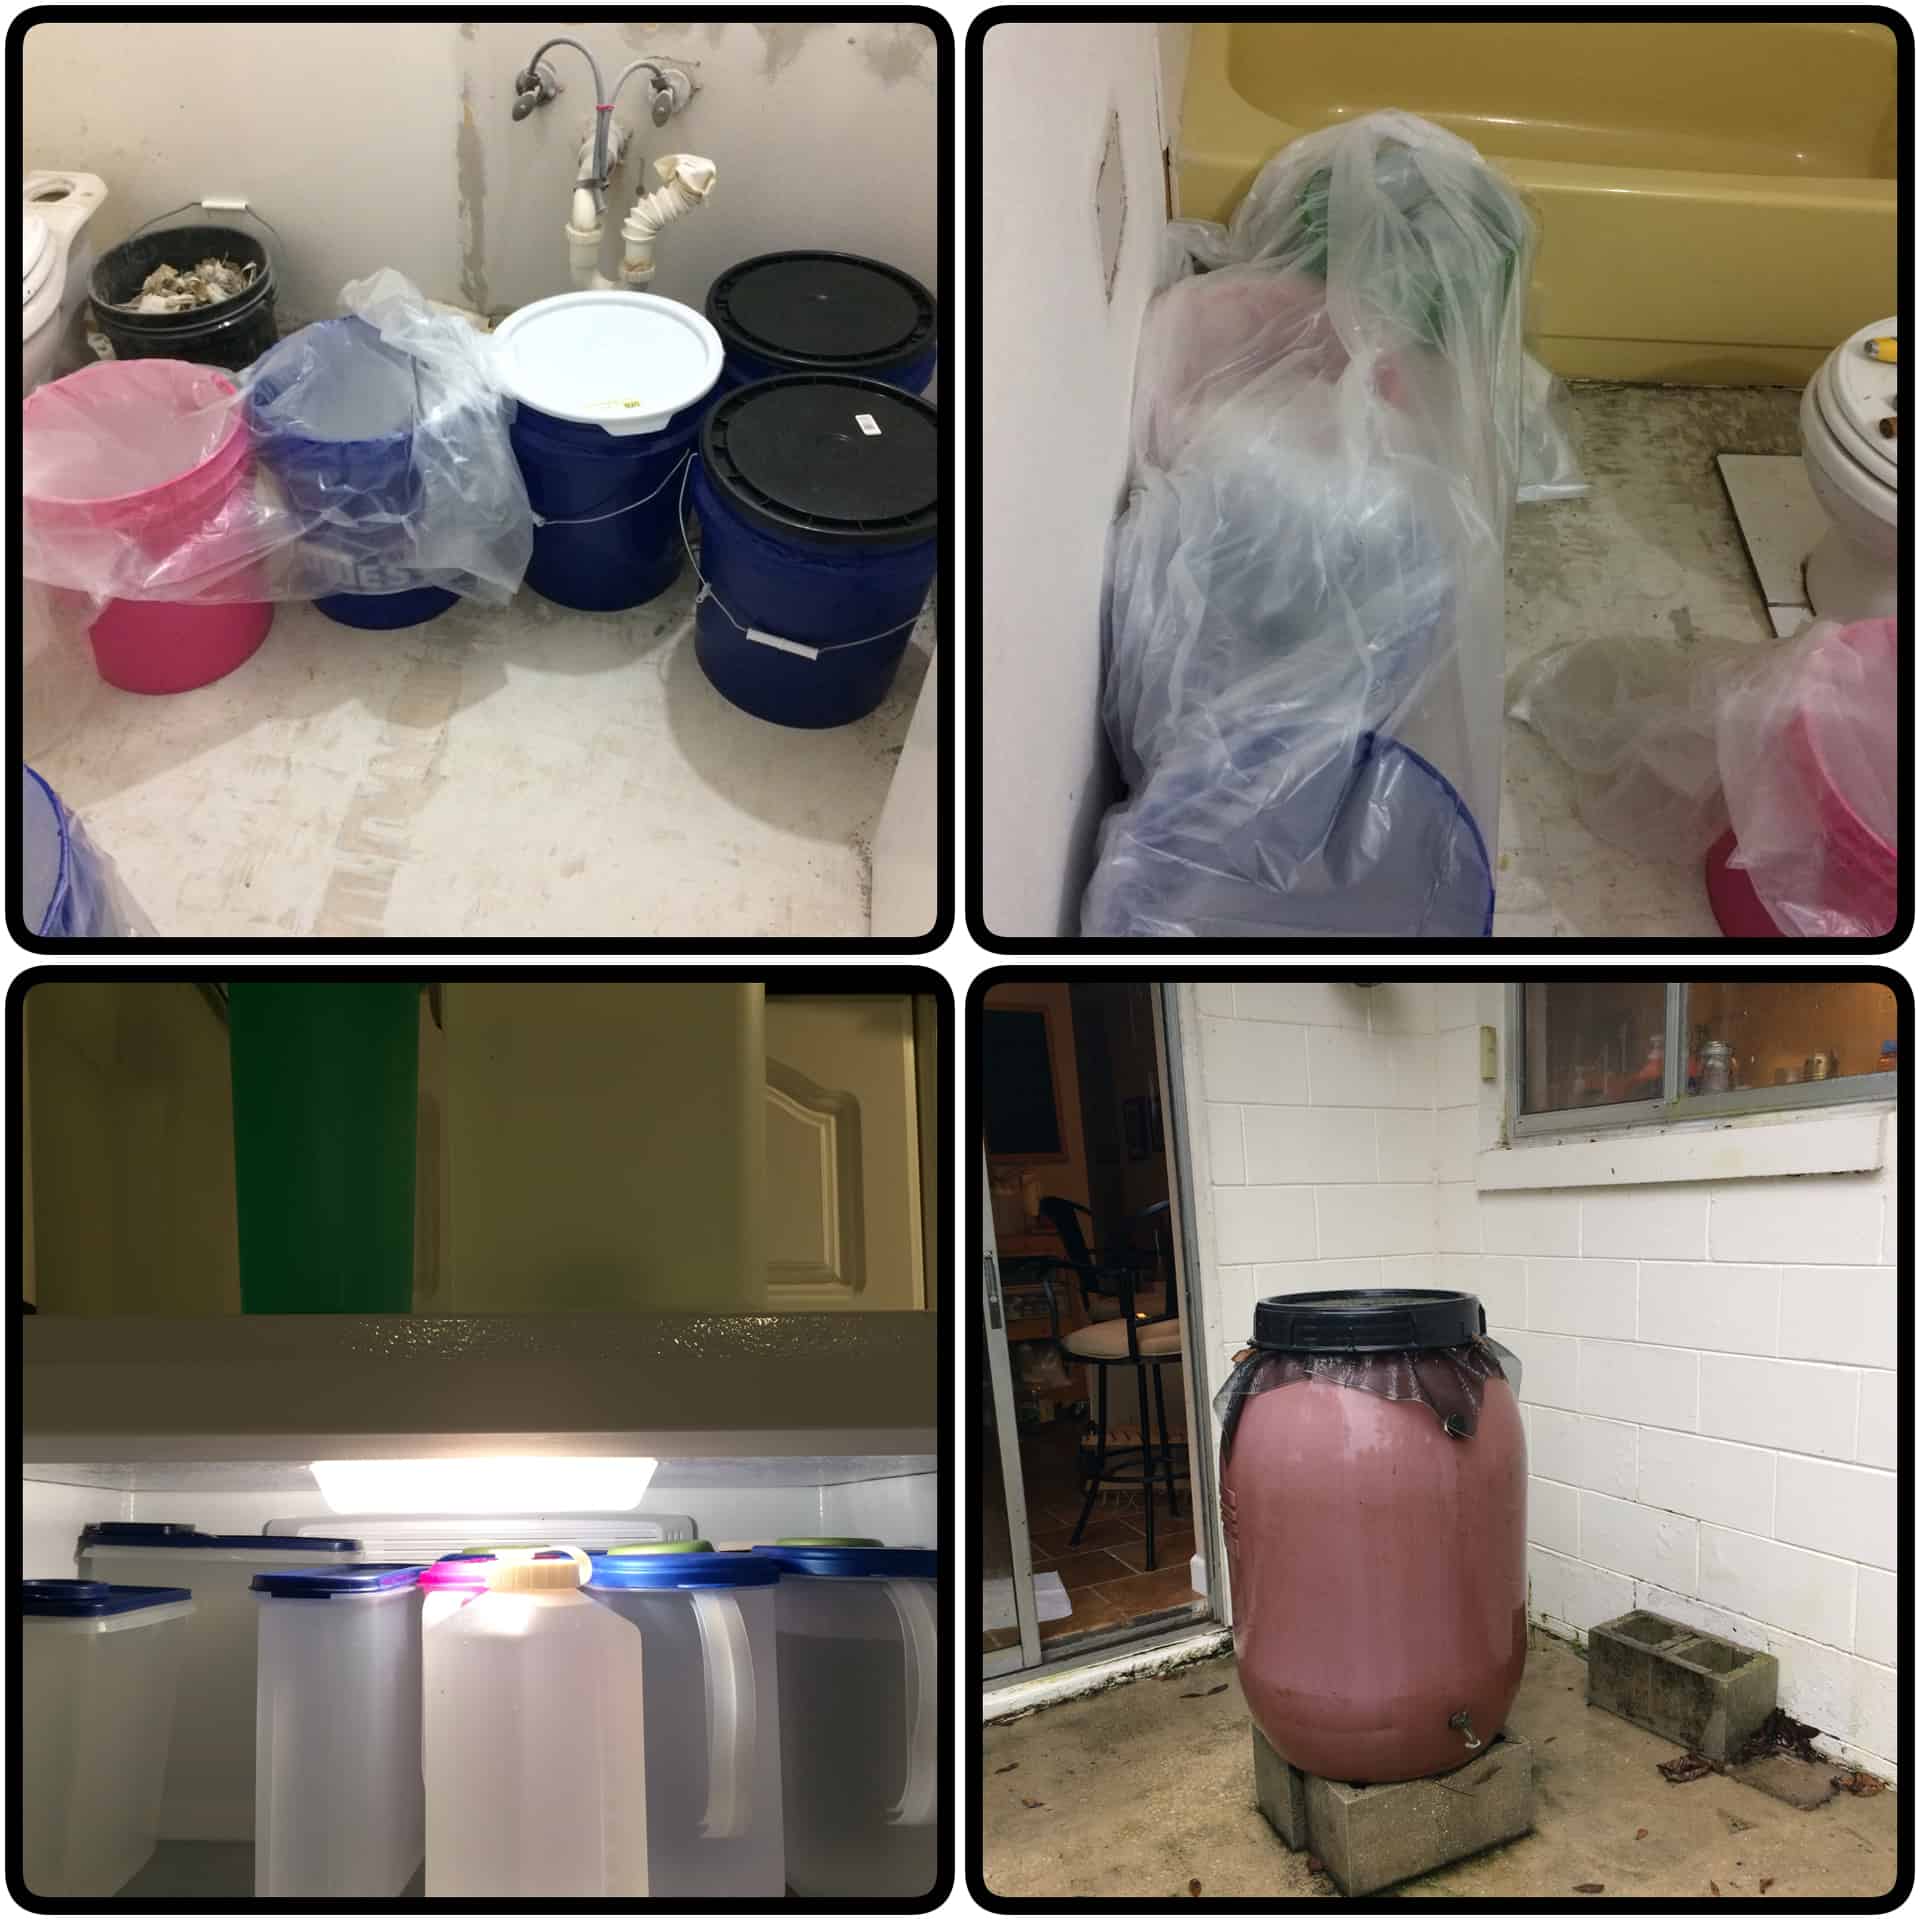
We filled the bathtub after I took this picture. Total water storage: 35ish gallons in the tub, 50 gallons in buckets, 6 or 7 gallons in the frig, 50 gallons of non-potable water in the rain barrel.
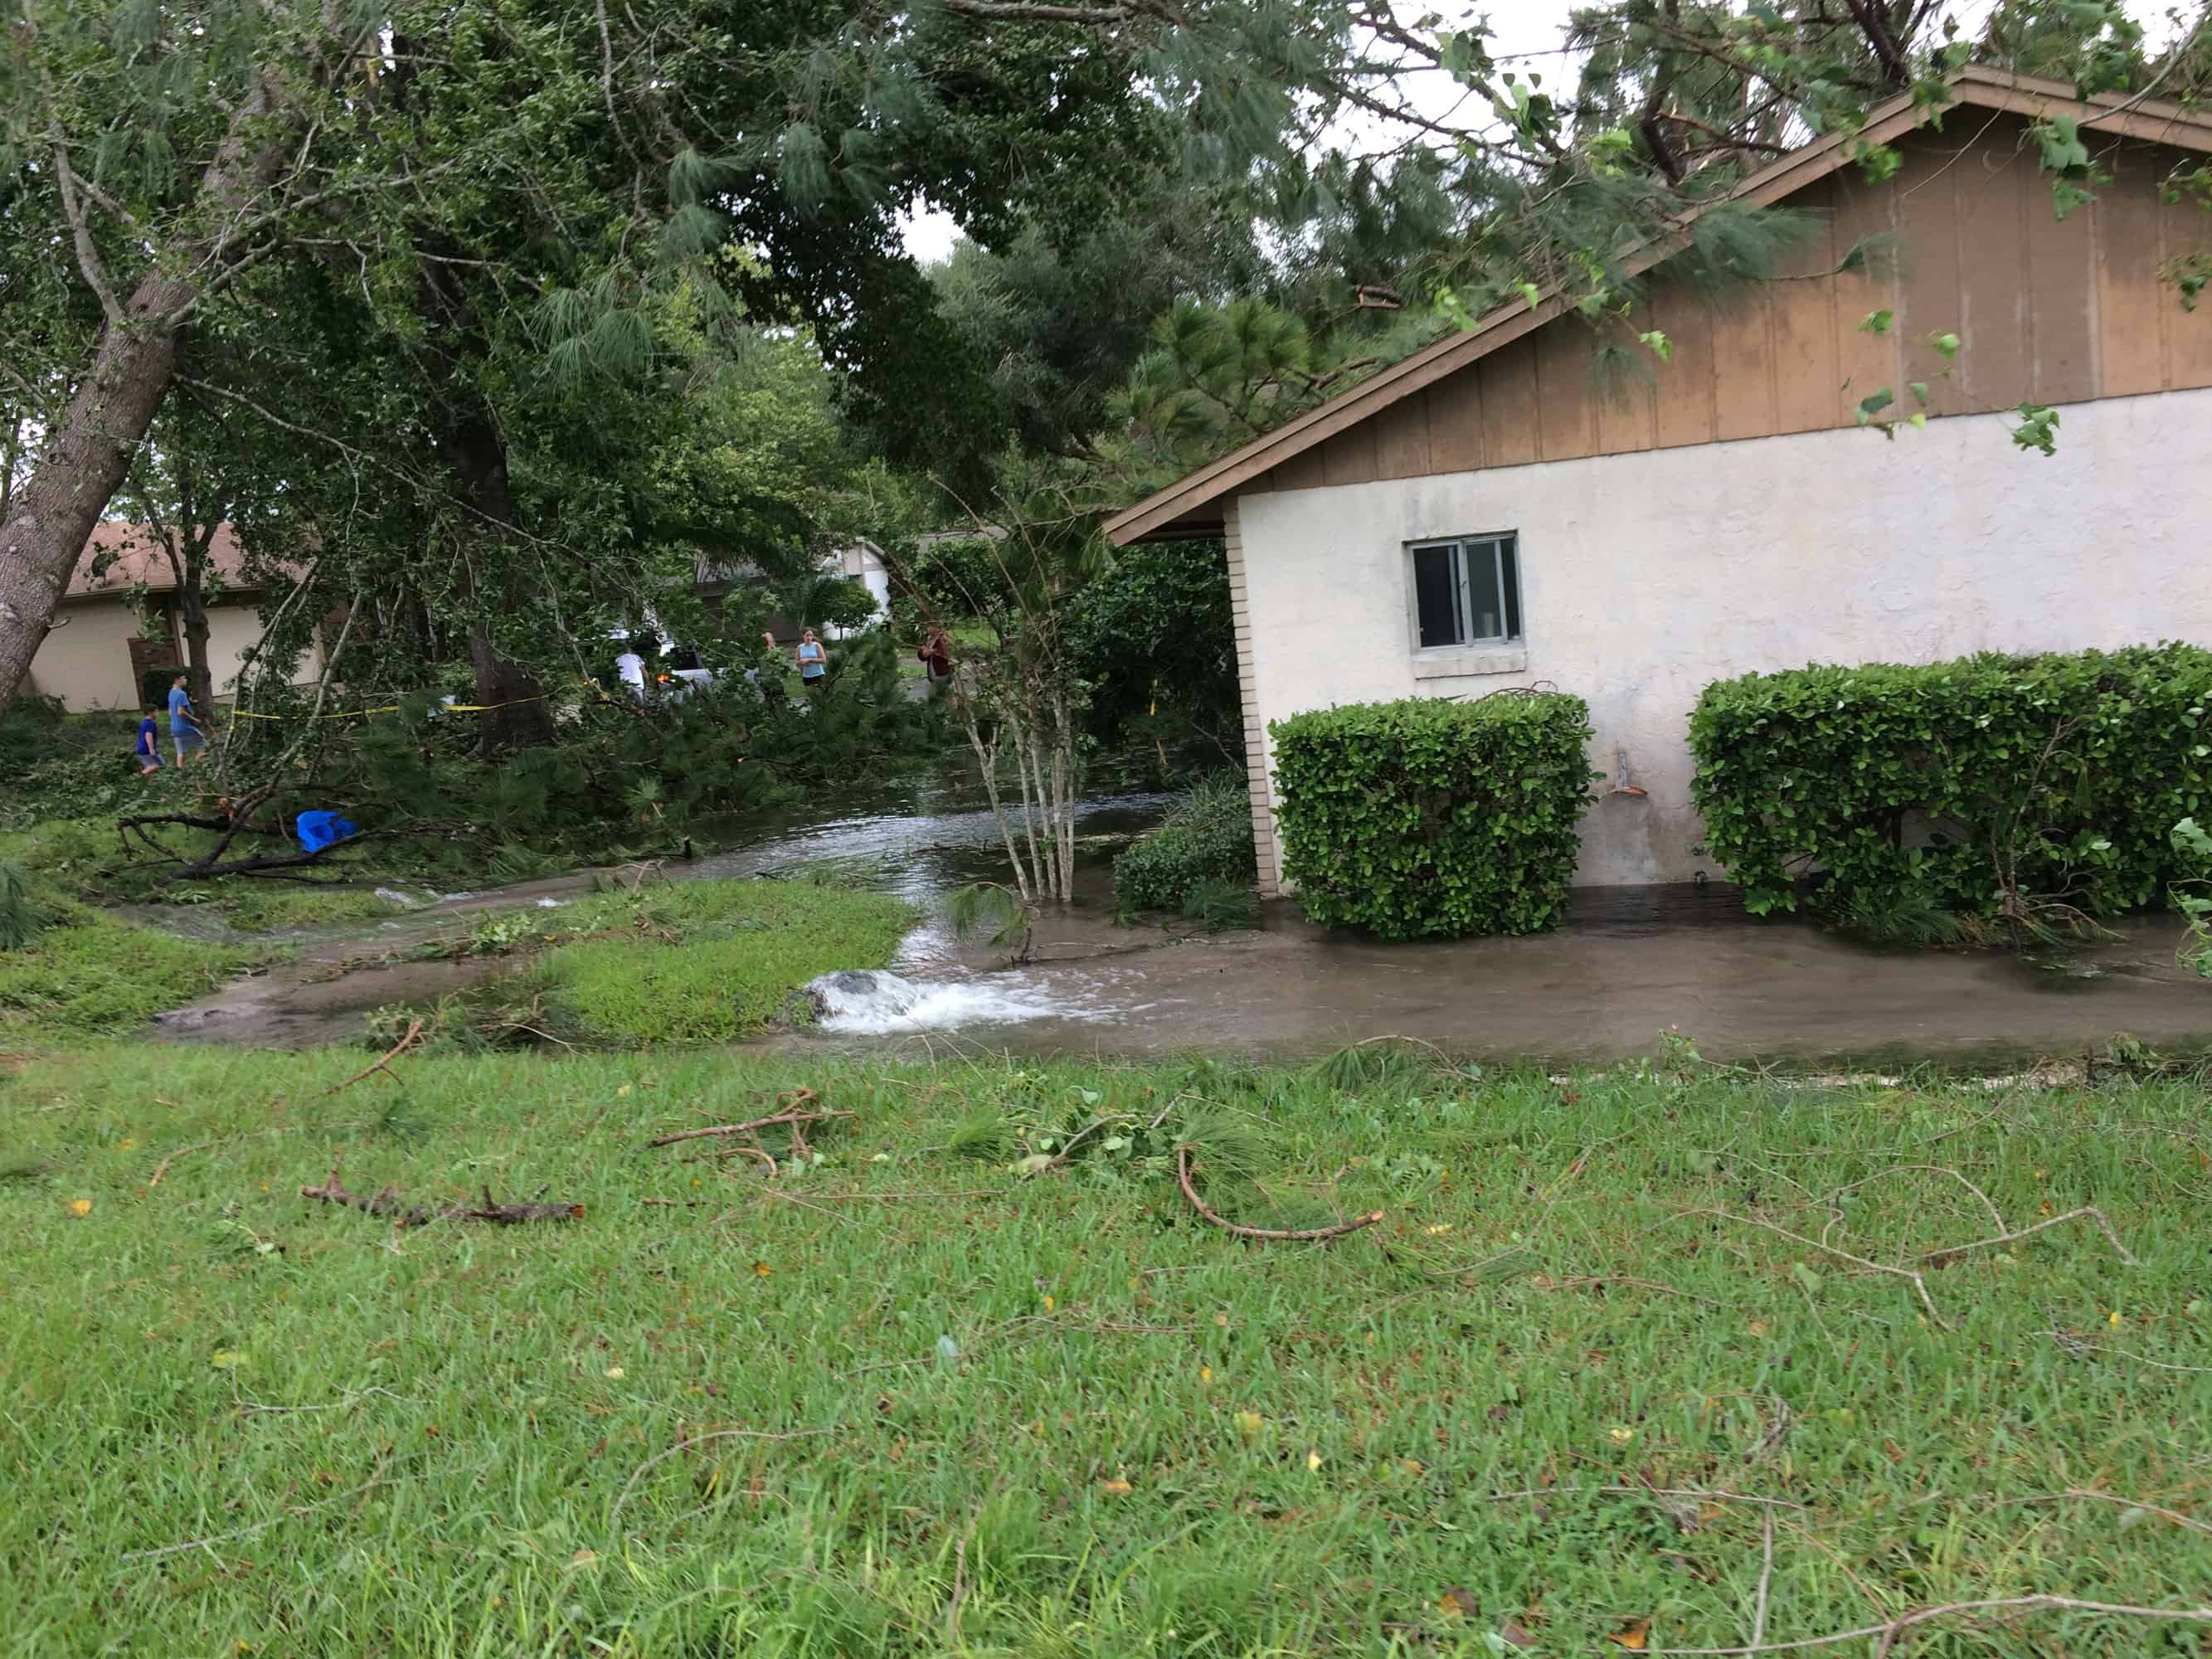
Copious water storage was an excellent thing because we were without power for 6 days, without water for 24 hours due to a water main break on our street, and on severe water restrictions (no showers, no flushing the toilet if you only peed) for a week because 85% of the lift stations in our county were without power. Lift stations move waste through the pipes to the treatment facility. If they can’t do their job, somewhere that sewage will seep into someone’s home.
Six trees came down at this house, including two that came through the roof in the middle of the storm, nearly hitting one of the teenagers. The family fled to a friend’s house. The roots of two trees pulled up through the water main, breaking it in multiple places.
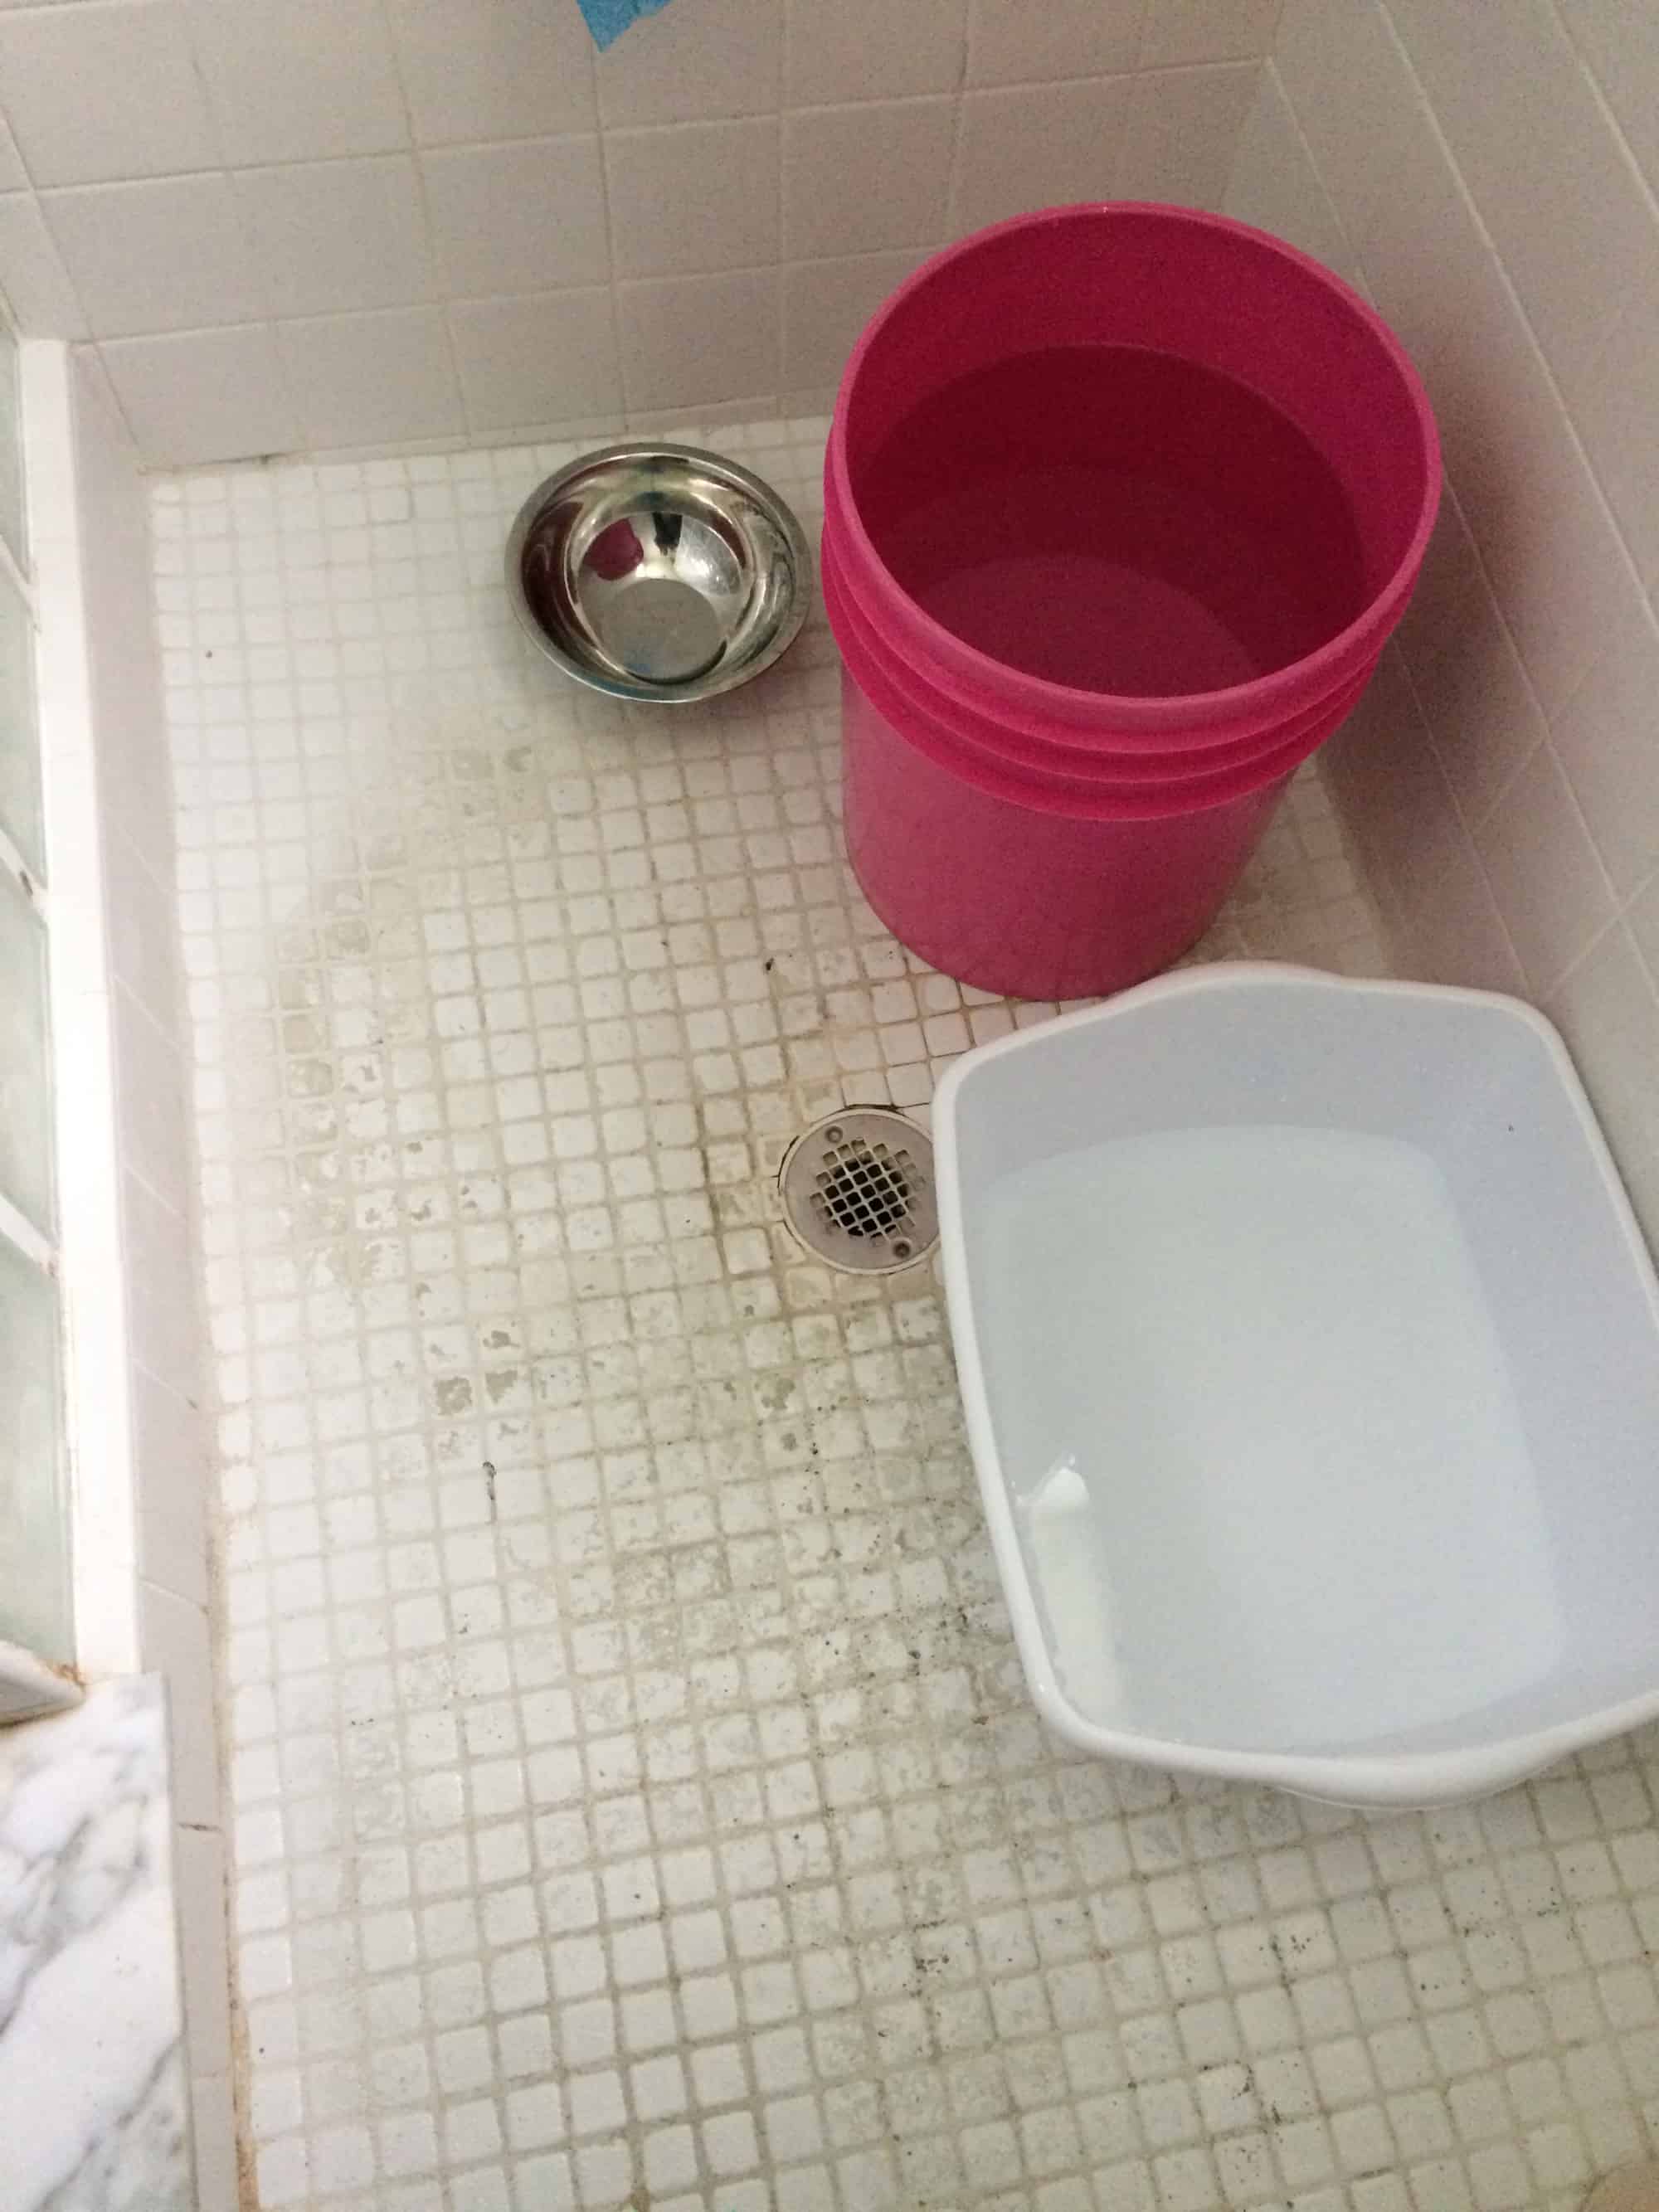
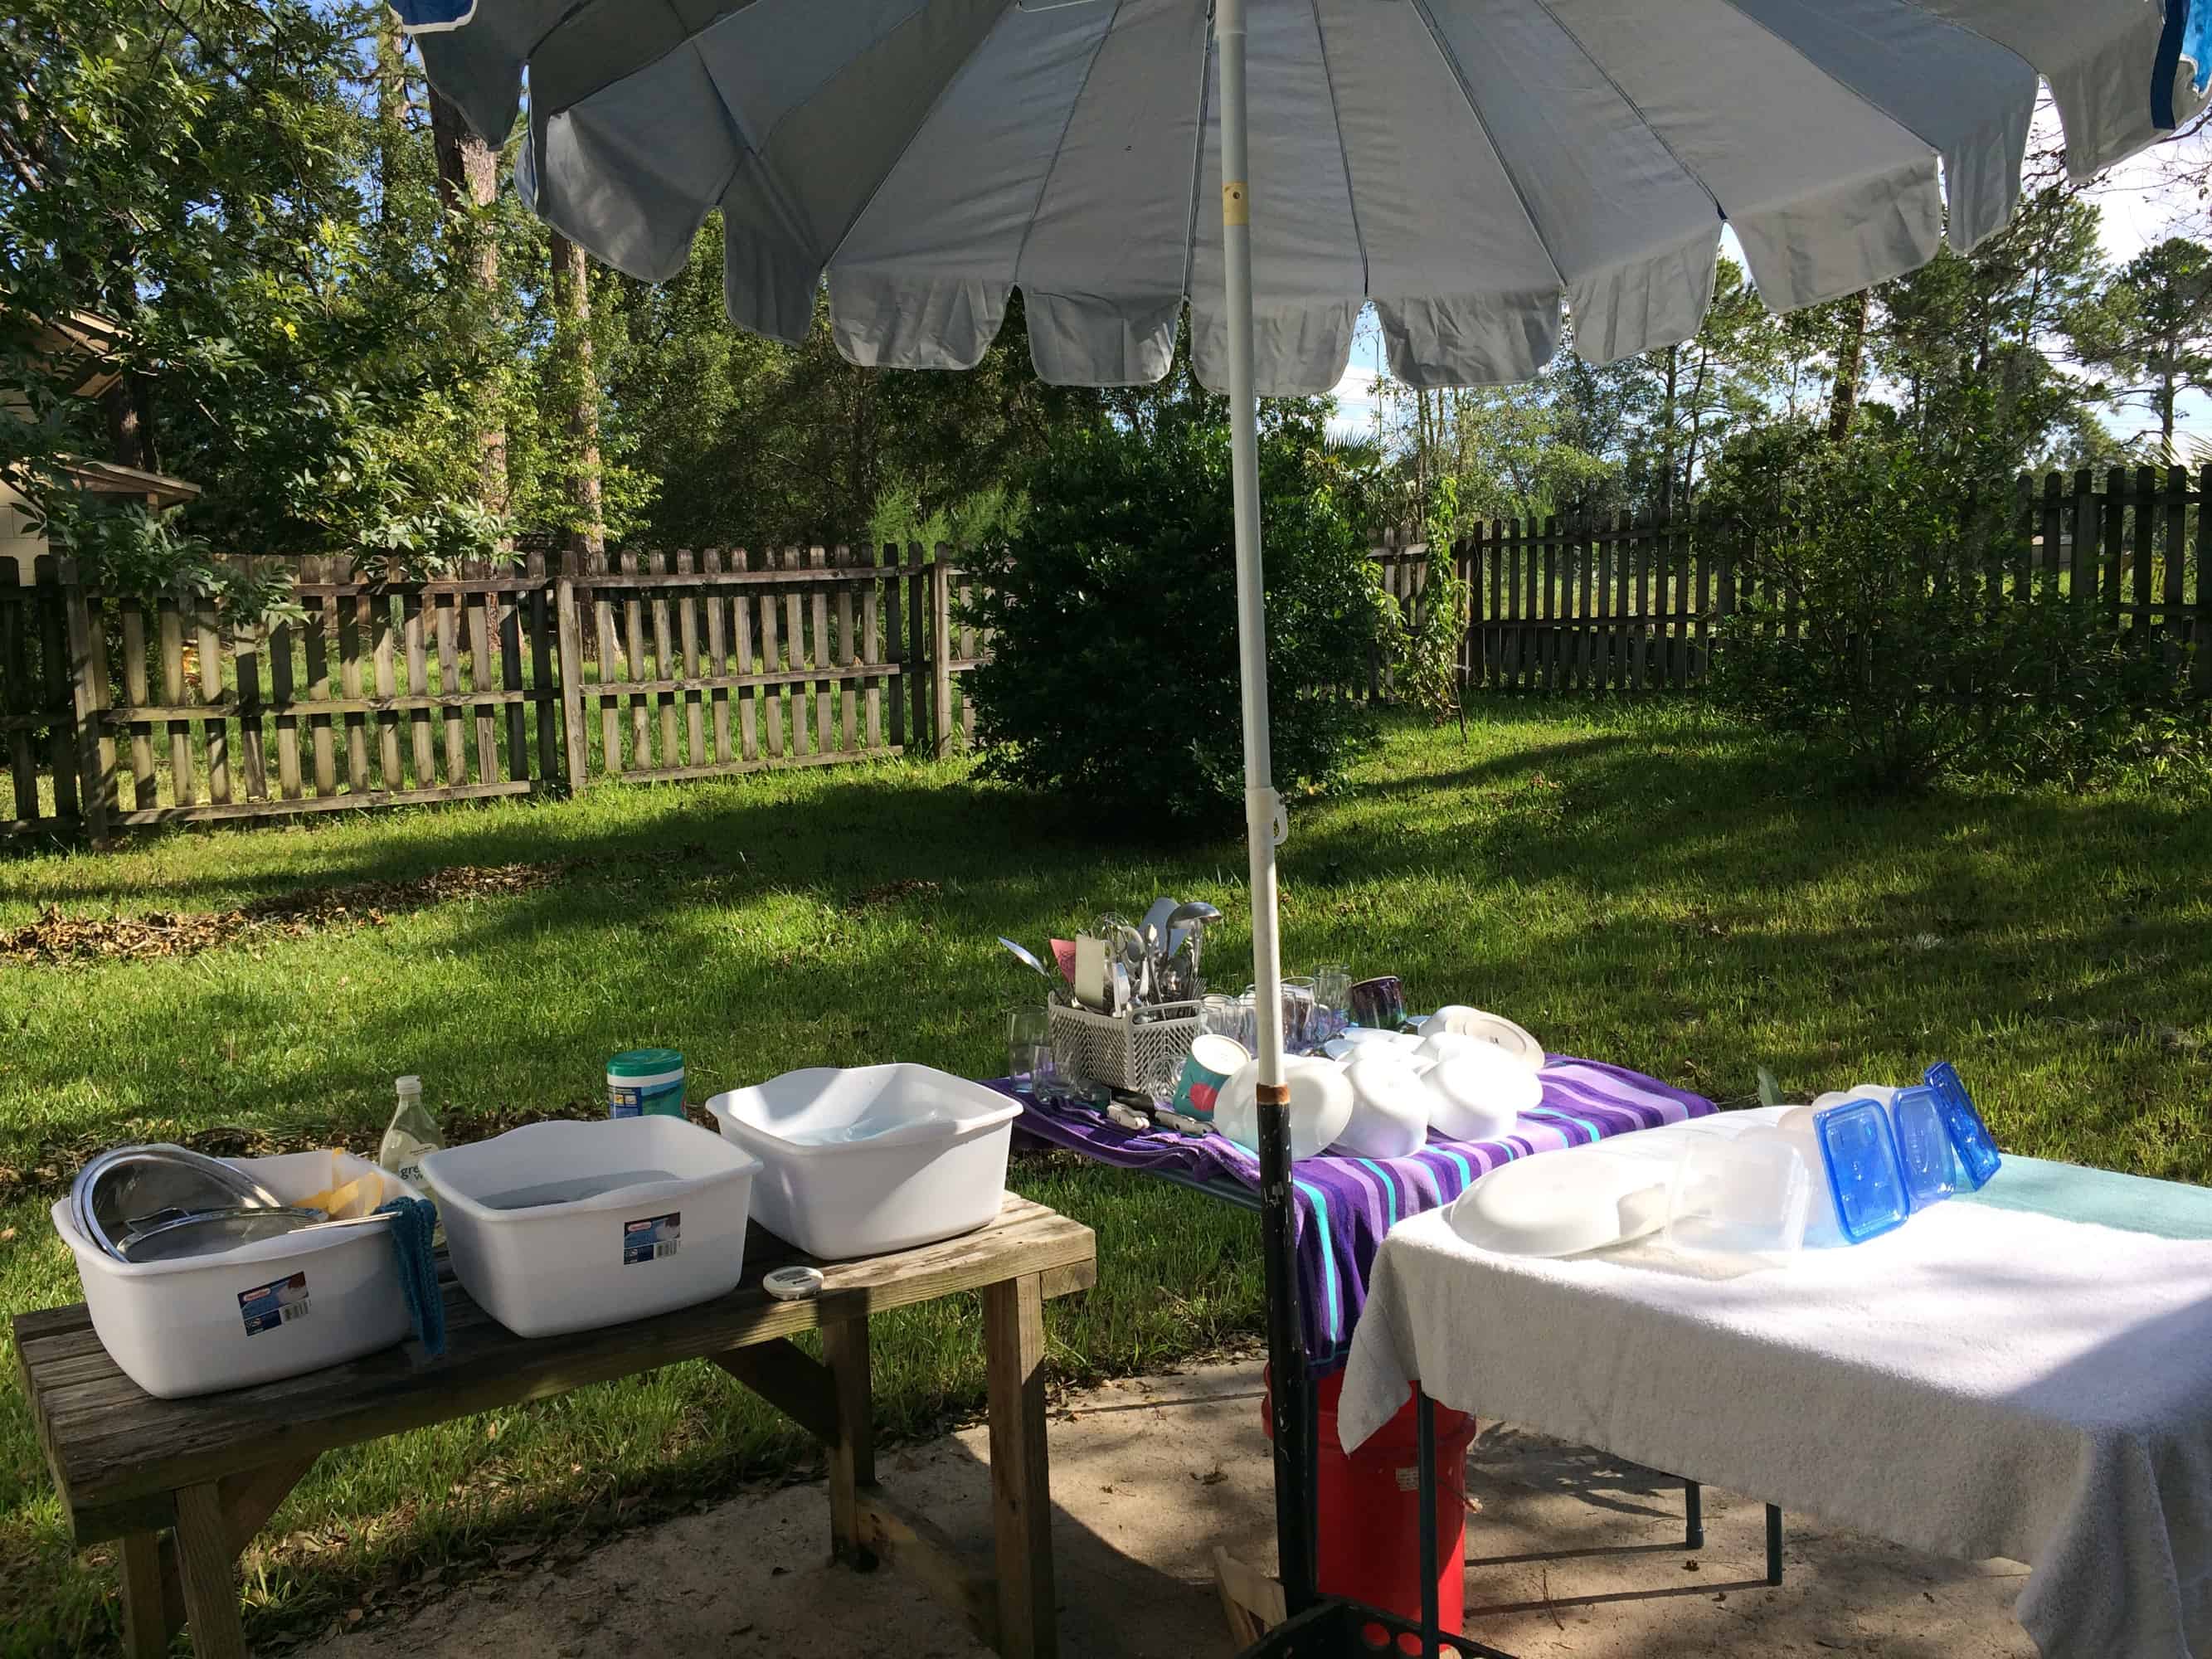
No running water, no showers, no electricity, high heat and high humidity. This is how we kept clean.
When our power went out, the dishwasher was full of dirty dishes. After a couple of days without power, they really needed to be washed. I did it in the backyard, using water from our buckets. I did the three bucket method, with the last being a chlorine bleach rinse which meant I didn’t have to heat water on the propane camp stove.
/TANGENT
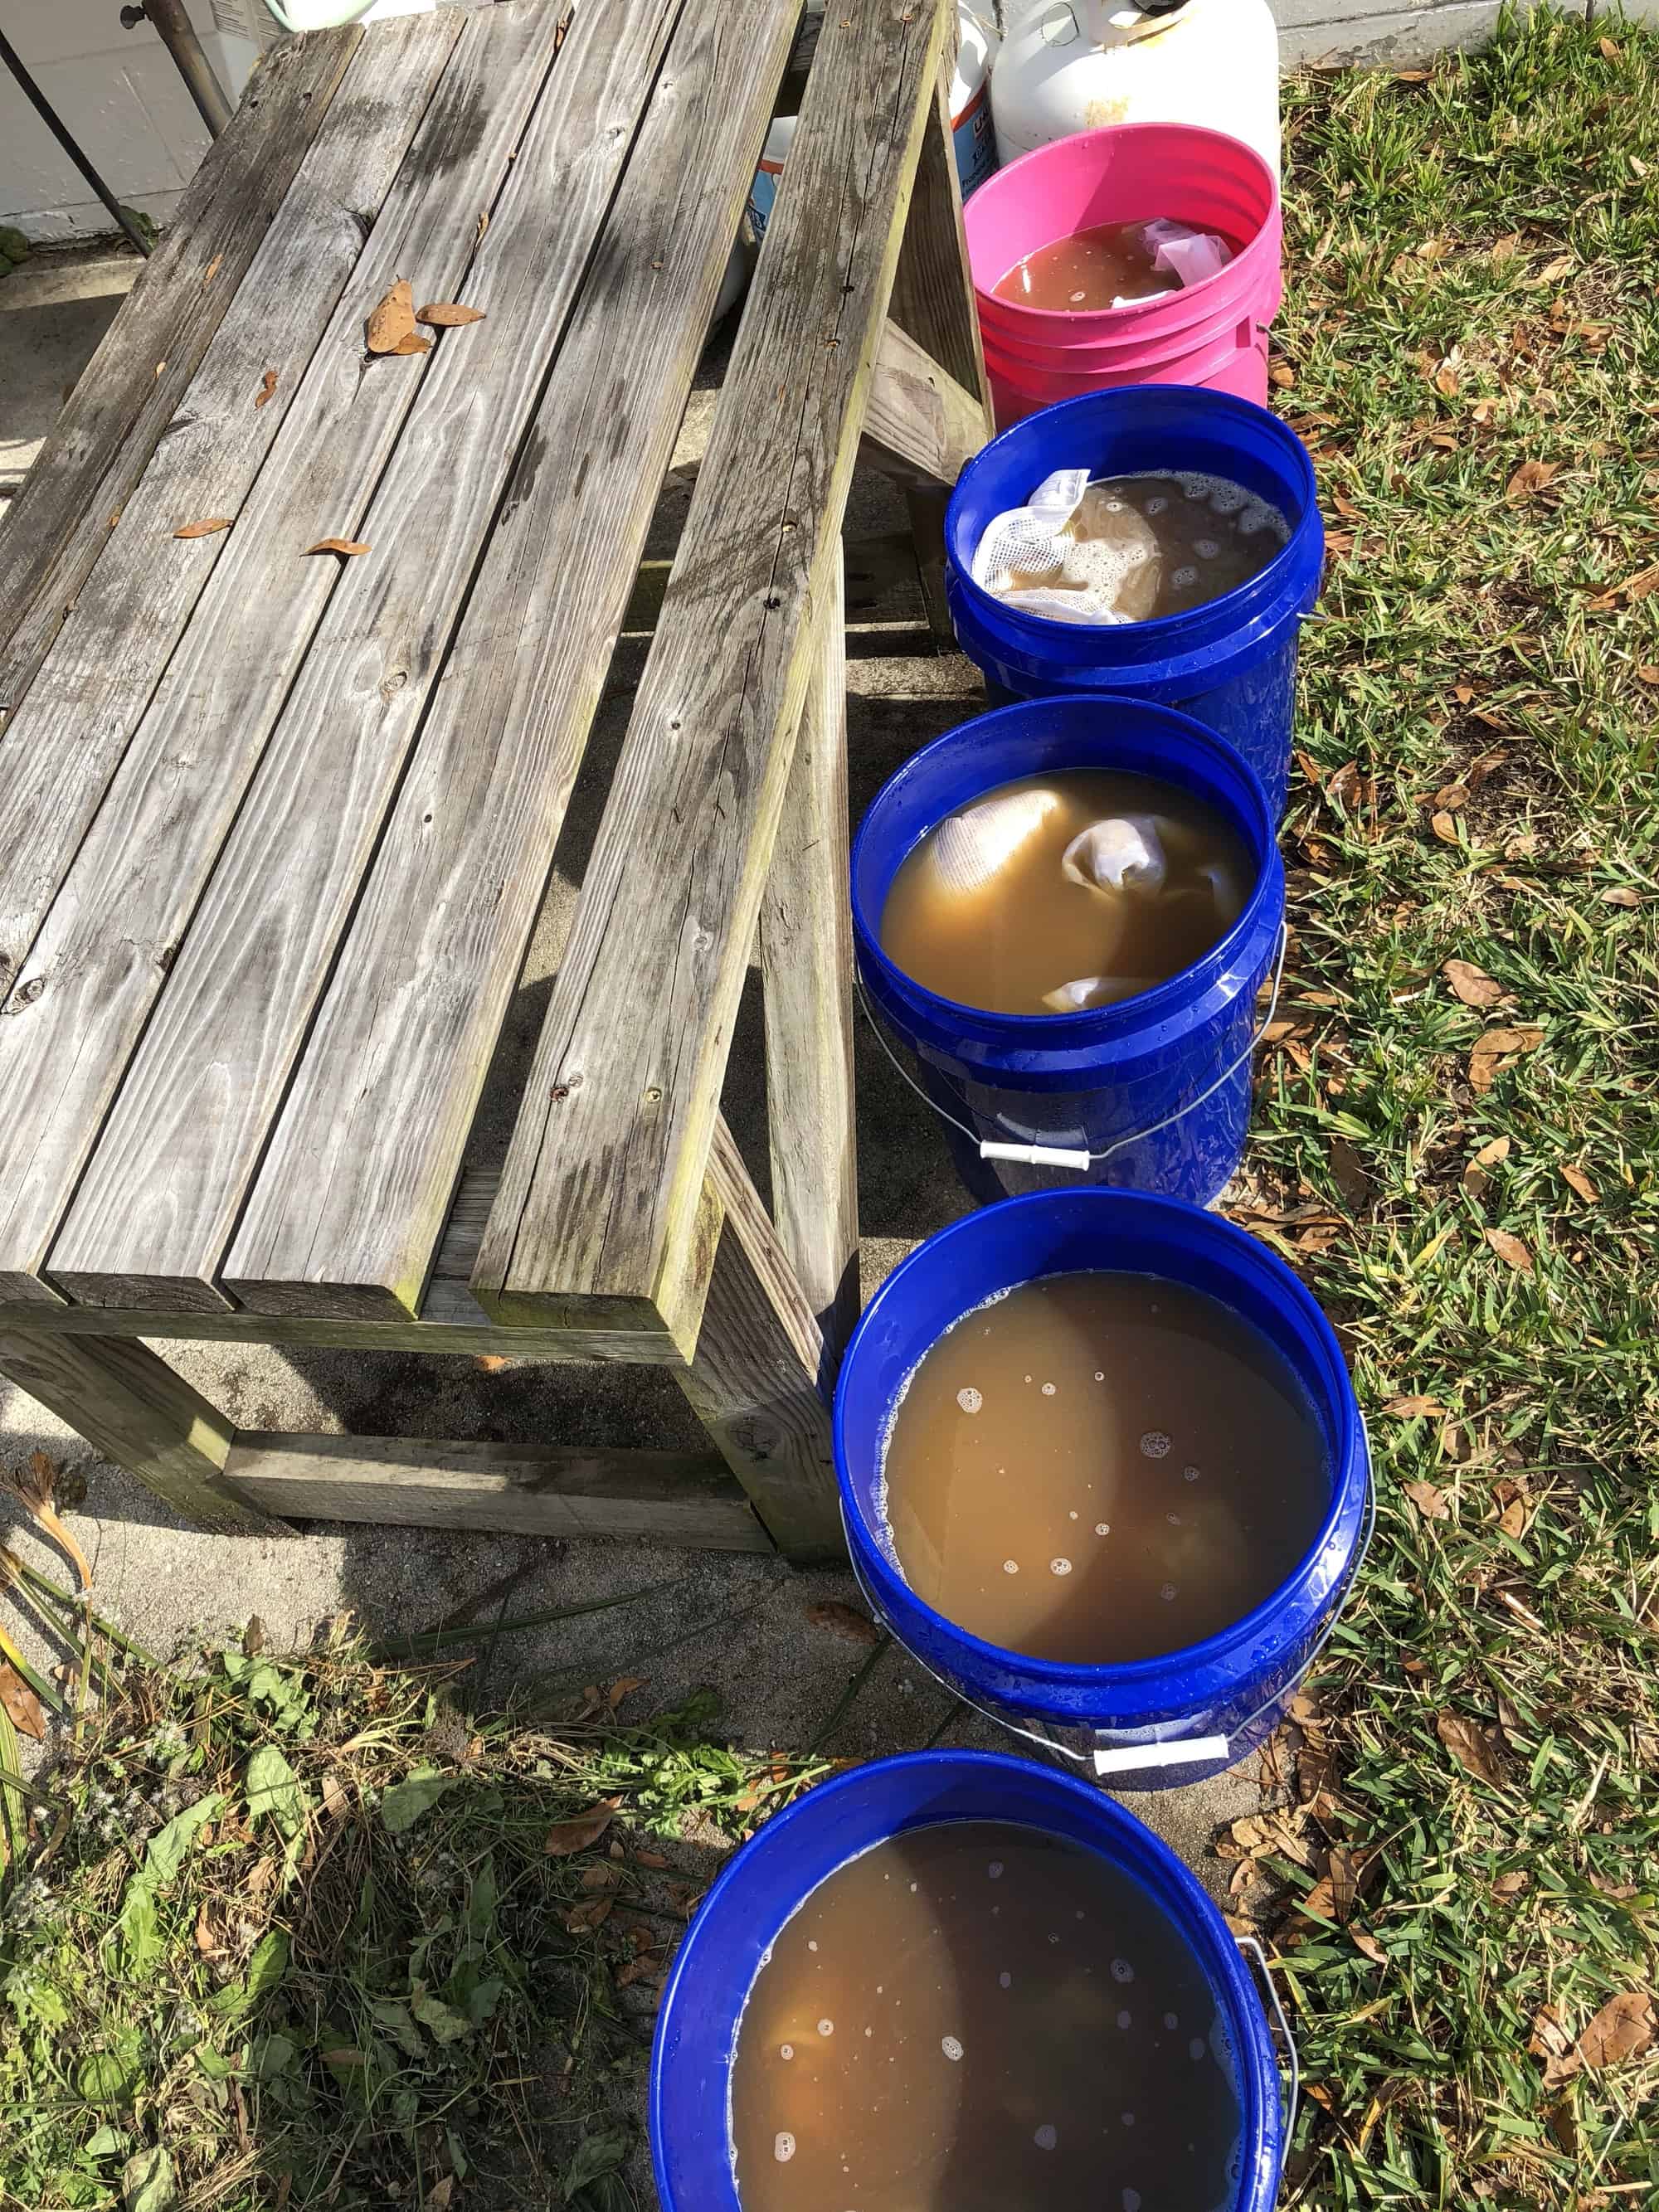
Sorry about the tangent. As I was saying, we have a plethora of 5 gallon buckets. I used those for the cold water soak.
No soap, no hot water, and maybe 15 minutes in the bucket at this point.
I liked the cold water presoak a lot. It is amazing how much comes out of the fleece, simply soaking it in cold water. I put the fleece into the pails to presoak, then finished setting up the rest of the equipment for scouring. When I took the fleeces out of presoak and put them into scour, I dumped the water out, filled the pail with clean water, and put more fleece in to soak. All the fleeces were in the cold water for a minimum of 20 minutes. Some were in there for an hour or more while I scoured others. With cold water, I don’t have to worry about the water cooling and lanolin redepositing onto the fleece. Anything that came out with just cool water should stay out!
I did only one scour with detergent on most of the fleece, followed by two plain water rinses. This was effective for almost all the fleeces. One particularly dirty alpaca fleece got two rounds with detergent and three plain water rinses. One or two of the greasier fleeces needed more scouring and I will be doing another scour on them. Stay tuned for more detailed blog posts on which ones needed more scouring and how I handled that.
I made one other change to the process I described in my previous post on scouring. I added two more bins for scouring, so I had 6 going at one time. When I was at the spinning group retreat, I discovered that my dish pans hold the same volume of water as the other containers I was using for scouring, so I set up two dish pans plus the containers!
With six bins going and the presoak doing a lot of work before scouring, I was able to scour 19.5 pounds of fleece in 4 hours. I have one fleece left to scour, an 8.5 pound black Corriedale fleece that I intend to scour a lock at a time using Fels-naptha soap. Stay tuned for a blog post on that when I get it done.
Spinning
My birthday was the day that NBC broadcast the opening ceremonies of the Olympics, so my parents came over and we watched that while I spun. I worked on the SassyBee polwarth batt I’ve been spinning for a bit.
It was an awesome birthday!
Post Script
My parents wanted to spend a day with me and told me to pick what I’d like to do and that would be their gift. The Tuesday after my birthday, we played an awesome escape game at Escape Effect
We had fabulous Indian food at a restaurant in the same plaza, then we went next door to Escape Effect and took the museum tour at the Chocolate Museum and Cafe.
In October 2016, I went to the Southeastern Animal Fiber Festival (SAFF) with several friends. A subset of those who went are members of the monthly spinning group I attend. We found a good deal on an unfinished Kromski Fantasia and split the cost so that we could have a spinning wheel to use for teaching people to spin when they stop by our group or for members of our group to borrow to learn to wheel spin. I brought the wheel home to finish it.
I decided to finish the wheel with Danish Oil. I also decided to apply Danish Oil to my 15″ Schacht Cricket Rigid Heddle Loom. I started working on both in December 2016. I applied clear Danish oil to the wheel and dark walnut to the loom. I applied three coats, waiting at least 24 hours between coats and making sure that they were dry to the touch before applying the next coat. I was trying to finish them before Orlando Distaff Day 2017, which was on the first Saturday of 2017. I signed up to do a wheel assembly demo and planned to bring all the parts of the Fantasia with me and assemble it at the event.
Early on the Friday morning before Distaff Day, I applied the fourth and final coat of Danish Oil. That Friday night and into Saturday morning it POURED. We’d had no rain for weeks and it felt like the sky had saved all the rain we should have gotten and dumped it all at once. The pieces of the loom and wheel were on the workbench out in the garage, which is where I’d been working on this project. The garage is not climate control. When I got up on Saturday morning, the loom and wheel were both tacky to the touch. In fact, they were tackier than they had been when I applied the fourth coat on Friday morning. Obviously, there was no way I could bring them to Distaff Day!
I left the loom and wheel on the workbench for 3 or 4 weeks. They were still tacky. I brought them into the house, and laid them out around the house on any spare flat surface. I figured they would dry better in the climate-controlled house. Every month or so, I checked the pieces and they were still tacky, though it did seem as though they were slowly improving.
In the spring and summer of 2017, I took some woodworking classes, including one on finishing wood projects. I asked the teachers about my problem. They shook their heads. In all likelihood, the reason for this problem was that the earlier coats weren’t cured as well as I thought they were. I could continue to let the pieces to sit. I could try to wipe them down with mineral spirits, which is the solvent for Danish Oil.
Since the fall of 2017 was so crazy here — Hurricane Irma left us with no power and no water / water restrictions for a week, my mother-in-law’s health declining, my husband getting laid off — I did not think about the loom and wheel pieces at all. When I checked them in late December, for the first time in months, I discovered that they were slightly sticky, but not so much so that you could see my fingerprint on the surface. I decided to try wiping them down with mineral spirits to see what happened. I did just the pieces of the stand for the rigid heddle loom. I figured that was the easiest thing to replace if the mineral spirits ruined the pieces rather than improving them. I wiped the pieces down three times, letting the pieces dry in between. Then I had something else to do and forgot about them.
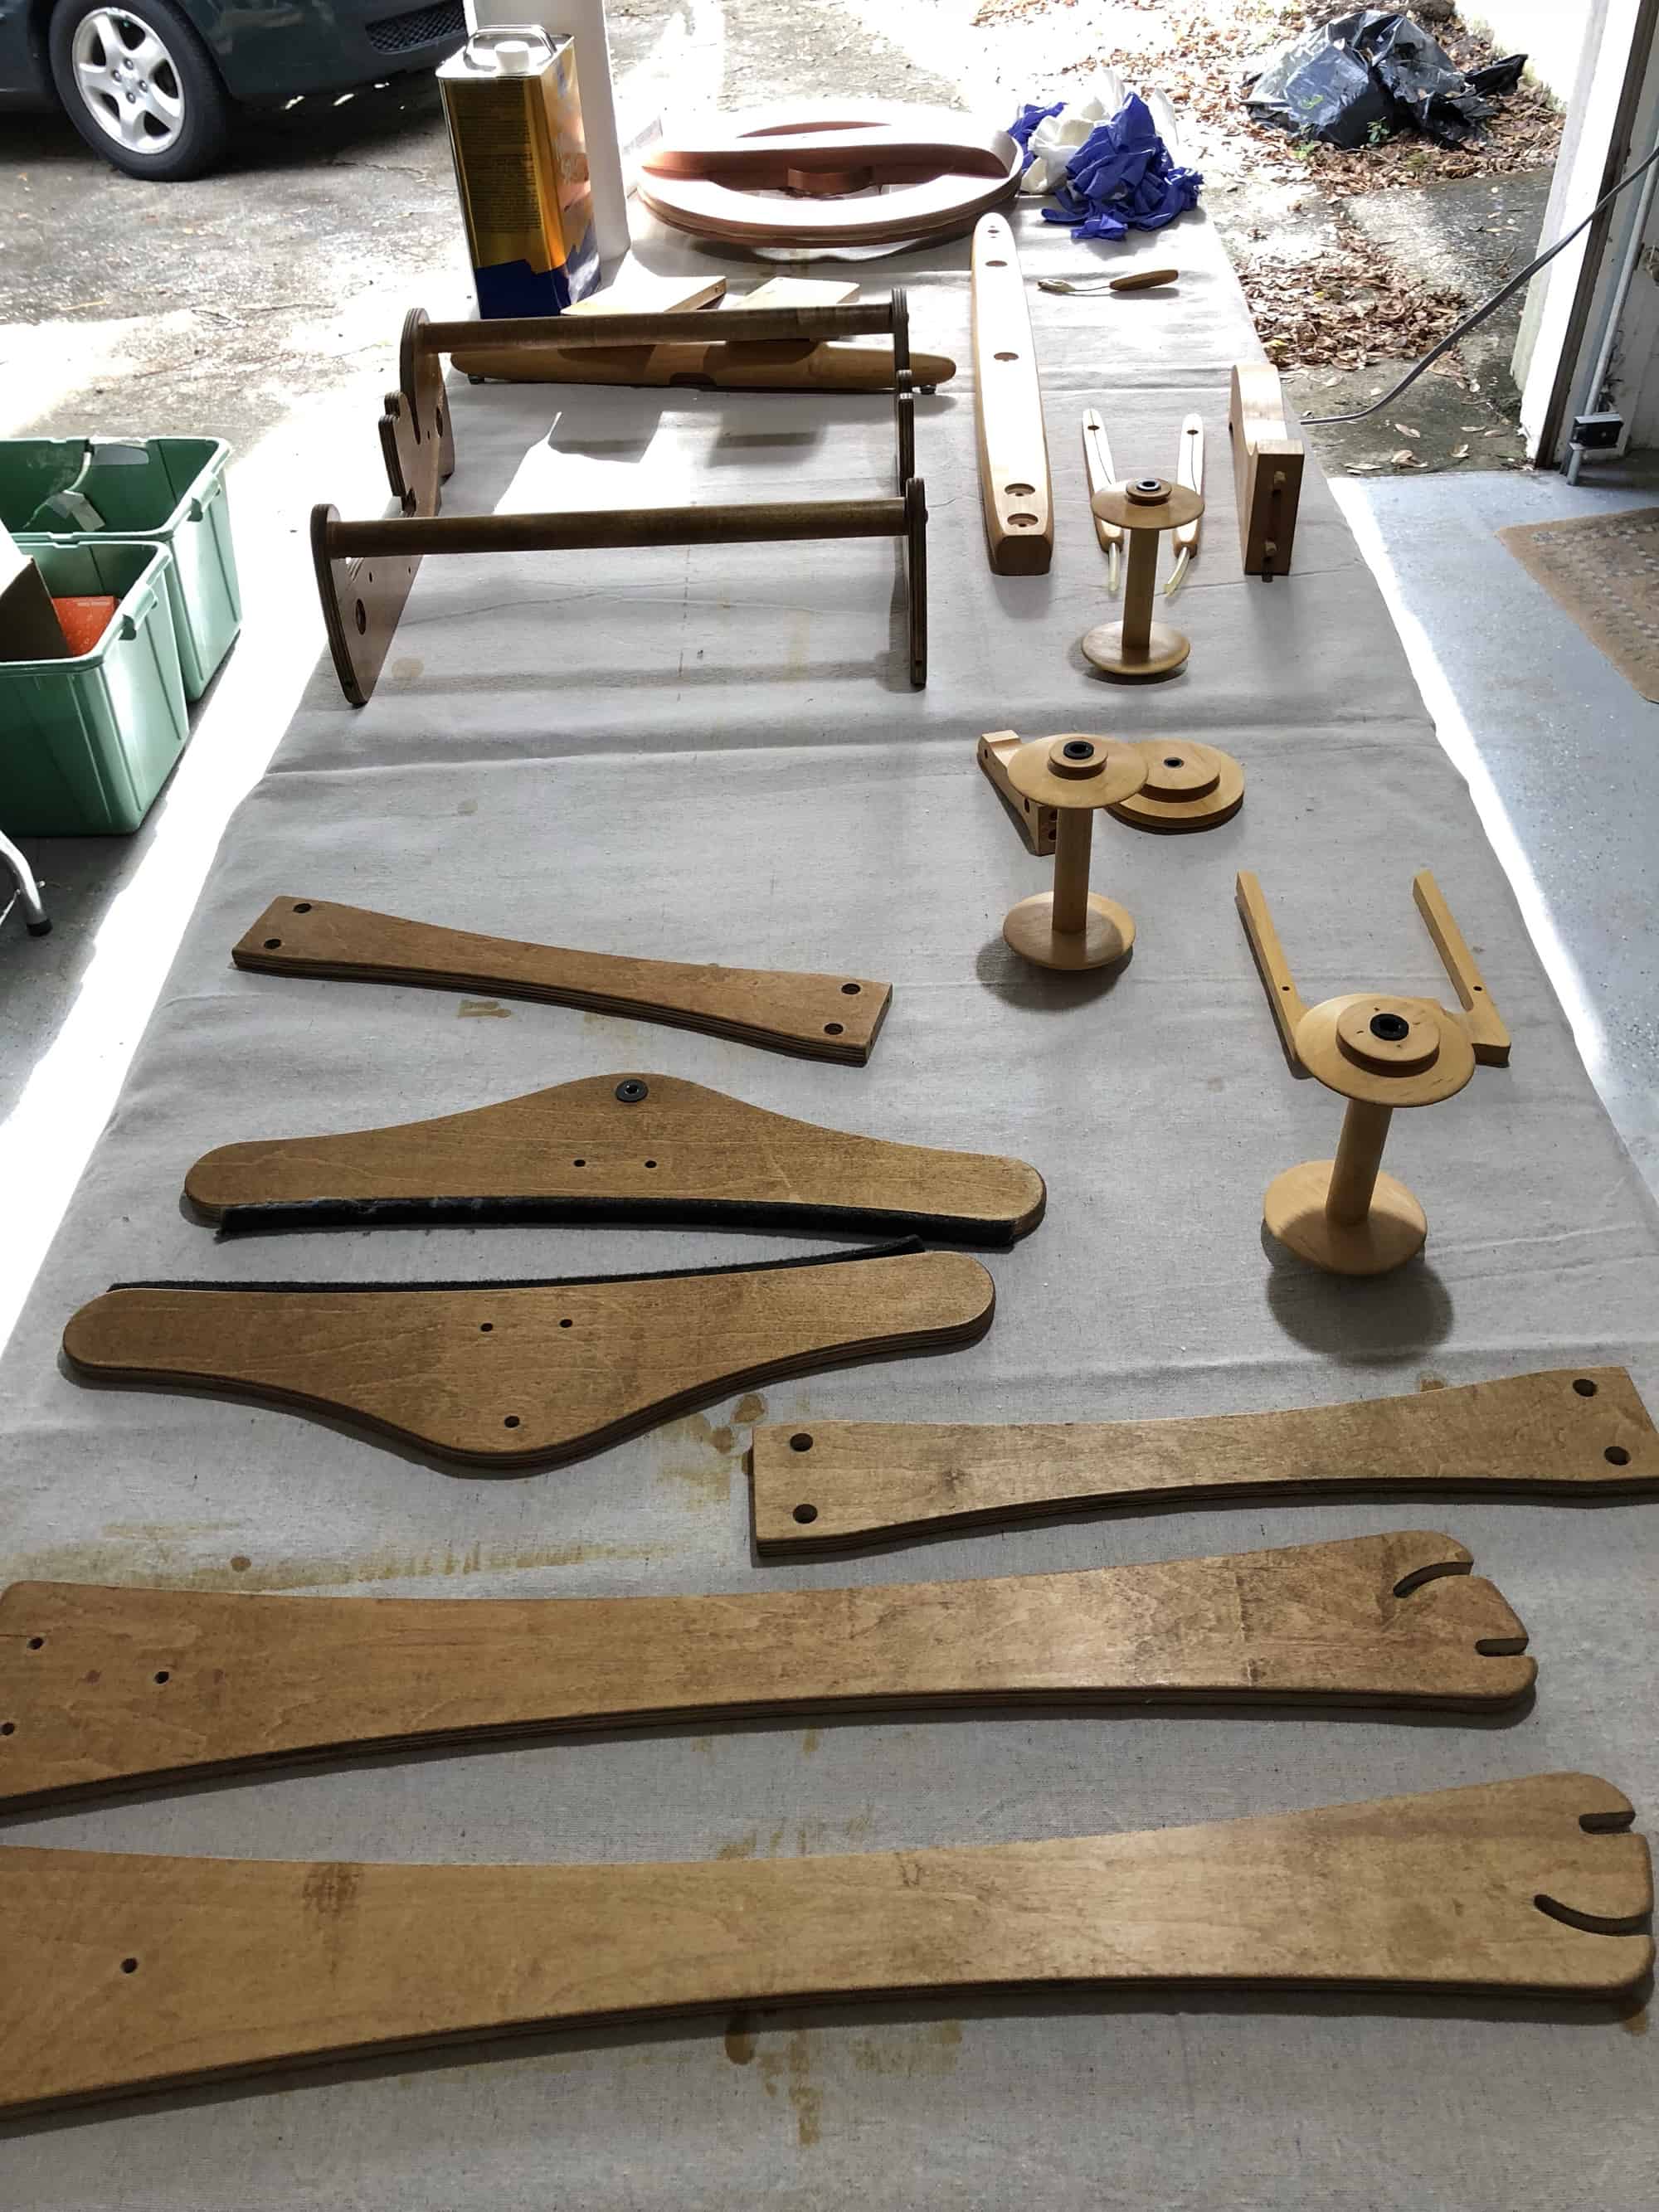
When we came home from our Christmas in New Jersey, my husband finished the project he’d left on the workbench when he unexpectedly left 3 weeks earlier. Then he asked me what projects I have to do. Due to the high humidity of our summers, woodworking is a winter task here and he knew that I’d been saving up some projects, waiting for the weather to co-operate. I checked the three pieces of the loom stand and found that they were no longer sticky. The mineral spirits worked! For the past two days, I’ve been working on the remaining loom pieces and the wheel pieces.
This morning, I wiped down the pieces with mineral spirits for the fourth time. The repeated coats of mineral spirits seem to be doing their work! It’s been humid the last two days and I think that this has caused more of the oil to come to the surface. Despite this, the pieces are clearly improving and becoming less sticky overall. For some of the pieces, this fourth coat should be the last coat I need to apply. I will need to flip a couple of the pieces over so I can do the back. My previous despair and fear that I’d ruined two expensive pieces of equipment have given way to hope. I think this is going to work!
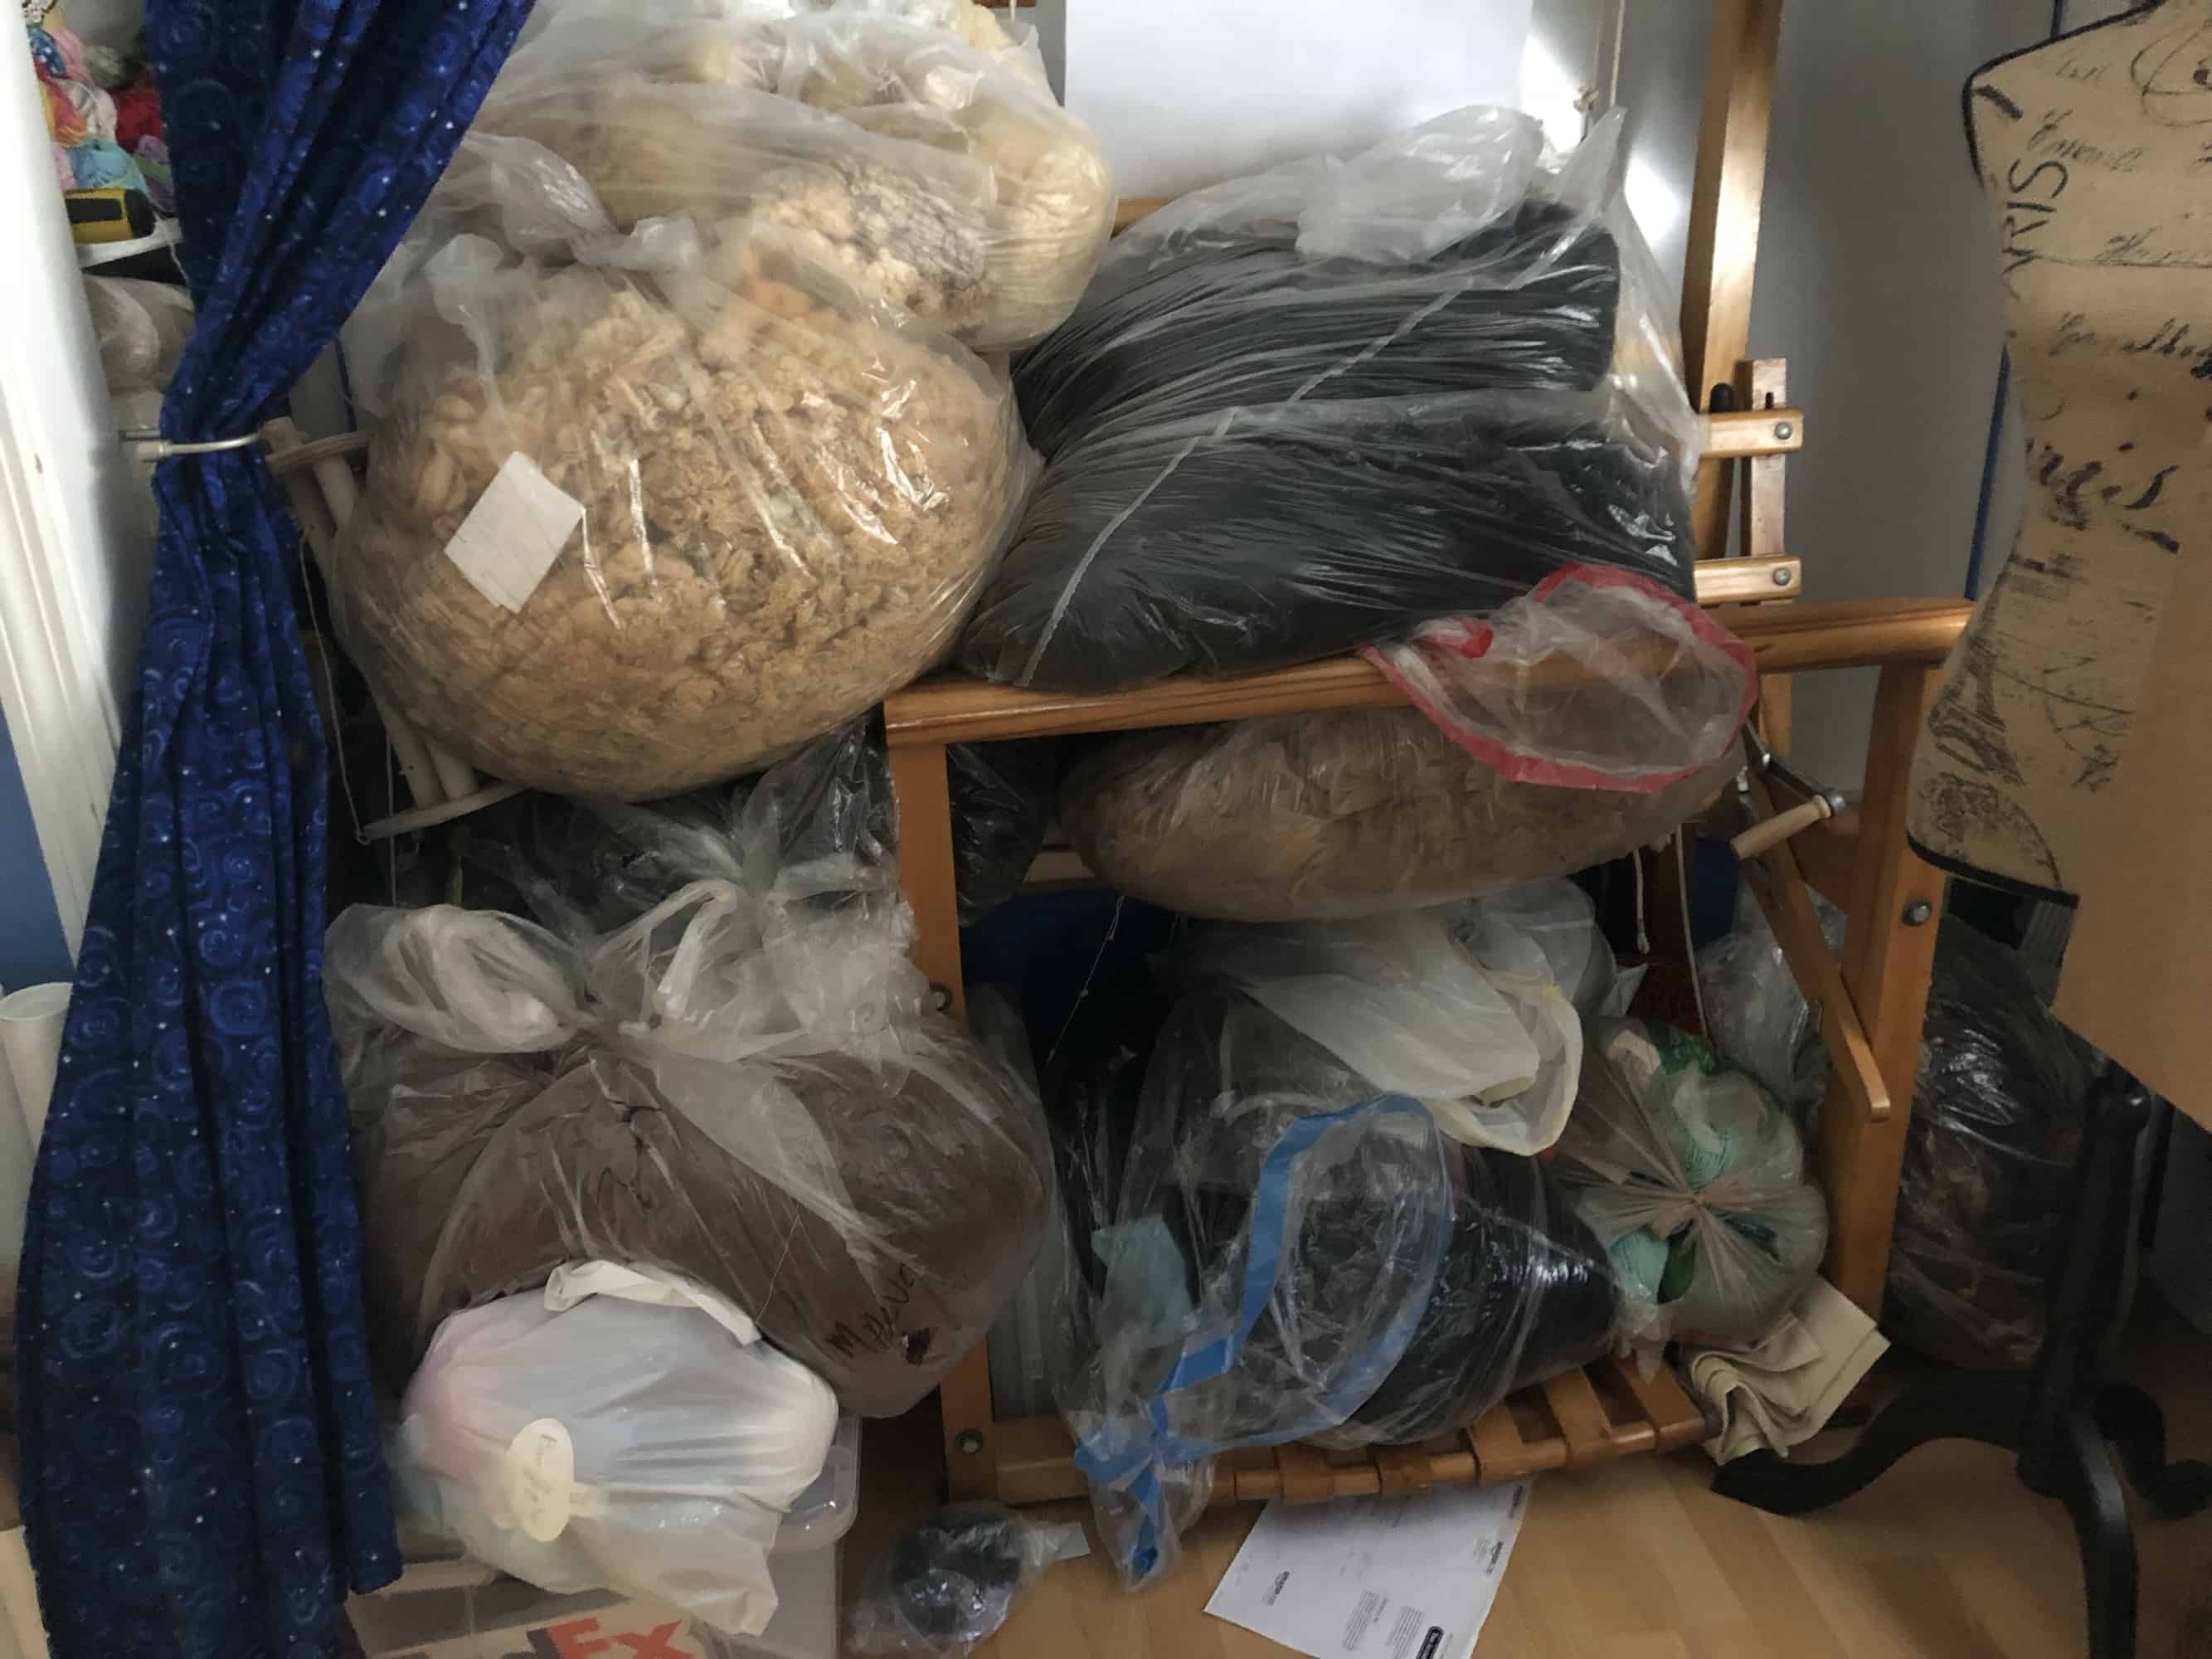
Last week, I posted about inventorying my stash. The post included two pictures showing all the raw fleece I have in my office. In case you missed it, here’s those two pictures again. The main pile, with all the full fleeces, has taken over one of my four-harness floor looms.
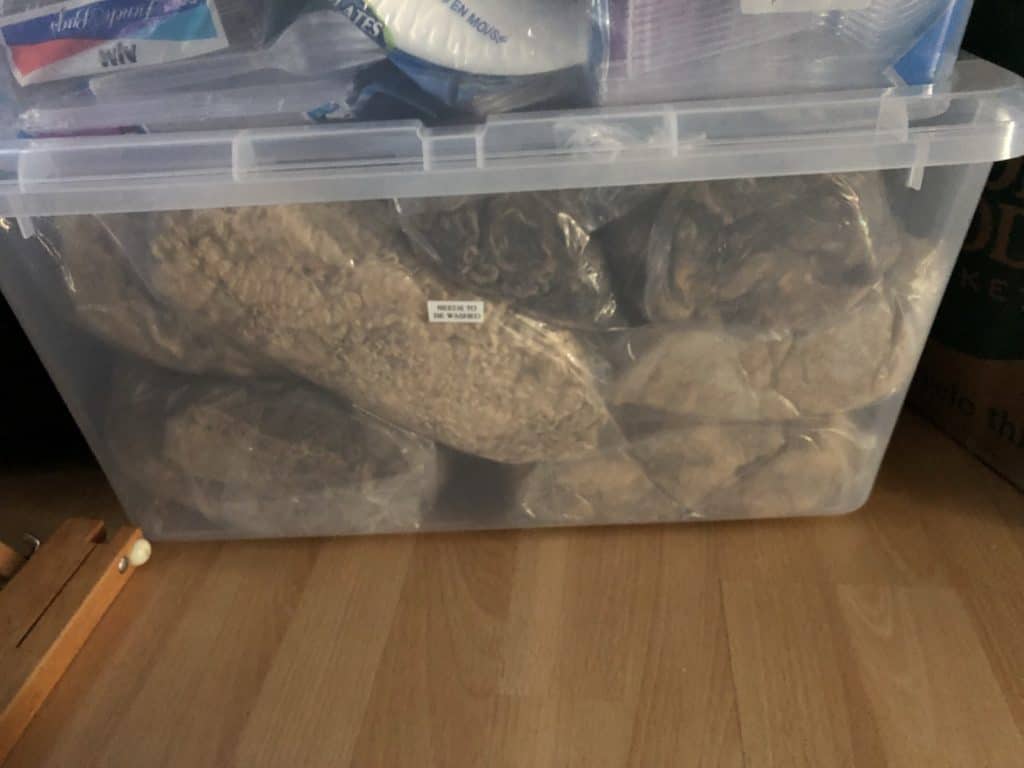
This bin consists of small portions of fleece, no more than a pound of any one breed.
Once upon a time, I said I would scour a fleece once, just to say I had done it, and then never do it again. It seemed like too much work and there’s so many beautiful prepared fibers available, why would I bother scouring fleece myself? But then I decided I wanted to do some breed-specific spinning, to understand the differences between breeds and why I’d chose one over another for a specific knitting, crocheting, or weaving project. My stash of spinning fiber exploded and I learned that many breeds aren’t available in prepared forms. I bought a couple fleeces and sent them to mills for processing.
The mills did a fine job, but then I took some classes and did some reading and learned how you can get very different yarns based on how you prep the fiber for spinning. The options are limited when you send fleece to be processed at a mill. I wanted to have more control over the finished yarn, or at least to understand how the different preps would change the finished yarn. In other words, my spinning journey keeps moving me backwards in the process of producing yarn. If I really want to understand yarn, I have to start at the beginning, with the raw wool. This is how I roll; I like to take things back to basics. So I started acquiring raw fleece and I made a spreadsheet to keep track of which fleeces and how much raw fleece and how much it cost and how much I lose in each step of processing.
Methodology
This post is not a step-by-step tutorial on how to scour fleece. This is only the third time I’ve scoured fleece; everything I know I learned from Beth Shearer Smith. Beth scours something like 300 pounds of fleece a year, partly for her own use and partly for use in the classes she teaches. Fortunately, we all get to learn from her through her wonderful writing. Visit her website for posts on the three ways of scouring: bulk scouring (most relevant to the rest of my blog post), tulle sausages, and by the lock. If you’d like more information on which method to use for a particular fleece, Beth’s book, The Spinners Book of Fleece (Amazon affiliate link), walks you through the reasons you might pick one of these methods over another. In the rest of my blog post, I’ll be describing the ways my set up differs from Beth’s and why I made those adjustments. However, the overall method is the bulk scouring method I linked you to above.
My Set Up
I am not able to use exactly the same set up Beth uses. My washer and dryer are not flat on top. They are at a bit of an angle. This means that anything I put on top of them is in danger of sliding off. I do not have a utility sink in my tiny laundry room. In order to get water from a tap, I could unhook the washer and attach a hose to that, but then I have to figure out how to dump out the water. Finally, the first time I went to scour fleece, I measured the temperature of the hot water coming out of my tap. It was only 110 degrees Fahrenheit. The Unicorn Power Scour requires a minimum of 115 degrees Fahrenheit. I had a plumber check our hot water heater, and it is set to 120 degrees Fahrenheit, which is the hottest they are allowed to set it by law. Our hot water is original to our house, which was built in 1977! At some point, we will have to replace it and maybe when we do, I’ll be able to get water out of the tap at a temperature that will work for scouring fleece. Until that day, I have to heat the water to get it hot enough for scouring fleece. It’s a lot easier to do that if I work outside.
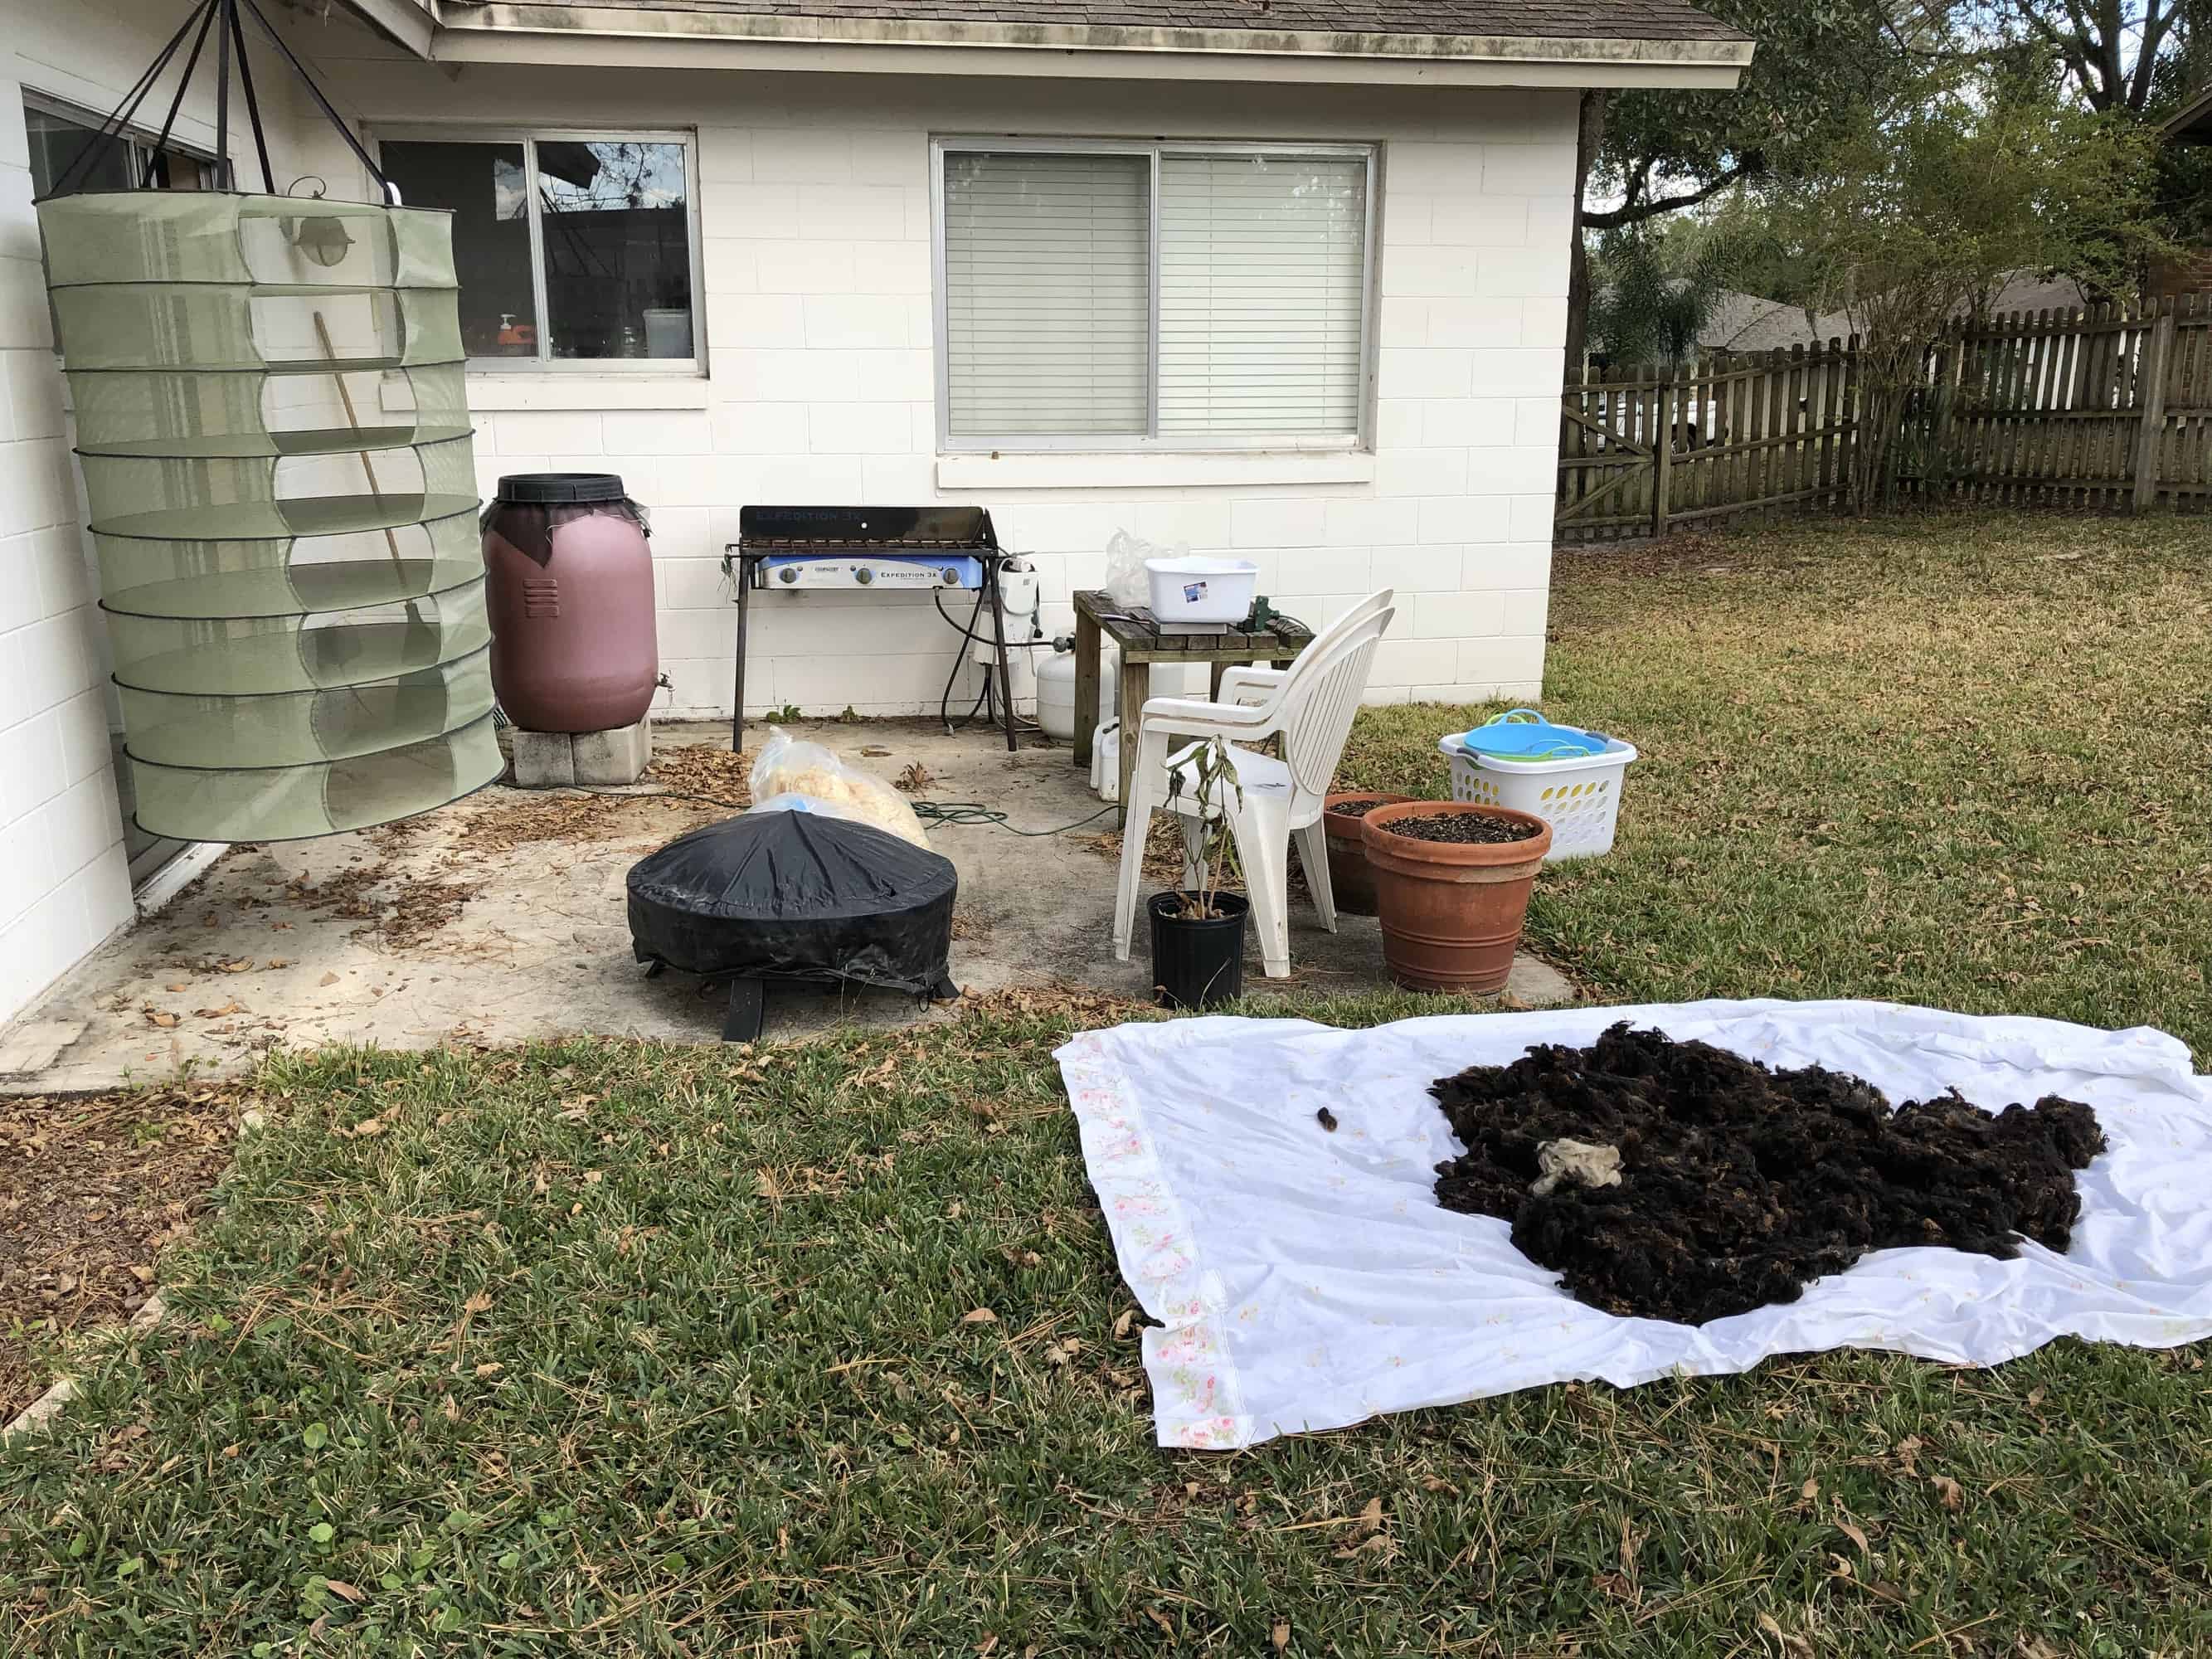
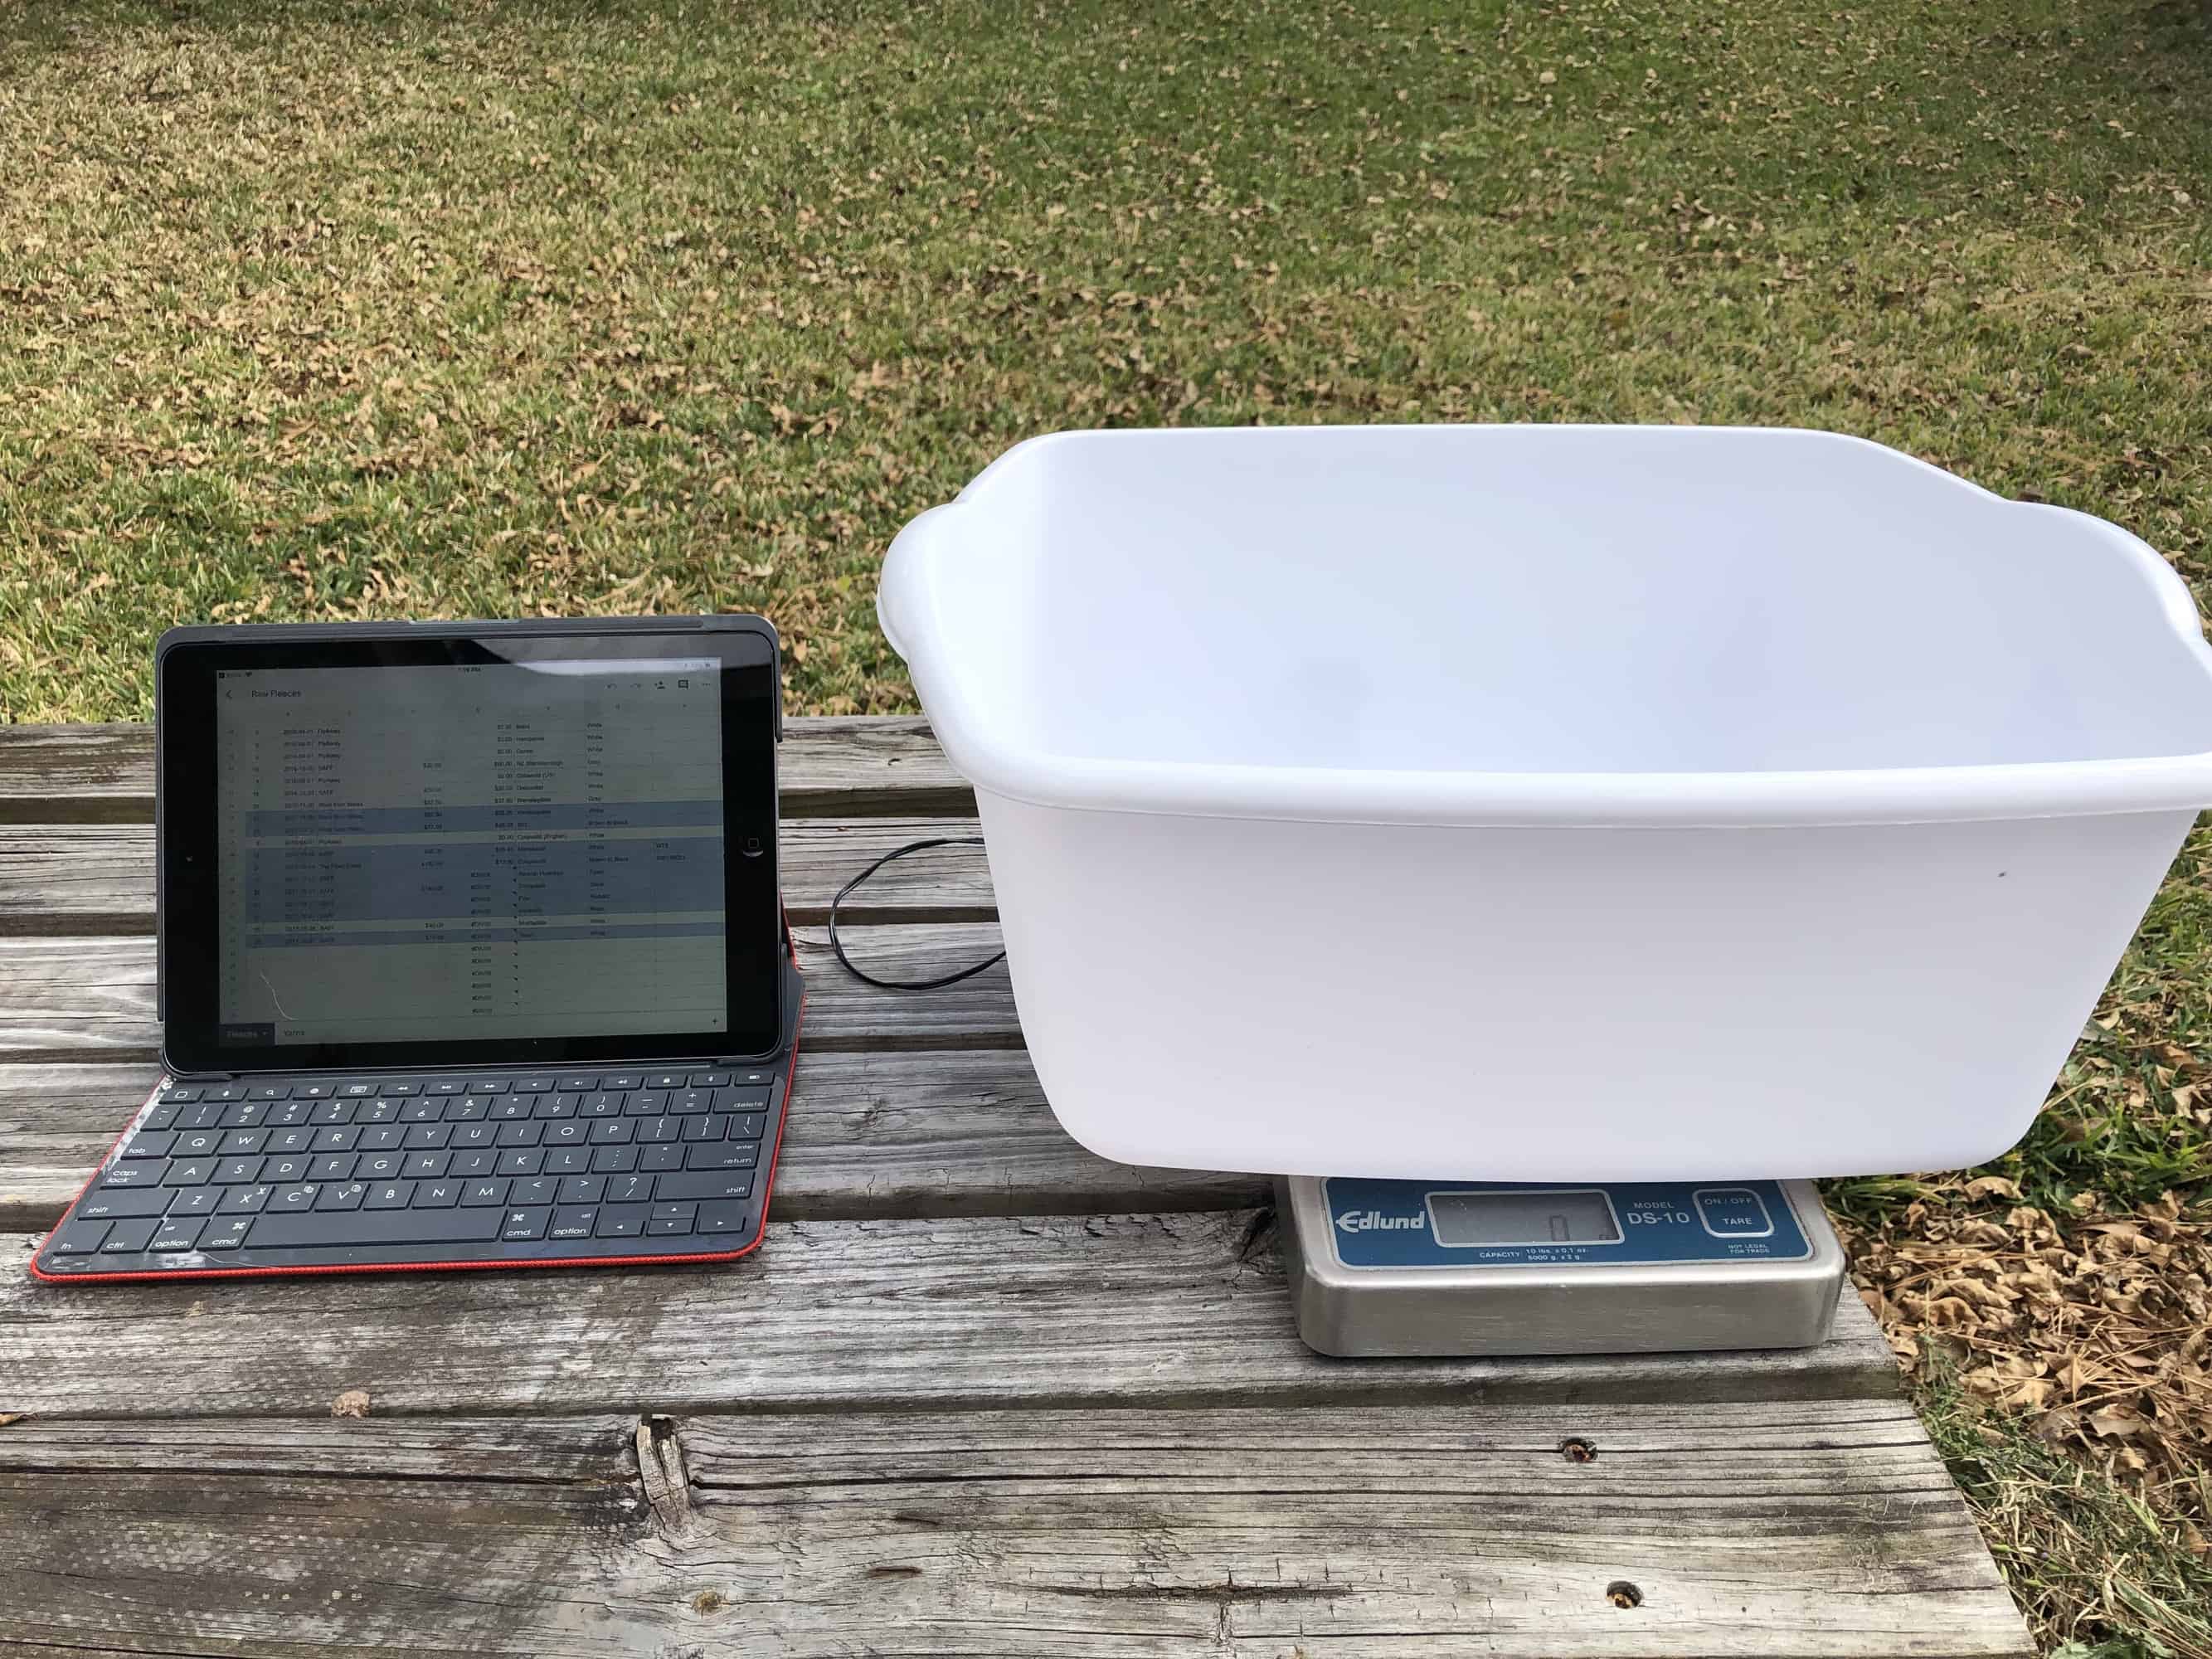
Apparently, I was too busy scouring to take a picture when I was fully set up, but you can see most of it here. I ended up adding a card table, which I placed just behind the fire pit, over those two bags of fleece you see peeking up behind it. In this picture, the white dish pan is sitting on top of my kitchen scale. I moved the dish pan and the scale to the card table and then set up the wash bins on the wooden table.
Since part of my learning process is understanding how much weight is lost in processing, I weigh fleece just before I wash it. I use an Edlund DS-10 food scale (Amazon Affiliate link), which I bought at a food supply place 15 or 20 years ago and which I also use for weighing ingredients when I bake. The scale weighs in either grams or ounces and can handle up to 10 pounds. I keep the fleece in the plastic bag and shove it into the dish pan. The fleeces are almost always larger than the dish pan can hold, but the plastic bag helps keep them contained. On my iPad, I have my fleece spreadsheet open so I can enter the weight of the fleece immediately after I weigh it.
Another option for weighing fleece is a fish scale (Amazon affiliate link). One of my friends brought hers to the fleece barn at SAFF this year and I have to get one of these! They are inexpensive, portable, less awkward to manage, and can handle more weight than my food scale. Sounds like a win all the way around!
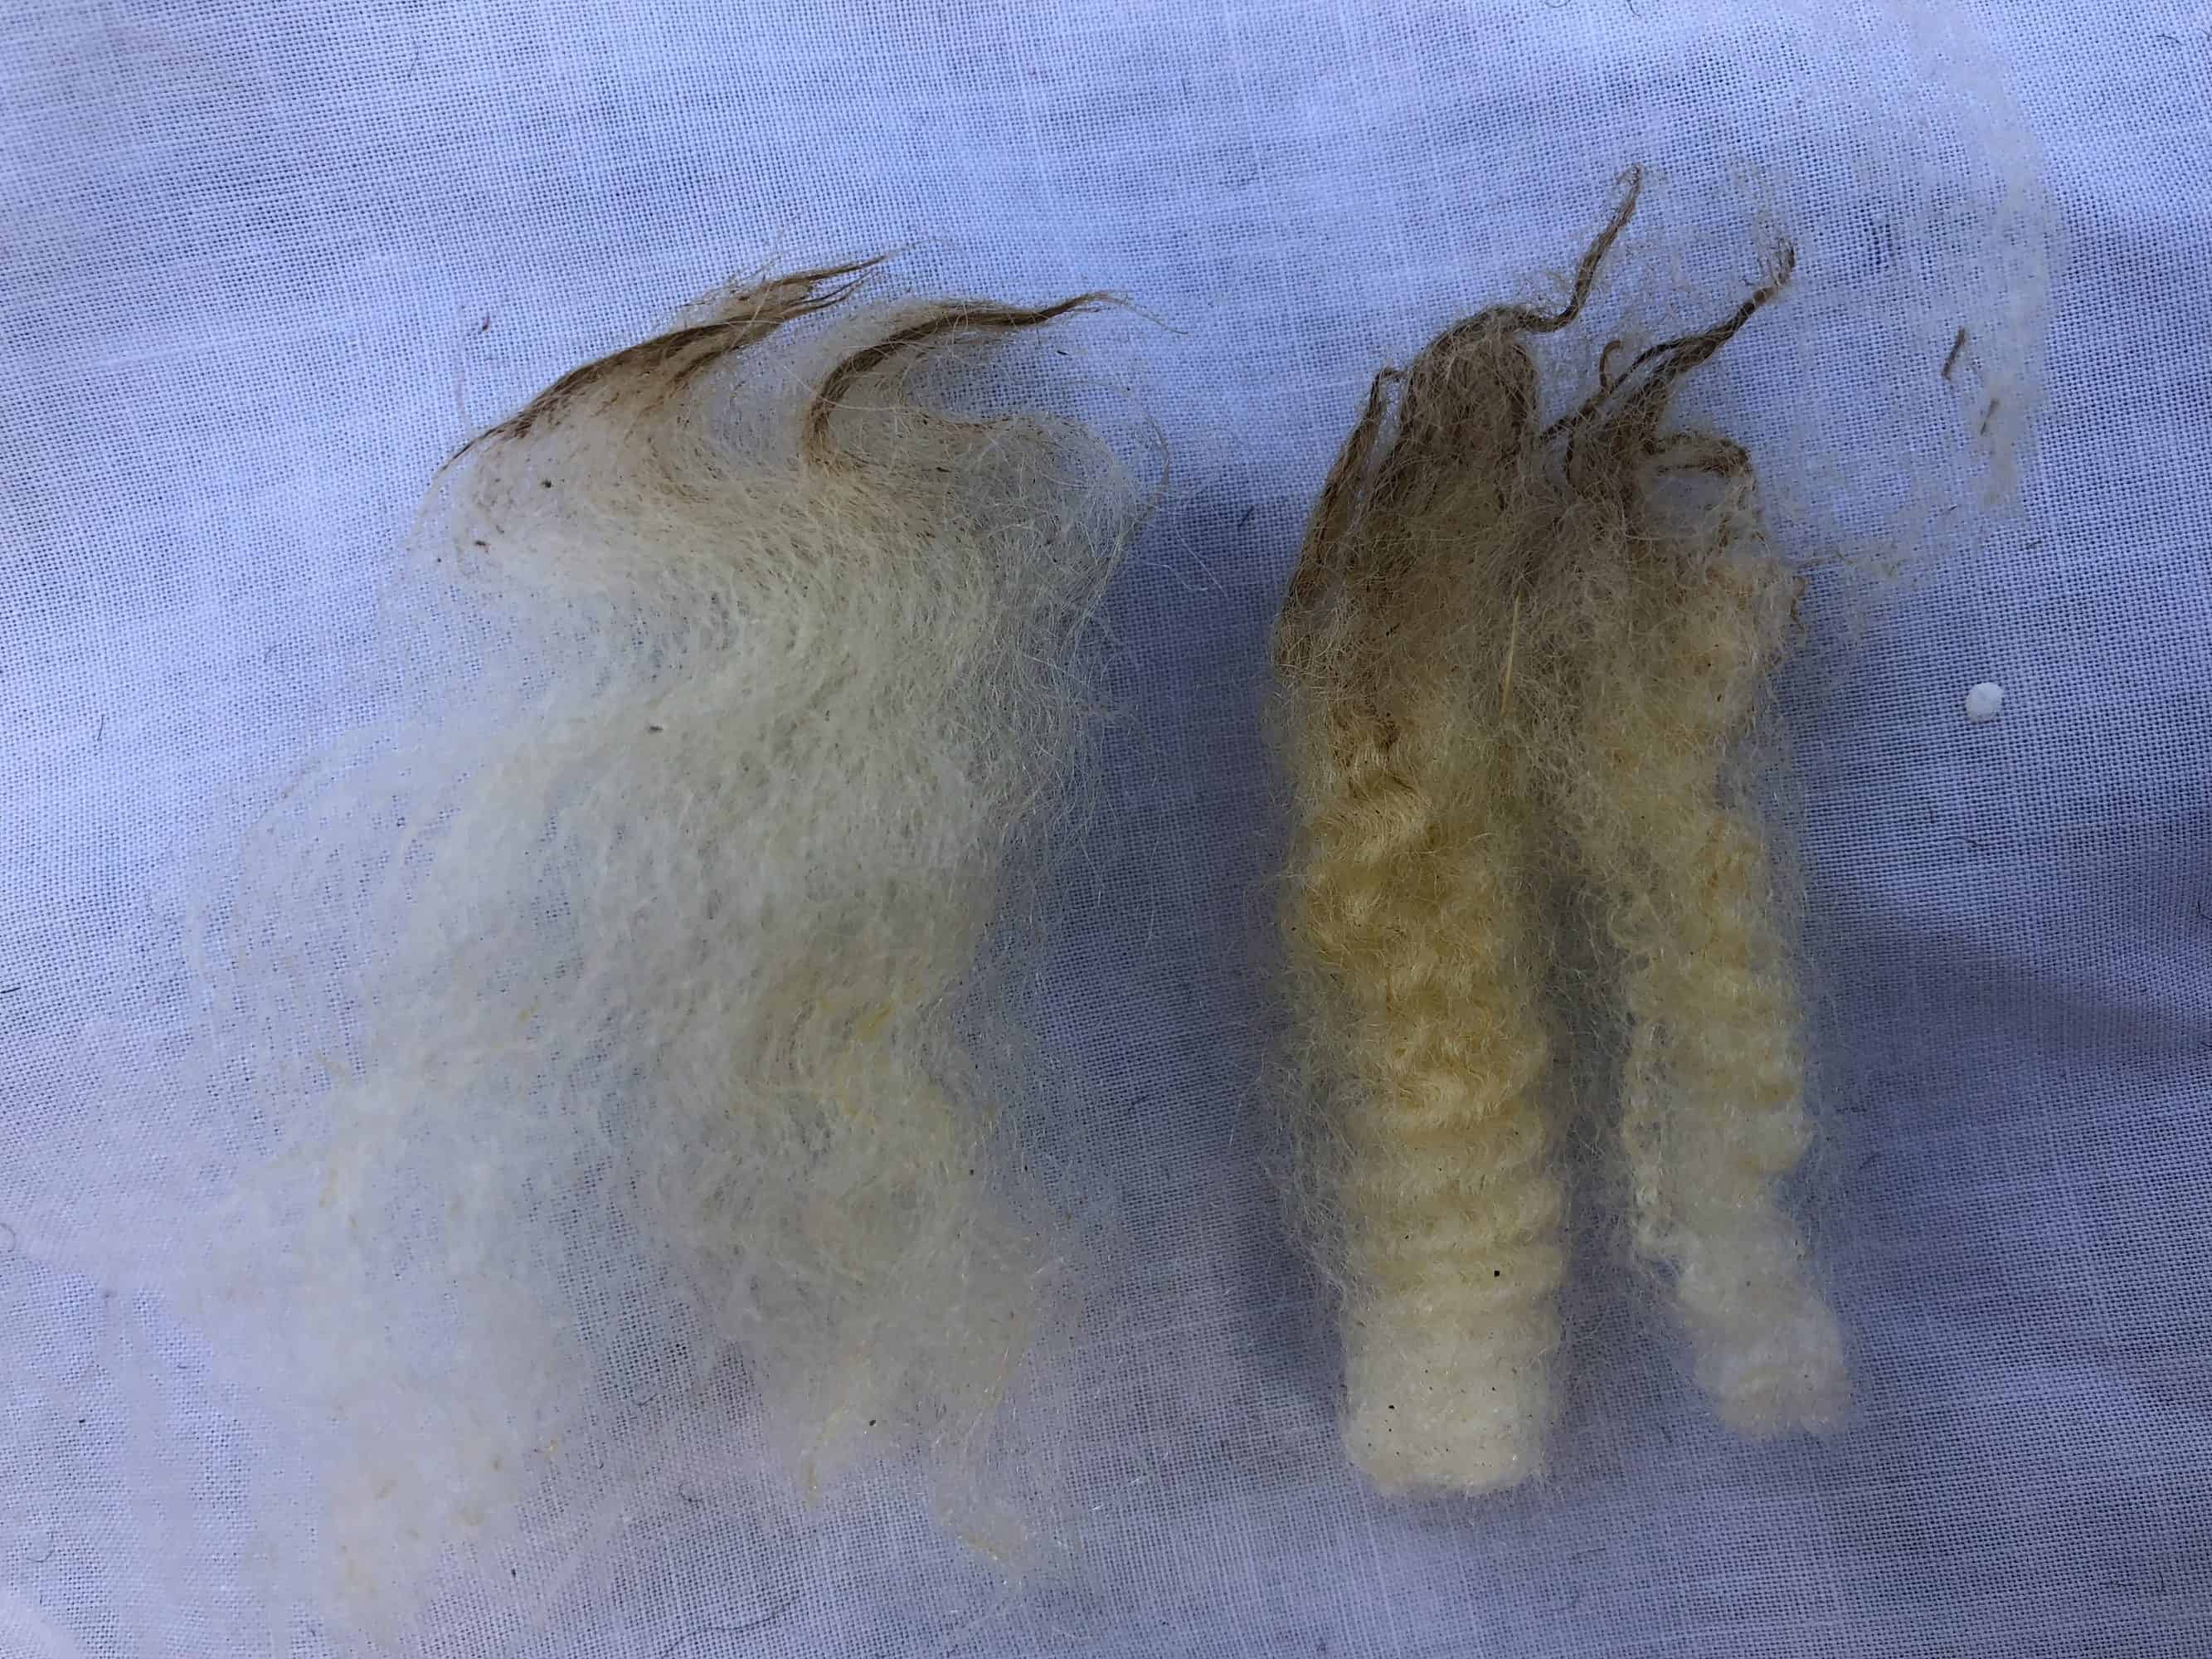
After weighing, I spread the fleece out on a sheet on the ground. I don’t have a skirting table (it’s on my wish list!), so this is the best I can do. When you buy a fleece at a show, you do your best to evaluate it, but you can’t always see everything. Spreading the fleece out lets you make some decisions before you scour. You get an idea of how dirty the fleece is. Most fleeces only need two washes, but if this one’s particularly dirty maybe it will need three. Sometimes the staple length or texture is different on different parts of the fleece. Do you want to separate out the different staples or textures to use them in different projects or are you going to keep them all the same? For example, look at the difference in the crimp on these two locks, both from the same Texel fleece.
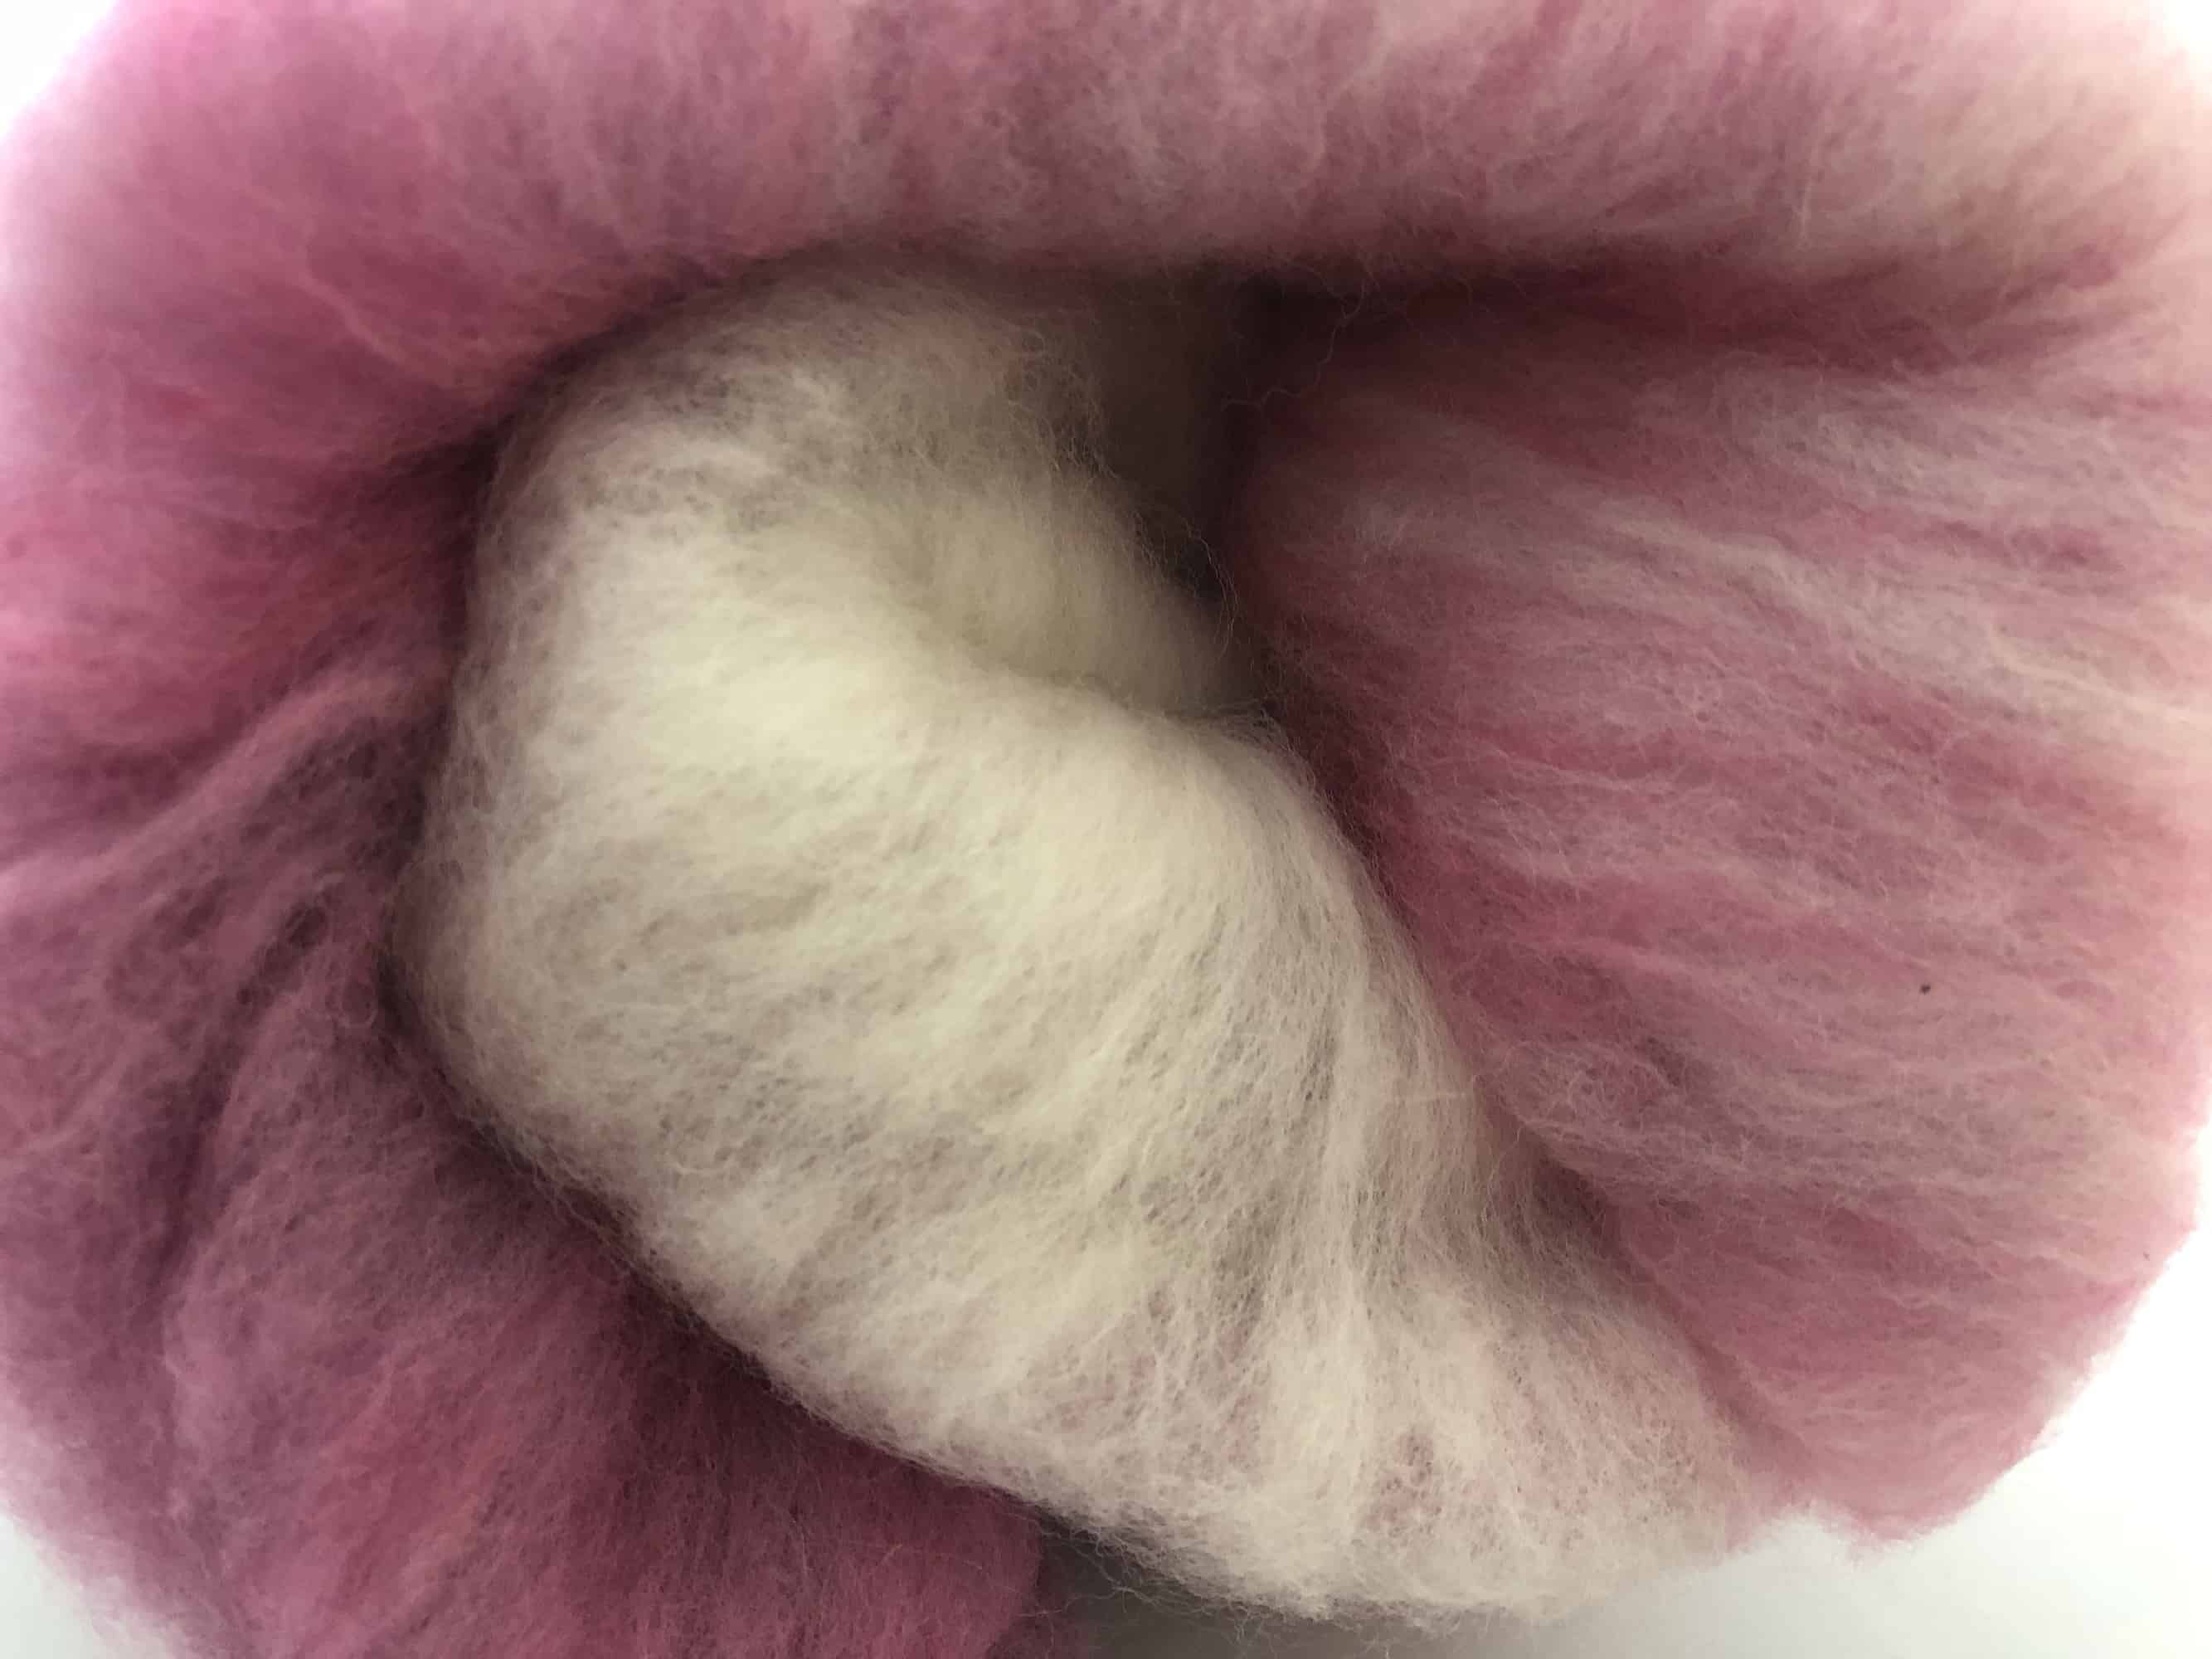
The fleece on the sheet in the layout picture above is a piebald Finn fleece. I thought I might want to separate it by color, but once I spread it out, I discovered that there was only one fist-sized clump of white, visible on the left end of the fleece. The rest of the white is stranded throughout the darker parts of the fleece and it would be impossible to separate the colors. I’ll break up the one clump of white and blend it in when I process this fleece. I assume the finished yarn will have a heathered appearance.
In order to get hot water for scouring, I bought a propane-heated outdoor shower. I wasn’t able to get it to work properly — water was spraying out everywhere, partly because the connection to the hose wasn’t solid, despite sealing it with Teflon tape and partly because the switch on the shower head was stuck in the on position. I ended up soaking wet from the thighs down and if someone had been there to get it on video, I’m sure it would have been a great laugh.
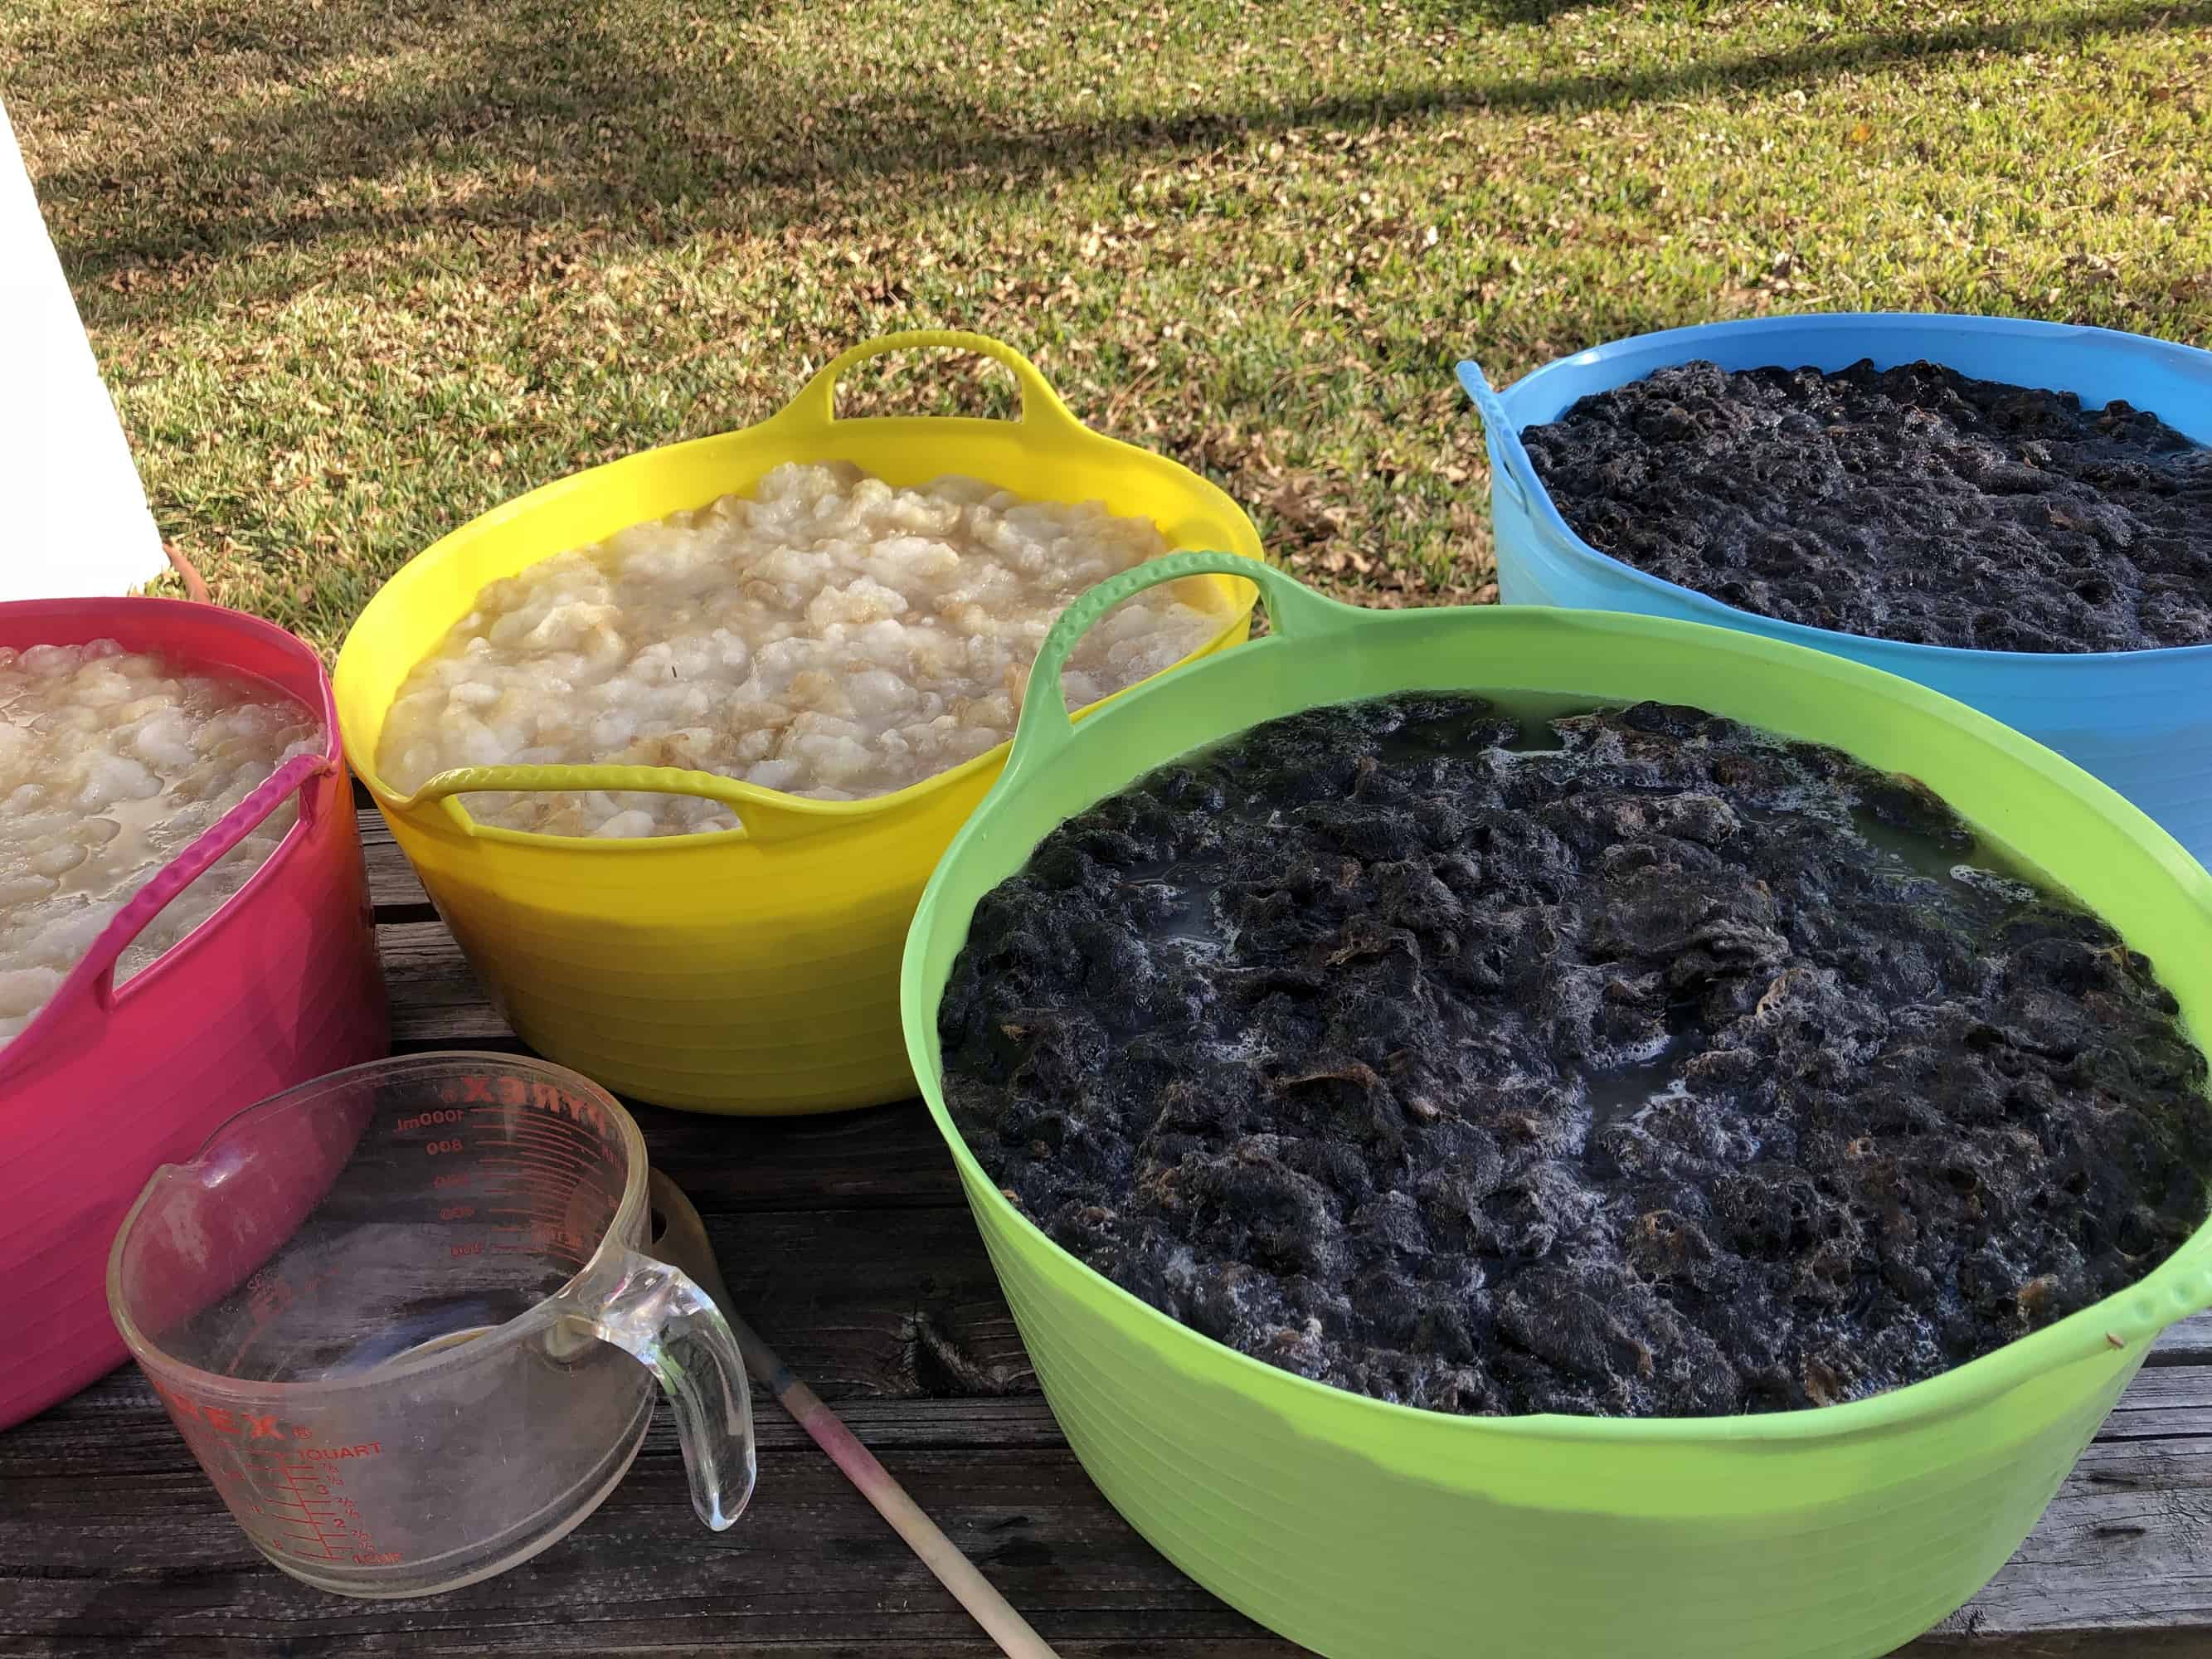
After an hour of fiddling with it, I gave up and heated water on the camp stove you can see in the layout picture. I have a couple of 20 quart pots that I used for heating water. When I am putting a dry fleece in for its first wash, it requires nearly one entire pot of water. For the subsequent washes and rinses, the fleece is already saturated so I only need about half of a pot of water. Rather than lifting the hot pots and pouring it in, I use a 4-cup Pyrex measuring cup (Amazon affiliate link) (I inherited mine from my friend Stacy’s grandmother) to transfer the water from the pots to the bins. Easier on my back and I’m less likely to get burned!
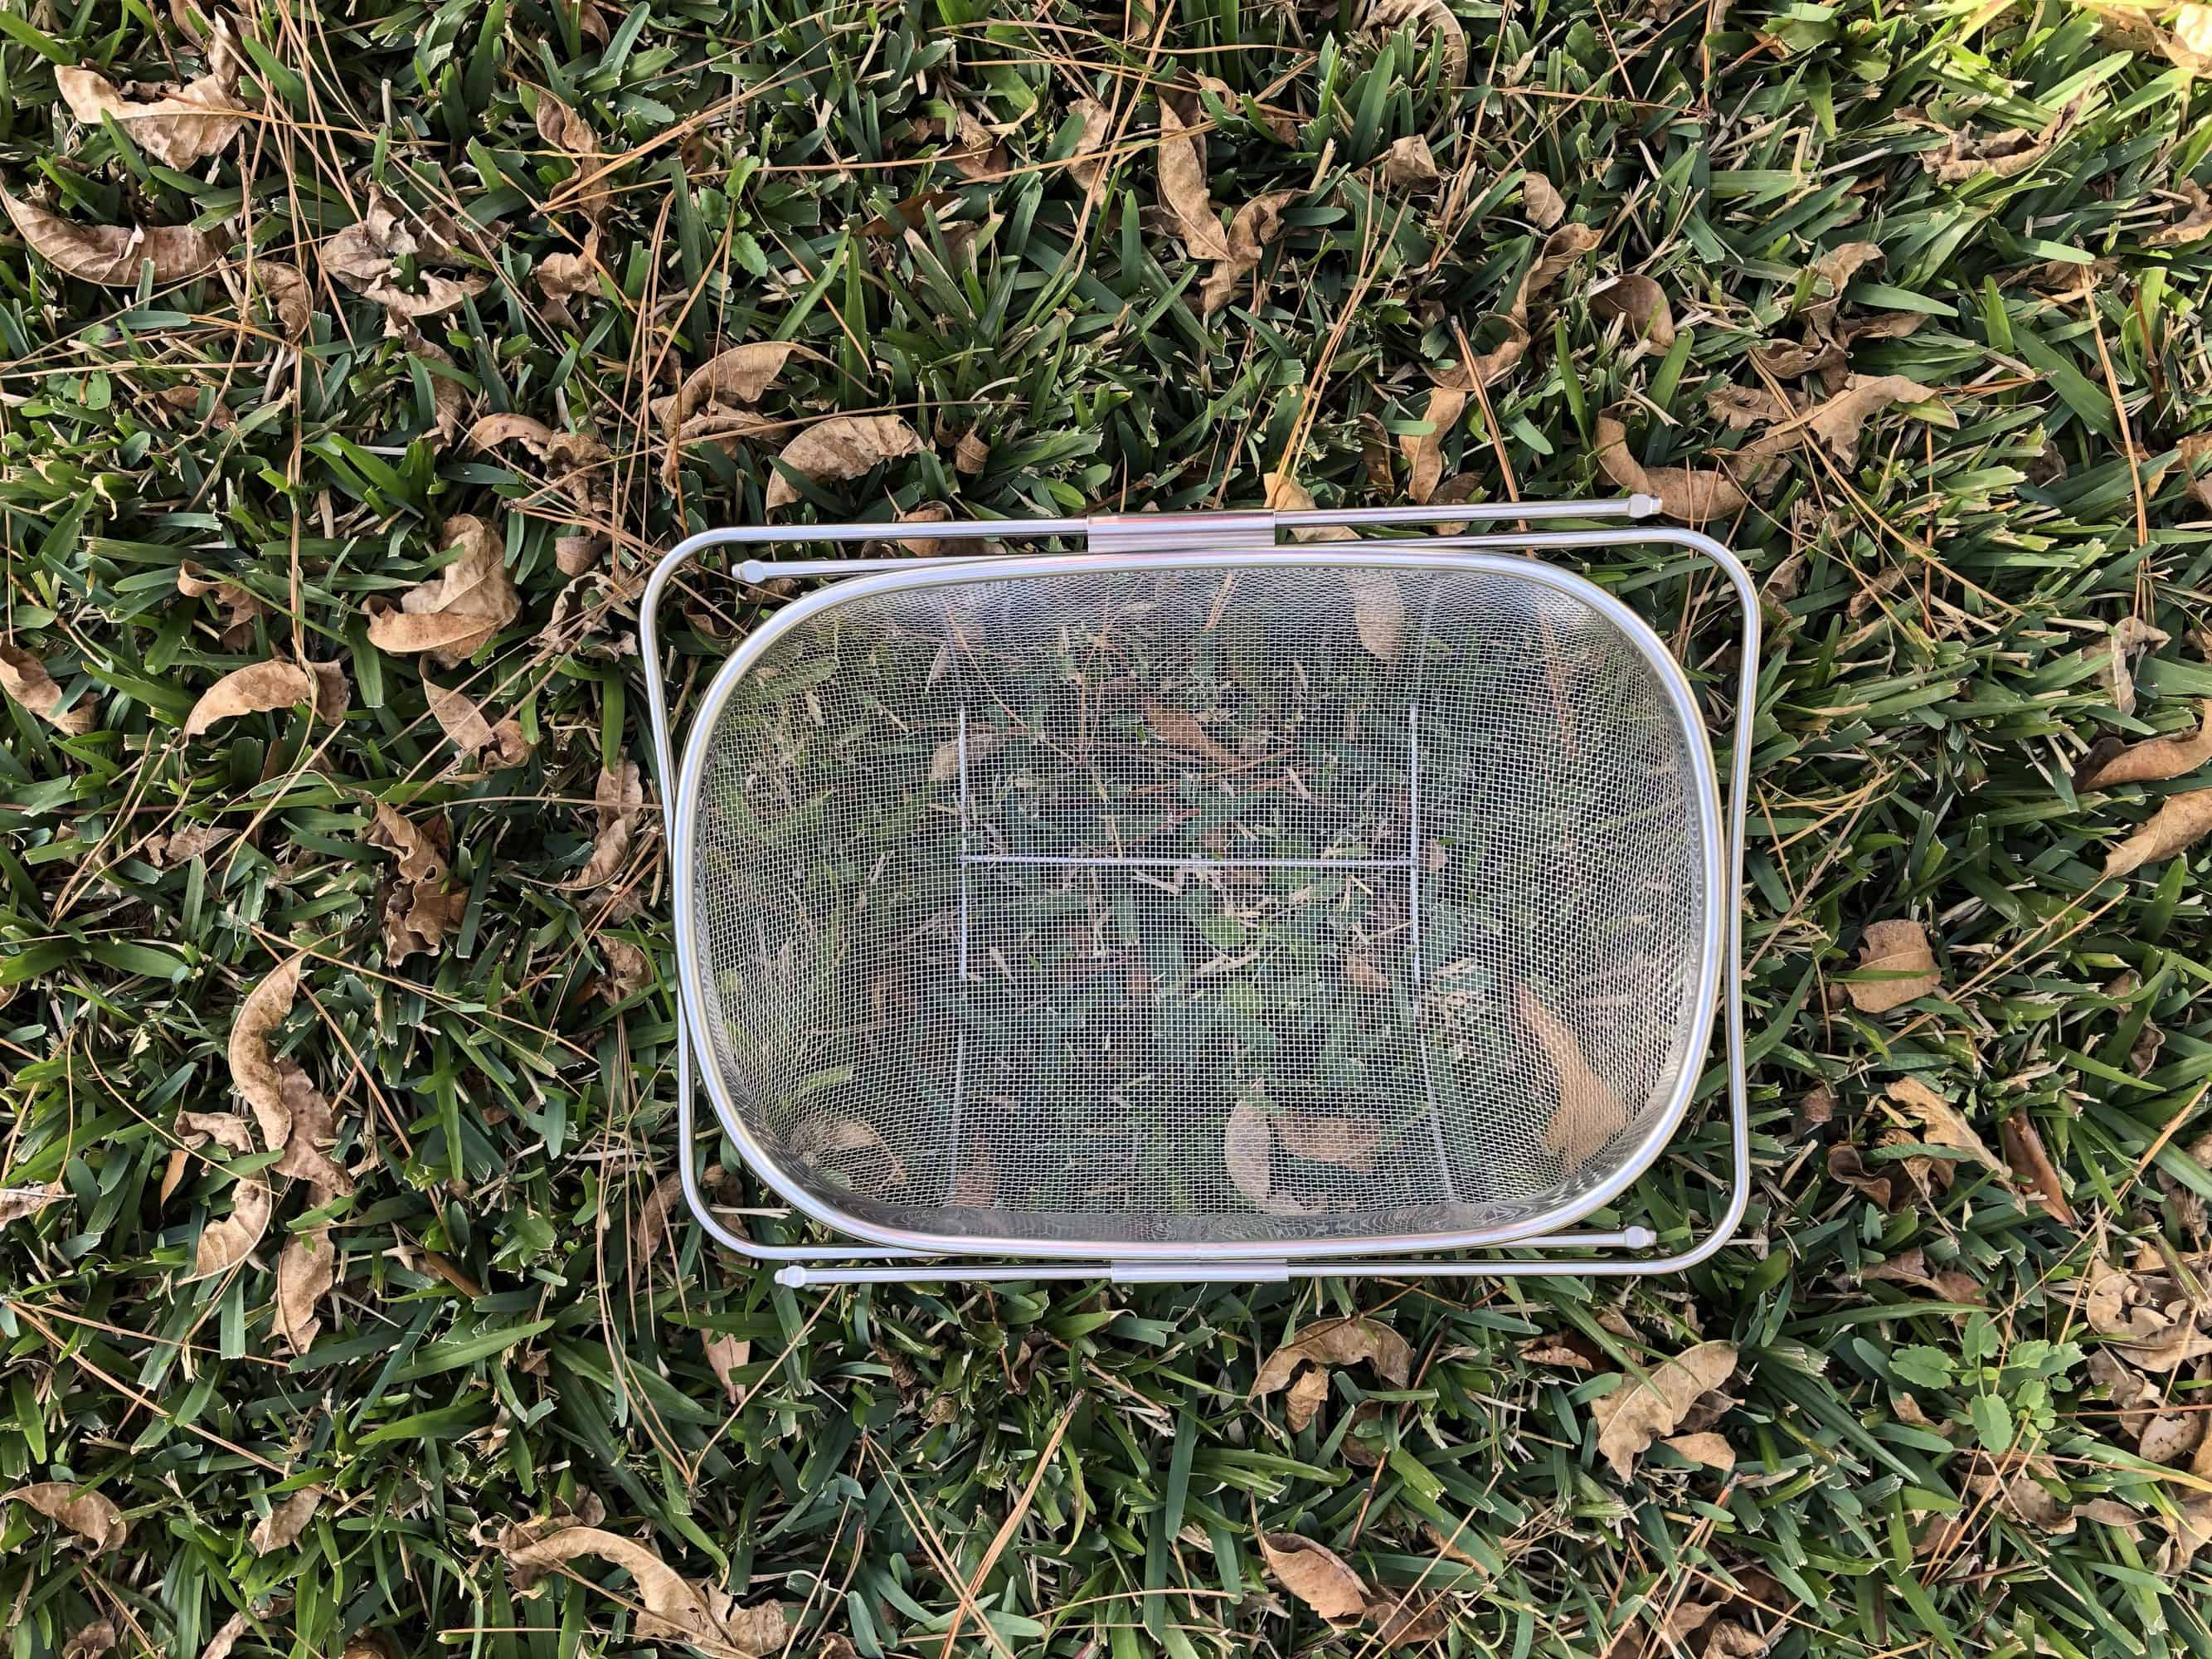
When changing the water between washes, I pour it onto the ground. I pour it through a mesh strainer (Amazon affiliate link) so when fleece inevitably sneaks out of the bin, I don’t have to fish it out of the grass or pick out leaves. Like Beth, I don’t put fleece in mesh laundry bags during washing, mostly because I don’t want to create an obstacle for any VM that would like to come out of the fleece during washing. There are a couple of good reasons to use a mesh bag, however.
One is if you have less than a couple of pounds of any one fleece. You can put 4 ounces, 8 ounces, 1 pound, or whatever of different fleeces into different bags and wash them in the same bin at that same time. Another reason for using mesh bags is the weight of the full bins. Each of the bins above is holding about 2 pounds of fleece and 3 – 4 gallons of water. Since water weighs 8 pounds / gallon, each bin full of fleece is in the neighborhood of 30 pounds. Lifting the bins and pouring the water out is a workout — especially if you wash multiple fleeces like I did while taking these pictures. I washed the two fleeces you see in these pictures (about 3 pounds each of Texel and Finn), plus a 2.5 pound Icelandic fleece, plus 6 pounds worth of an 8.5 pound Coopworth fleece. I then ran out of both daylight and propane, so I had to stop. It took me about 4 hours, during which I was lifting each of those bins every 15 – 20 minutes. As I told my personal trainer when I saw him the next day, that’s why I train; it makes the rest of my life possible. If lifting that much weight is not an option for you, put the fleece in mesh bags! You can lift them all the way out of the water and use a measuring cup or some other scoop to remove the water a little at a time.
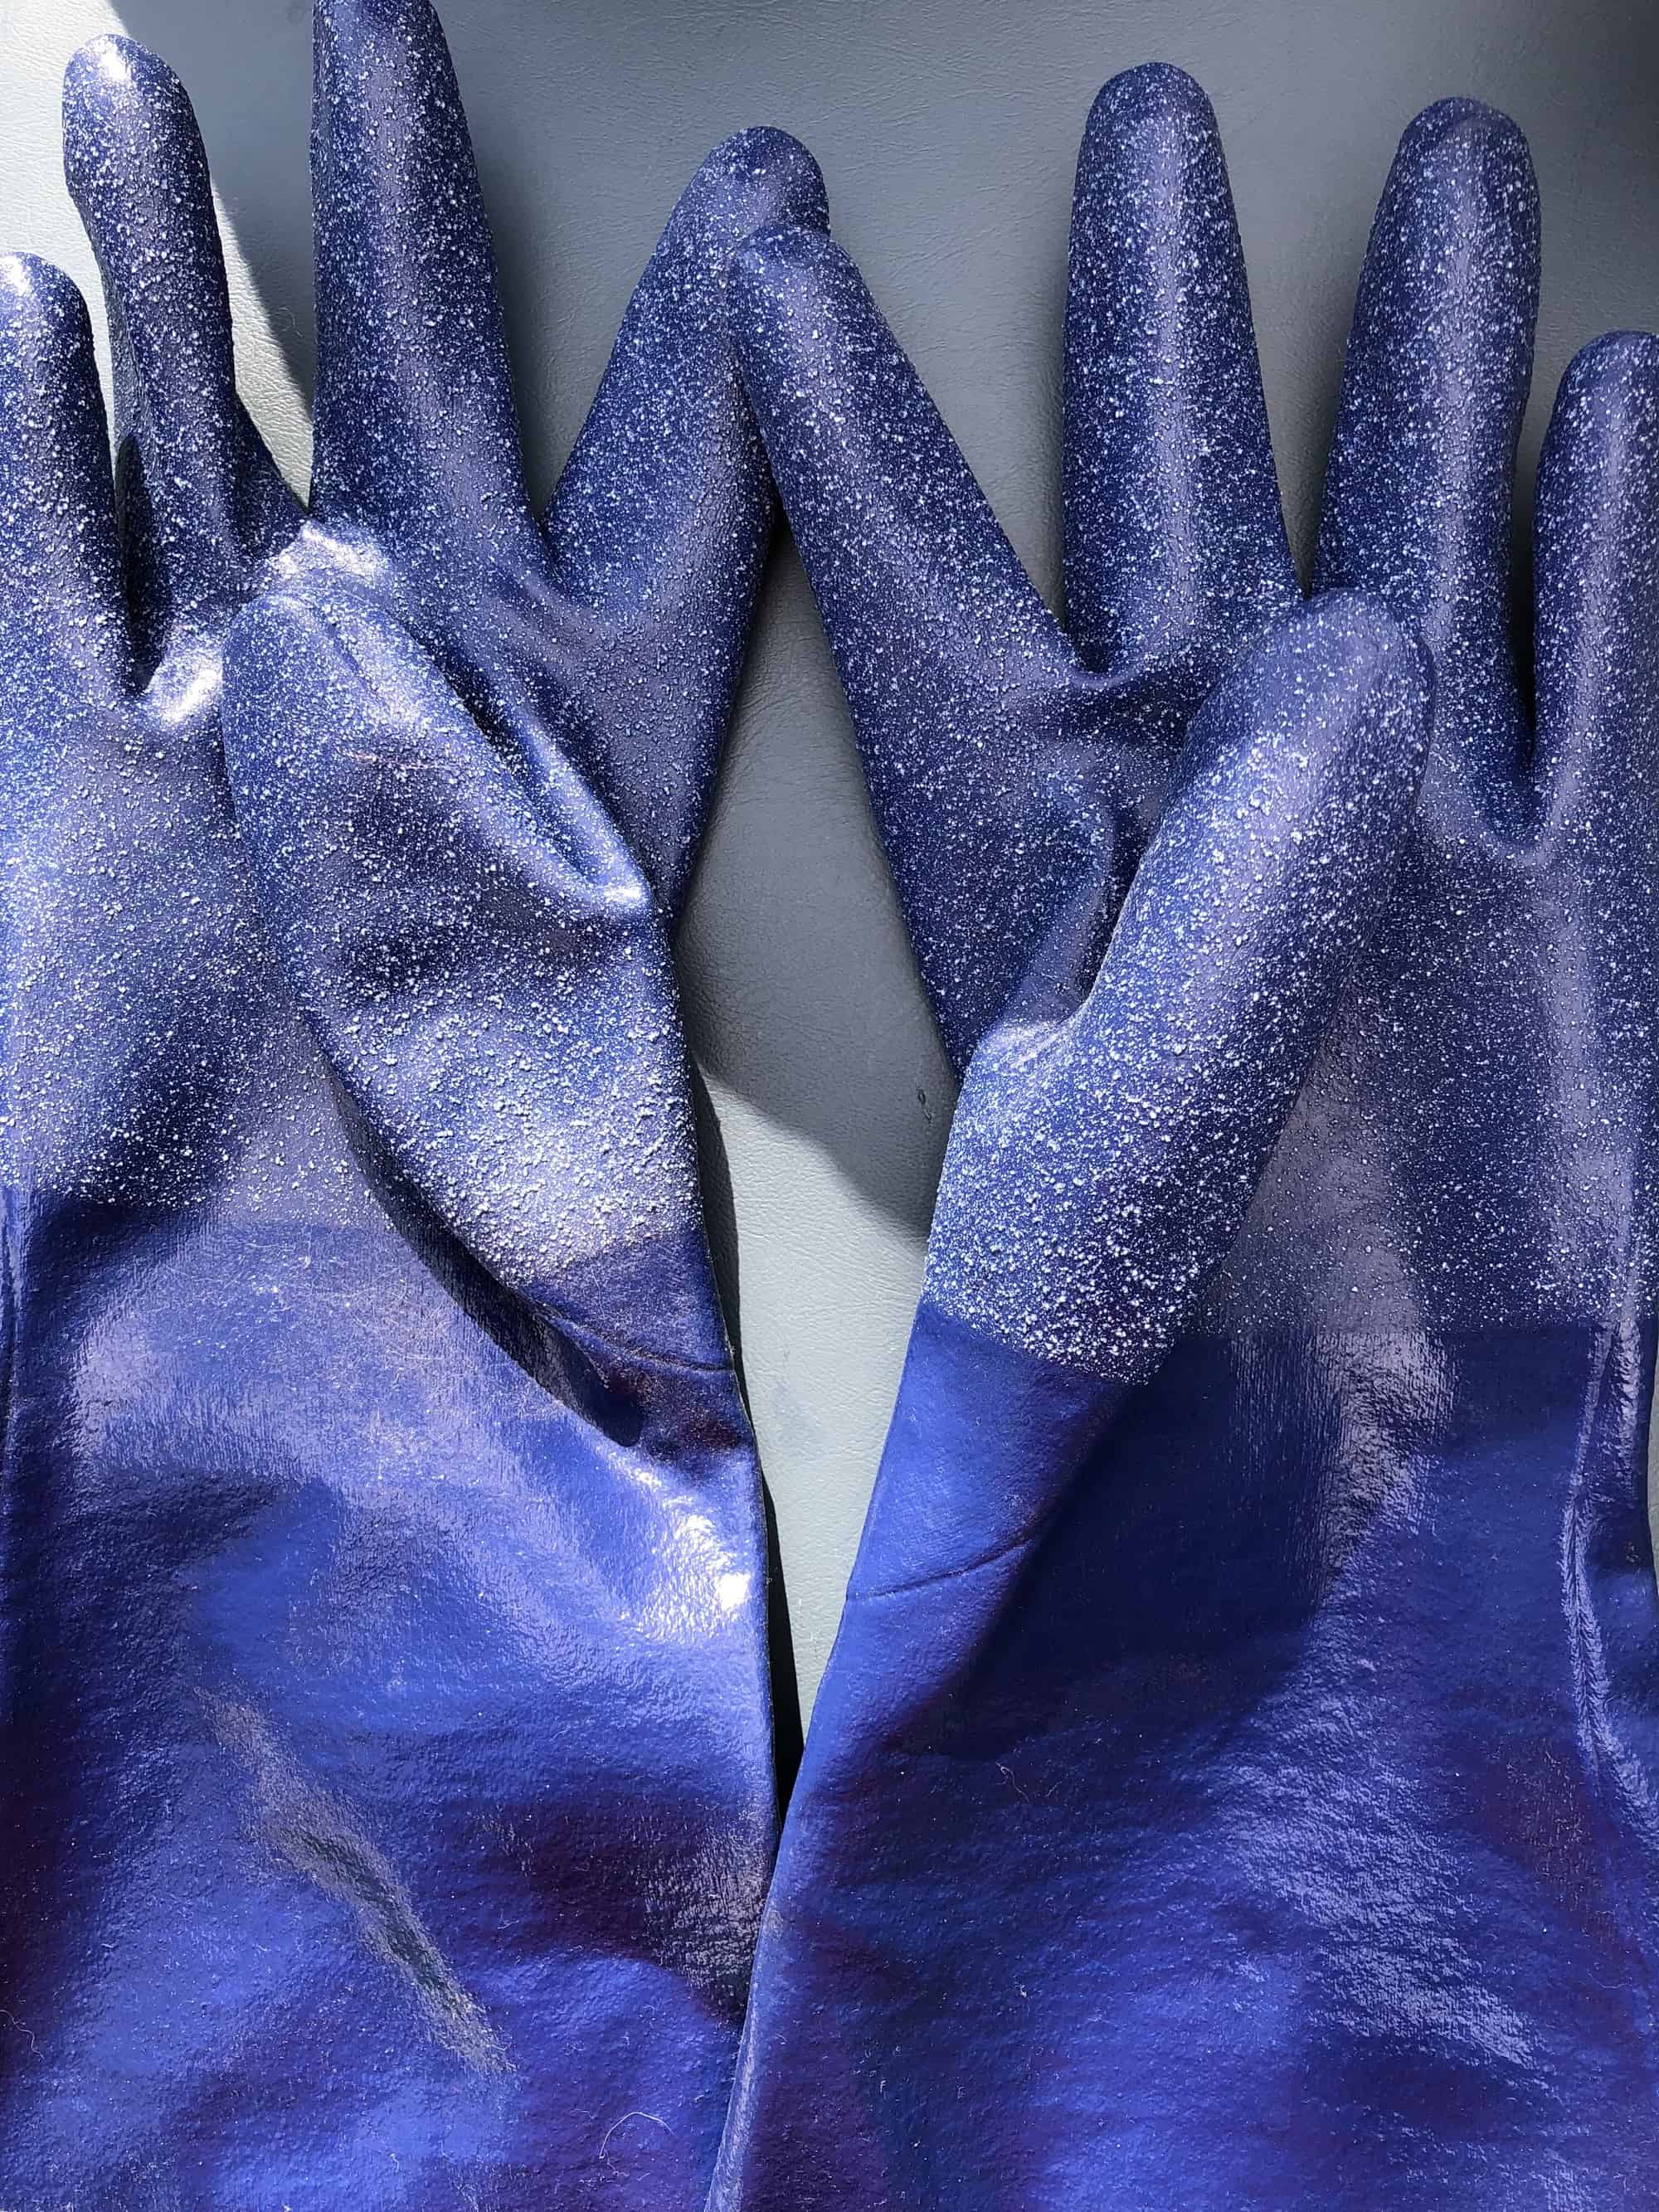
When working with hot water and wool, I use SteamGloves (Amazon affiliate link) to protect my hands and arms. These gloves are made for food service workers to protect themselves when working around steam tables or with cleaning chemicals. The gloves are rated to 225 degrees Fahrenheit. I use them when dyeing, to pick the finished yarn directly out of the hot water. I use them with scouring, either to pick hot wool directly out of the hot water or to protect the hand that is holding the wool in the bin while I pour out the hot dirty water. The pair I have are 20″ long, which means the cuffs come above my elbow, and they are a size large. I bought these at a local restaurant supply place and it was the only size they had. Amazon carries a variety of lengths and sizes. The link I provided is the size and length I use, but click around a bit if you need a different size and you should find something suitable.
After scouring, I put the fleece into mesh laundry bags and run it through the spin cycle of my washing machine. I bought mesh laundry bags in a couple of sizes for this purpose. I’ve been using the jumbo size, which can hold an entire fleece, but I’m going to switch to a smaller size because there is too much space in the jumbo ones. The fleece moves around itself and I ended up with a little felting. It’s not terrible, and I’ll be able to deal with it when I comb or card or flick the wool, but why make extra work for myself?
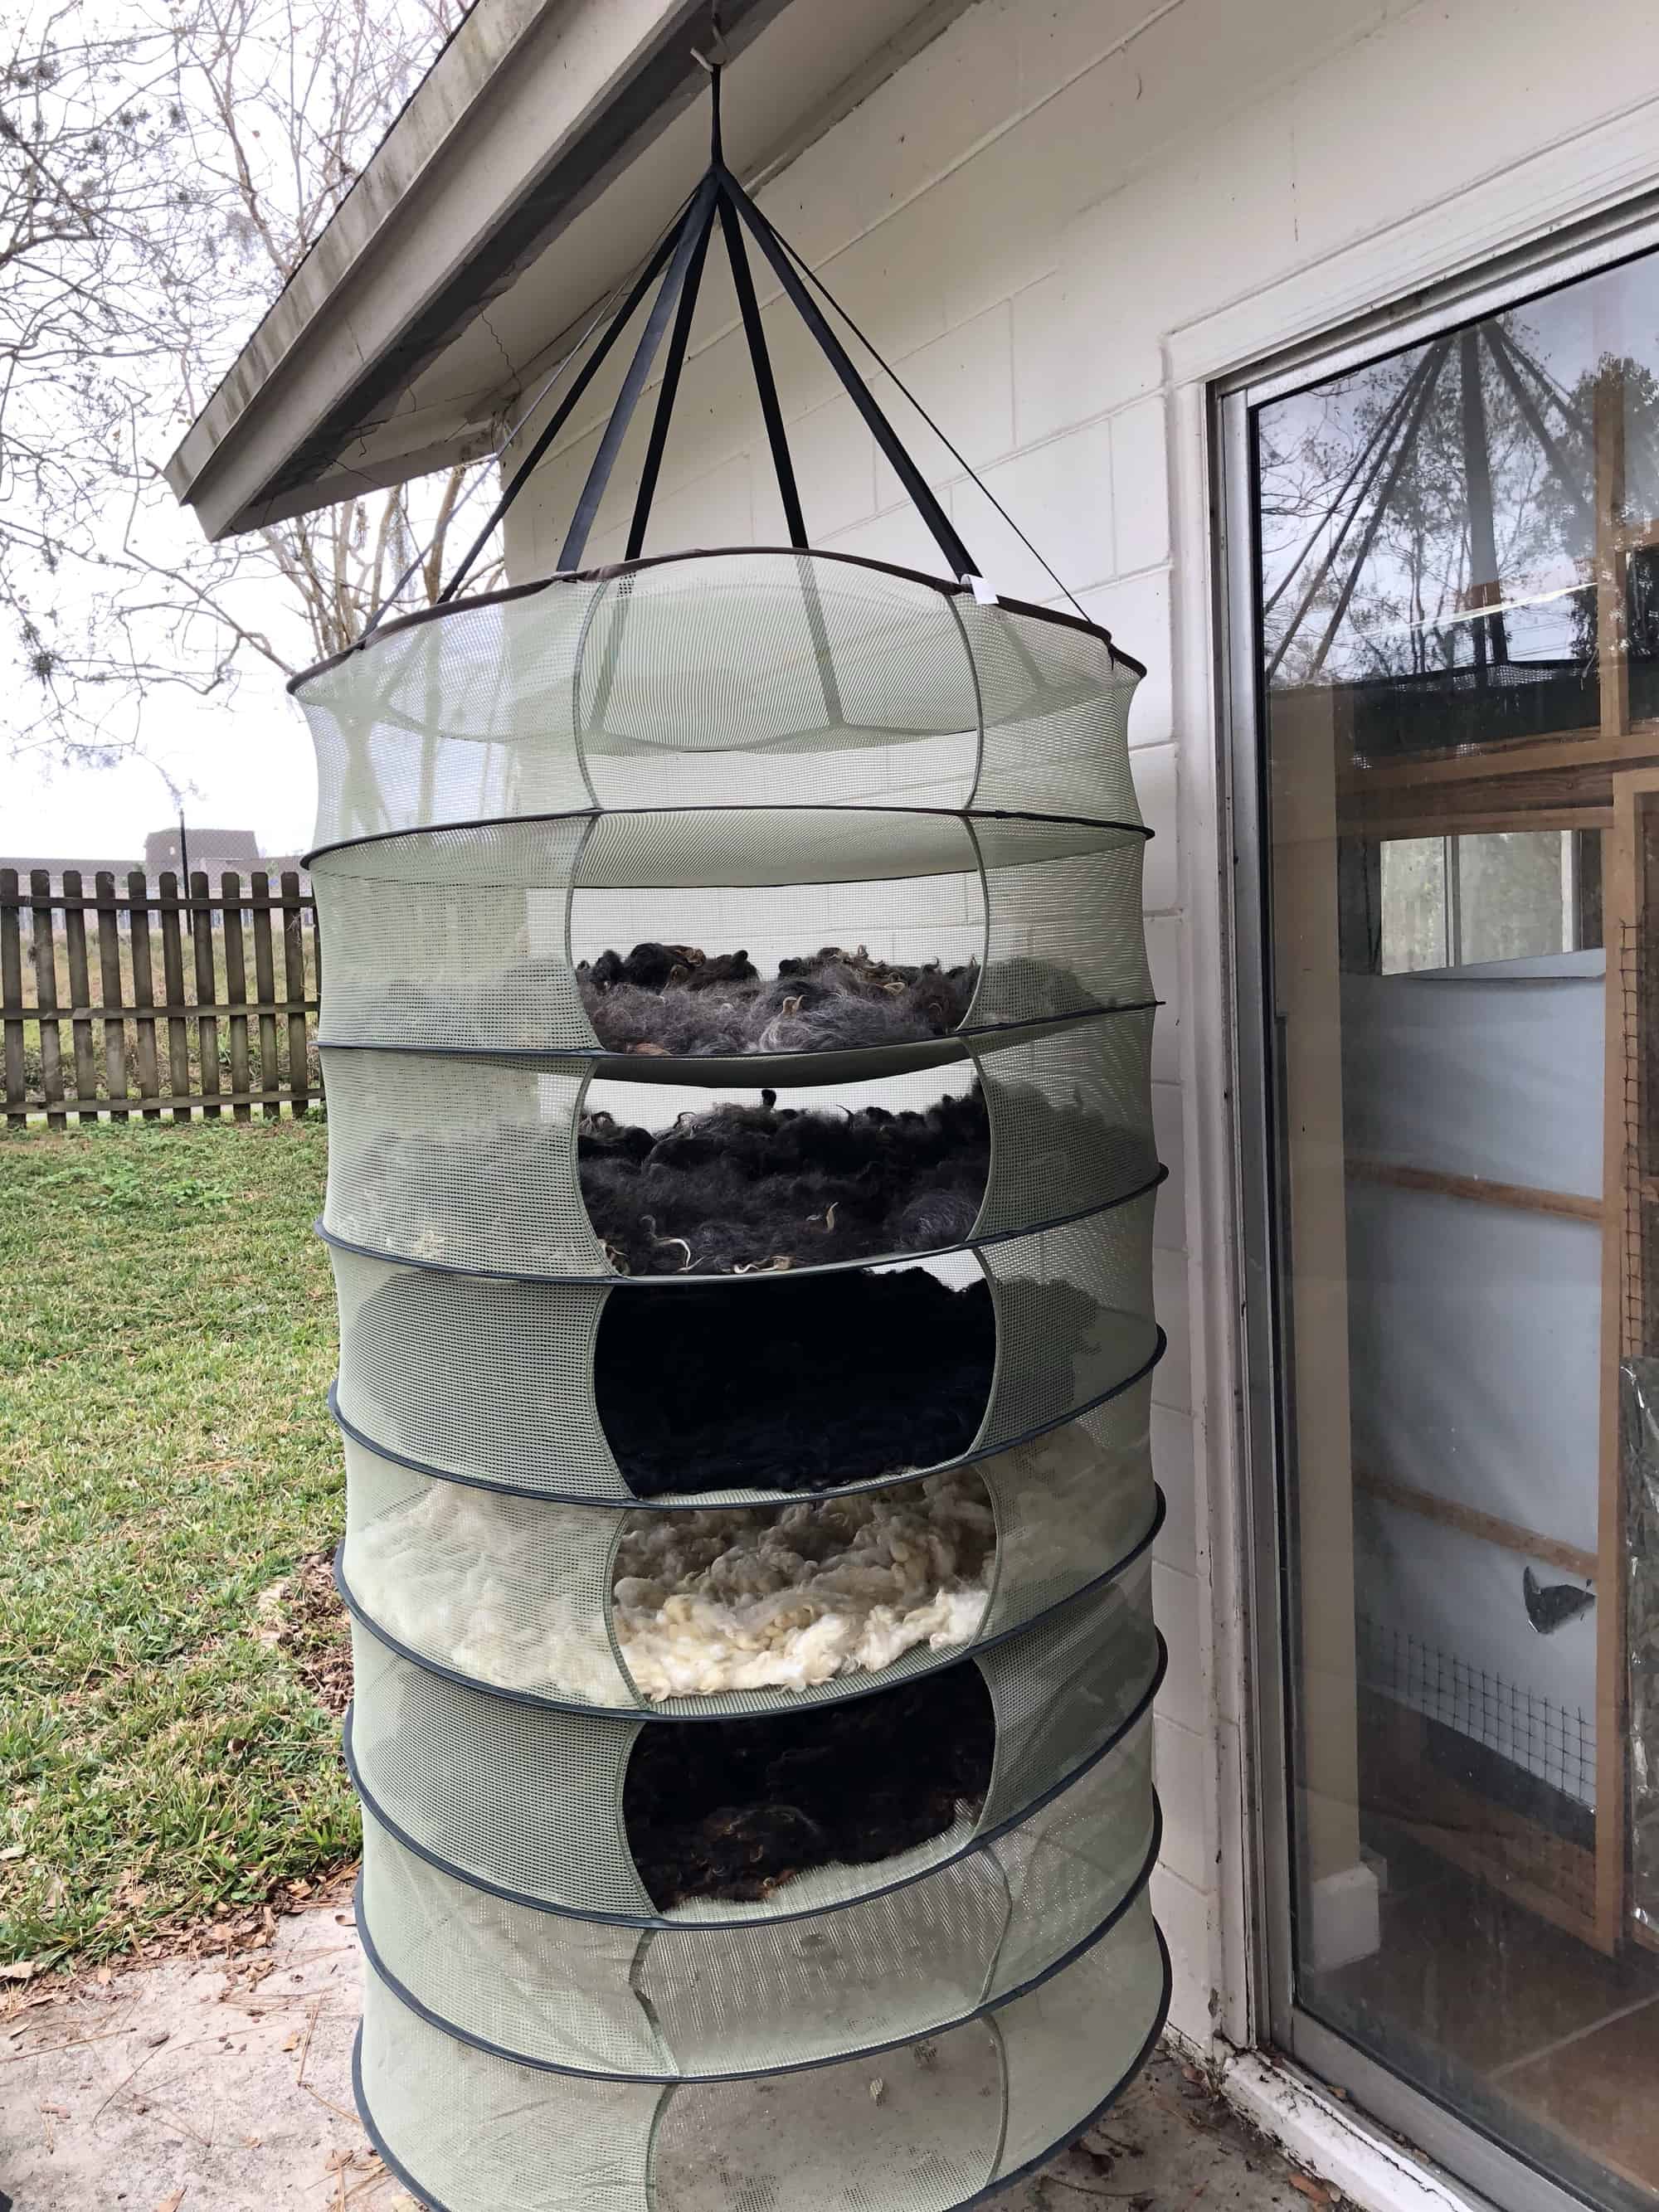
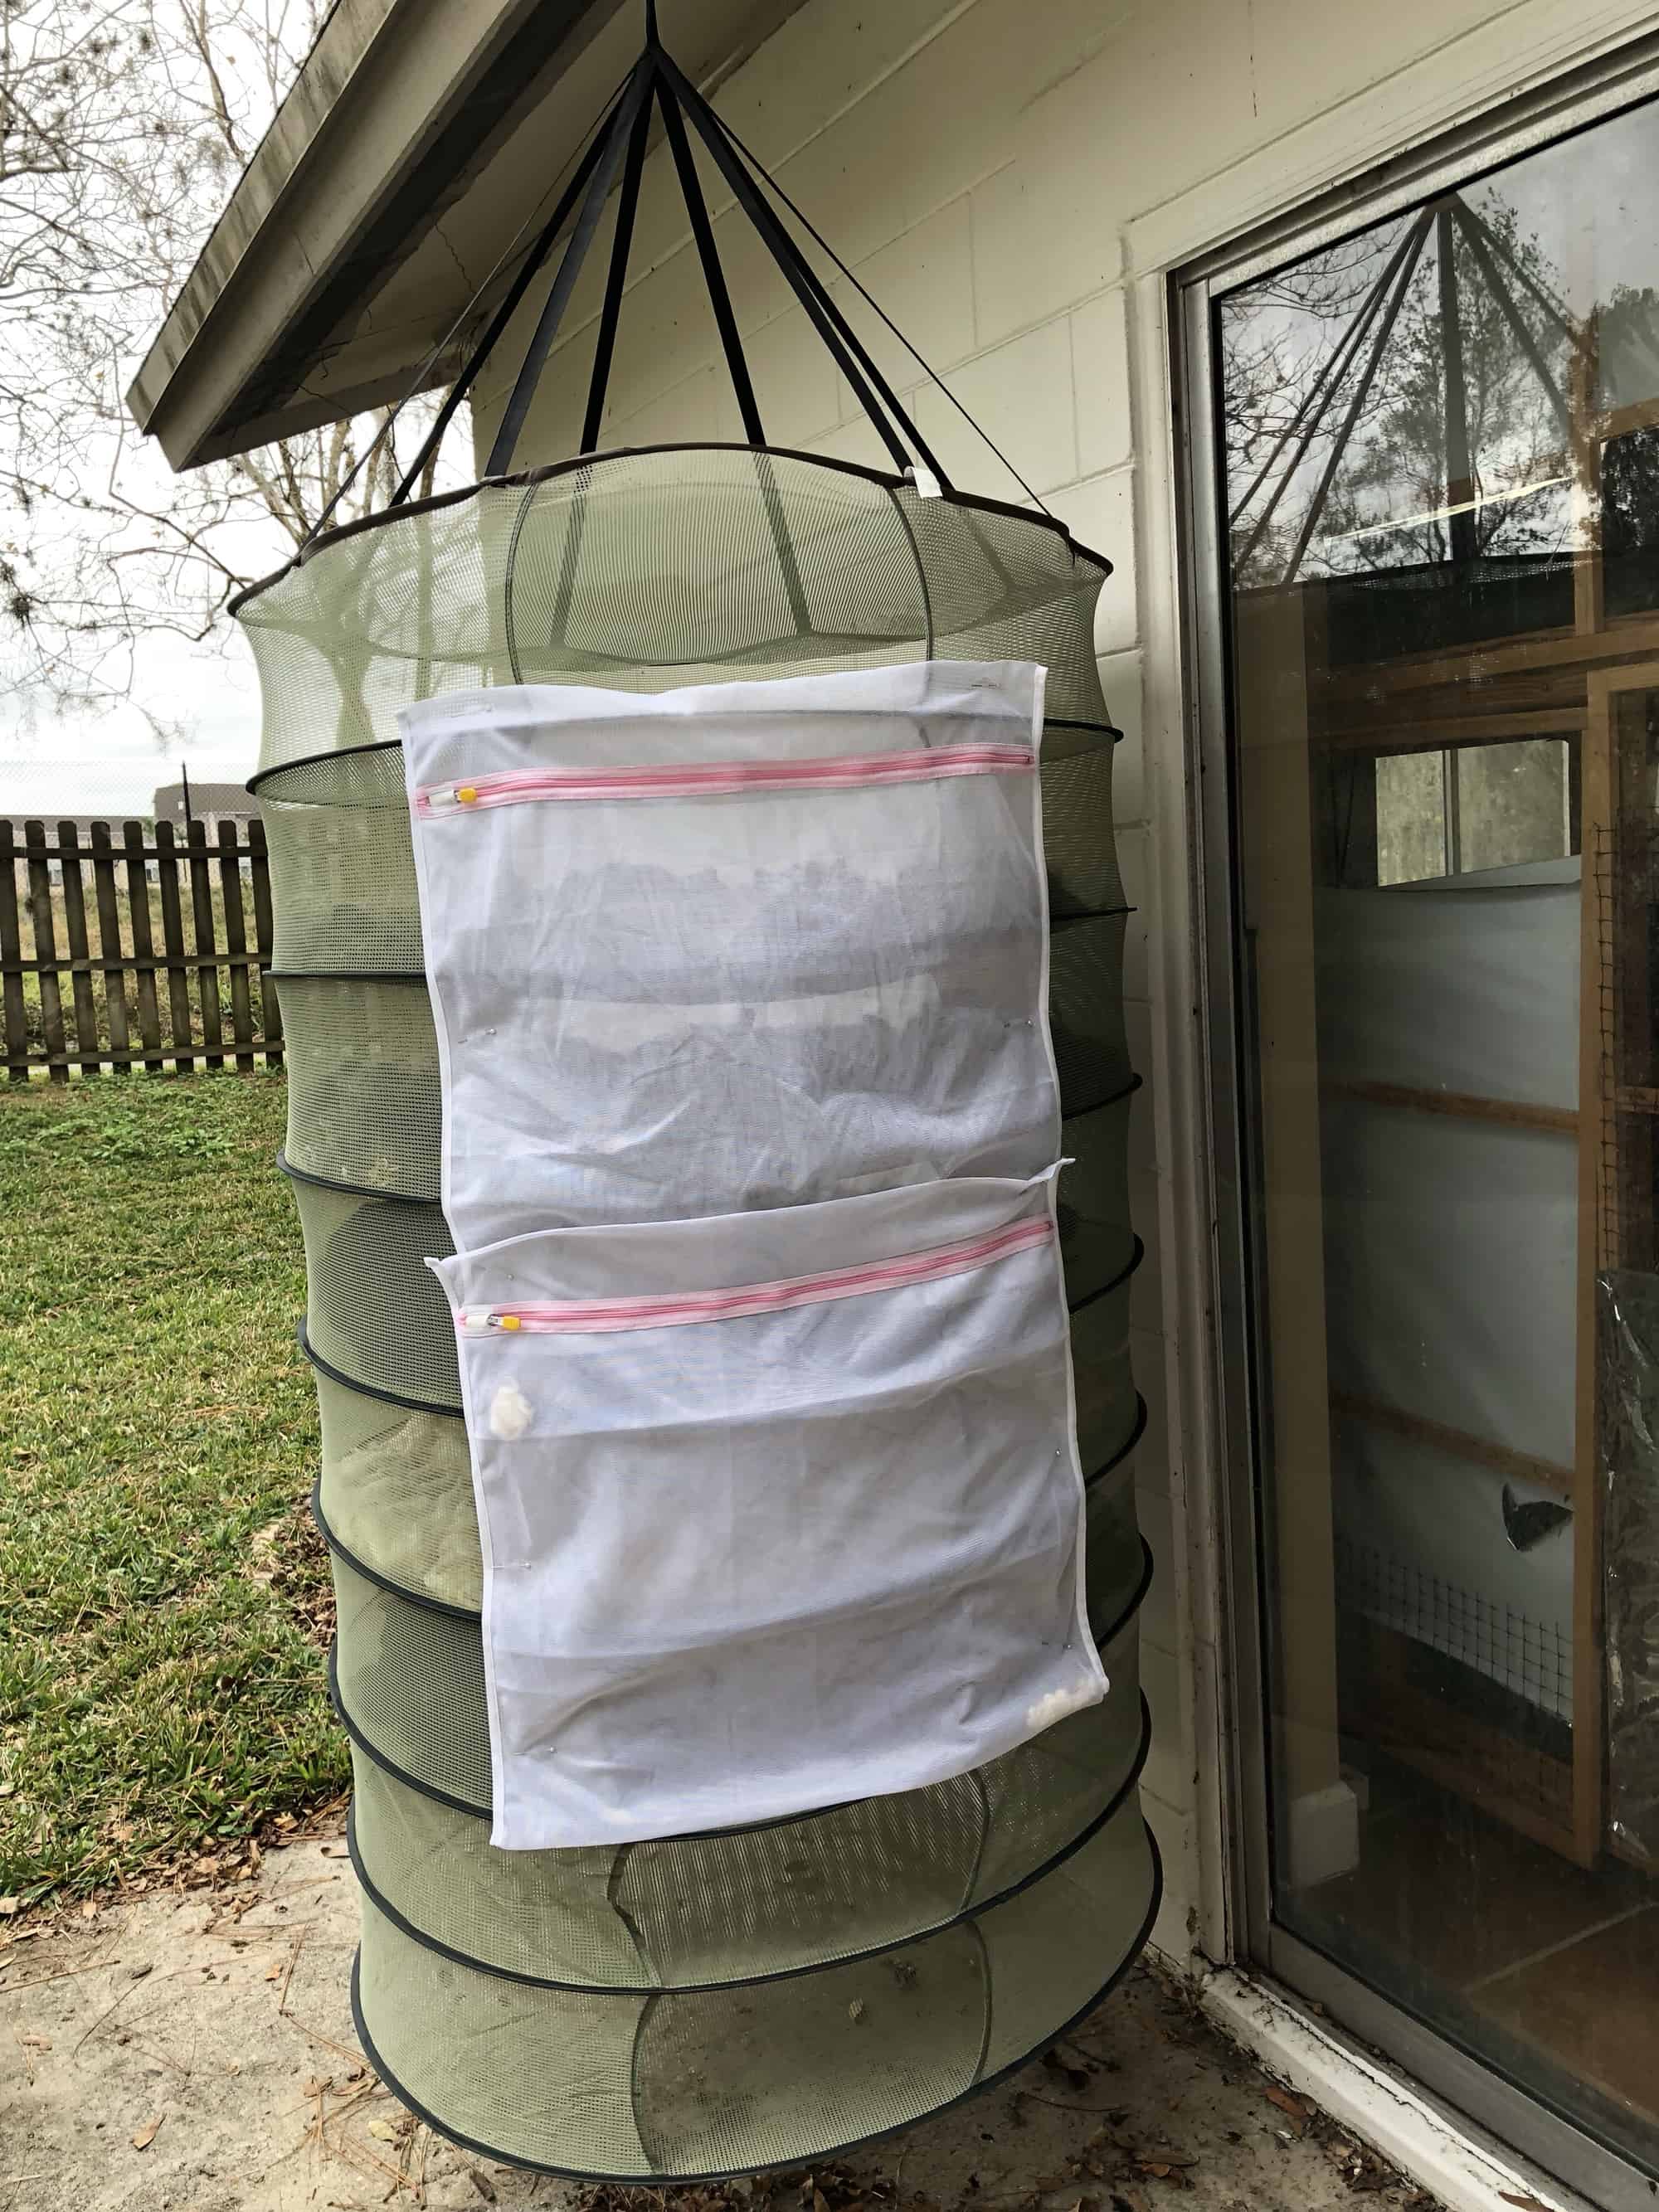
After the spin cycle, it’s time to lay the fleece out to dry. That big green thing is my drying rack. It’s meant for drying herbs and it’s the best thing I’ve found for drying wool. It’s huge — more than 3.5 feet in diameter — and has 8 shelves. Each shelf holds at least 3 pounds of fleece. The shelves are strong enough to hold more than 3 pounds, but I like to spread the fleece out in a thin layer so it will dry quicker. When I’m done drying fleece, the rack collapses and folds up into a small carrying case that fits inside the bins I use for washing. I store all of my fleece washing equipment together, stacked up in the white laundry basket in the first picture. Two of these drying racks fit in that stack. The rack is hanging from a plant hook installed by the prior owners of our house. In this picture, it is holding (from top to bottom) the 6 pounds of Coopworth separated into two sections, the 2.5 pound Icelandic fleece, the 2.75 pound Texel fleece, and the 3.15 pound Finn fleece.
I’ve got a huge oak tree in the front yard and it is home to many squirrels. Since I don’t want the squirrels stealing fleece to line their nests, I pin mesh laundry bags over the openings.
Here in Florida, since I wash and dry outside, scouring fleece is a winter task. Between April and October, sometimes into November, it is so hot that you don’t want to be doing all this labor outside and the humidity is so high that the fleece just will not dry outside . I do not have anywhere inside to hang the drying rack. But last Sunday, it was in the mid-60s and the humidity was low. It was spectacular weather for working outside and I had a pleasant afternoon scouring fleece. I hope to scour the rest of my fleece by the end of January and then I’ll start processing it!
This week, I’m sharing my two active projects. I have a lot of WIPs / UFOs that are sitting around, waiting for me to get to them. As part of the inventory that I blogged about on Monday, I will be making sure Ravelry is up-to-date with those projects.
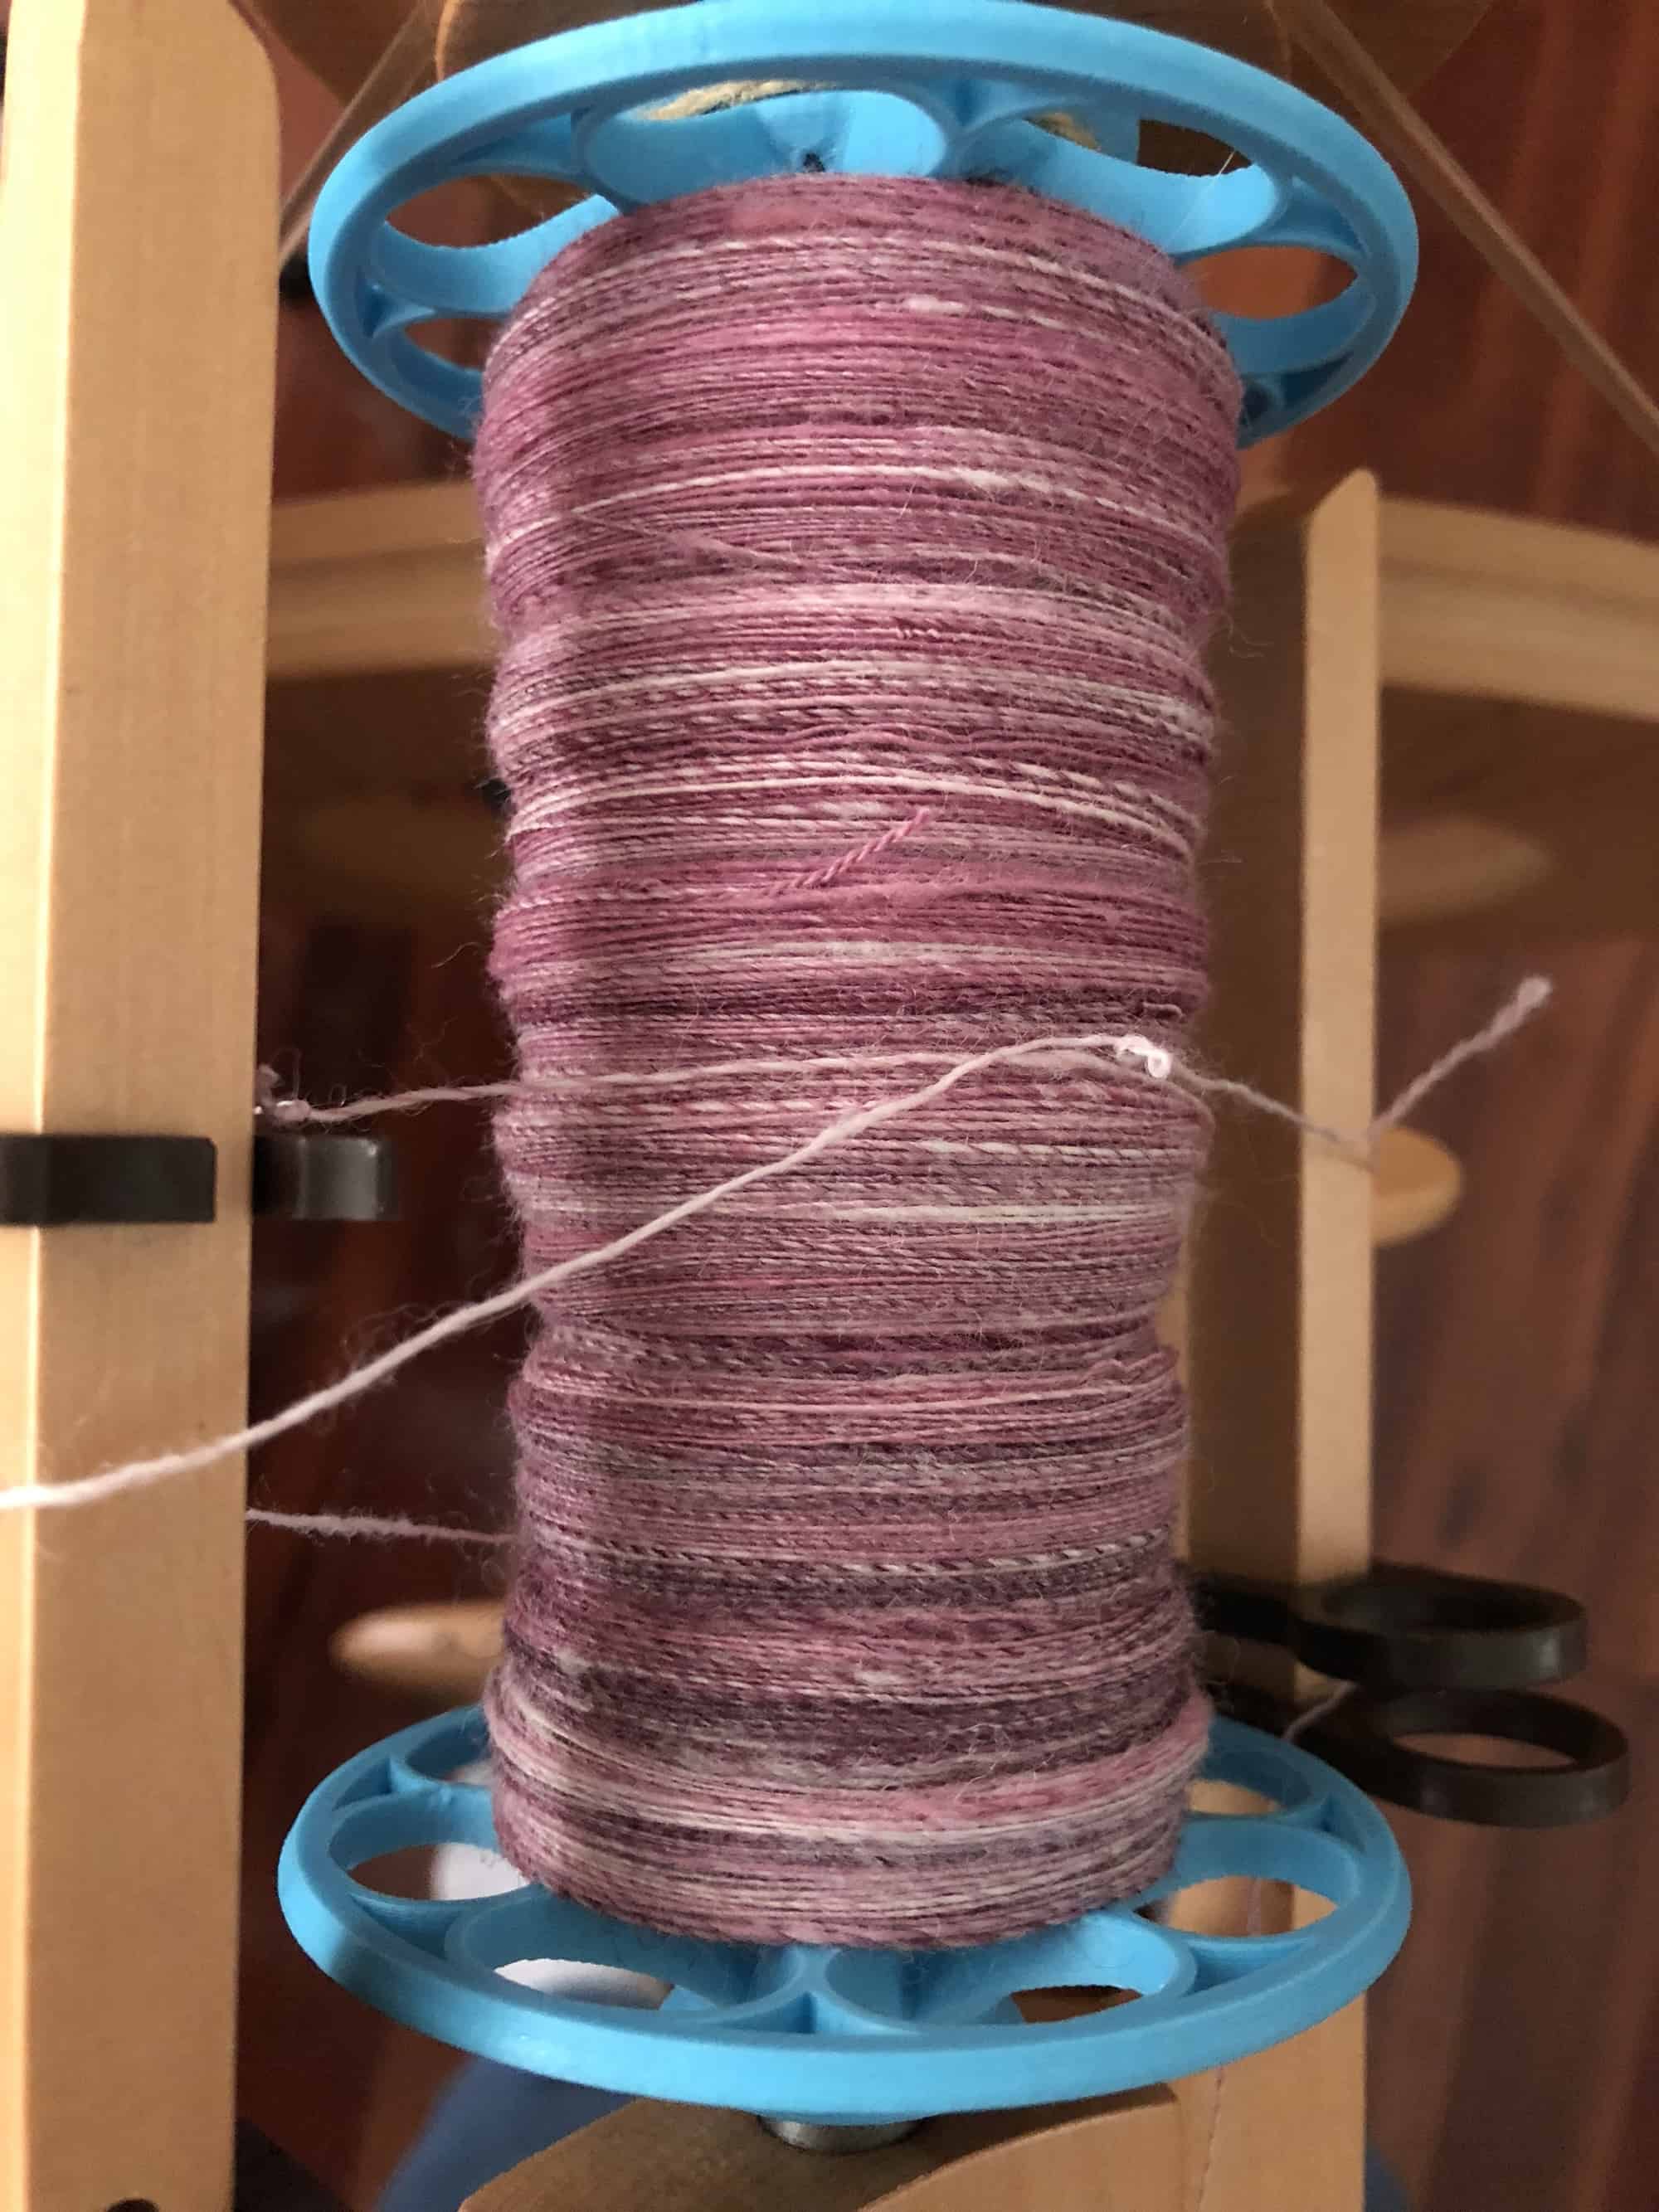
SassyBee Orchid
My current spinning project is two batts of SassyBee Orchid on Polwarth.
SassyBee Fibers (this is a link to her FB page as her website isn’t active) is a vendor at The Fiber Event in Greencastle, Indiana, which I have attended for the last 3 or 4 years. I love her batts and I have a pile of them. In fact, all the batts in the suitcase full of batts, pictured in Monday’s post about inventory, are SassyBee batts. In addition, one of the big bins in the big pile of bins is full of SassyBee batts. They are so beautiful, but I had not spun any of them. In fact, I had never spun from a batt at all. On the first Friday in December, I spent the day spinning as a demo during the Weavers of Orlando Annual Holiday Sale. My wheel was empty, so I grabbed a SassyBee batt and spun that the entire day. I’ve spun a little more on it since, but not a lot due to the holidays. I’m about 3/4 of the way through the first batt.
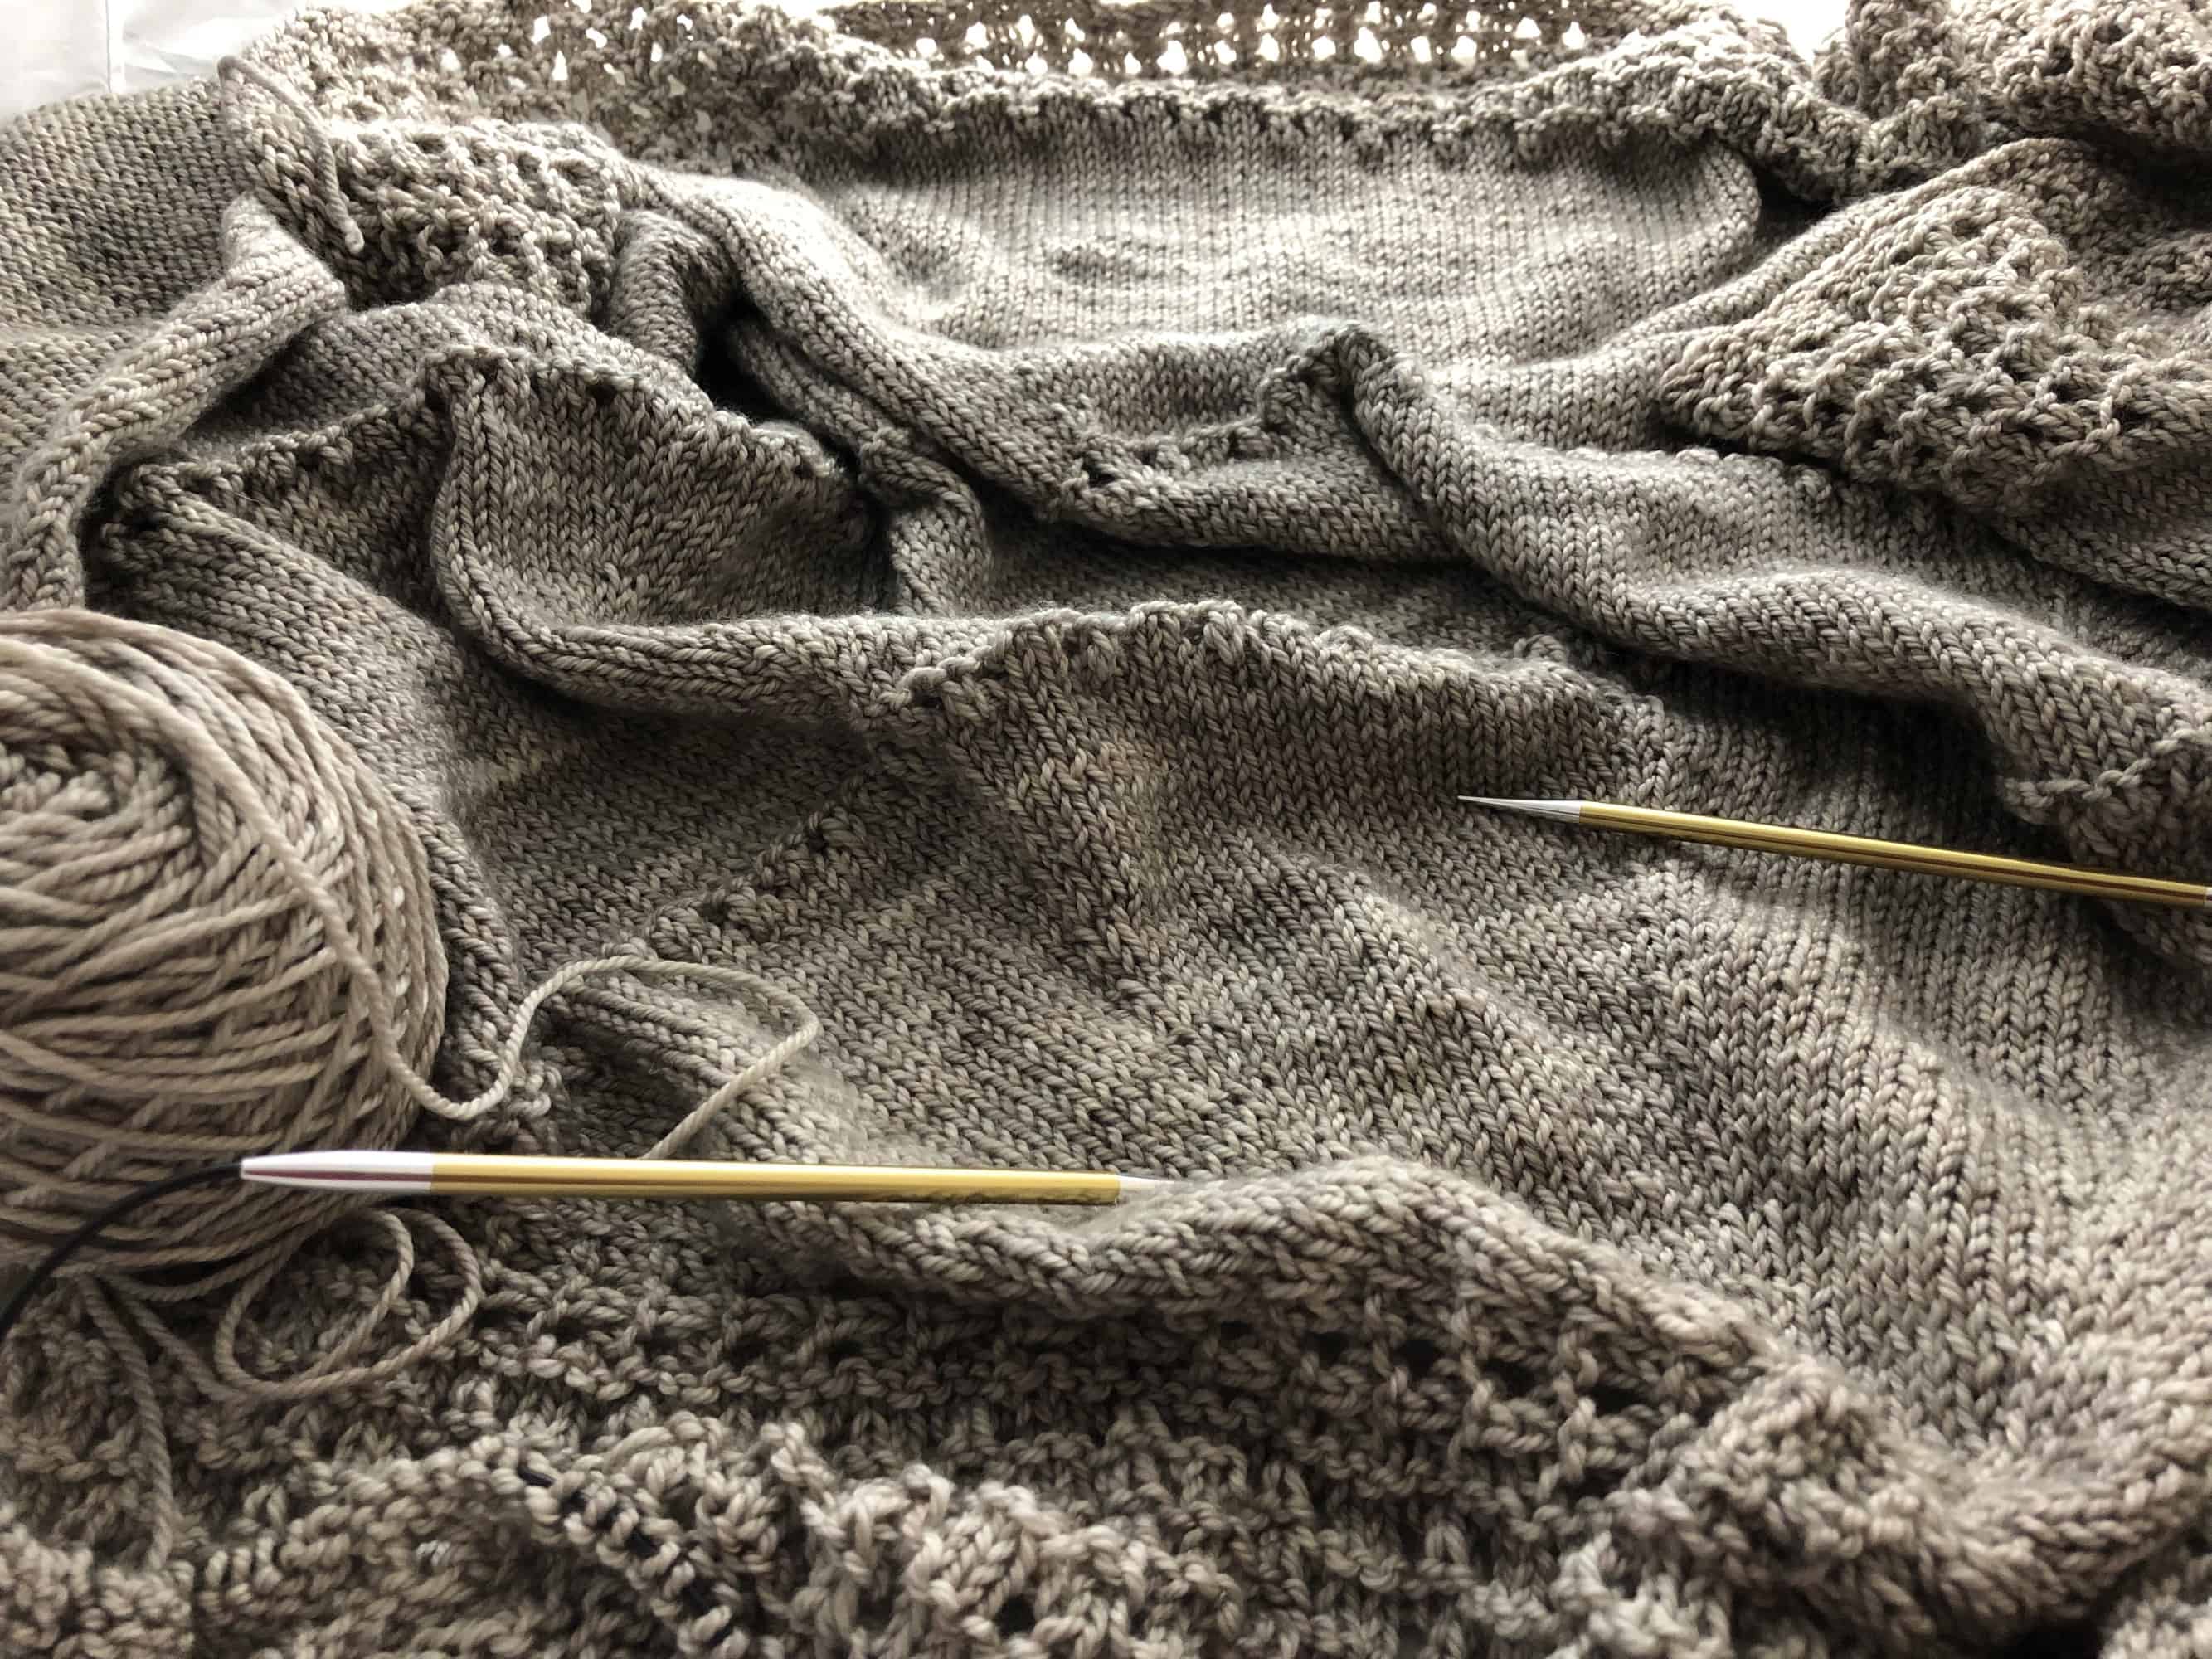
Mesa
Last year, my LYS had an Anzula trunk show. This cape (available on Ravelry) was one of the sample items Anzula brought with them as part of the show. I tried it on and loved it. I also thought my mother would love it. I bought the yarn and the pattern and intended to finish it for her birthday in March. Then for Mother’s Day in May. Then for Christmas. I only have about 10 rows of knitting left, then I have to weave in the ends, sew on buttons, and block it.