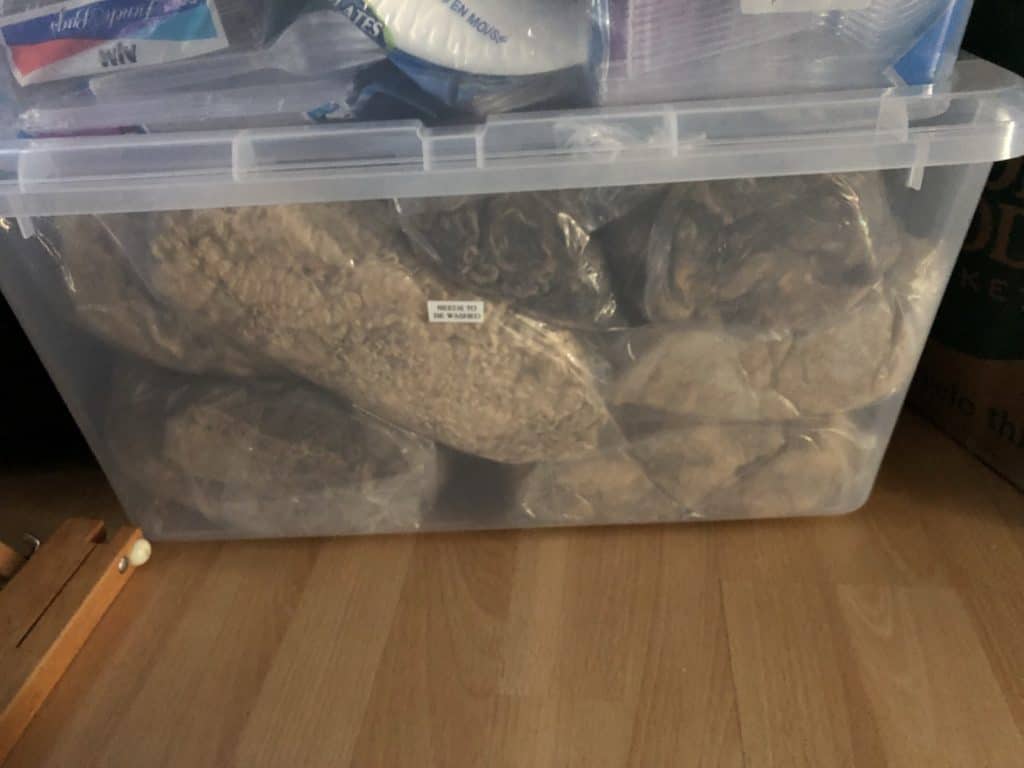
Last week, I posted about inventorying my stash. The post included two pictures showing all the raw fleece I have in my office. In case you missed it, here’s those two pictures again. The main pile, with all the full fleeces, has taken over one of my four-harness floor looms.
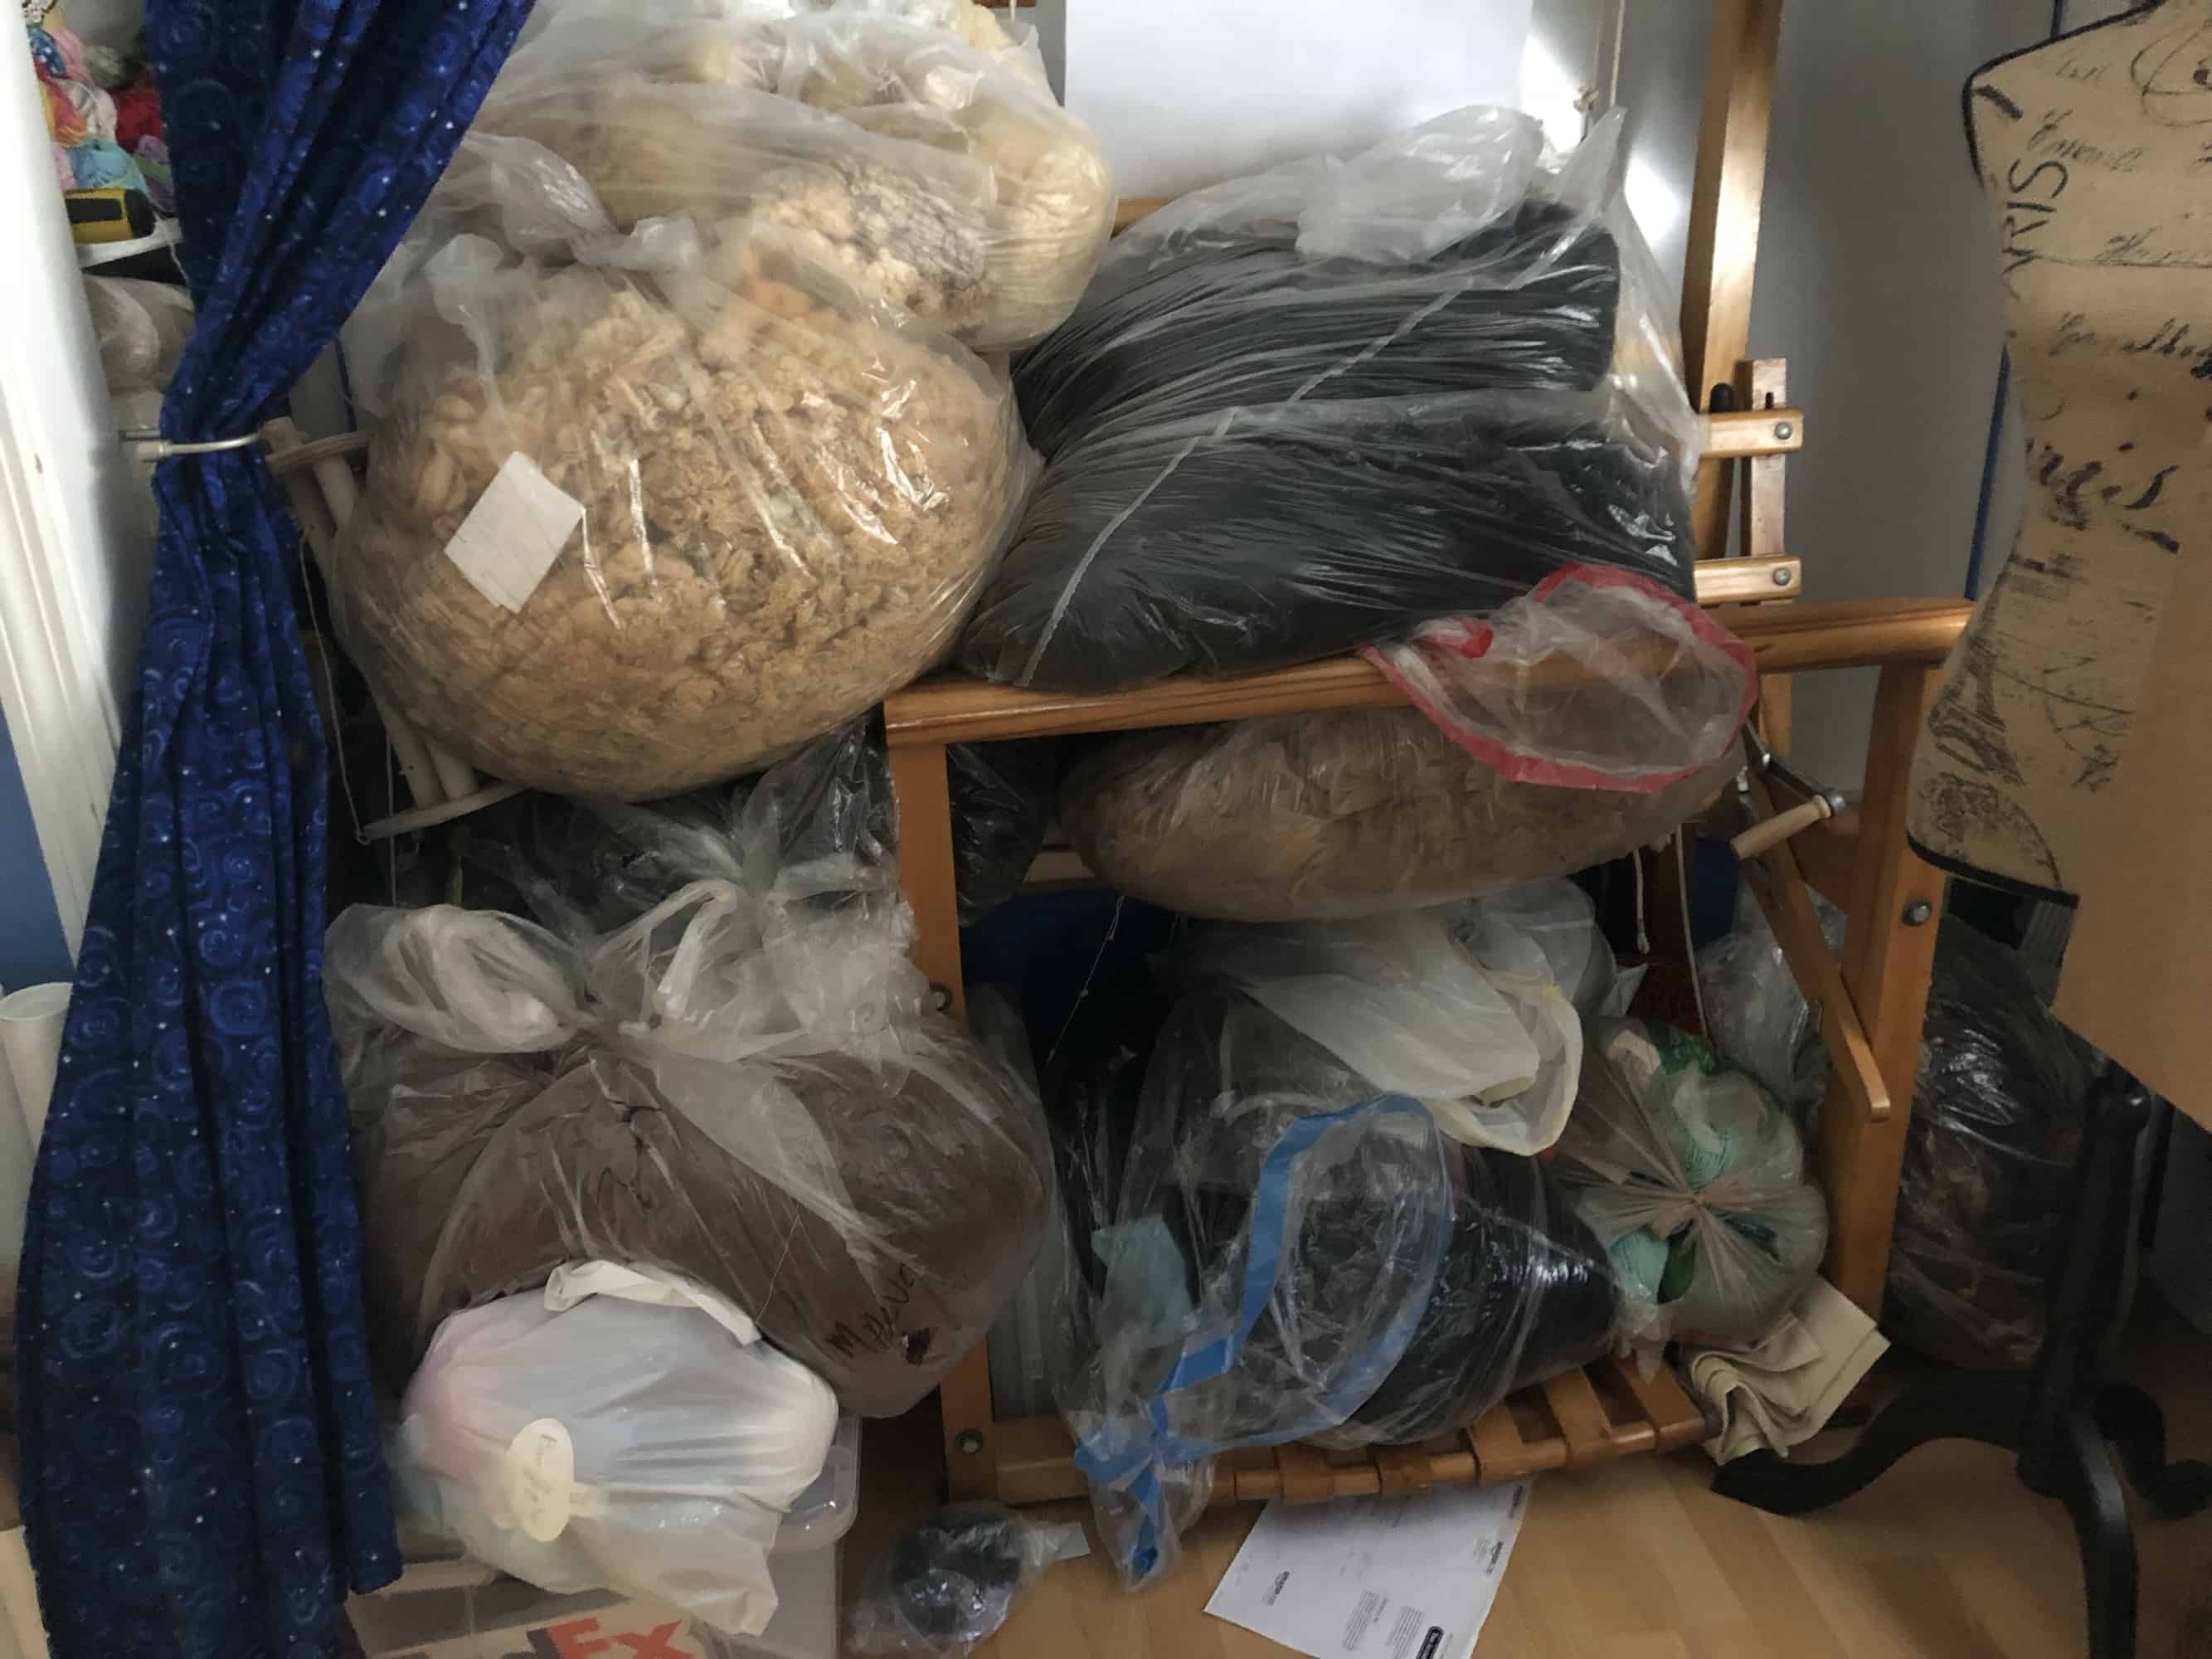
This bin consists of small portions of fleece, no more than a pound of any one breed.
Once upon a time, I said I would scour a fleece once, just to say I had done it, and then never do it again. It seemed like too much work and there’s so many beautiful prepared fibers available, why would I bother scouring fleece myself? But then I decided I wanted to do some breed-specific spinning, to understand the differences between breeds and why I’d chose one over another for a specific knitting, crocheting, or weaving project. My stash of spinning fiber exploded and I learned that many breeds aren’t available in prepared forms. I bought a couple fleeces and sent them to mills for processing.
The mills did a fine job, but then I took some classes and did some reading and learned how you can get very different yarns based on how you prep the fiber for spinning. The options are limited when you send fleece to be processed at a mill. I wanted to have more control over the finished yarn, or at least to understand how the different preps would change the finished yarn. In other words, my spinning journey keeps moving me backwards in the process of producing yarn. If I really want to understand yarn, I have to start at the beginning, with the raw wool. This is how I roll; I like to take things back to basics. So I started acquiring raw fleece and I made a spreadsheet to keep track of which fleeces and how much raw fleece and how much it cost and how much I lose in each step of processing.
Methodology
This post is not a step-by-step tutorial on how to scour fleece. This is only the third time I’ve scoured fleece; everything I know I learned from Beth Shearer Smith. Beth scours something like 300 pounds of fleece a year, partly for her own use and partly for use in the classes she teaches. Fortunately, we all get to learn from her through her wonderful writing. Visit her website for posts on the three ways of scouring: bulk scouring (most relevant to the rest of my blog post), tulle sausages, and by the lock. If you’d like more information on which method to use for a particular fleece, Beth’s book, The Spinners Book of Fleece (Amazon affiliate link), walks you through the reasons you might pick one of these methods over another. In the rest of my blog post, I’ll be describing the ways my set up differs from Beth’s and why I made those adjustments. However, the overall method is the bulk scouring method I linked you to above.
My Set Up
I am not able to use exactly the same set up Beth uses. My washer and dryer are not flat on top. They are at a bit of an angle. This means that anything I put on top of them is in danger of sliding off. I do not have a utility sink in my tiny laundry room. In order to get water from a tap, I could unhook the washer and attach a hose to that, but then I have to figure out how to dump out the water. Finally, the first time I went to scour fleece, I measured the temperature of the hot water coming out of my tap. It was only 110 degrees Fahrenheit. The Unicorn Power Scour requires a minimum of 115 degrees Fahrenheit. I had a plumber check our hot water heater, and it is set to 120 degrees Fahrenheit, which is the hottest they are allowed to set it by law. Our hot water is original to our house, which was built in 1977! At some point, we will have to replace it and maybe when we do, I’ll be able to get water out of the tap at a temperature that will work for scouring fleece. Until that day, I have to heat the water to get it hot enough for scouring fleece. It’s a lot easier to do that if I work outside.
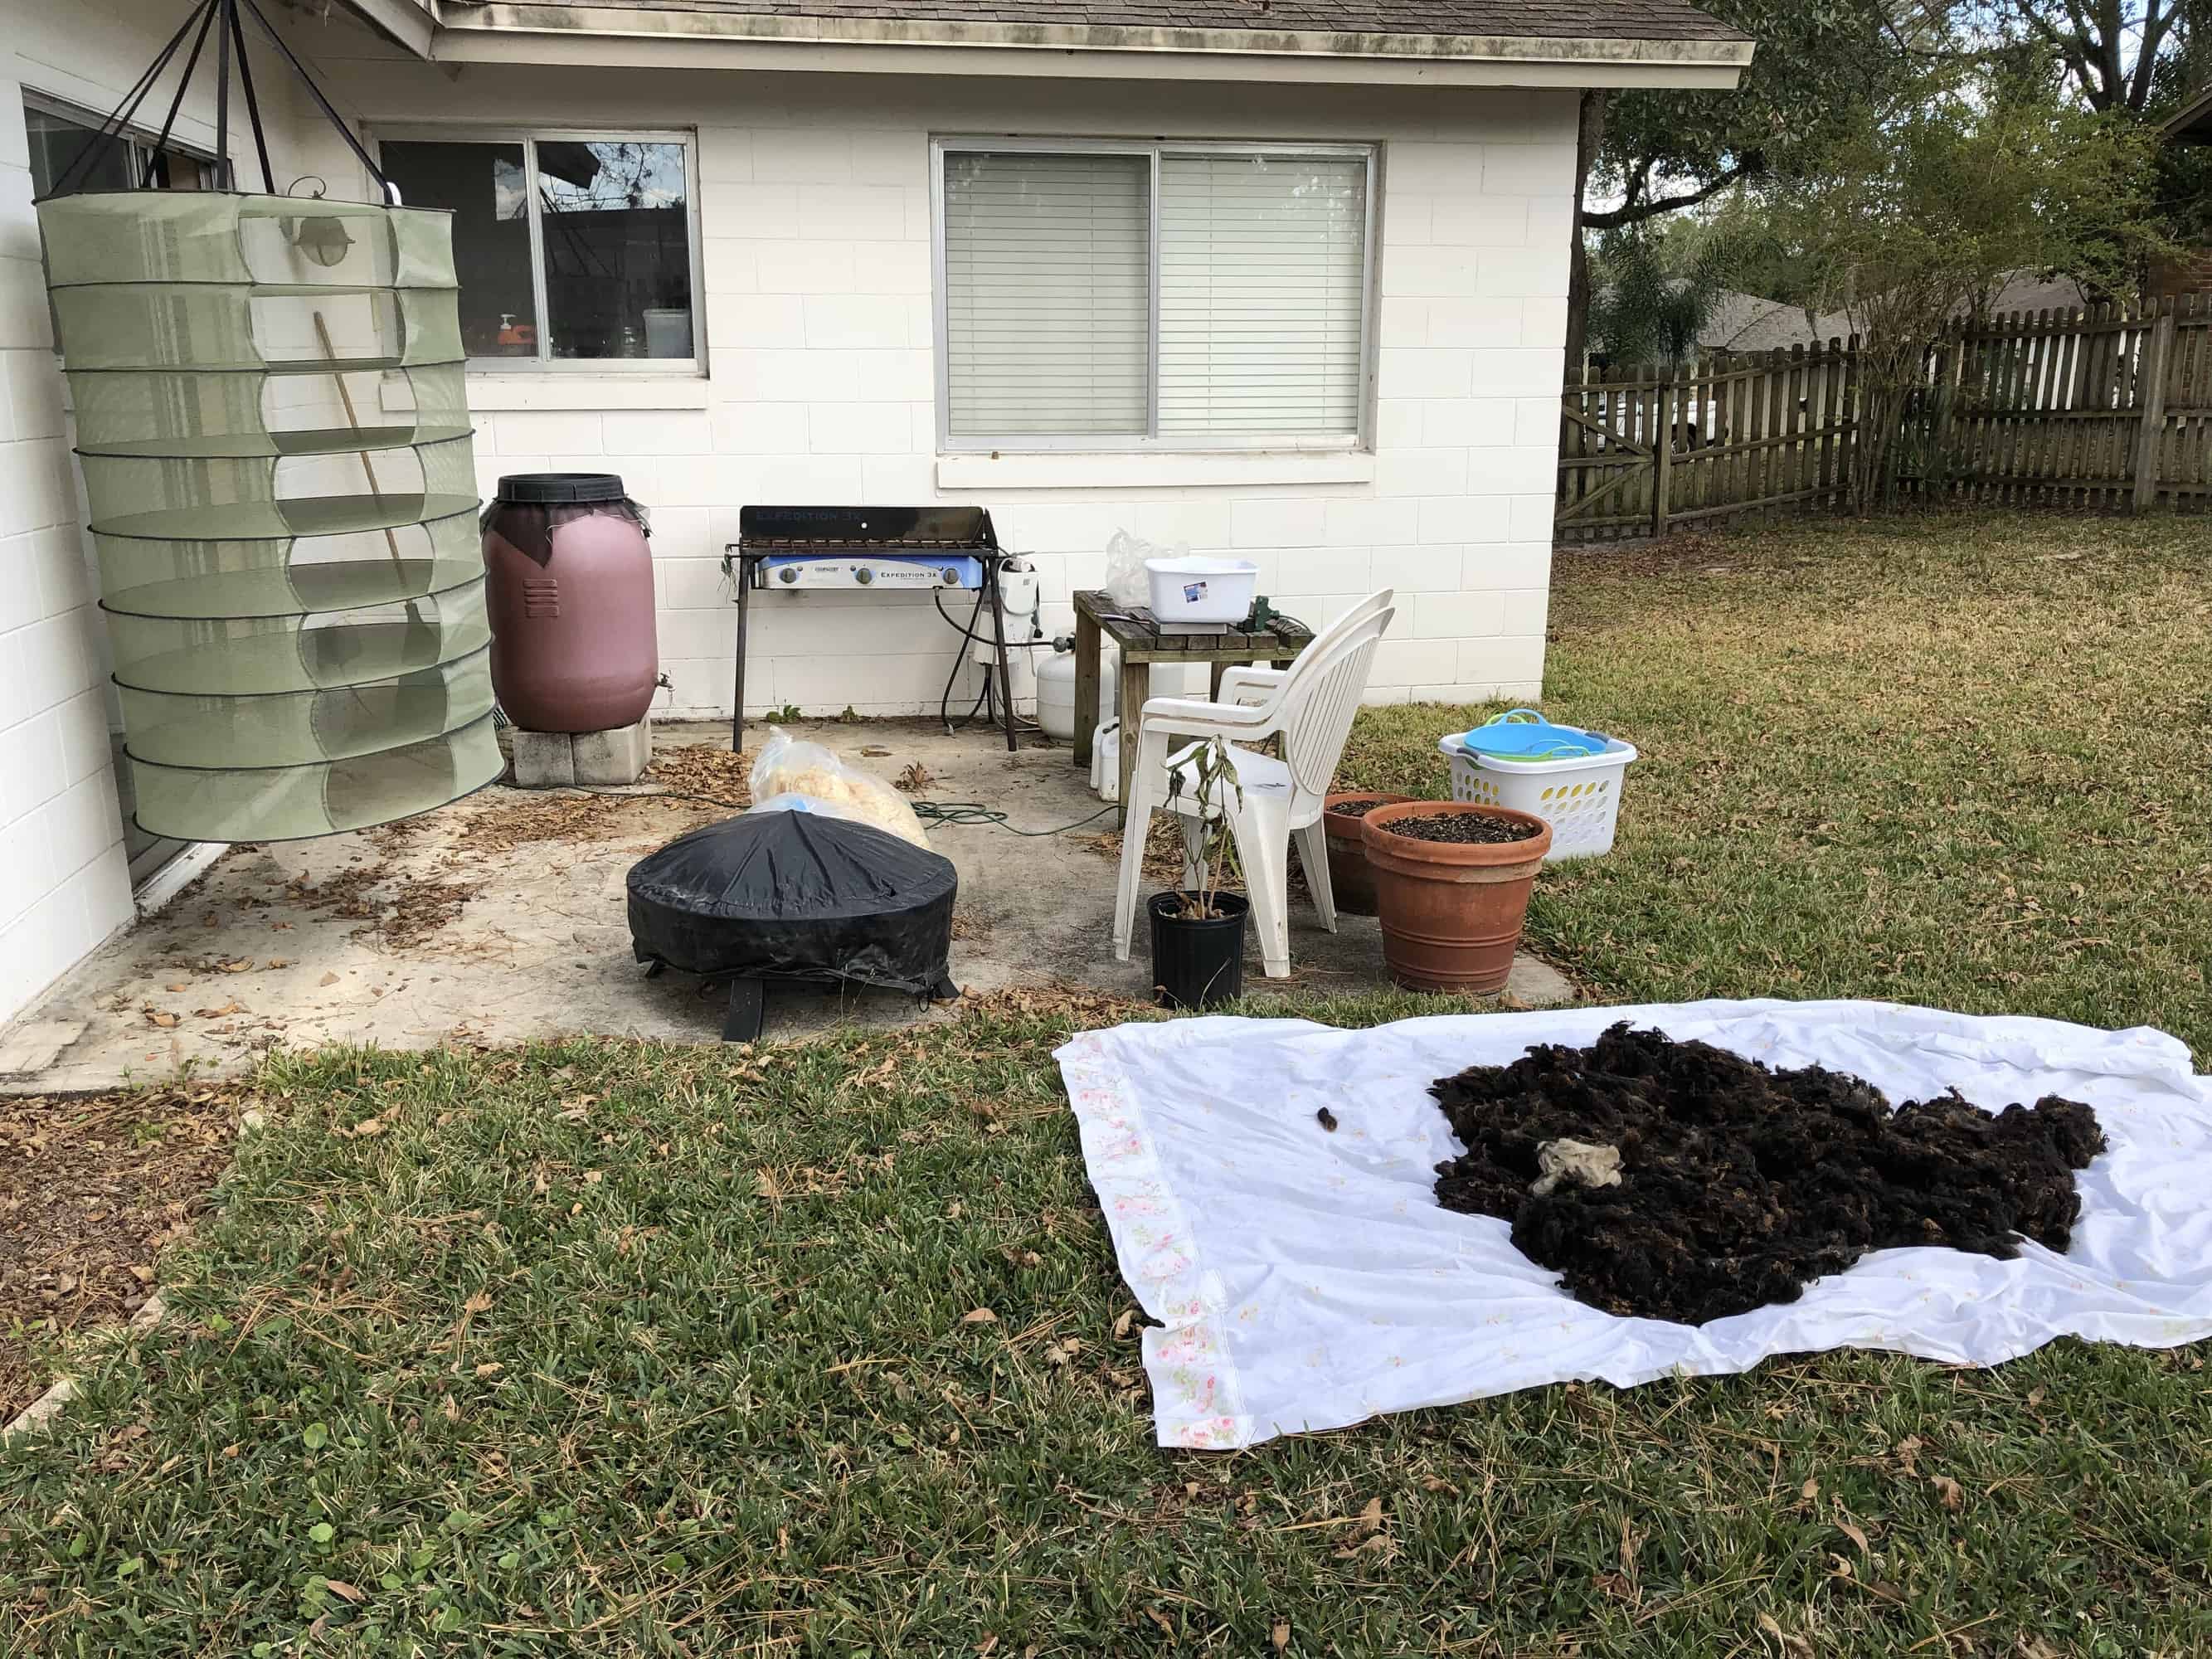
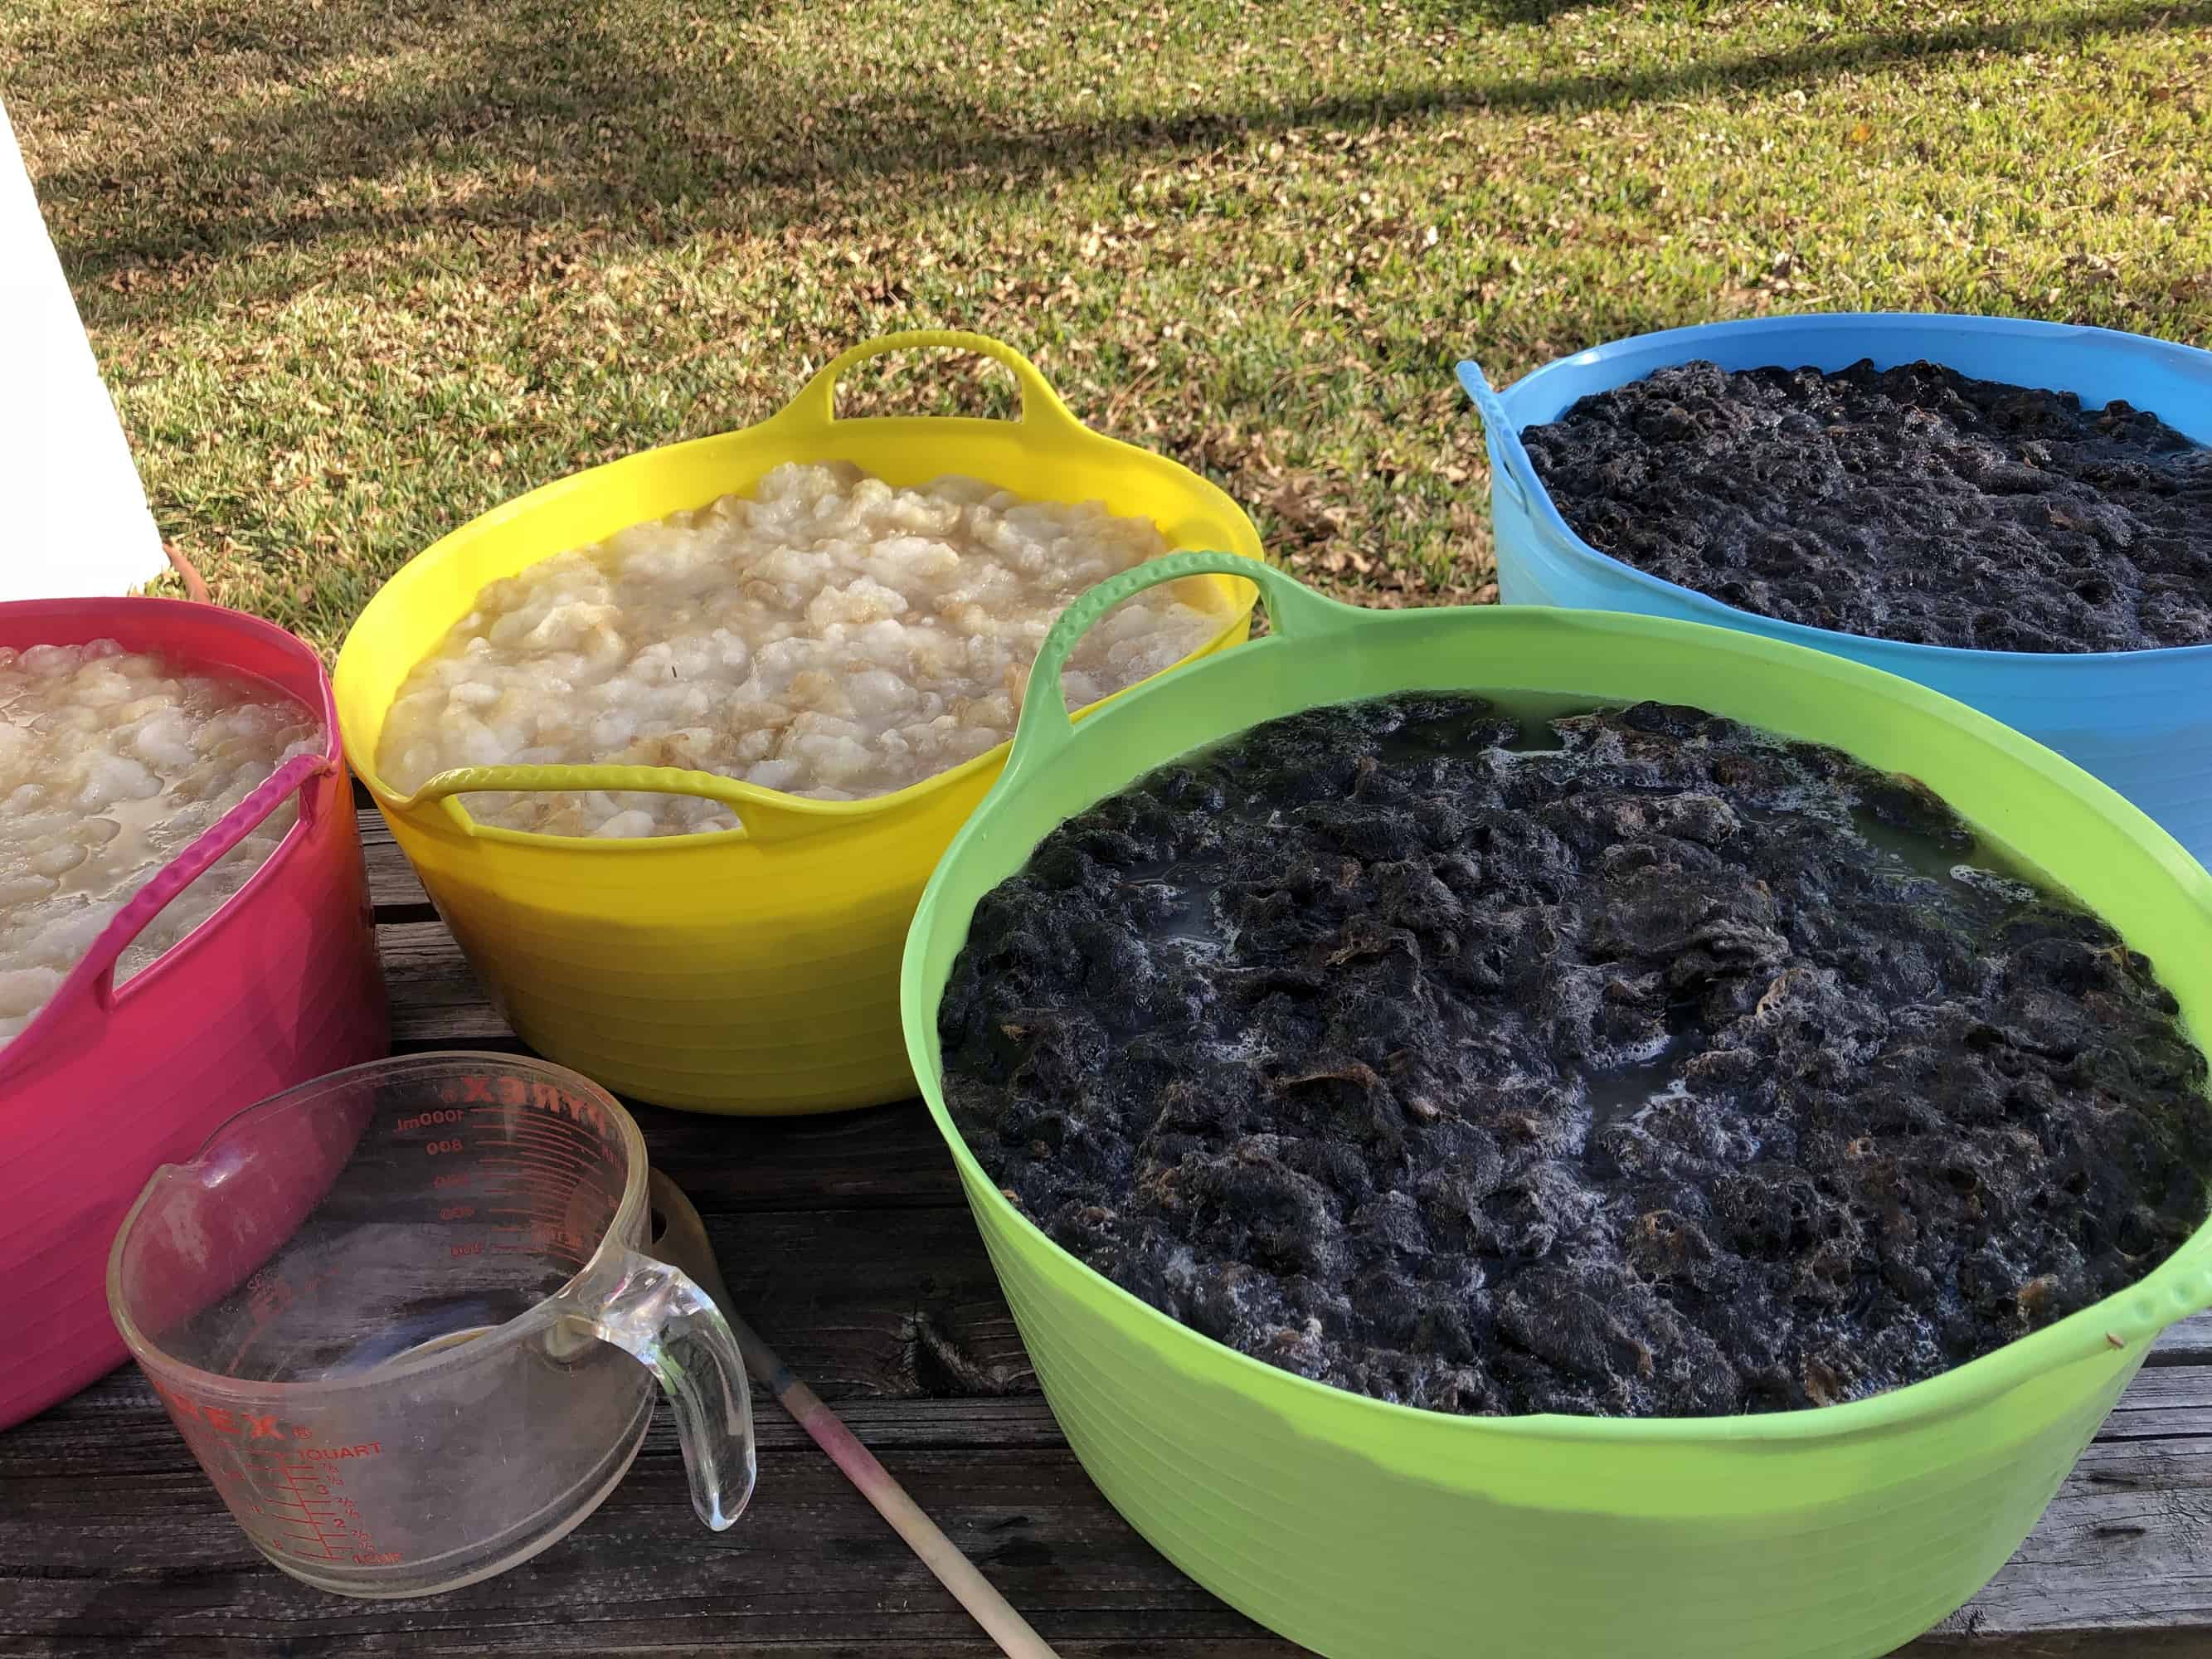
Apparently, I was too busy scouring to take a picture when I was fully set up, but you can see most of it here. I ended up adding a card table, which I placed just behind the fire pit, over those two bags of fleece you see peeking up behind it. In this picture, the white dish pan is sitting on top of my kitchen scale. I moved the dish pan and the scale to the card table and then set up the wash bins on the wooden table.
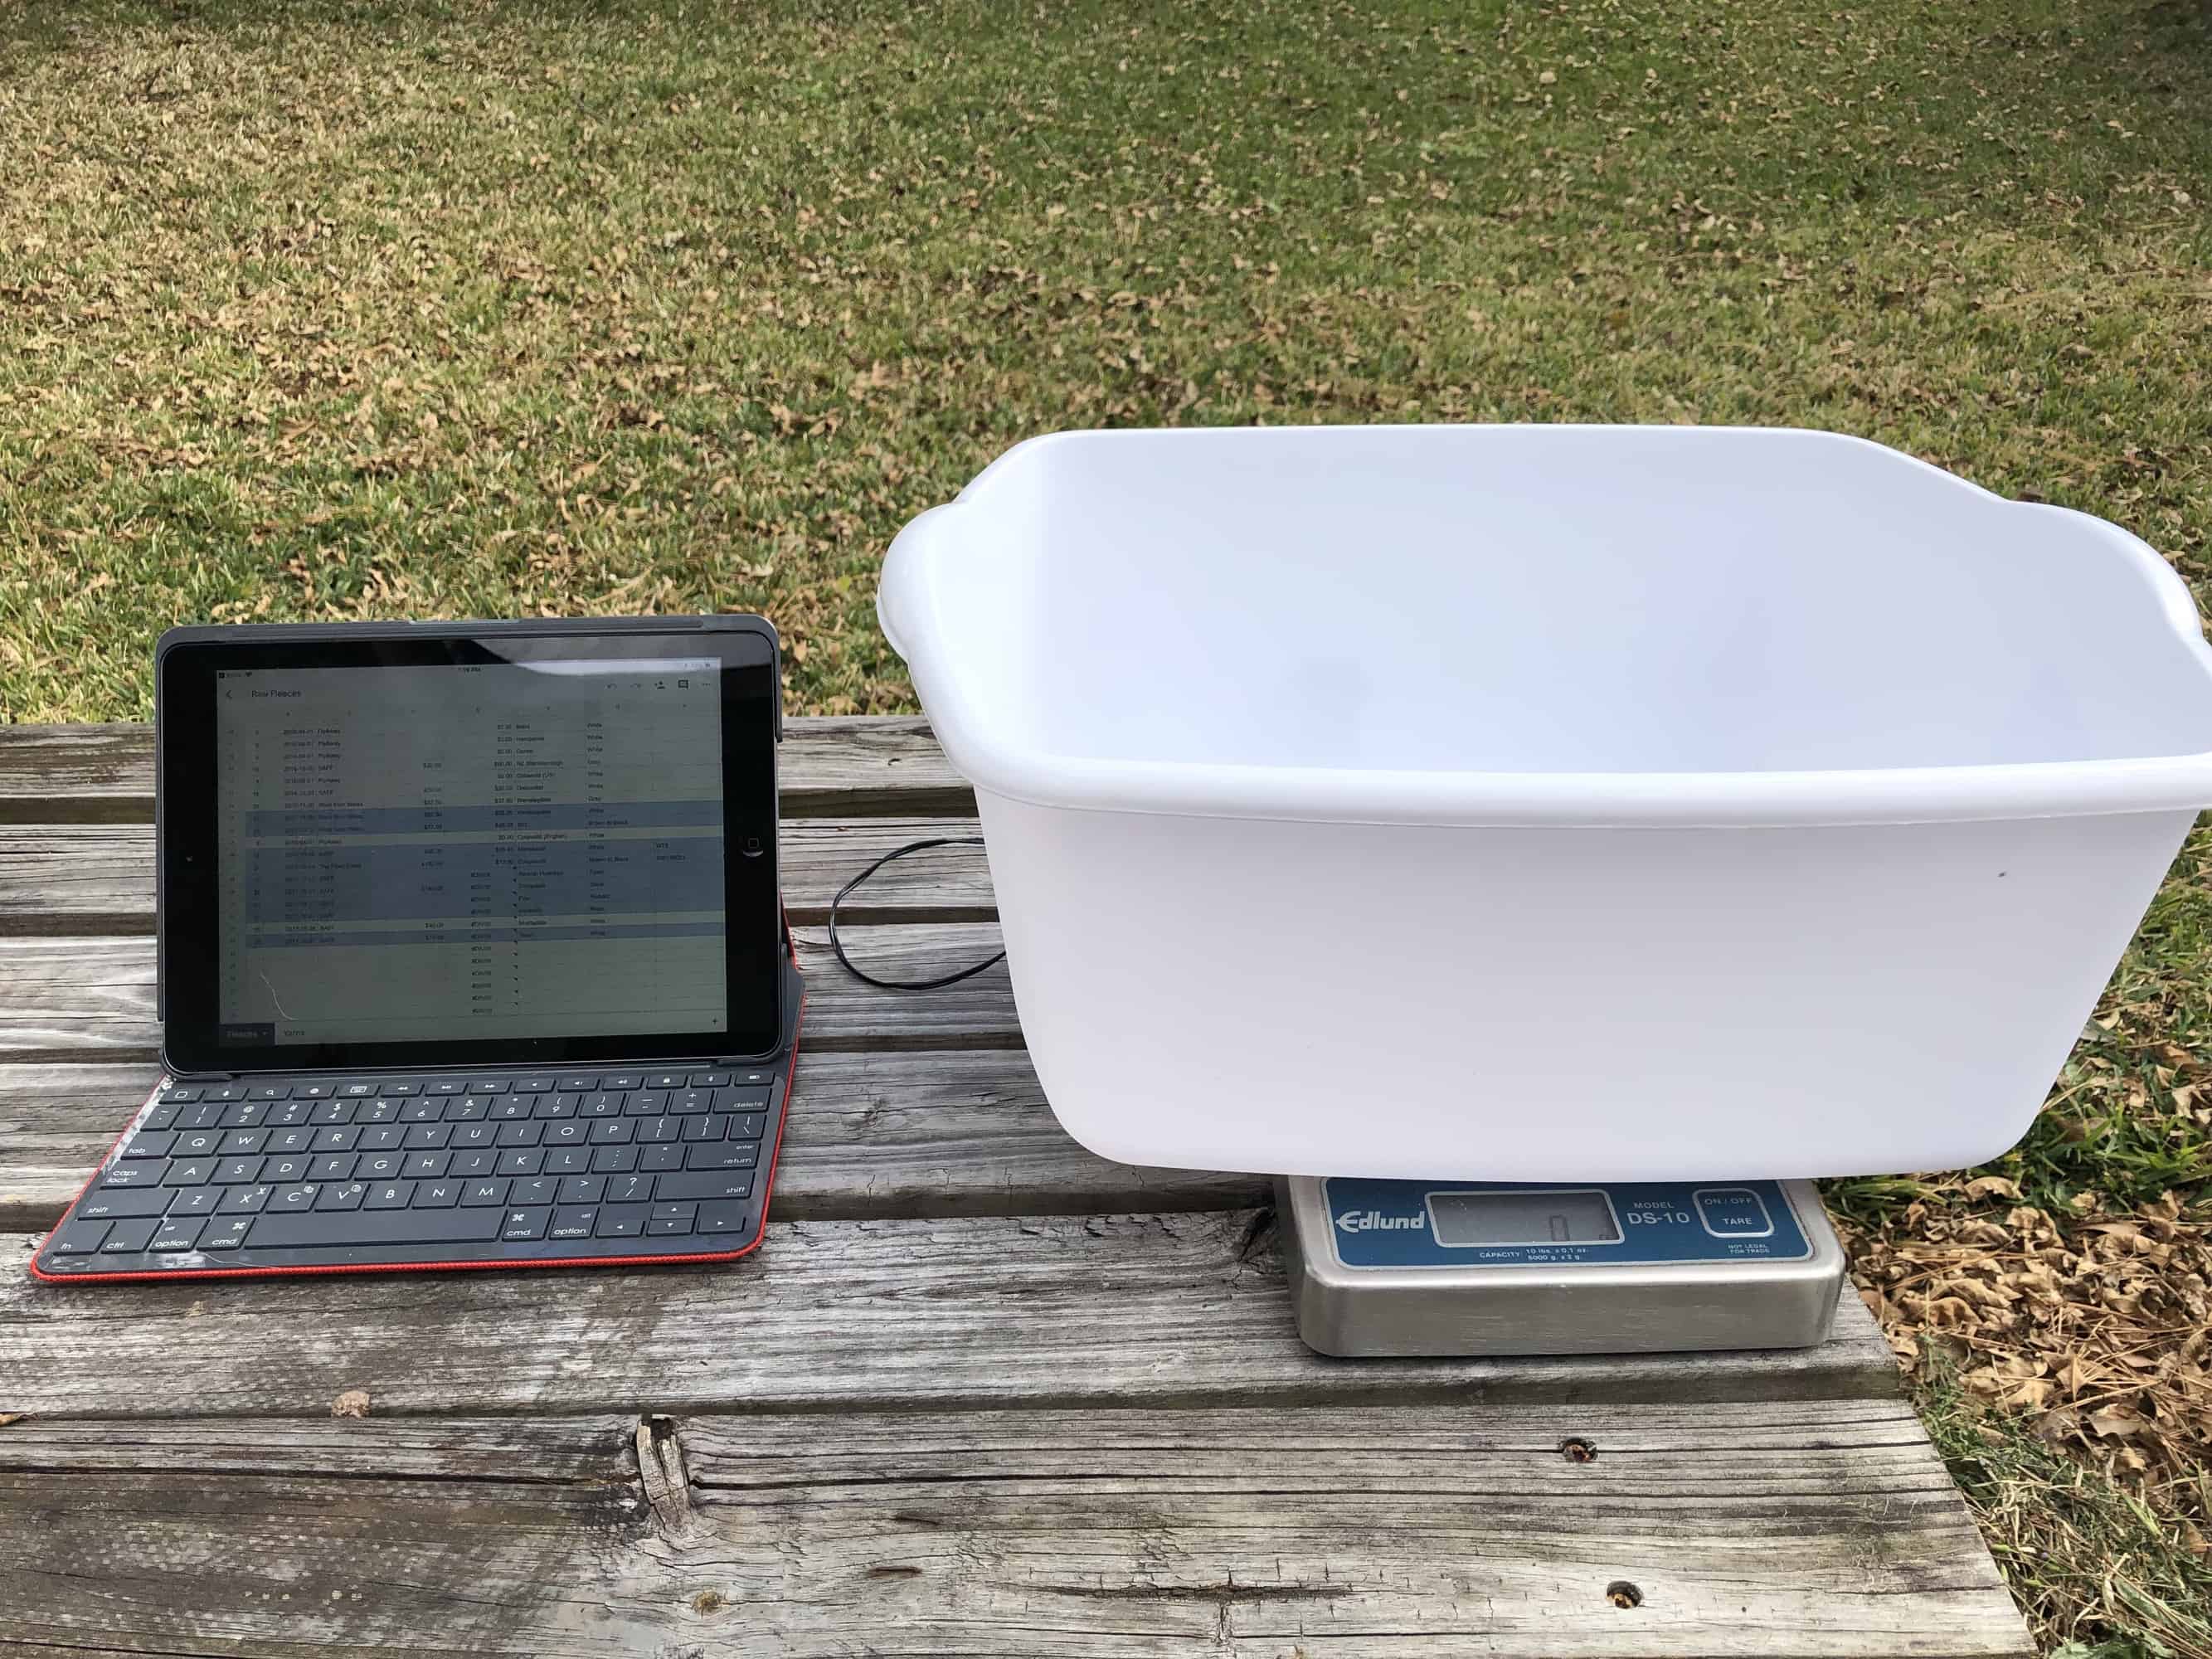
Since part of my learning process is understanding how much weight is lost in processing, I weigh fleece just before I wash it. I use an Edlund DS-10 food scale (Amazon Affiliate link), which I bought at a food supply place 15 or 20 years ago and which I also use for weighing ingredients when I bake. The scale weighs in either grams or ounces and can handle up to 10 pounds. I keep the fleece in the plastic bag and shove it into the dish pan. The fleeces are almost always larger than the dish pan can hold, but the plastic bag helps keep them contained. On my iPad, I have my fleece spreadsheet open so I can enter the weight of the fleece immediately after I weigh it.
Another option for weighing fleece is a fish scale (Amazon affiliate link). One of my friends brought hers to the fleece barn at SAFF this year and I have to get one of these! They are inexpensive, portable, less awkward to manage, and can handle more weight than my food scale. Sounds like a win all the way around!
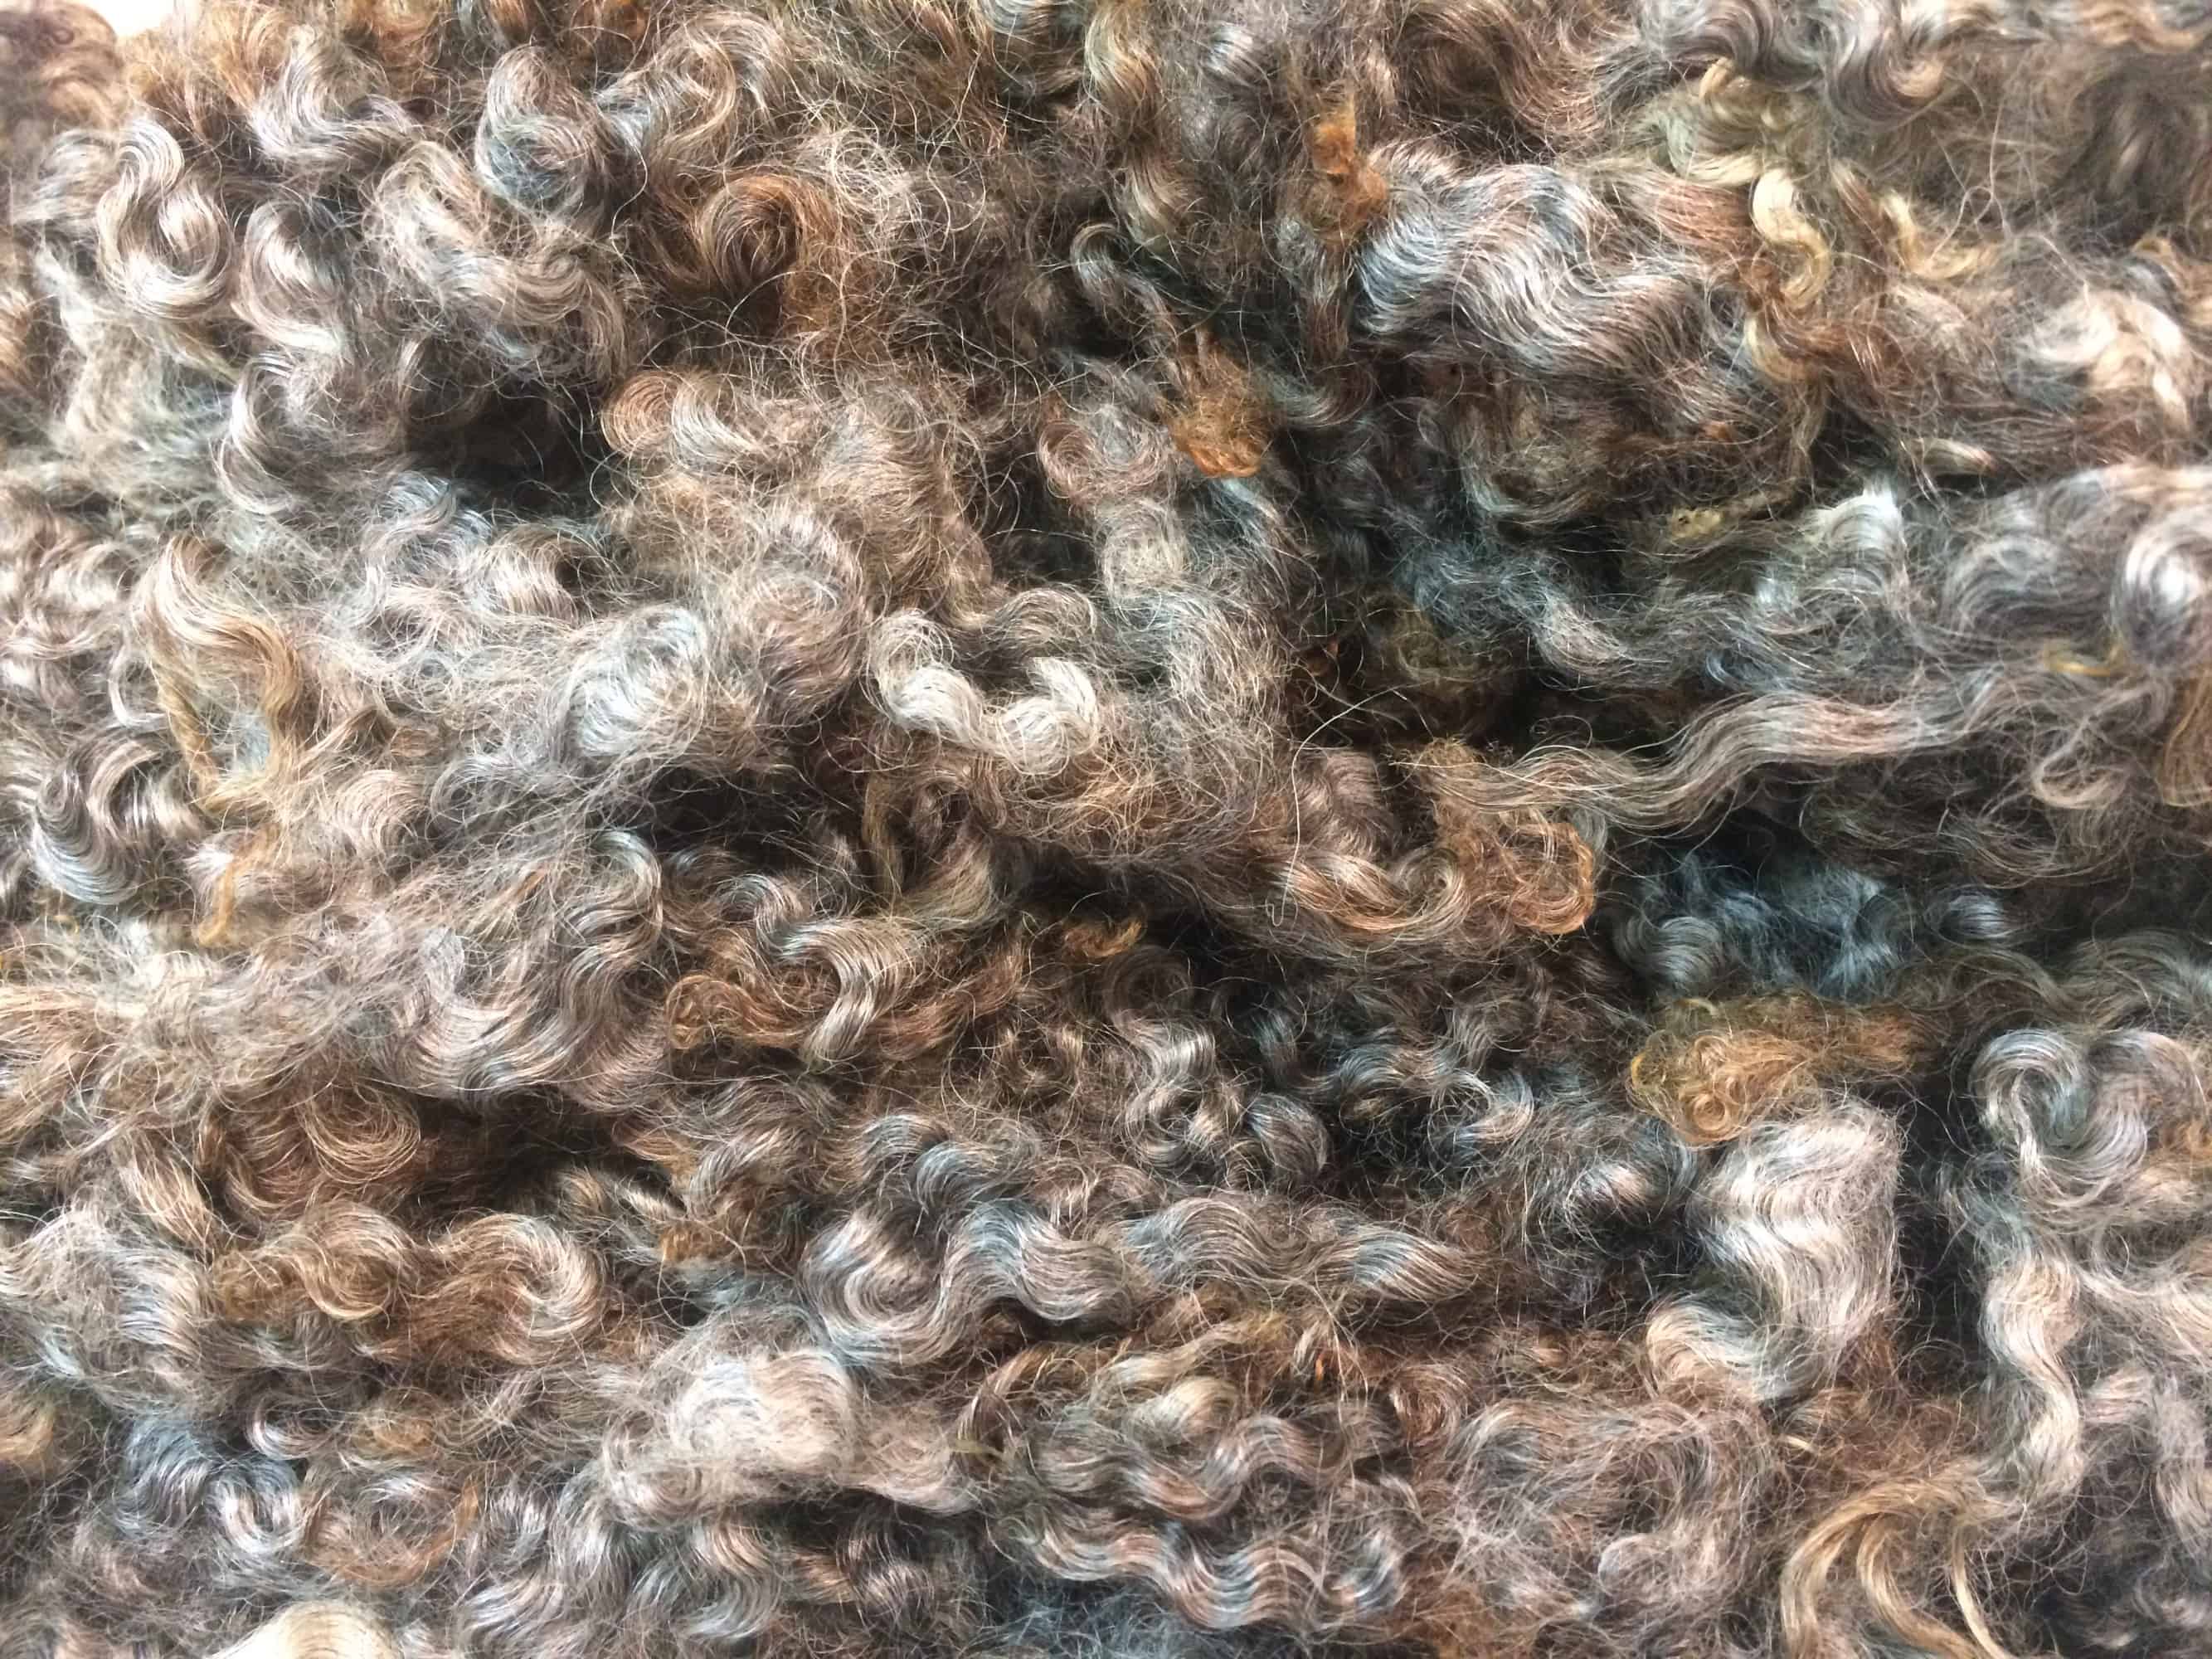
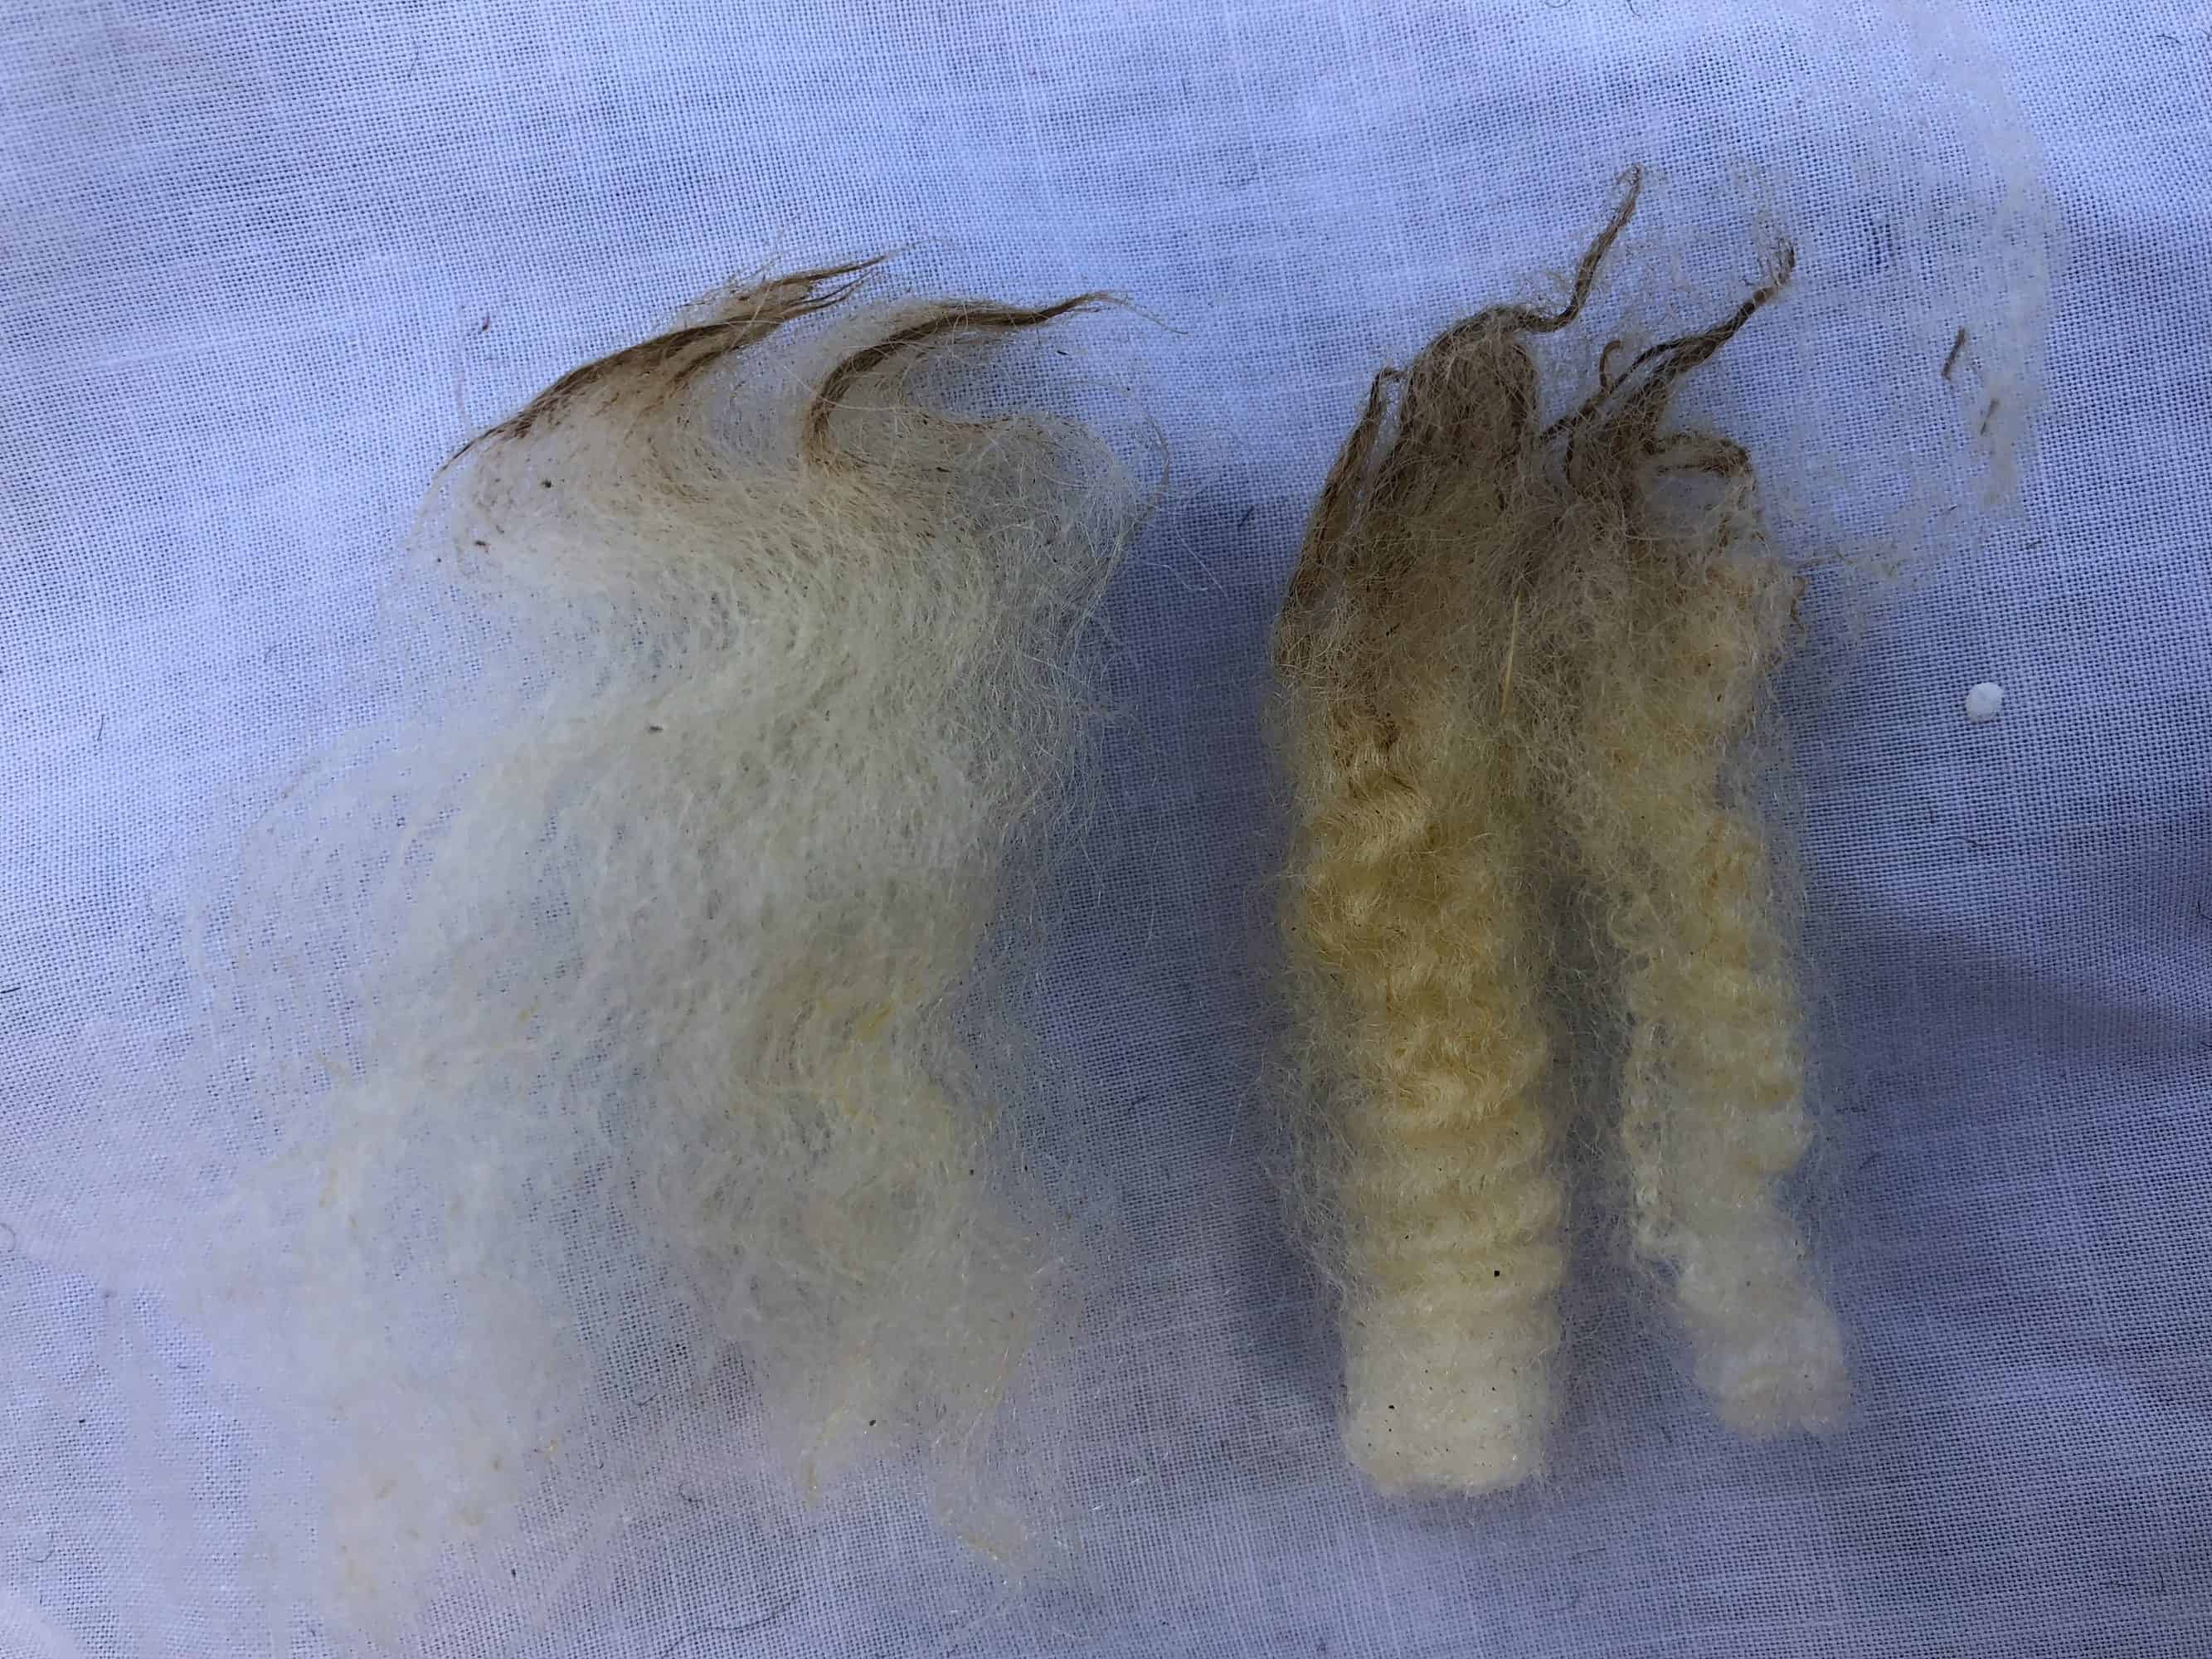
After weighing, I spread the fleece out on a sheet on the ground. I don’t have a skirting table (it’s on my wish list!), so this is the best I can do. When you buy a fleece at a show, you do your best to evaluate it, but you can’t always see everything. Spreading the fleece out lets you make some decisions before you scour. You get an idea of how dirty the fleece is. Most fleeces only need two washes, but if this one’s particularly dirty maybe it will need three. Sometimes the staple length or texture is different on different parts of the fleece. Do you want to separate out the different staples or textures to use them in different projects or are you going to keep them all the same? For example, look at the difference in the crimp on these two locks, both from the same Texel fleece.
The fleece on the sheet in the layout picture above is a piebald Finn fleece. I thought I might want to separate it by color, but once I spread it out, I discovered that there was only one fist-sized clump of white, visible on the left end of the fleece. The rest of the white is stranded throughout the darker parts of the fleece and it would be impossible to separate the colors. I’ll break up the one clump of white and blend it in when I process this fleece. I assume the finished yarn will have a heathered appearance.
In order to get hot water for scouring, I bought a propane-heated outdoor shower. I wasn’t able to get it to work properly — water was spraying out everywhere, partly because the connection to the hose wasn’t solid, despite sealing it with Teflon tape and partly because the switch on the shower head was stuck in the on position. I ended up soaking wet from the thighs down and if someone had been there to get it on video, I’m sure it would have been a great laugh.
After an hour of fiddling with it, I gave up and heated water on the camp stove you can see in the layout picture. I have a couple of 20 quart pots that I used for heating water. When I am putting a dry fleece in for its first wash, it requires nearly one entire pot of water. For the subsequent washes and rinses, the fleece is already saturated so I only need about half of a pot of water. Rather than lifting the hot pots and pouring it in, I use a 4-cup Pyrex measuring cup (Amazon affiliate link) (I inherited mine from my friend Stacy’s grandmother) to transfer the water from the pots to the bins. Easier on my back and I’m less likely to get burned!

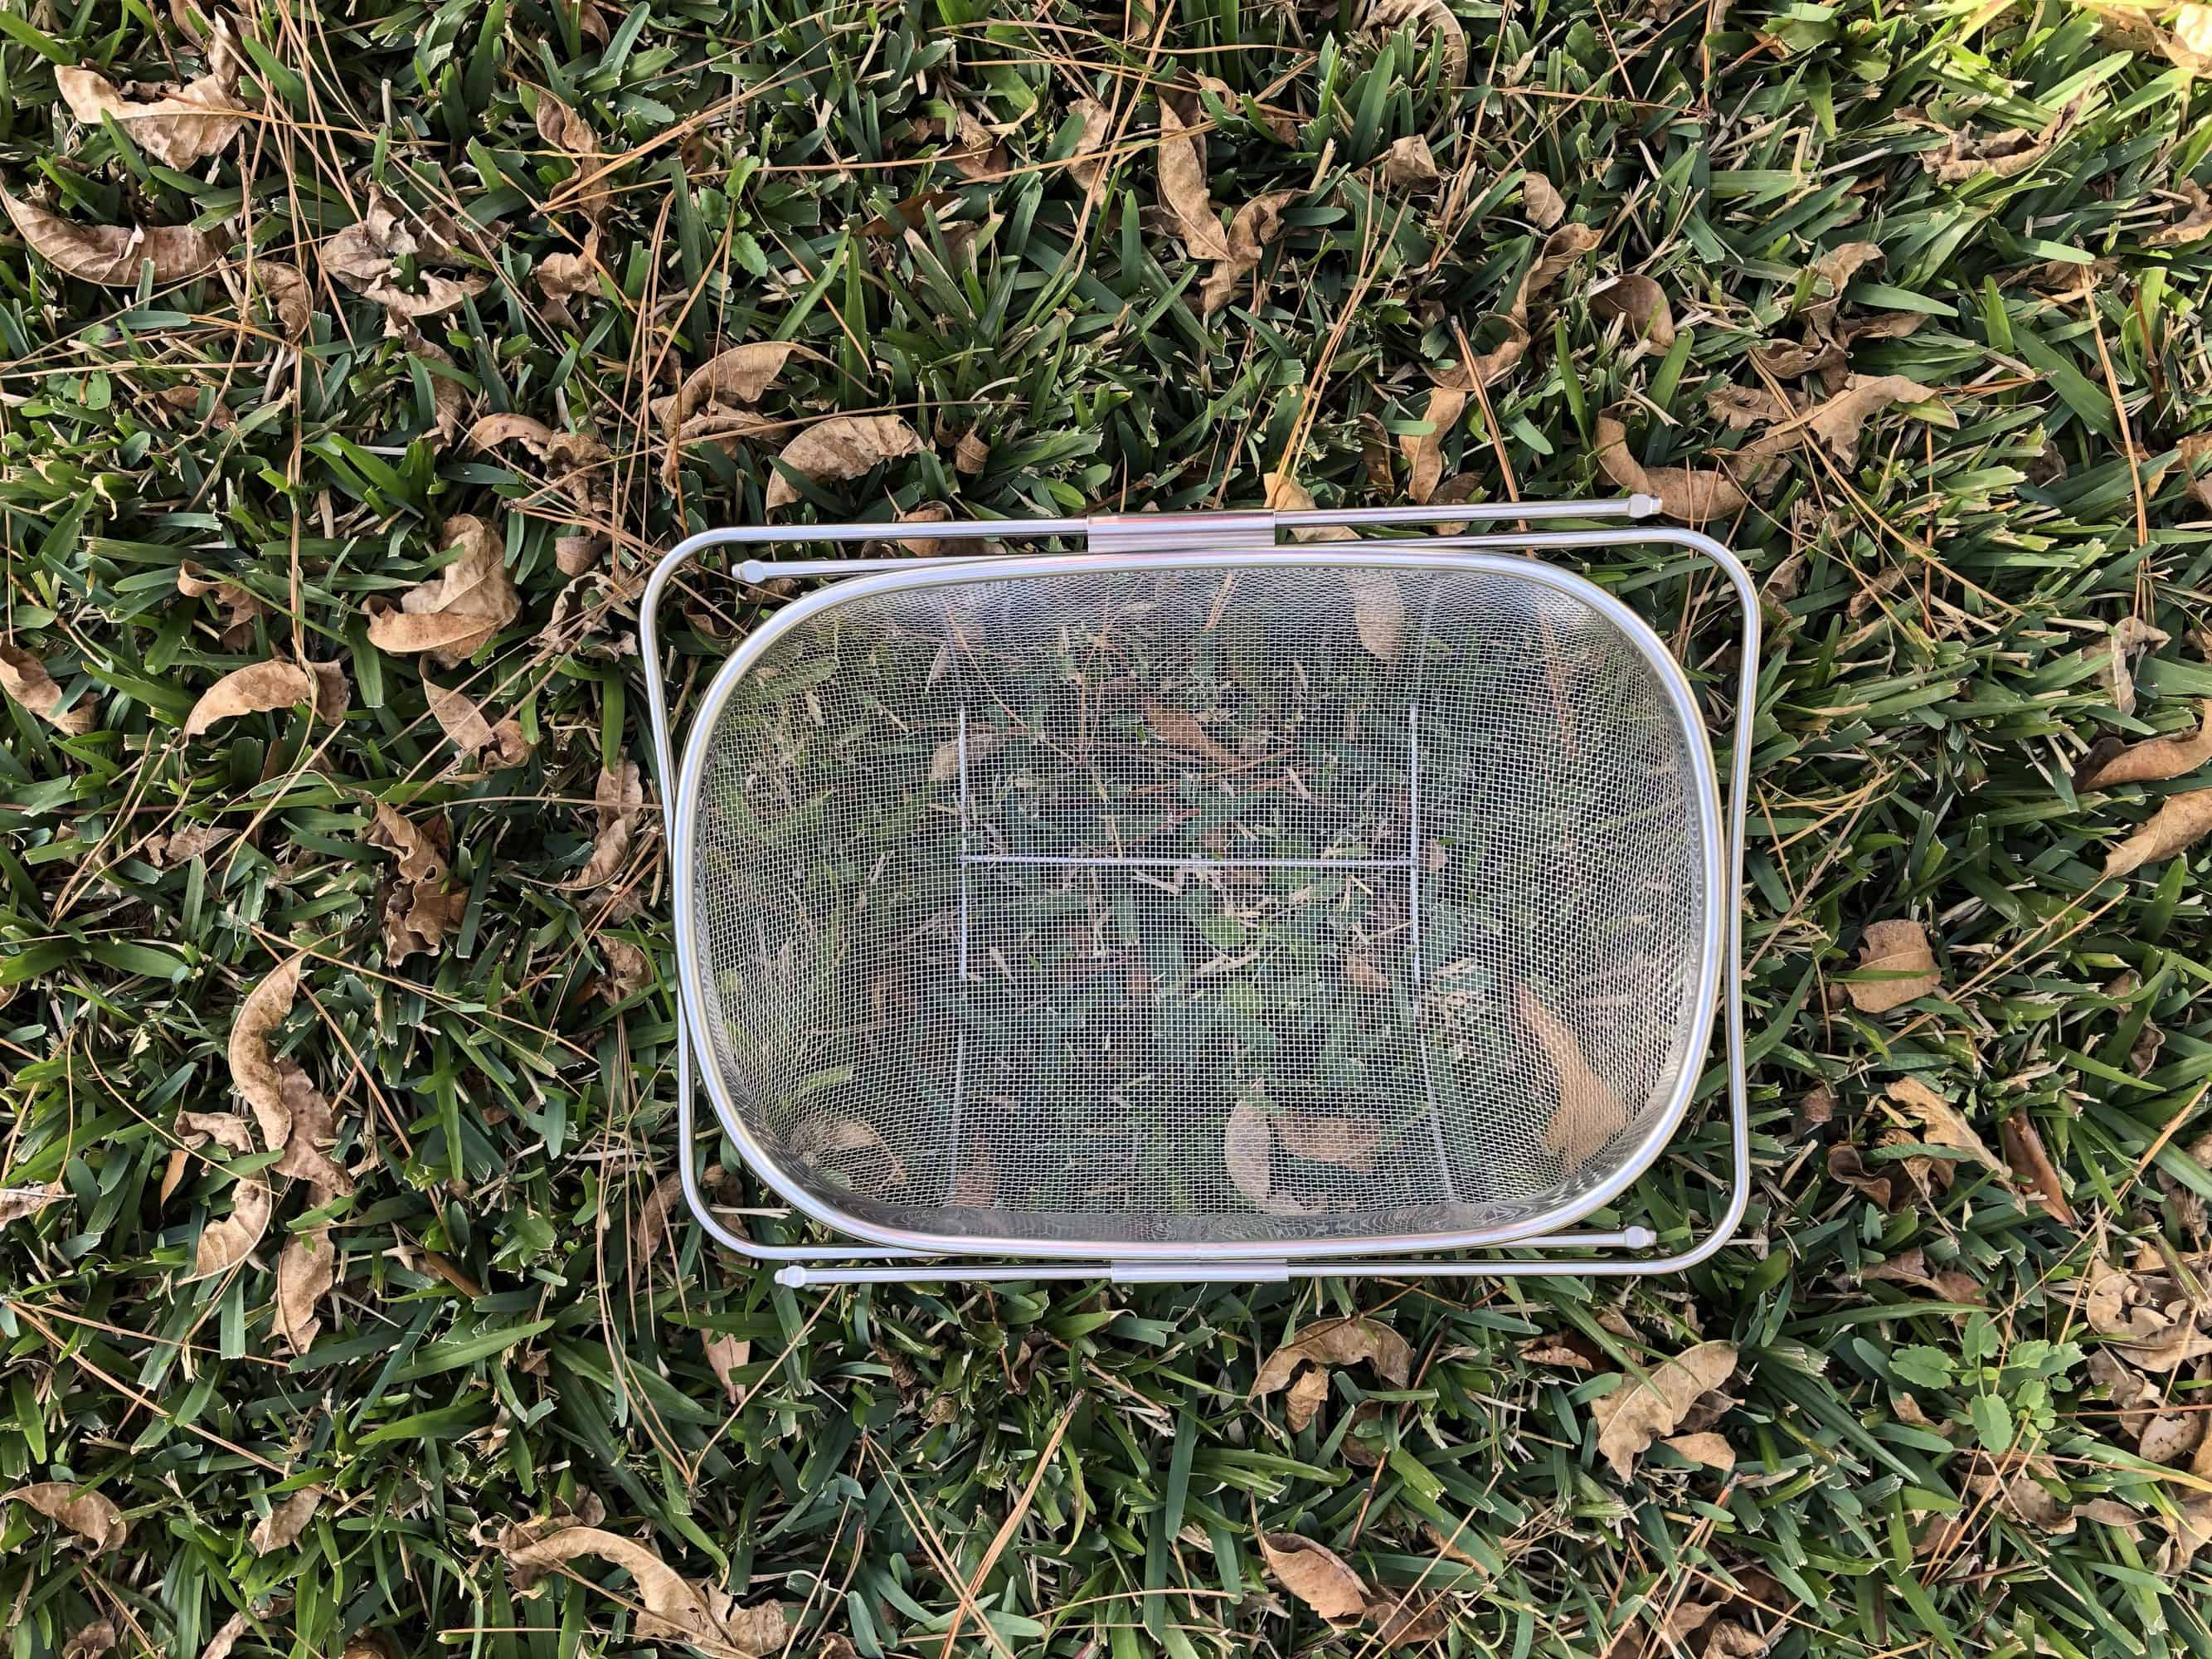
When changing the water between washes, I pour it onto the ground. I pour it through a mesh strainer (Amazon affiliate link) so when fleece inevitably sneaks out of the bin, I don’t have to fish it out of the grass or pick out leaves. Like Beth, I don’t put fleece in mesh laundry bags during washing, mostly because I don’t want to create an obstacle for any VM that would like to come out of the fleece during washing. There are a couple of good reasons to use a mesh bag, however.
One is if you have less than a couple of pounds of any one fleece. You can put 4 ounces, 8 ounces, 1 pound, or whatever of different fleeces into different bags and wash them in the same bin at that same time. Another reason for using mesh bags is the weight of the full bins. Each of the bins above is holding about 2 pounds of fleece and 3 – 4 gallons of water. Since water weighs 8 pounds / gallon, each bin full of fleece is in the neighborhood of 30 pounds. Lifting the bins and pouring the water out is a workout — especially if you wash multiple fleeces like I did while taking these pictures. I washed the two fleeces you see in these pictures (about 3 pounds each of Texel and Finn), plus a 2.5 pound Icelandic fleece, plus 6 pounds worth of an 8.5 pound Coopworth fleece. I then ran out of both daylight and propane, so I had to stop. It took me about 4 hours, during which I was lifting each of those bins every 15 – 20 minutes. As I told my personal trainer when I saw him the next day, that’s why I train; it makes the rest of my life possible. If lifting that much weight is not an option for you, put the fleece in mesh bags! You can lift them all the way out of the water and use a measuring cup or some other scoop to remove the water a little at a time.
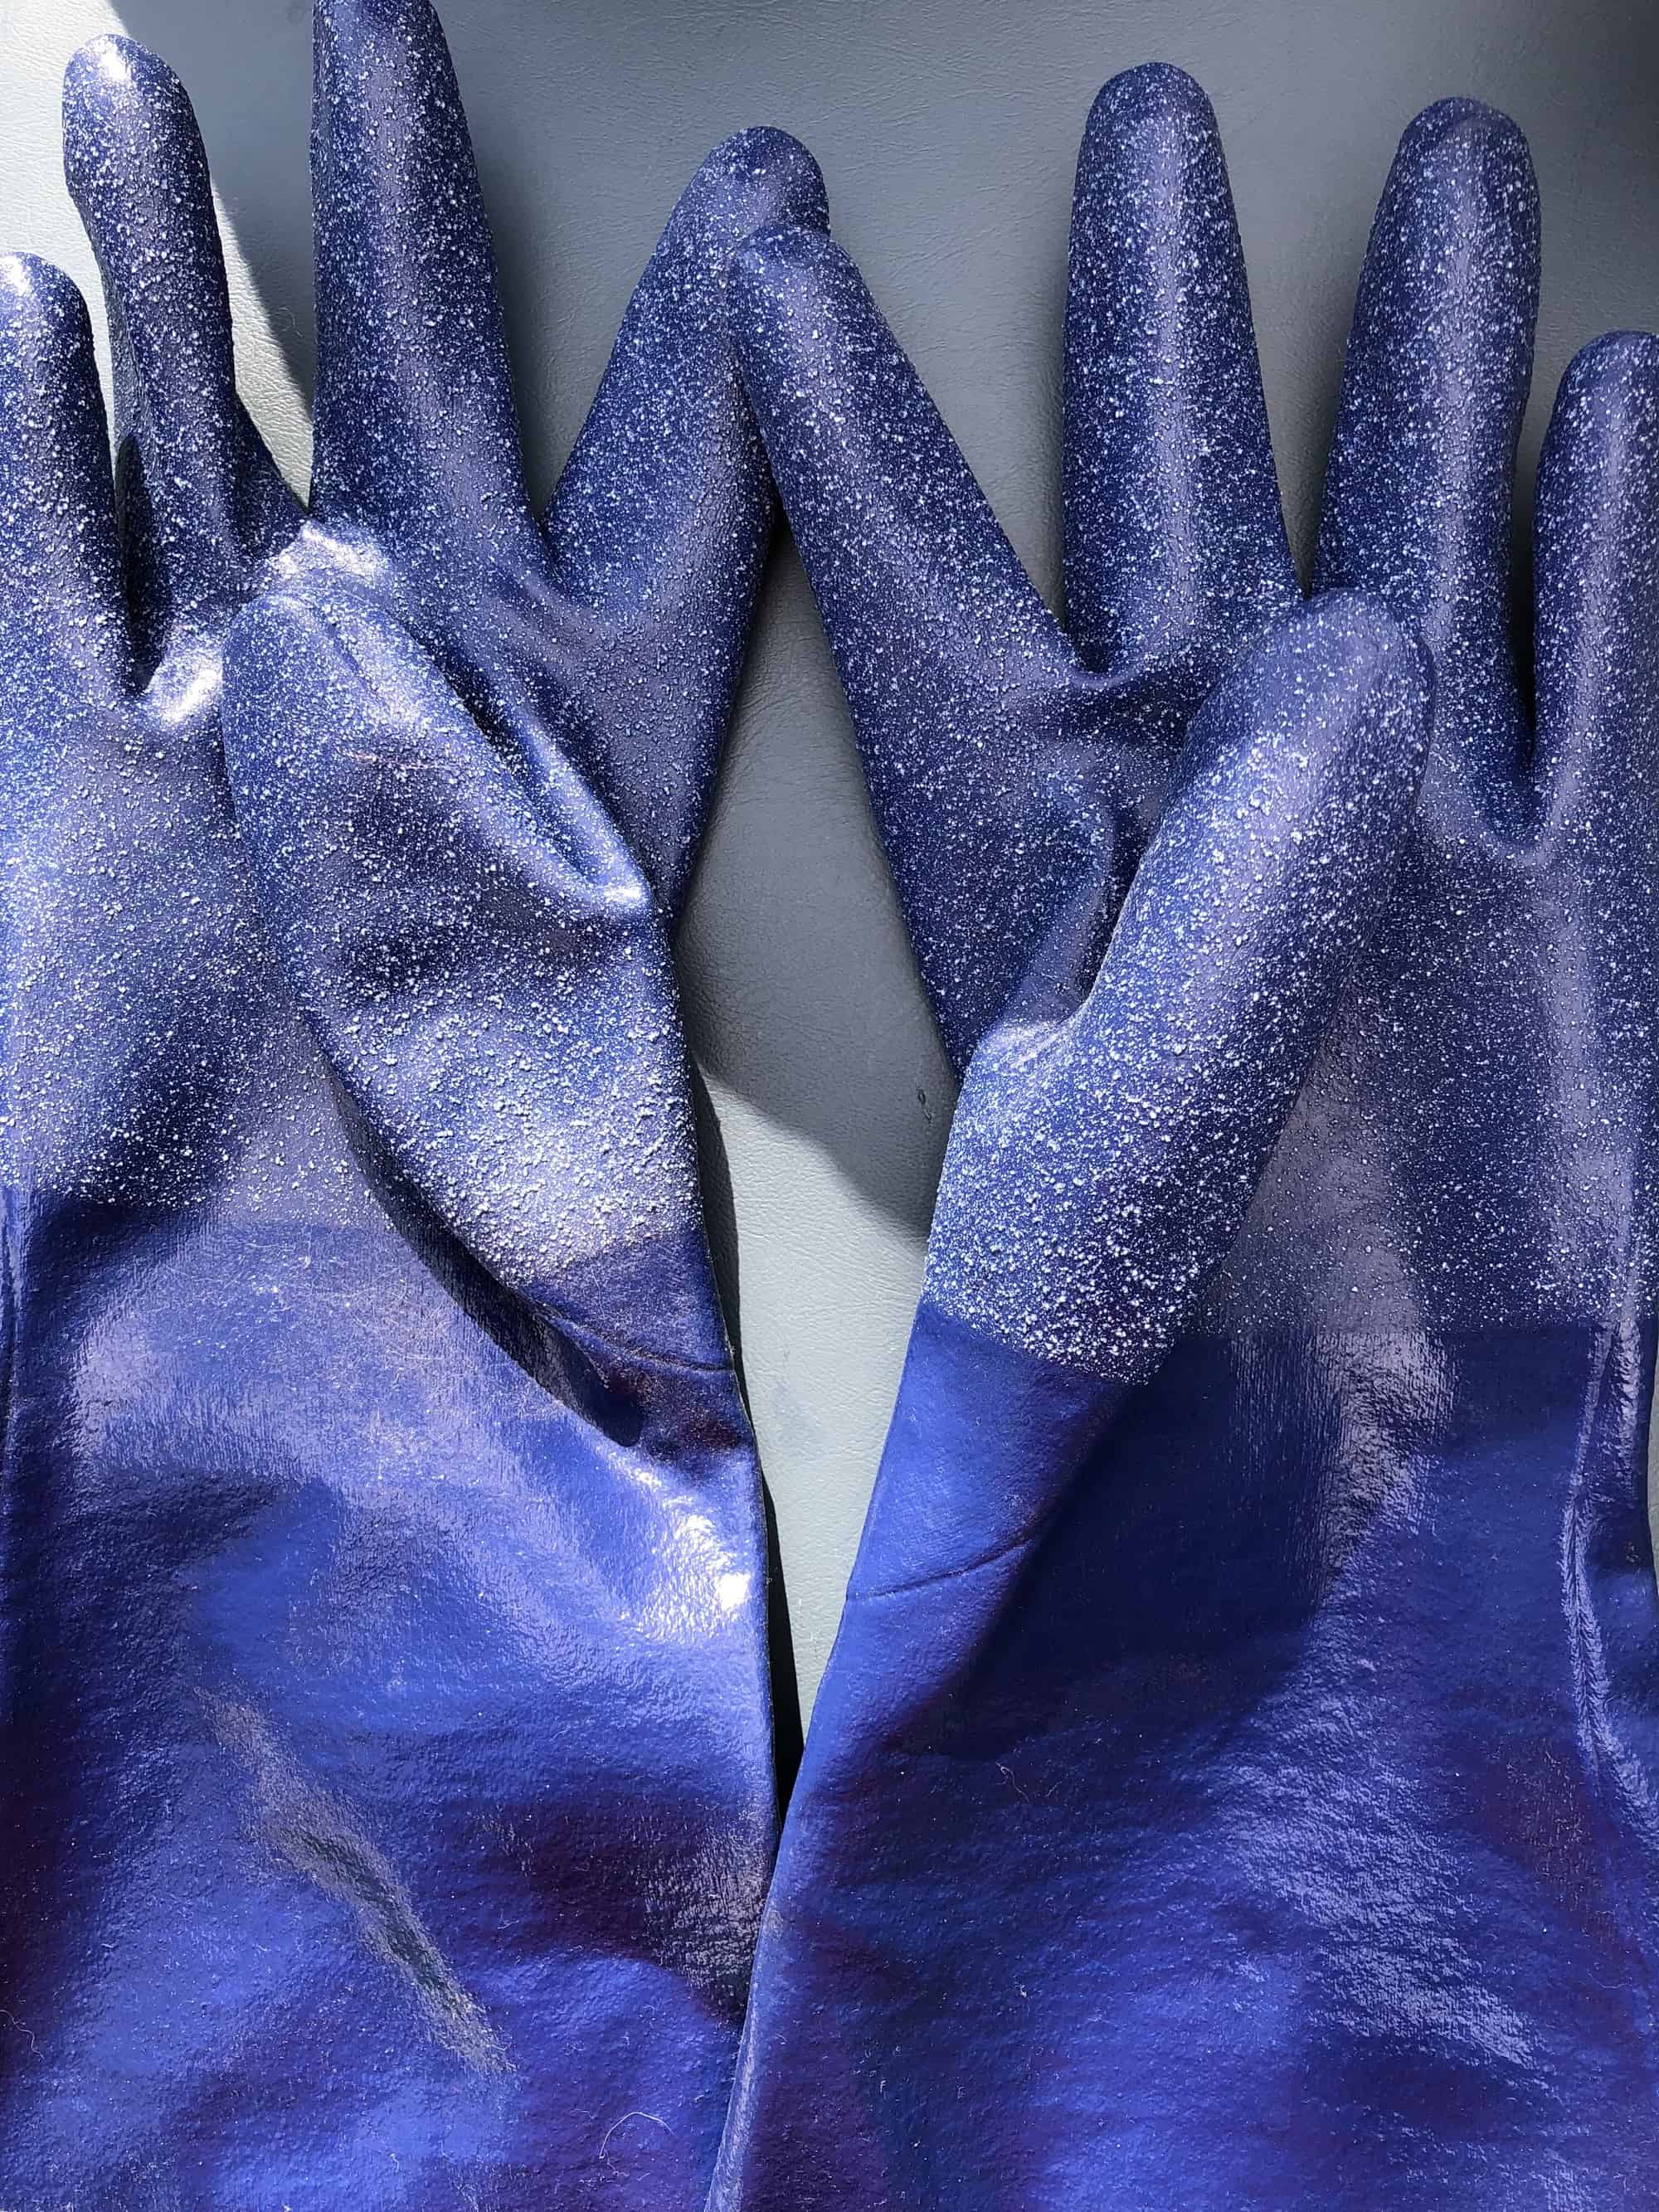
When working with hot water and wool, I use SteamGloves (Amazon affiliate link) to protect my hands and arms. These gloves are made for food service workers to protect themselves when working around steam tables or with cleaning chemicals. The gloves are rated to 225 degrees Fahrenheit. I use them when dyeing, to pick the finished yarn directly out of the hot water. I use them with scouring, either to pick hot wool directly out of the hot water or to protect the hand that is holding the wool in the bin while I pour out the hot dirty water. The pair I have are 20″ long, which means the cuffs come above my elbow, and they are a size large. I bought these at a local restaurant supply place and it was the only size they had. Amazon carries a variety of lengths and sizes. The link I provided is the size and length I use, but click around a bit if you need a different size and you should find something suitable.
After scouring, I put the fleece into mesh laundry bags and run it through the spin cycle of my washing machine. I bought mesh laundry bags in a couple of sizes for this purpose. I’ve been using the jumbo size, which can hold an entire fleece, but I’m going to switch to a smaller size because there is too much space in the jumbo ones. The fleece moves around itself and I ended up with a little felting. It’s not terrible, and I’ll be able to deal with it when I comb or card or flick the wool, but why make extra work for myself?
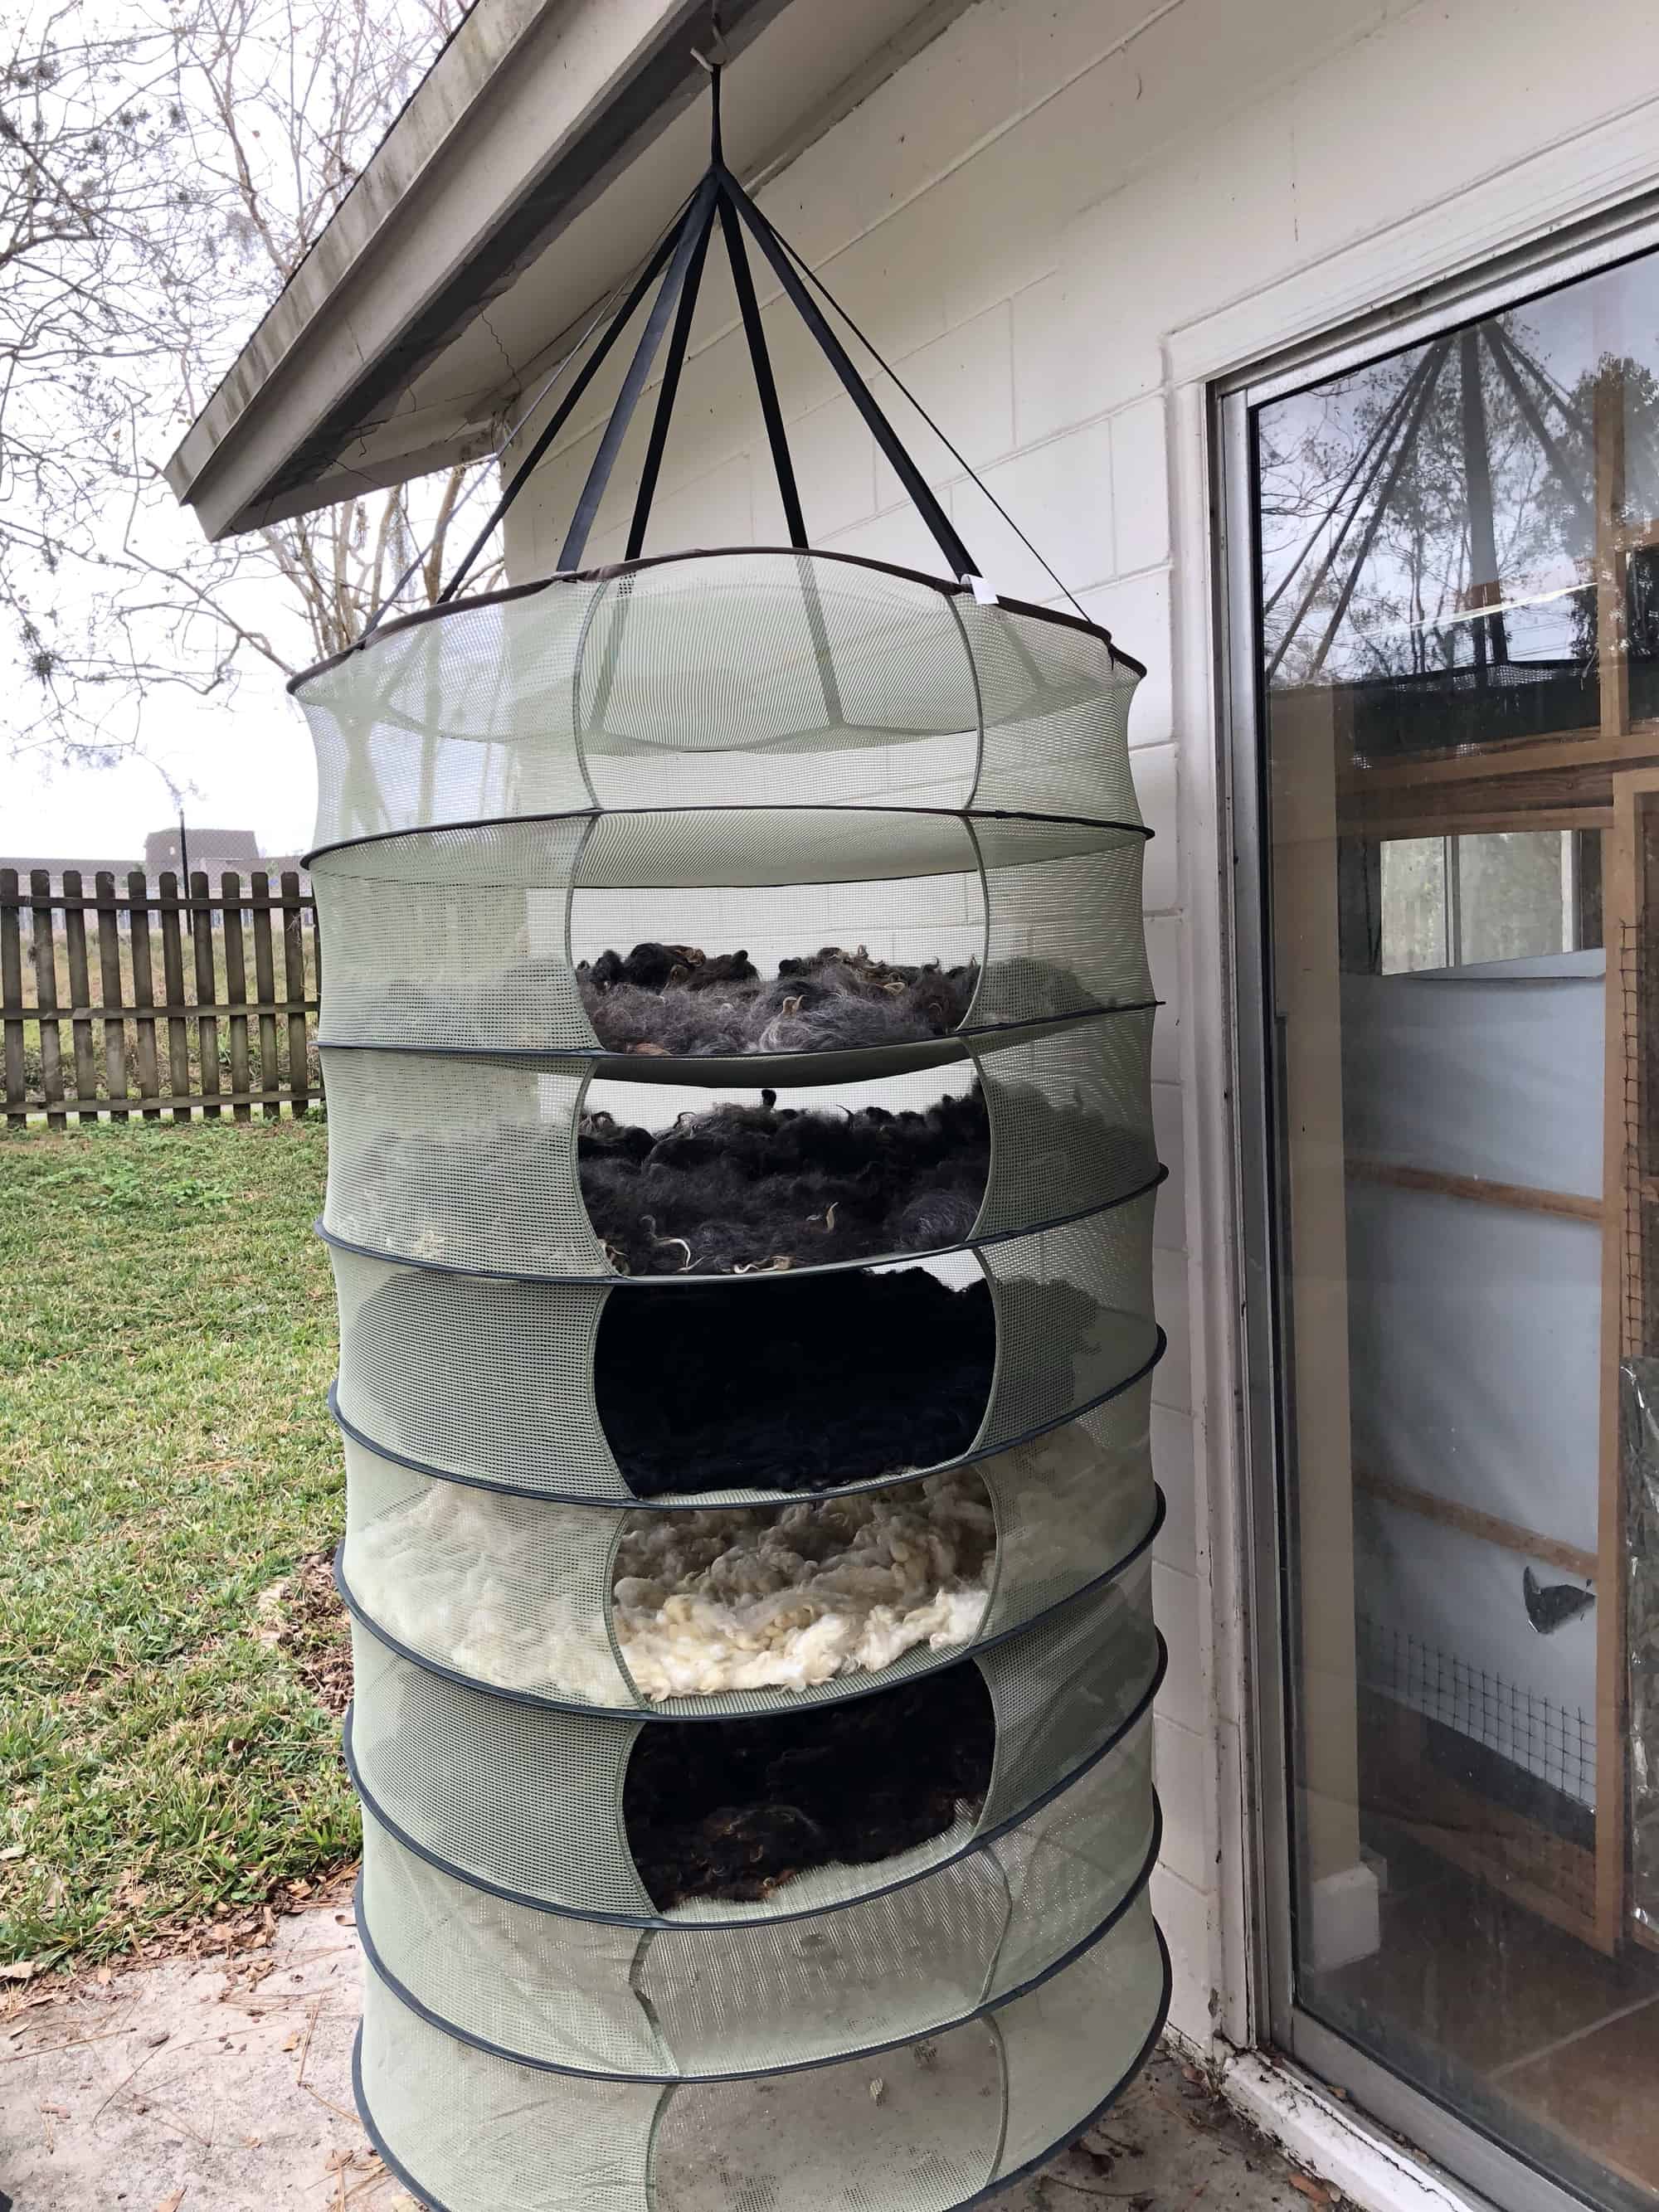
After the spin cycle, it’s time to lay the fleece out to dry. That big green thing is my drying rack. It’s meant for drying herbs and it’s the best thing I’ve found for drying wool. It’s huge — more than 3.5 feet in diameter — and has 8 shelves. Each shelf holds at least 3 pounds of fleece. The shelves are strong enough to hold more than 3 pounds, but I like to spread the fleece out in a thin layer so it will dry quicker. When I’m done drying fleece, the rack collapses and folds up into a small carrying case that fits inside the bins I use for washing. I store all of my fleece washing equipment together, stacked up in the white laundry basket in the first picture. Two of these drying racks fit in that stack. The rack is hanging from a plant hook installed by the prior owners of our house. In this picture, it is holding (from top to bottom) the 6 pounds of Coopworth separated into two sections, the 2.5 pound Icelandic fleece, the 2.75 pound Texel fleece, and the 3.15 pound Finn fleece.
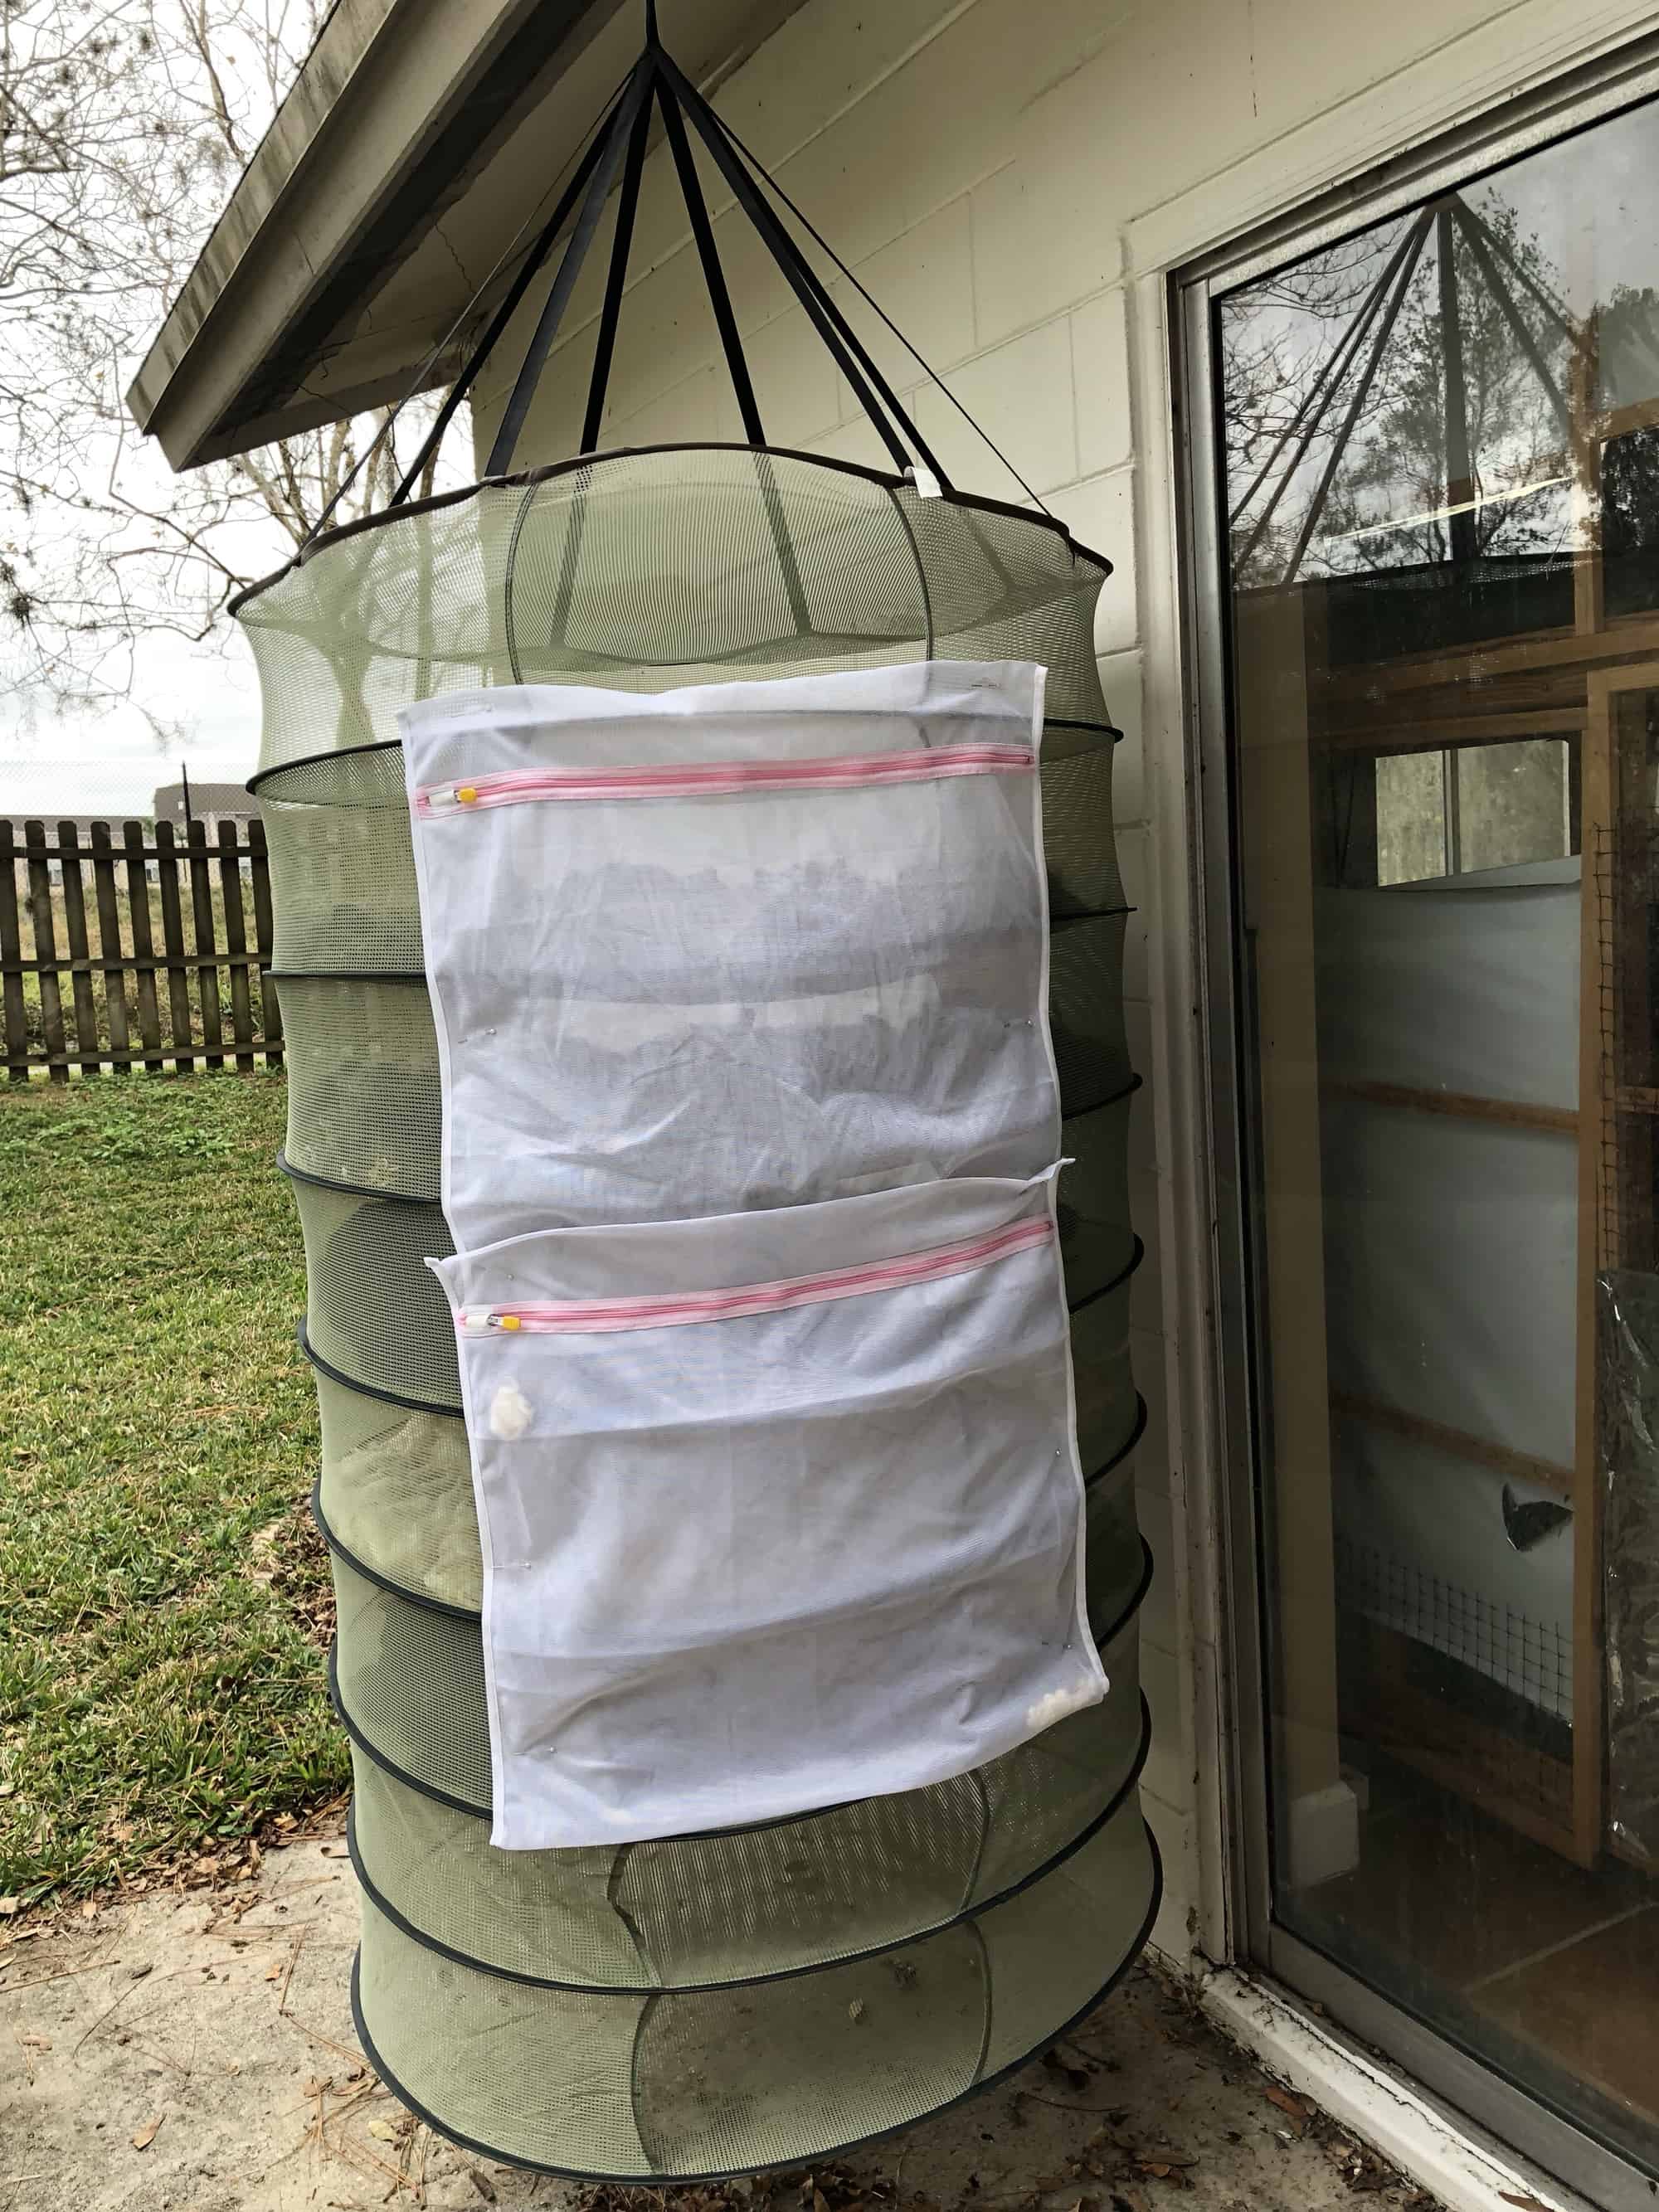
I’ve got a huge oak tree in the front yard and it is home to many squirrels. Since I don’t want the squirrels stealing fleece to line their nests, I pin mesh laundry bags over the openings.
Here in Florida, since I wash and dry outside, scouring fleece is a winter task. Between April and October, sometimes into November, it is so hot that you don’t want to be doing all this labor outside and the humidity is so high that the fleece just will not dry outside . I do not have anywhere inside to hang the drying rack. But last Sunday, it was in the mid-60s and the humidity was low. It was spectacular weather for working outside and I had a pleasant afternoon scouring fleece. I hope to scour the rest of my fleece by the end of January and then I’ll start processing it!