On My Birthday

My birthday was several days ago.  We got home from New Jersey only a few days before that.  I was tired and needed to get back into a rhythm at home.  I decided the best gift I could give myself for my birthday was progress on personal projects.  I made progress on three projects: (1) Finishing a loom and spinning wheel; (2) Scouring fleece; and (3) Spinning a batt.

Finishing

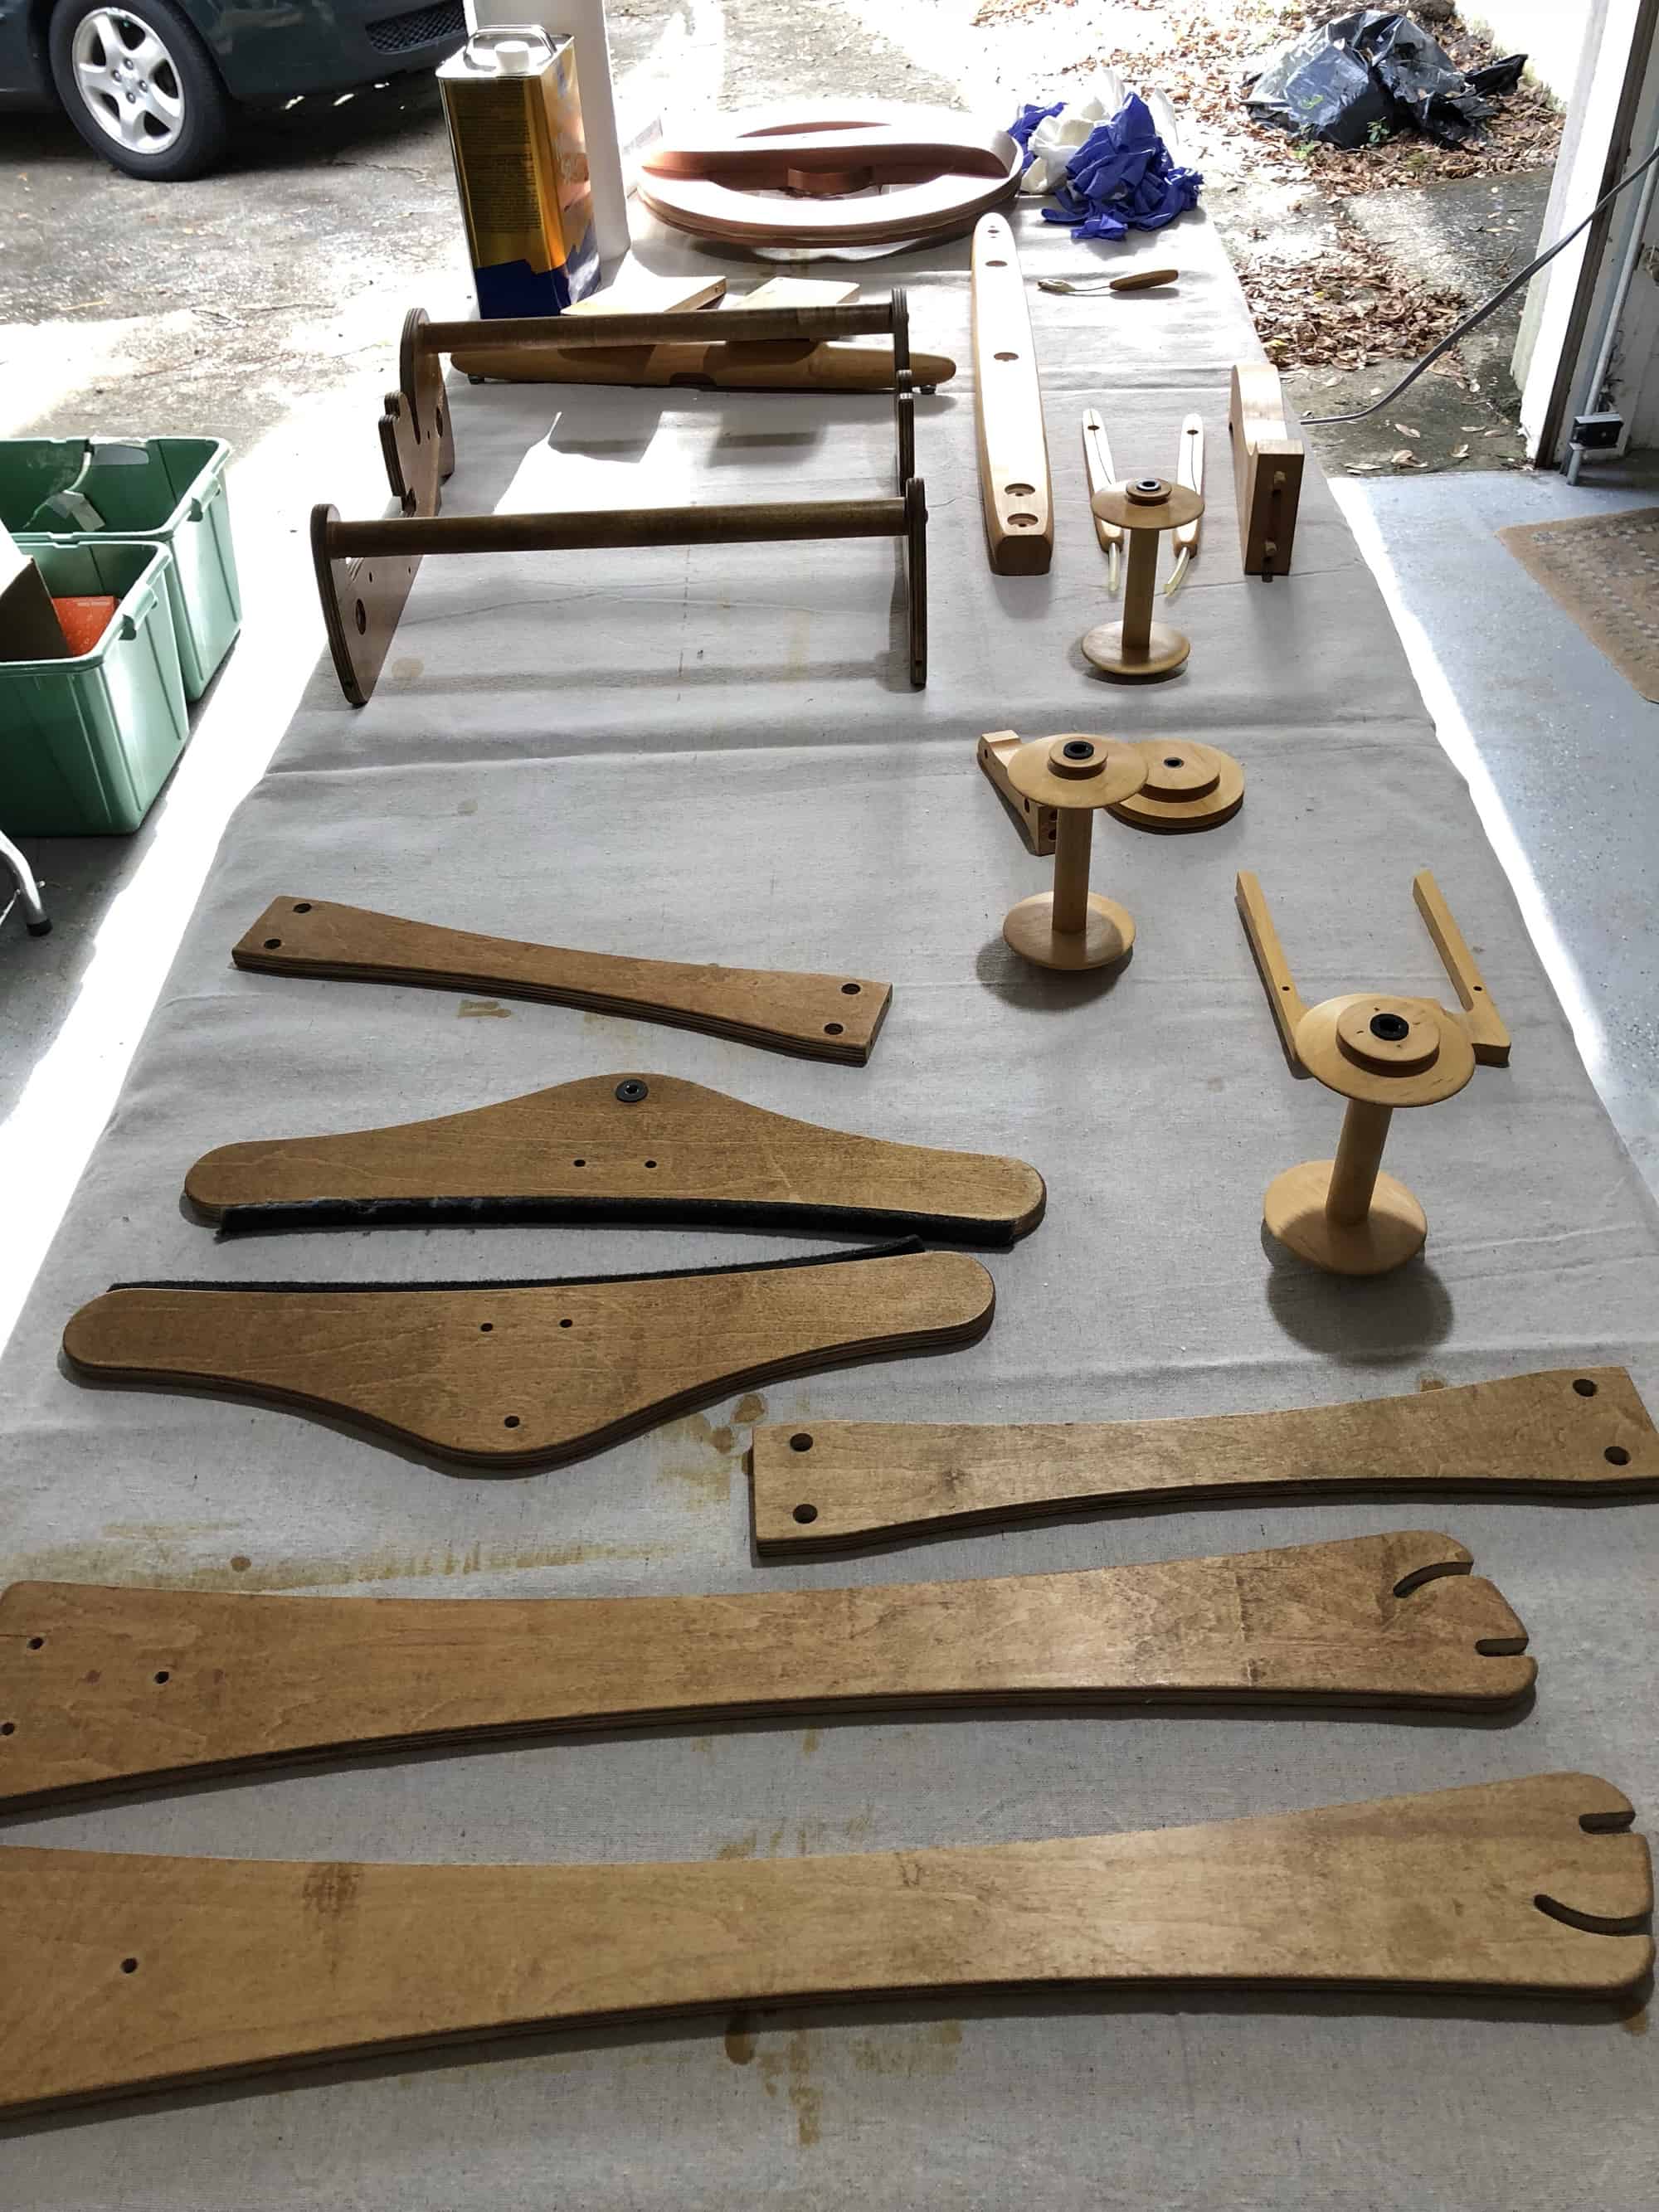
In early January, I wrote about the problems I have with the finish on my rigid heddle loom and my spinning group’s wheel.  My mother-in-law passed away the day after I wrote that post.  When we left for New Jersey, I left all the pieces out on the workbench.  I was at a bit of a loss of how to proceed because after five passes with the mineral spirits, some of the pieces were still tacky.  On my birthday, I took the loom and the treadles to our local Woodcraft store and explained what I had done so far.  They said I probably put too much Danish Oil on, which is why it never dried.  They said that continuing with the mineral spirits was the correct approach but that if that doesn’t work then I will have to remove the entire finish and start over.  I was using paper towels to apply the mineral spirits.  They suggested that I use a shop towel because the paper towel might be too smooth.  Over the course of the last several days, I applied another 5 or 6 rounds of mineral spirits.  Some of the pieces are no longer tacky, some have parts that are tacky and some that are not, and some are still tacky all over but are not as tacky as they were before.  We continue to move in the right direction!

Scouring

In early January, I scoured some fleece and wrote a long post about it.  That day, I only scoured a fraction of the fleece I needed to scour.

The day my mother-in-law died, I was at a friend’s house, about to scour more fleece.  My spinning group was holding our third annual retreat (I posted about the first one).  This year, we decided to spend the day at the home of one of our members.  These retreats are usually low-key, bring a project and do your own thing affairs, but this year several of us had fleece to scour, others had never scoured and wanted to learn, and our hostess has excellent space for scouring, so we decided to do a scouring day.  I brought all the fleece I needed to scour and all my equipment.

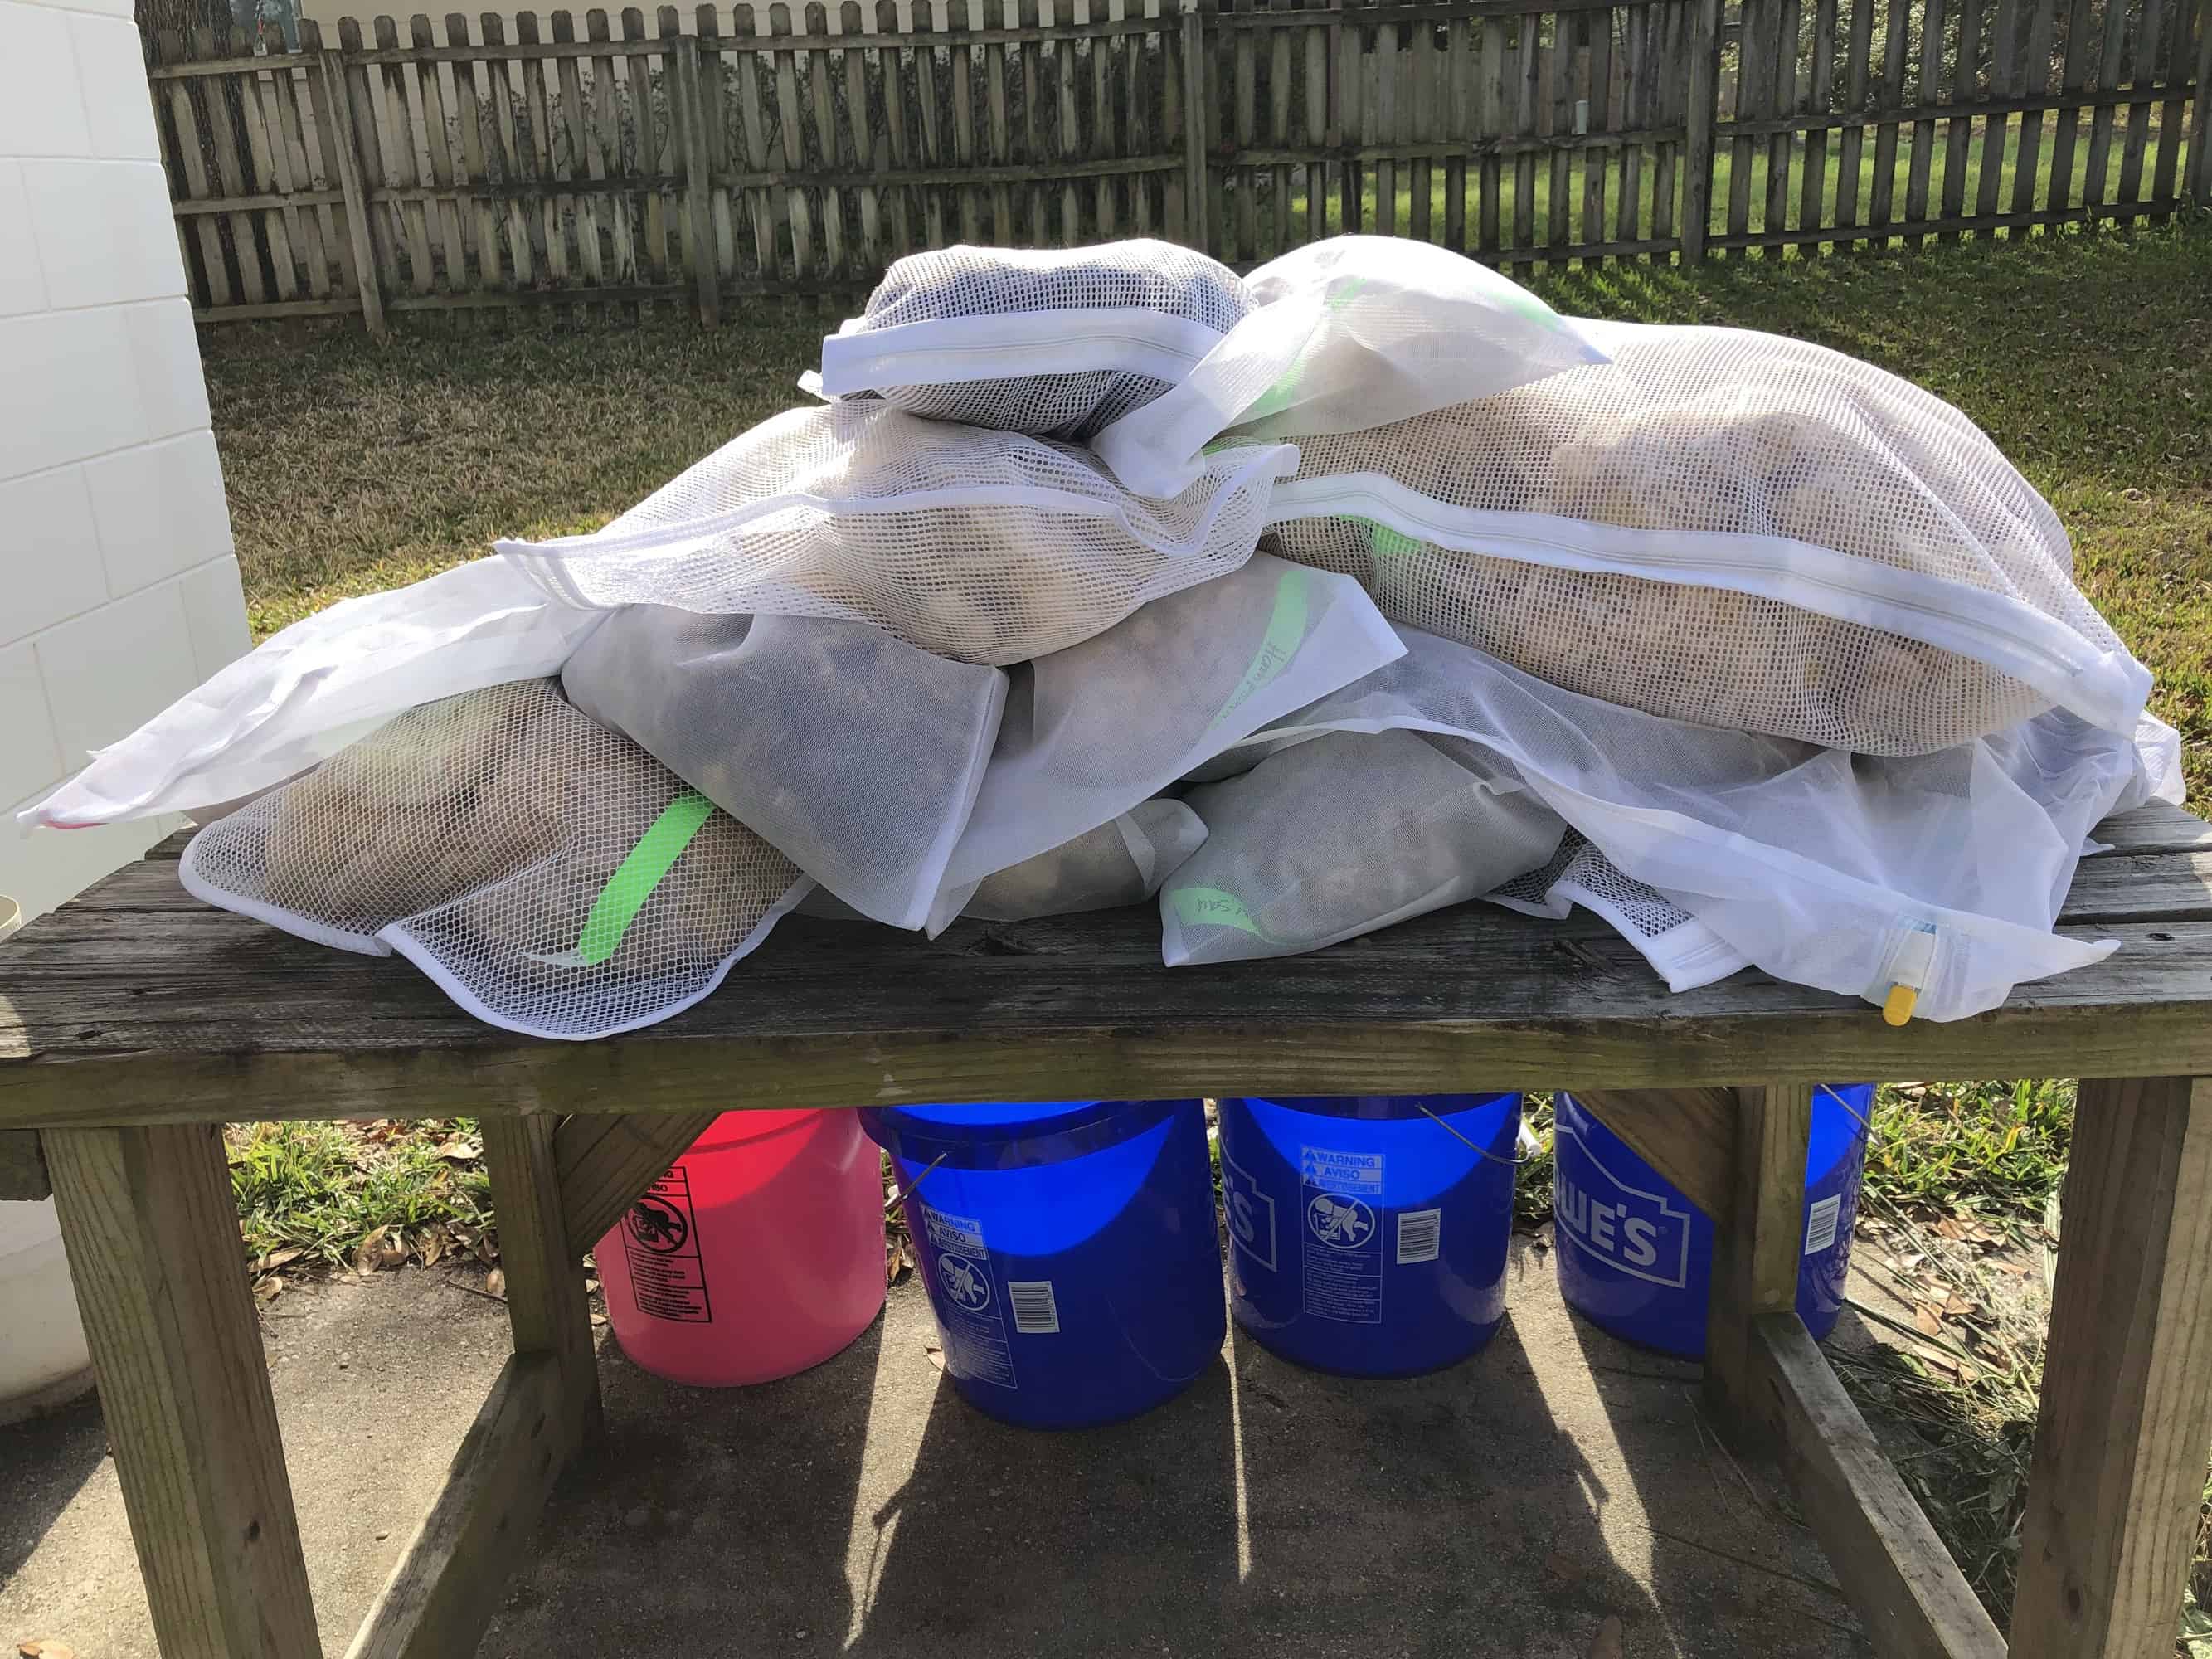
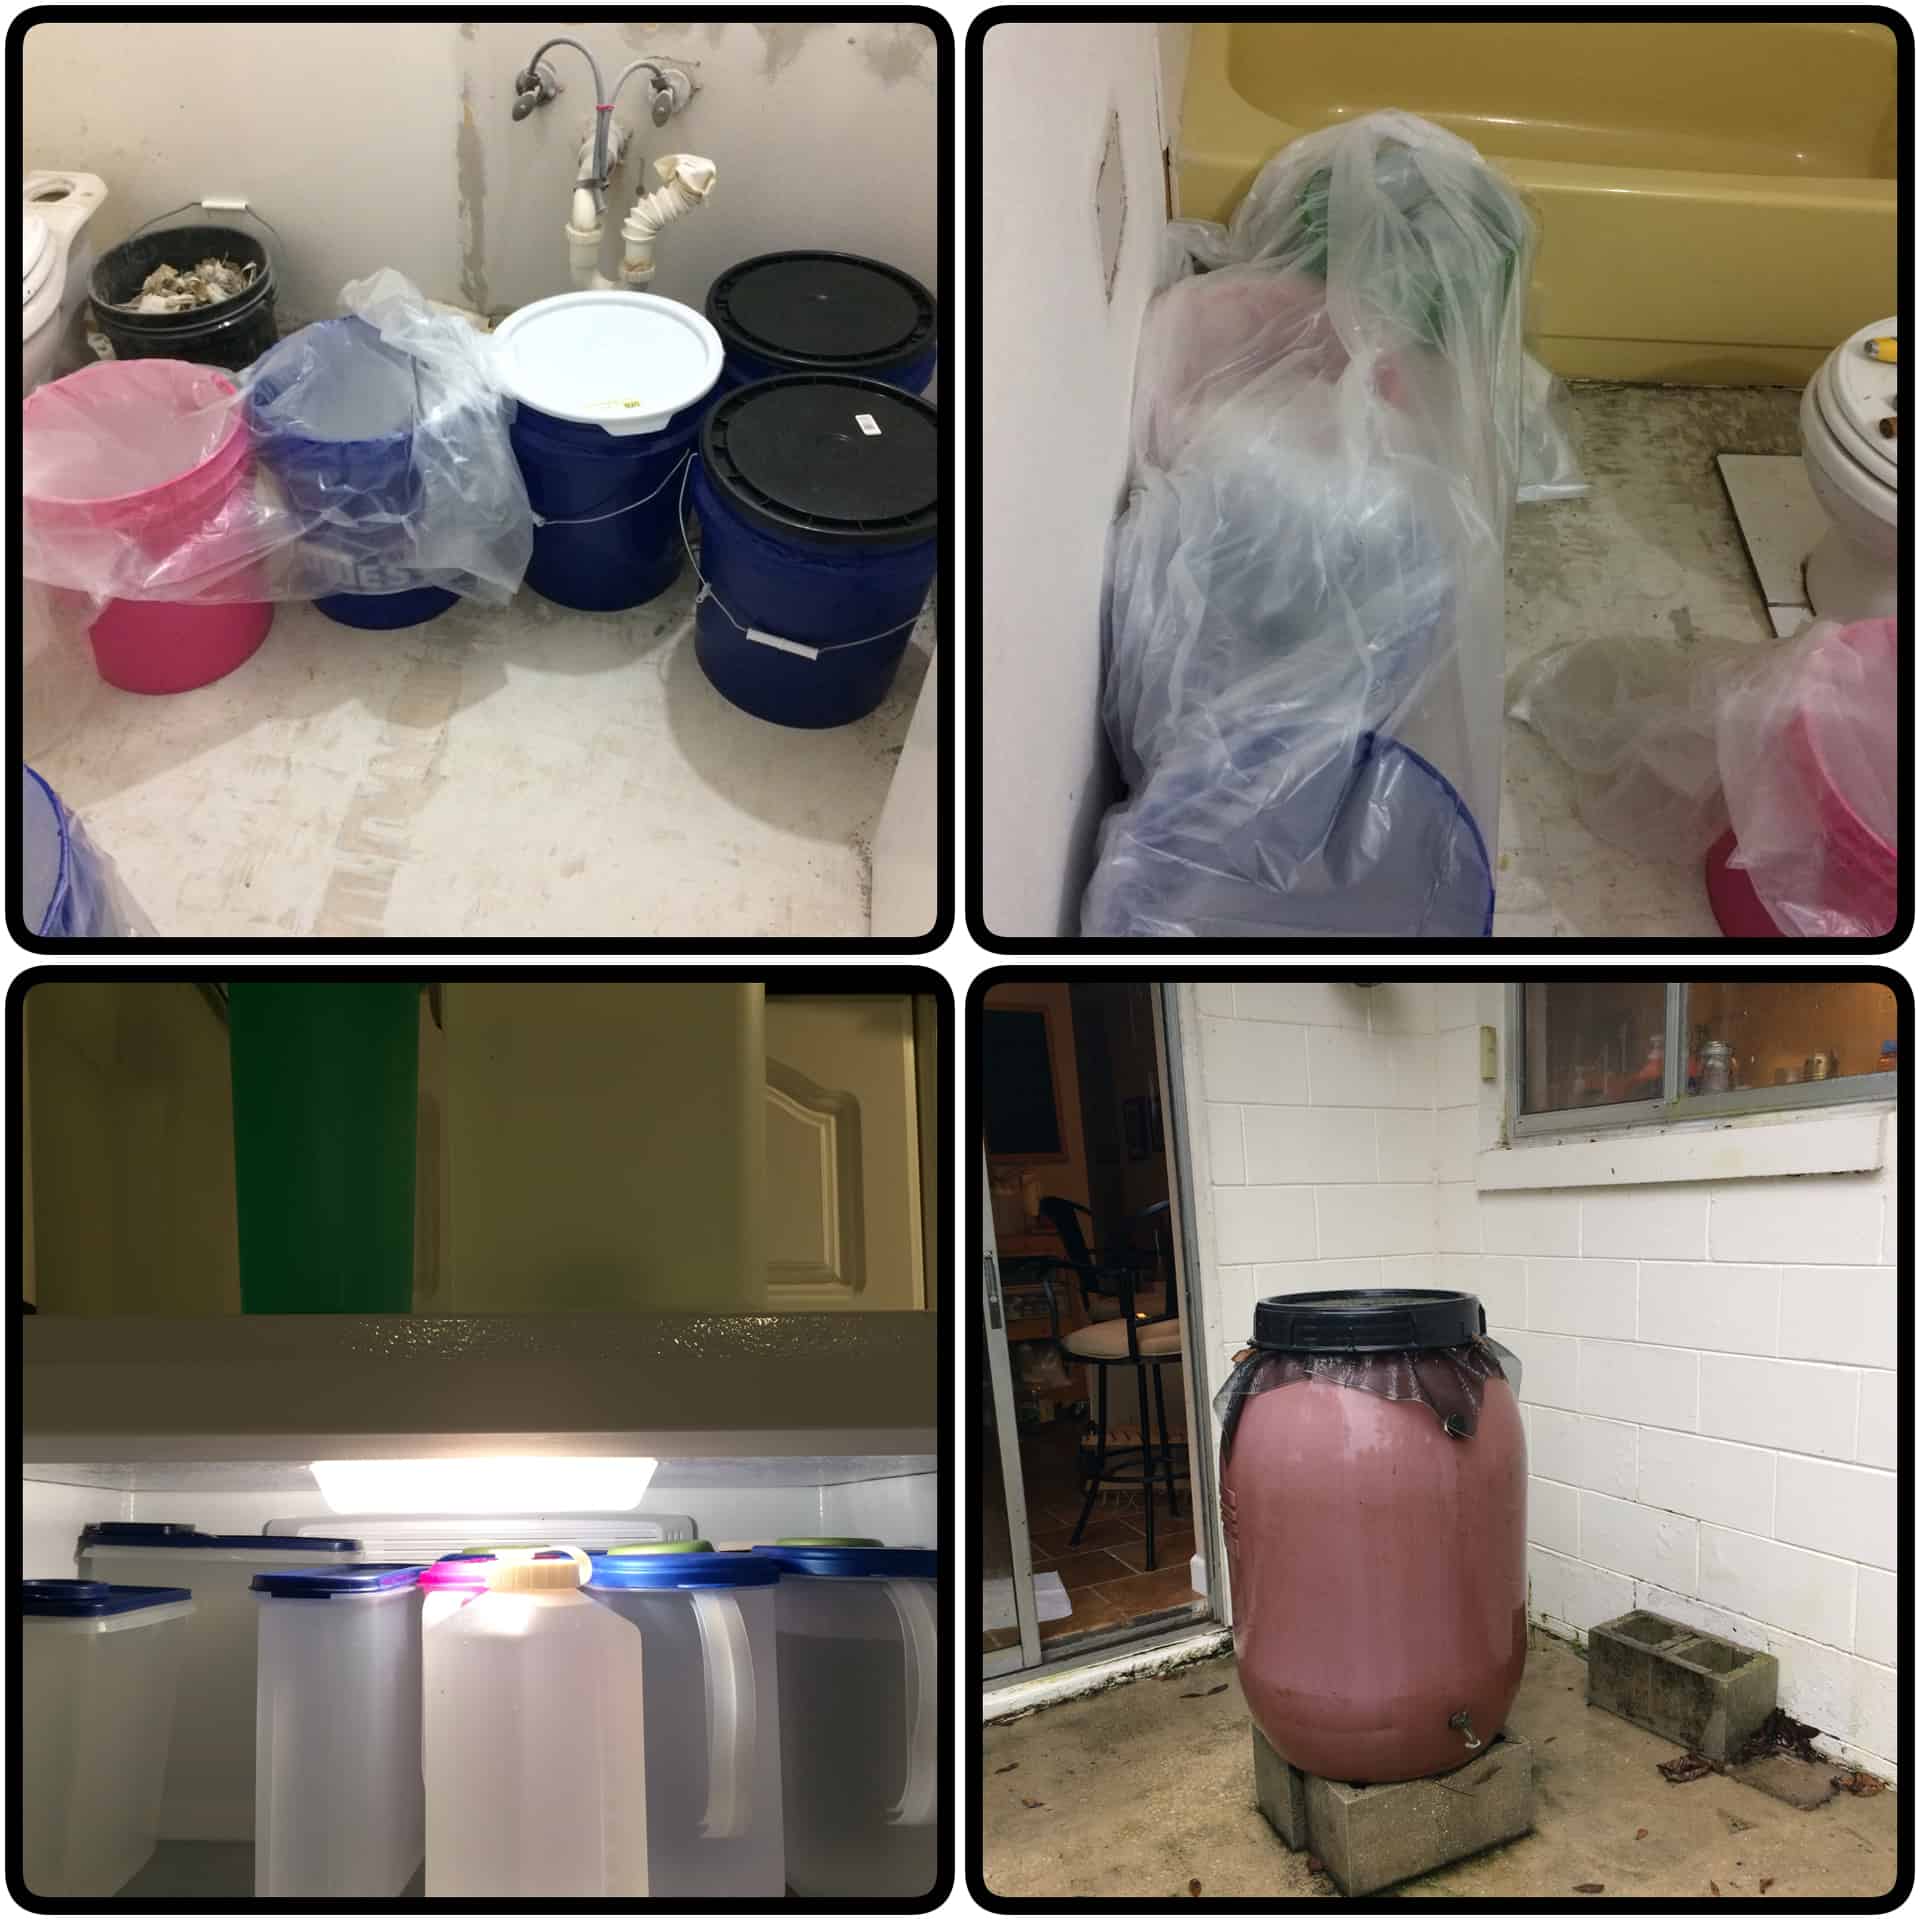
Since several of us were processing fleece and since I had several 4 – 16 ounce samples, I put all my fleece into mesh laundry bags.  Inside each laundry bag, I wrote the name of the breed on a tyvek wrist band (Amazon affiliate link).  I used these wristbands when dyeing and scouring because they will not dissolve in water and you can write on them with a Sharpie.  I had just finished putting everything into bags and was about to start scouring when my husband called to tell me his mother had passed.  I immediately packed up all my fleece and drove home, leaving my equipment behind since everyone else was using it.  I picked up the equipment after we returned home.

I still wanted to get all that fleece, plus additional fleece I had at my house, scoured.  So I spent the afternoon of my birthday scouring fleece.  Here’s all the fleece I put into laundry bags while with my spinning group.

My friend Nancy told us that she and her sister now do cold soaks of fleece before scouring.  I decided that I would try that method.  We have a plethora of 5 gallon pails.  We use them for putting water into our hydroponics system, for toting around tools, and for storing things in the garage.  Last September, we bought several more to use for water storage as part of our Hurricane Irma preparations.

TANGENT/

We filled the bathtub after I took this picture. Total water storage: 35ish gallons in the tub, 50 gallons in buckets, 6 or 7 gallons in the frig, 50 gallons of non-potable water in the rain barrel.

Copious water storage was an excellent thing because we were without power for 6 days, without water for 24 hours due to a water main break on our street, and on severe water restrictions (no showers, no flushing the toilet if you only peed) for a week because 85% of the lift stations in our county were without power.  Lift stations move waste through the pipes to the treatment facility.  If they can’t do their job, somewhere that sewage will seep into someone’s home.

Six trees came down at this house, including two that came through the roof in the middle of the storm, nearly hitting one of the teenagers. The family fled to a friend’s house. The roots of two trees pulled up through the water main, breaking it in multiple places.
No running water, no showers, no electricity, high heat and high humidity. This is how we kept clean.
When our power went out, the dishwasher was full of dirty dishes. After a couple of days without power, they really needed to be washed. I did it in the backyard, using water from our buckets. I did the three bucket method, with the last being a chlorine bleach rinse which meant I didn’t have to heat water on the propane camp stove.

/TANGENT

Sorry about the tangent.  As I was saying, we have a plethora of 5 gallon buckets.  I used those for the cold water soak.

No soap, no hot water, and maybe 15 minutes in the bucket at this point.

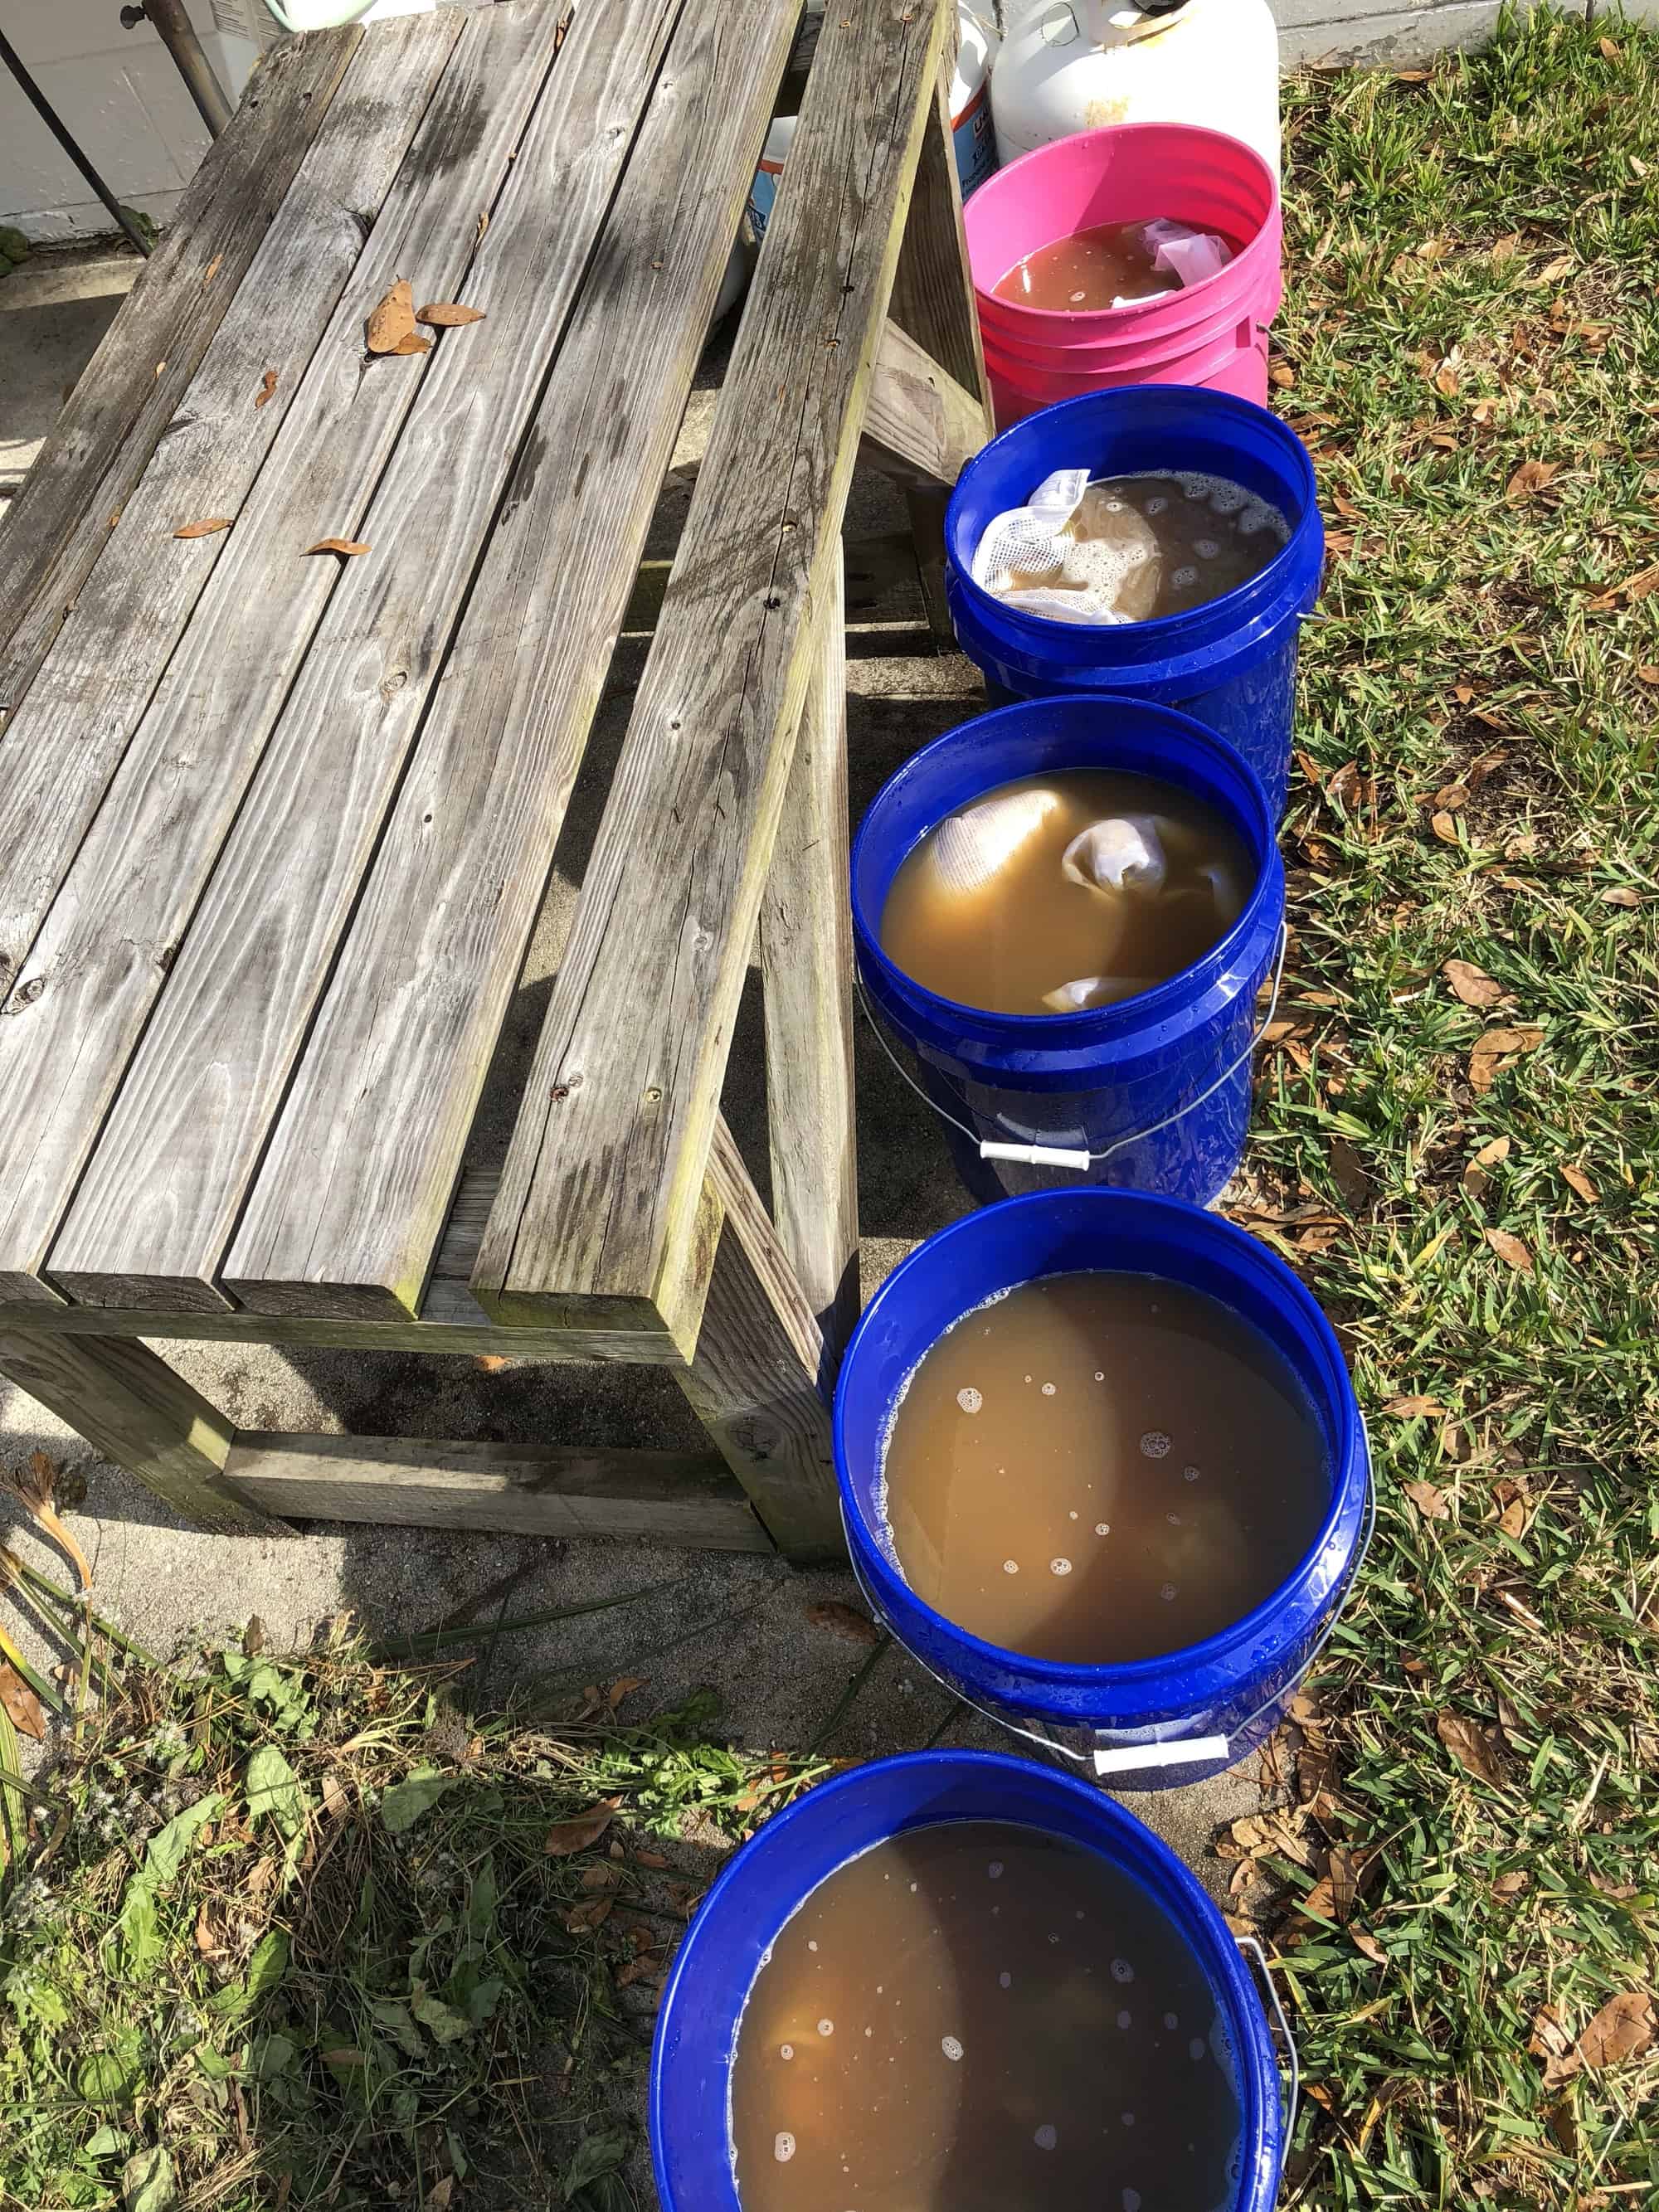
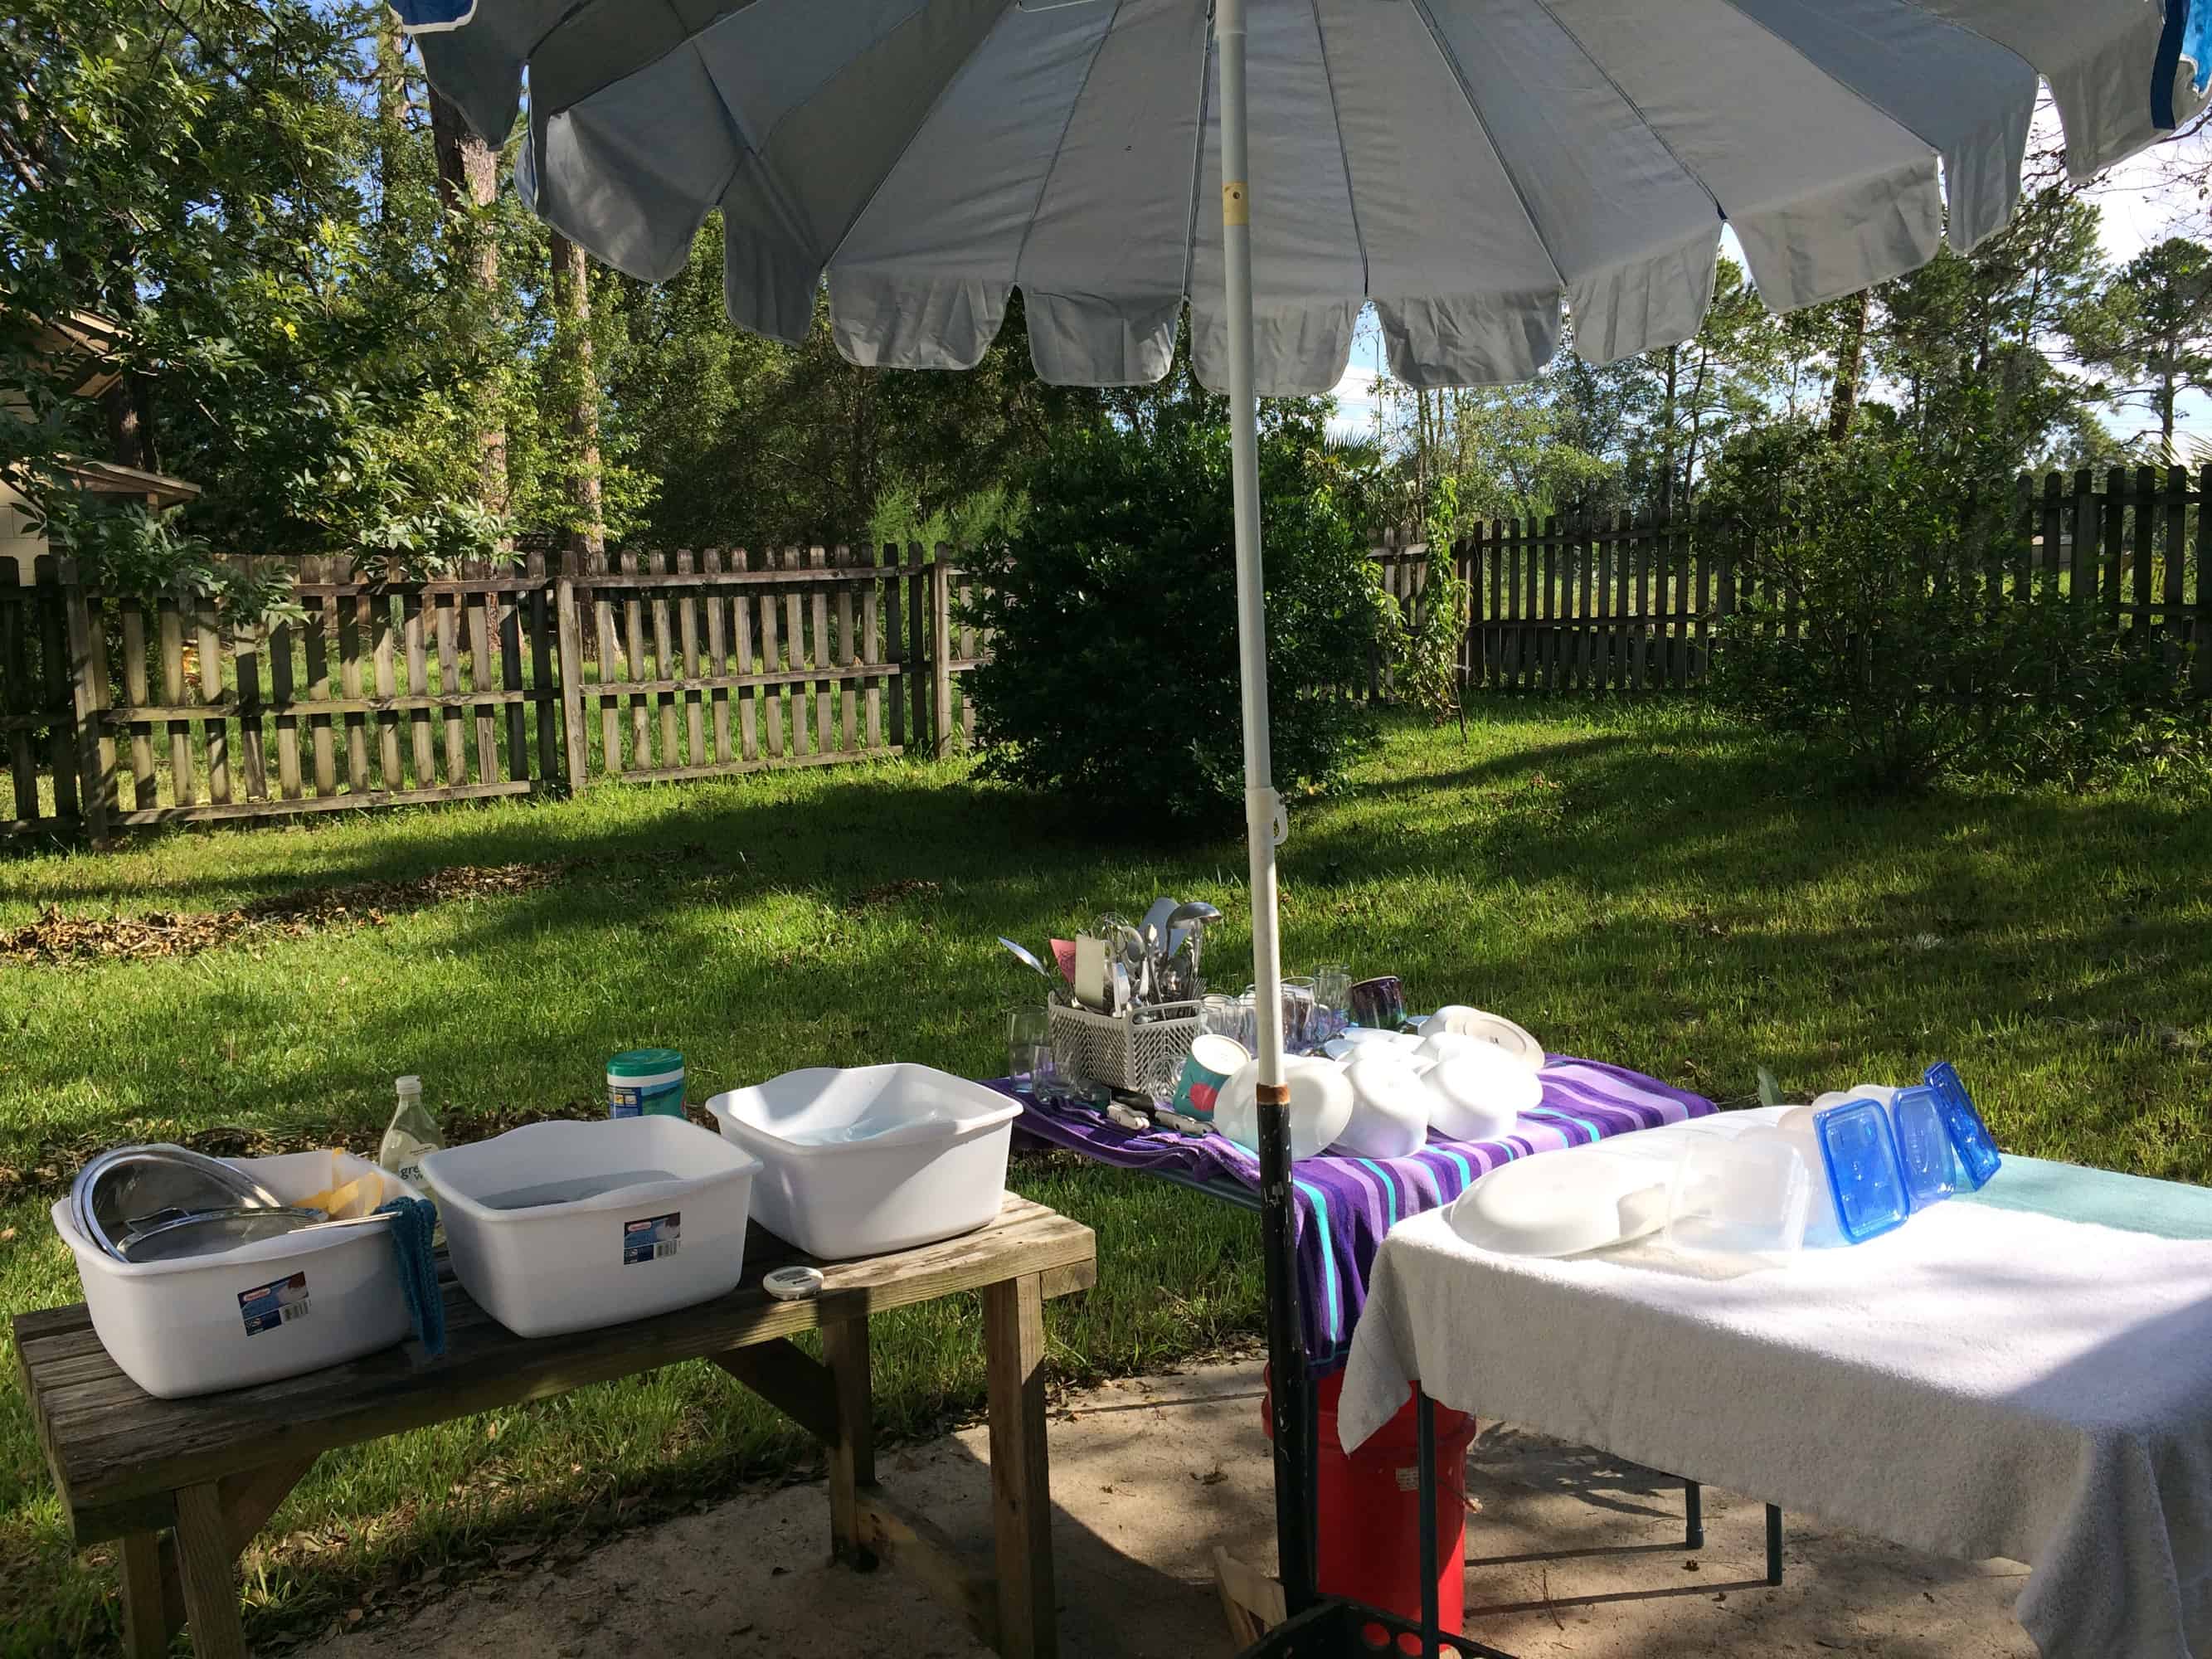
I liked the cold water presoak a lot.  It is amazing how much comes out of the fleece, simply soaking it in cold water.  I put the fleece into the pails to presoak, then finished setting up the rest of the equipment for scouring.  When I took the fleeces out of presoak and put them into scour, I dumped the water out, filled the pail with clean water, and put more fleece in to soak.  All the fleeces were in the cold water for a minimum of 20 minutes.  Some were in there for an hour or more while I scoured others.  With cold water, I don’t have to worry about the water cooling and lanolin redepositing onto the fleece.  Anything that came out with just cool water should stay out!

I did only one scour with detergent on most of the fleece, followed by two plain water rinses.  This was effective for almost all the fleeces.  One particularly dirty alpaca fleece got two rounds with detergent and three plain water rinses.  One or two of the greasier fleeces needed more scouring and I will be doing another scour on them.  Stay tuned for more detailed blog posts on which ones needed more scouring and how I handled that.

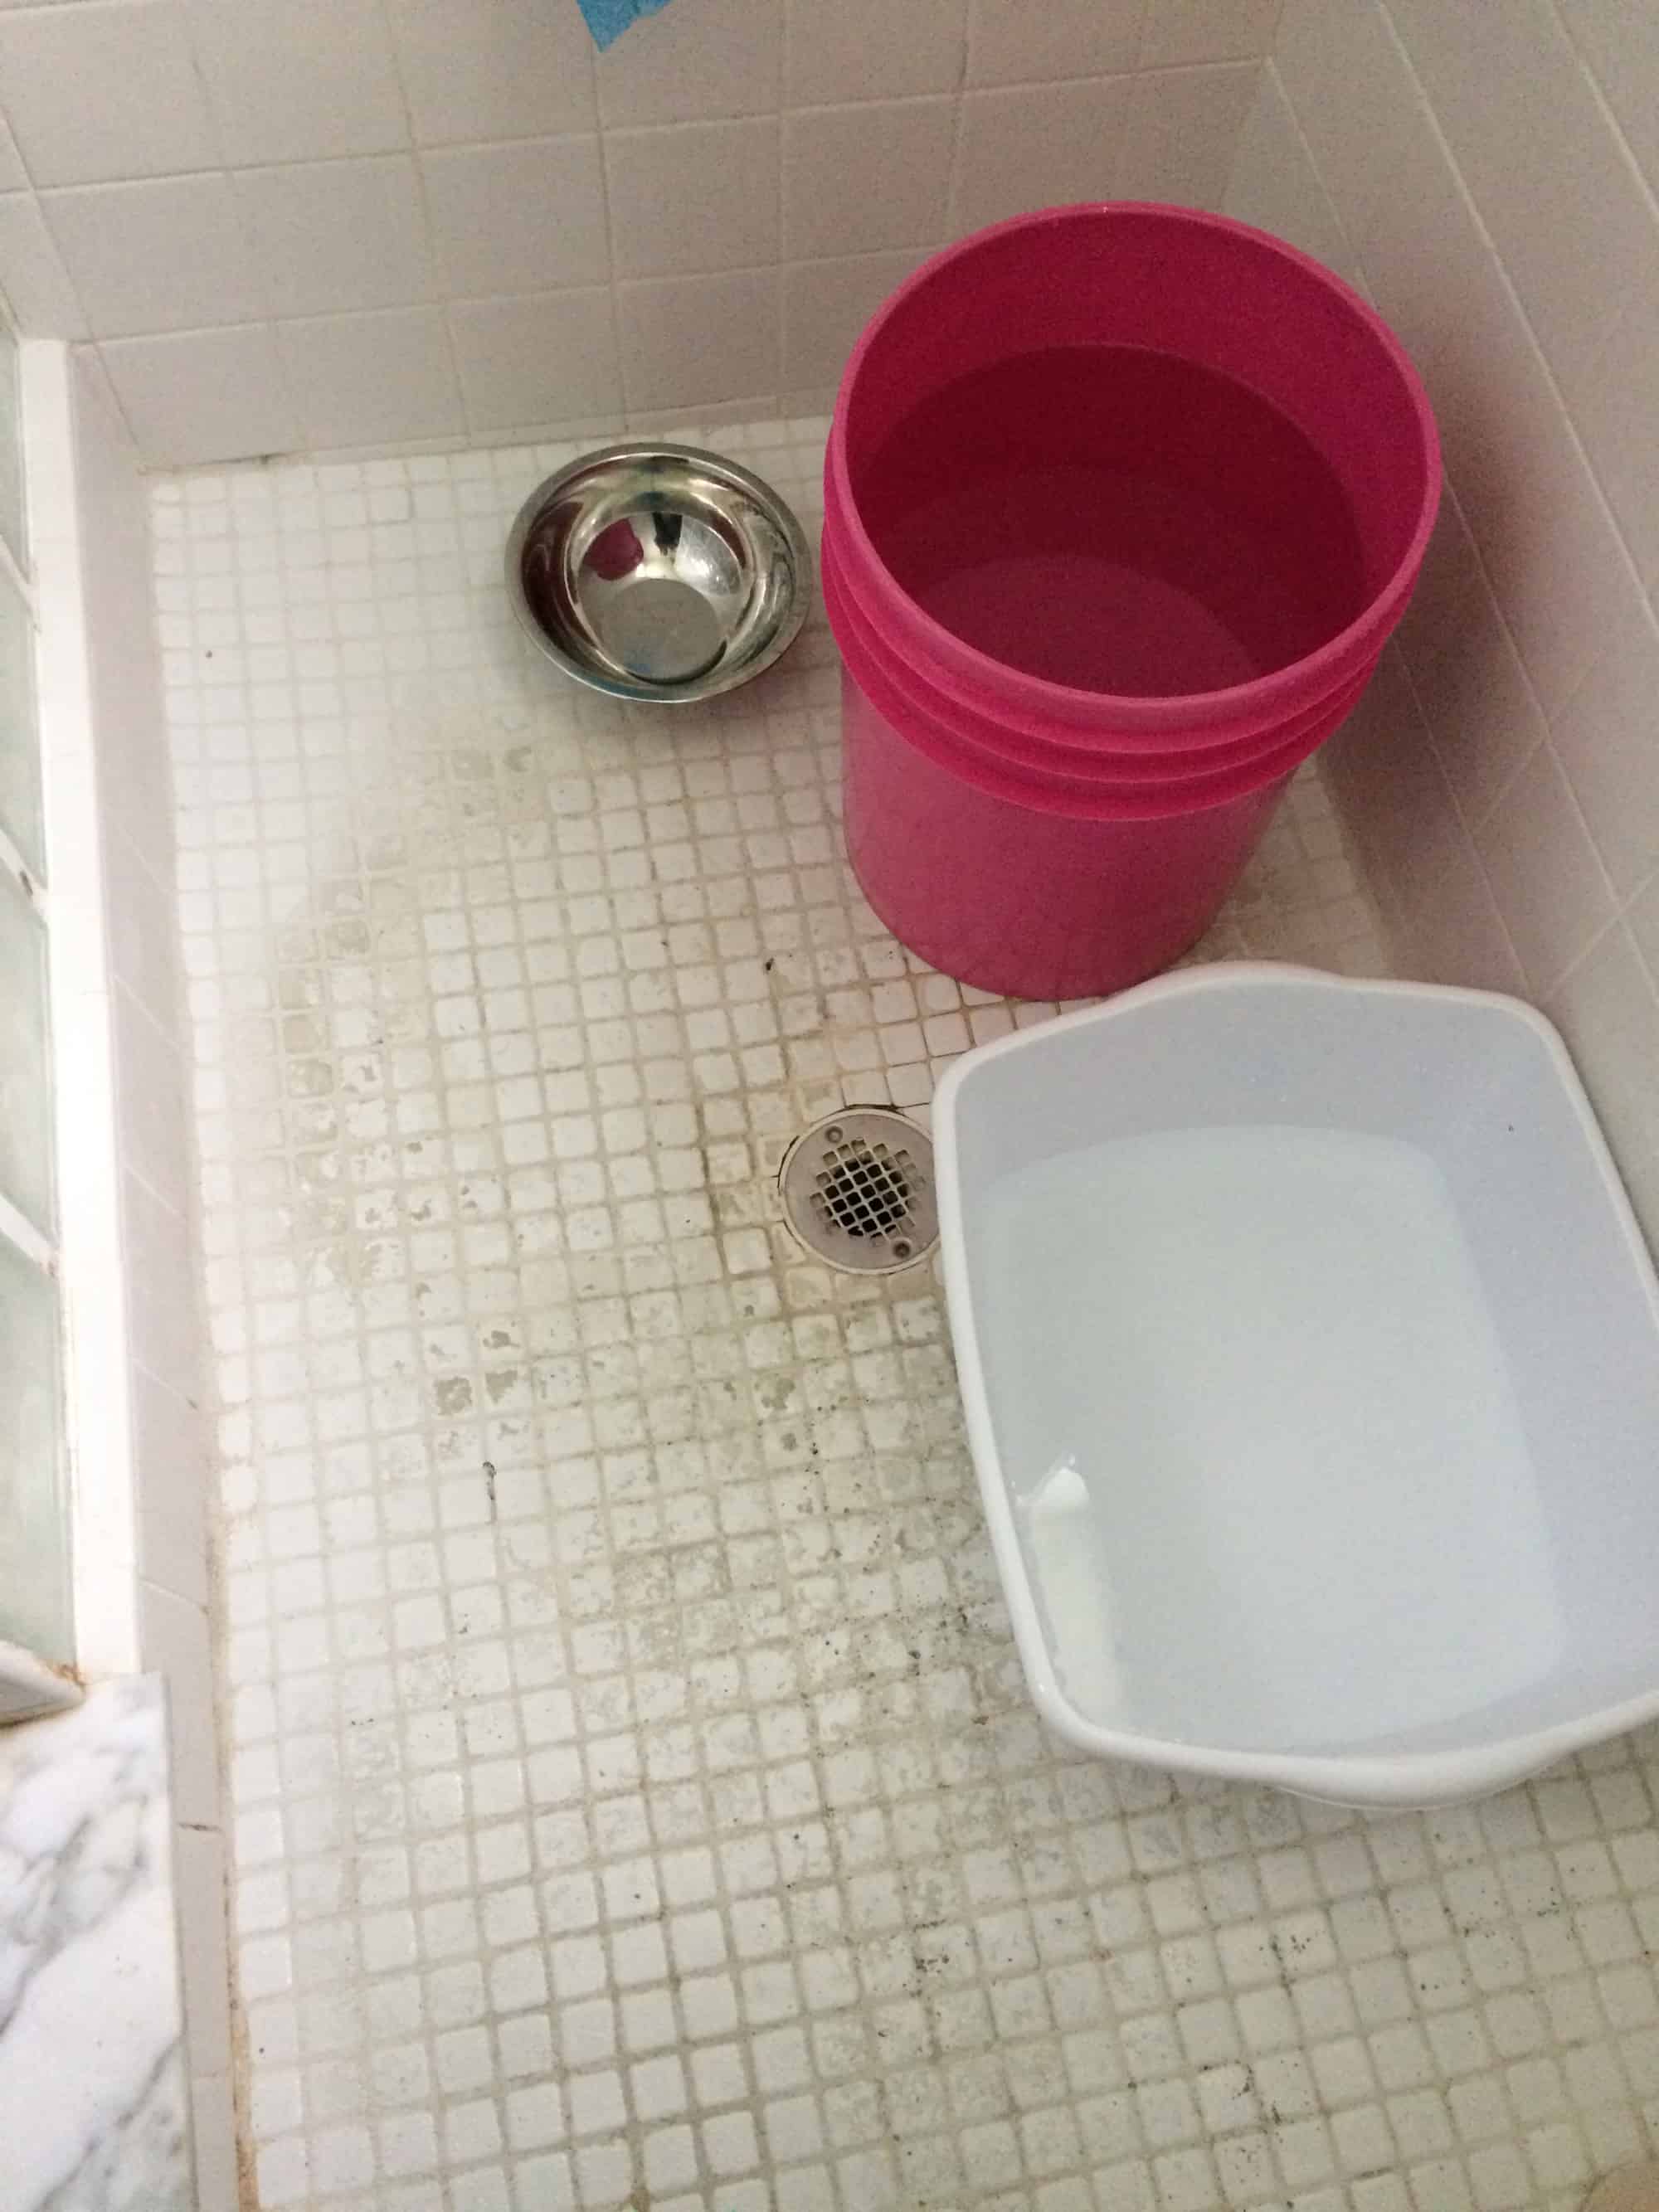
I made one other change to the process I described in my previous post on scouring.  I added two more bins for scouring, so I had 6 going at one time.  When I was at the spinning group retreat, I discovered that my dish pans hold the same volume of water as the other containers I was using for scouring, so I set up two dish pans plus the containers!

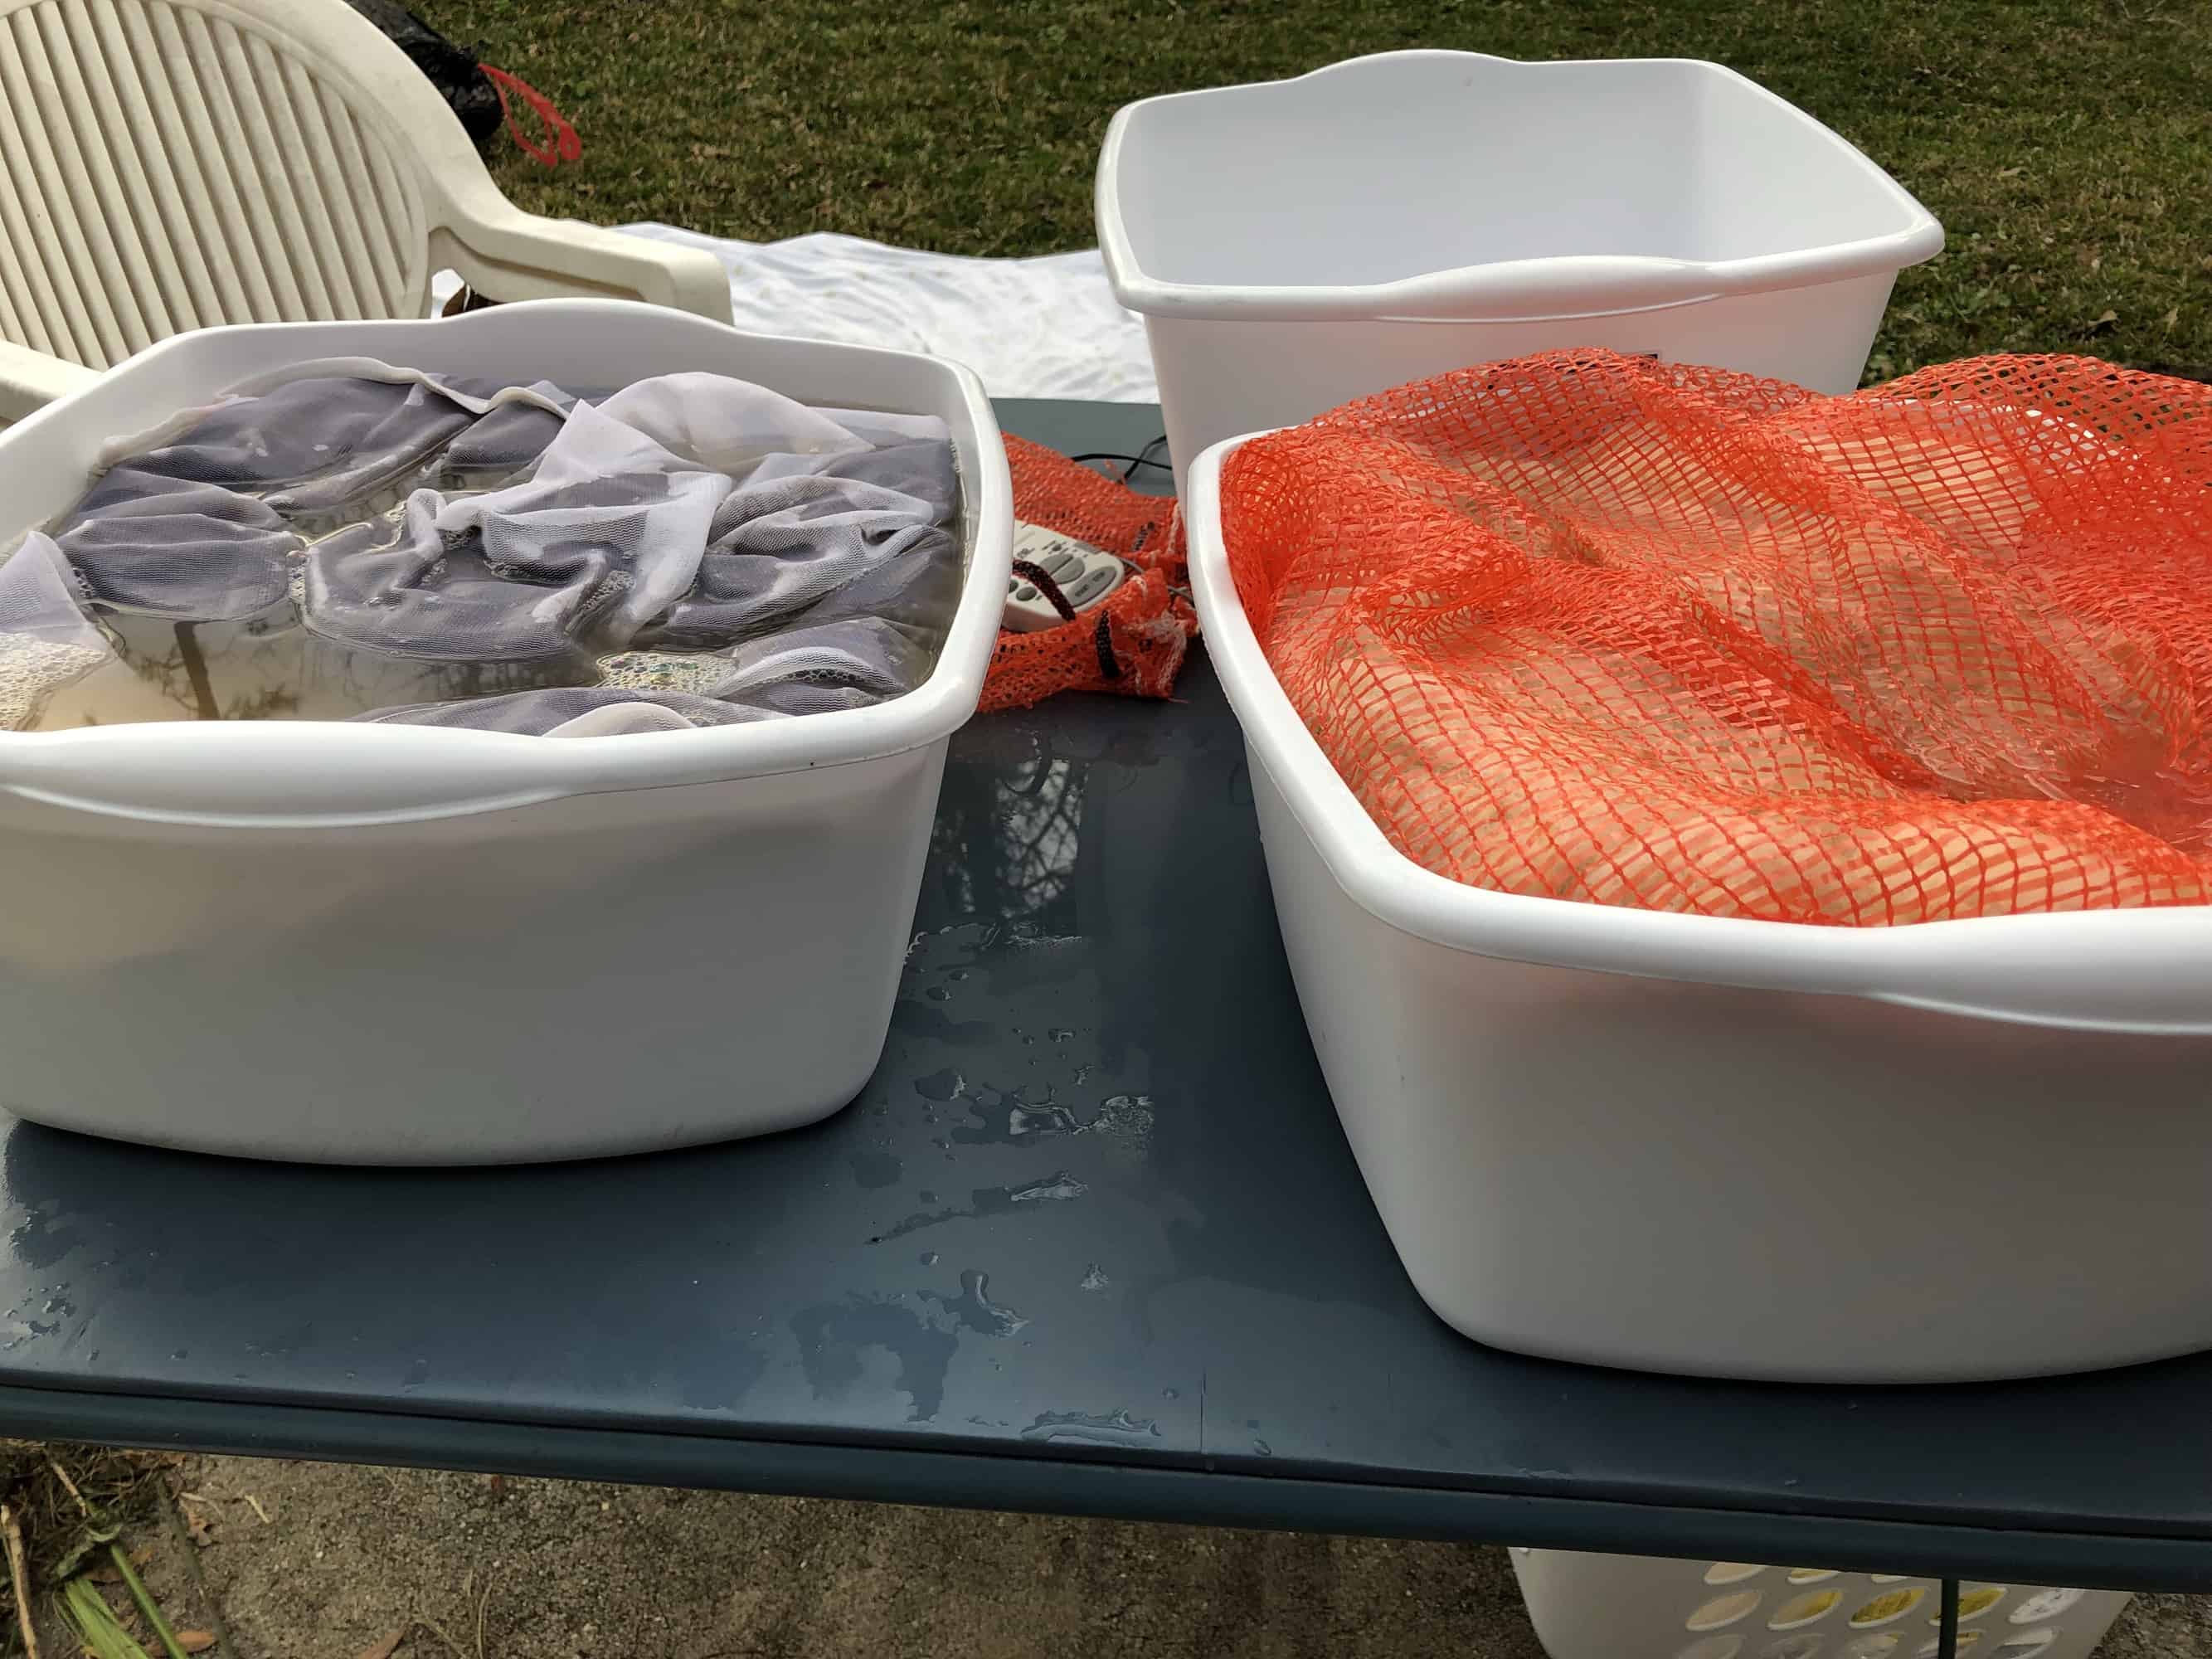
With six bins going and the presoak doing a lot of work before scouring, I was able to scour 19.5 pounds of fleece in 4 hours.  I have one fleece left to scour, an 8.5 pound black Corriedale fleece that I intend to scour a lock at a time using Fels-naptha soap.  Stay tuned for a blog post on that when I get it done.

Spinning

My birthday was the day that NBC broadcast the opening ceremonies of the Olympics, so my parents came over and we watched that while I spun.  I worked on the SassyBee polwarth batt I’ve been spinning for a bit.

It was an awesome birthday!

Post Script

My parents wanted to spend a day with me and told me to pick what I’d like to do and that would be their gift.  The Tuesday after my birthday, we played an awesome escape game at Escape Effect

We had fabulous Indian food at a restaurant in the same plaza, then we went next door to Escape Effect and took the museum tour at the Chocolate Museum and Cafe.

Yes, this Taj Mahal is made out of chocolate!

Problem Solving

In October 2016, I went to the Southeastern Animal Fiber Festival (SAFF) with several friends.  A subset of those who went are members of the monthly spinning group I attend.  We found a good deal on an unfinished Kromski Fantasia and split the cost so that we could have a spinning wheel to use for teaching people to spin when they stop by our group or for members of our group to borrow to learn to wheel spin.  I brought the wheel home to finish it.

I decided to finish the wheel with Danish Oil.  I also decided to apply Danish Oil to my 15″ Schacht Cricket Rigid Heddle Loom.  I started working on both in December 2016.  I applied clear Danish oil to the wheel and dark walnut to the loom.  I applied three coats, waiting at least 24 hours between coats and making sure that they were dry to the touch before applying the next coat.  I was trying to finish them before Orlando Distaff Day 2017, which was on the first Saturday of 2017.  I signed up to do a wheel assembly demo and planned to bring all the parts of the Fantasia with me and assemble it at the event.

Early on the Friday morning before Distaff Day, I applied the fourth and final coat of Danish Oil.  That Friday night and into Saturday morning it POURED.  We’d had no rain for weeks and it felt like the sky had saved all the rain we should have gotten and dumped it all at once.  The pieces of the loom and wheel were on the workbench out in the garage, which is where I’d been working on this project.  The garage is not climate control.  When I got up on Saturday morning, the loom and wheel were both tacky to the touch.  In fact, they were tackier than they had been when I applied the fourth coat on Friday morning.  Obviously, there was no way I could bring them to Distaff Day!

I left the loom and wheel on the workbench for 3 or 4 weeks.  They were still tacky.  I brought them into the house, and laid them out around the house on any spare flat surface.  I figured they would dry better in the climate-controlled house.  Every month or so, I checked the pieces and they were still tacky, though it did seem as though they were slowly improving.

In the spring and summer of 2017, I took some woodworking classes, including one on finishing wood projects.  I asked the teachers about my problem.  They shook their heads.  In all likelihood, the reason for this problem was that the earlier coats weren’t cured as well as I thought they were.  I could continue to let the pieces to sit.  I could try to wipe them down with mineral spirits, which is the solvent for Danish Oil.

Since the fall of 2017 was so crazy here — Hurricane Irma left us with no power and no water / water restrictions for a week, my mother-in-law’s health declining, my husband getting laid off — I did not think about the loom and wheel pieces at all.  When I checked them in late December, for the first time in months, I discovered that they were slightly sticky, but not so much so that you could see my fingerprint on the surface.  I decided to try wiping them down with mineral spirits to see what happened.  I did just the pieces of the stand for the rigid heddle loom.  I figured that was the easiest thing to replace if the mineral spirits ruined the pieces rather than improving them.  I wiped the pieces down three times, letting the pieces dry in between.  Then I had something else to do and forgot about them.

When we came home from our Christmas in New Jersey, my husband finished the project he’d left on the workbench when he unexpectedly left 3 weeks earlier.  Then he asked me what projects I have to do.  Due to the high humidity of our summers, woodworking is a winter task here and he knew that I’d been saving up some projects, waiting for the weather to co-operate.  I checked the three pieces of the loom stand and found that they were no longer sticky.  The mineral spirits worked!  For the past two days, I’ve been working on the remaining loom pieces and the wheel pieces.

This morning, I wiped down the pieces with mineral spirits for the fourth time.  The repeated coats of mineral spirits seem to be doing their work!  It’s been humid the last two days and I think that this has caused more of the oil to come to the surface.  Despite this, the pieces are clearly improving and becoming less sticky overall.  For some of the pieces, this fourth coat should be the last coat I need to apply.  I will need to flip a couple of the pieces over so I can do the back.  My previous despair and fear that I’d ruined two expensive pieces of equipment have given way to hope.  I think this is going to work!

TKGA 2015: Finishing with Arenda Holladay

Thursday was the first official day of the TKGA Conference.  I should have already mentioned that CGOA (the Crochet Guild of America) Annual Conference and the TKGA Annual Conference are held at the same time and place.  Attendees can choose to attend only knitting events, only crocheting events, or a combination.  I only attended knitting events because my primary goal was to learn anything and everything that might help me complete the Master Hand Knitter levels.  This year’s attendance was a record.  I didn’t hear an official number, but the rumor swirling around the event was that 600 knitters and crocheters came to San Diego!

For those of you that asked yesterday, I never did find out who bought me dinner.  I’m happy to leave it that way!  On Thursday, I met Heather from South Carolina, Jo from Sydney, Australia, and Emma from Illinois.  All four of us were newbies and had come to the Conference knowing no one there.  We spent the rest of the event hanging out.  Eventually we discovered that Heather, Jo, and I are practically triplets; our birthdays fall within an 8 month range!  Unfortunately, we never got our picture taken together.  I have a picture of Heather and I taken at the Yarn Tasting, so I’m saving that picture for tomorrow.  Here’s a picture of Emma (left) and Jo (center) with Master Hand Knitting Committee Member Christina Hanger (right) on Masters Day.  I believe Sadie Pachan took this picture.

image

I attended a 2-day Finishing class taught by Arenda Holladay, the Executive Director of Cast On magazine.  Rather than writing a post about everything I did on Thursday (first day of Finishing and the Market Preview), today I’m just going to writing about the Finishing course.  Tomorrow I’ll write about the Market and the two wonderful events I attended on Friday, the Breakfast of Brilliance and the Yarn Tasting.

image

The finishing class covered all the skills you need to assemble a finished garment.  This included seaming vertical, horizontal, and combination (attaching a horizontal to a vertical) seams; picking up stitches along vertical, horizontal, and combination (e.g., collars because they are vertical on the sides and horizontal across the back of the neck) edges; buttonholes; weaving in ends; three-needle bind off; Kitchener stitch; and probably other skills that I’m forgetting.

I took this class for three reasons. (1) In 20+ years of knitting, I’ve never knit a sweater.  Knitting myself a sweater is on my list of goals for this year.  If I’m going to knit a sweater, I need to finish it properly.  If I don’t, it won’t be wearable!  (2) Master Hand Knitting Level 2 is all about finishing.  (3) I have 12 of S’s sweaters to finish.  I learned so much in this class, and I’m now excited that I have all those sweaters since I have a way to practice my new skills!

We had to knit (or buy from Arenda) a lot of homework for this class.  I already posted a picture of my finished homework in last week’s Year of Projects post, but in case you missed it, here it is again (the one piece in the bottom right was not for the finishing class):

image

Finishing requires so much homework because you need two pieces to practice seaming techniques and because we practiced vertical seams and weaving in tails in various stitch patterns — stockinette, garter, seed stitch, 1×1 ribbing, and 2×2 ribbing.  We even had two different swatches for 2×2 ribbing so we could see two different ways to create seams in ribbing.  Despite having two full days and a talented, organized teacher, we did not have enough time in class to actually execute all the seaming.  There’s just so much to cover!

Arenda is a fantastic teacher.  (She also brought us bourbon caramels from a distillery near her Kentucky home and a constant supply of chocolates.  And she’s hilarious).  For each technique and variation, she first explained what we were trying to accomplish, the correct technique, and the common mistakes.  She used still photographs to illustrate these points; the photos were marked with arrows or diamonds or numbers to clearly identify stitches or running thread or whatever it was we needed to see.  She then demonstrated each technique live, projecting the video onto the screen so everyone could easily see what she was doing.  Then we each used our own swatches to work the technique and she walked around the room answering questions and correcting our inevitable mistakes.

Arenda suggested that we leave the last inch or so of our seams loose so that when we look back at them, we can see the path of the yarn.  Prior to this class, I’d done minimal seaming and I hadn’t done any of it correctly.  I totally did not understand how mattress stitch worked!

The swatches in the left column are my vertical seams in stockinette, garter, and seed stitch.  From top to bottom on the right: seaming horizontal edge to vertical edge, three-needle bind off, seaming horizontal edges together, and seaming stair step edges.
The swatches in the left column are my vertical seams in stockinette, garter, and seed stitch. From top to bottom on the right: seaming horizontal edge to vertical edge, three-needle bind off, seaming horizontal edges together, and seaming stair step edges.

Prior to this class, I had picked up stitches on horizontal and vertical edges, but never on curved edges.  I had never done a double pick up for bands.

image
The unmarked swatch is the double-pick up. I started binding it off too soon because I was running low on the pink yarn we were using for picking up stitches. I probably needed to knit at least one more row for it to look right.

Prior to this class, I had never knit a buttonhole.  We knit these swatches in class and they aren’t blocked, which makes it more difficult to see the buttonholes!

image

On the second day of class, we ran out of time for weaving in ends.  Arenda presented the information and gave us a demo, but the only swatch we worked in class was the mid-row color change.  I haven’t woven in the ends on any of the other swatches yet!

image

And here’s all the finished swatches together!

image

I highly recommend attending Arenda’s Finishing class if you have the opportunity.  However, those of you unable to attend the Finishing Course either because you weren’t in San Diego or because the class was sold out aren’t entirely out of luck.  Arenda has an excellent YouTube channel and blog covering many of the techniques we learned in class.  Here’s links to the relevant videos and blog posts.

Seams

Vertical

Horizontal

Other

Picking Up Stitches

Buttonholes

Weaving in Ends

In Peripherally Related News

Just a quick note on my swatch photos.  I use my iPhone to take the photos that appear on this blog.  I usually take the pictures on my dining room table in the mid-afternoon when filtered sunlight shines through the window right beside the table.  If it’s raining or I’m busy, I sometimes have to wait to take pictures until I can take them in good light.  In order to be more flexible with photos, I’ve wanted to get a light box.  During Amazon’s Prime Day sale, I bought the StudioPRO 24″ Portable Table Top Product Photography Lighting Tent Kit (affiliate link).  It was delivered to my house while Chris and I were in NJ for his Uncle Angelo’s funeral.  These finished swatch pictures are the first pictures I’ve taken with the light box.  It was 10:30 pm when I took them, so obviously I wasn’t getting any sunlight!  I love how the pictures came out and I look forward to using the light box on my future pictures!

image